aima big sur bike manual

Welcome to the AIMA Big Sur Bike Manual. This guide provides essential information on safety, features, assembly, and maintenance. Reading it carefully is crucial for safe and enjoyable riding. The Big Sur is a powerful, 26″ fat-tire e-bike designed for all-terrain adventures.

Product Overview

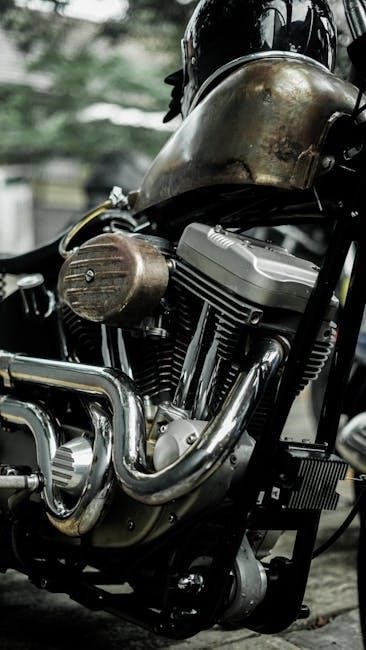
The AIMA Big Sur is a 26″ fat-tire all-terrain e-bike, featuring a powerful 750W Bafang rear hub motor, extra-large 203mm brakes, and a specially designed headlight for enhanced visibility and control, ensuring a safe and thrilling ride.

2.1 Key Features of the AIMA Big Sur E-Bike

The AIMA Big Sur E-Bike features a powerful 750W Bafang rear hub motor, 26″ x 4″ fat tires for all-terrain stability, and 203mm hydraulic disc brakes for reliable stopping power. It includes a high-intensity headlight, rear light with turn signals, and an 8-speed drivetrain for versatile performance. The bike is equipped with a comfortable saddle, robust frame, and advanced control systems for a smooth and enjoyable riding experience in various conditions.

2.2 Technical Specifications

The AIMA Big Sur E-Bike is equipped with a 750W Bafang rear hub motor, 26″ x 4″ fat tires, and 203mm hydraulic disc brakes. It features an 8-speed drivetrain, a 130-link chain, and a comfortable AIMA saddle. The bike includes a front light, rear light with turn signals, and a robust frame designed for durability. These specifications ensure reliable performance across various terrains and conditions, making it a versatile choice for riders seeking both power and stability.

2.3 Design and Build Quality

The AIMA Big Sur E-Bike boasts a robust frame design, ensuring durability and stability on various terrains. Its 26″ x 4″ fat tires provide excellent traction, while the AIMA Comfort saddle offers a ergonomic fit. The bike features an integrated rear light with turn signals and a large headlight for enhanced visibility. Built with high-quality components, the Big Sur combines strength and comfort, making it a reliable choice for both on-road and off-road adventures.

Safety Guidelines

Always perform pre-ride checks, wear protective gear, and follow traffic rules. Be aware of your surroundings and avoid risky conditions to ensure a safe riding experience.

3.1 Pre-Ride Checks

Regular pre-ride inspections are essential for safe and enjoyable cycling. Check tire pressure, brakes, battery charge, and ensure all lights are functioning. Inspect the frame, fork, and wheels for damage. Verify proper lubrication of the chain and ensure all bolts and nuts are secure. Familiarize yourself with the bike’s controls and settings before starting your journey. A thorough check ensures reliability and minimizes risks while riding.

3.2 Safety Precautions

Always wear a helmet, knee pads, and reflective clothing for visibility. Avoid distractions like using your phone while riding. Be aware of your surroundings and follow traffic laws. Ensure the bike is properly sized for your height. Keep a safe distance from other vehicles and pedestrians. Adjust your speed according to road conditions and weather. Familiarize yourself with local cycling regulations to ensure a safe and enjoyable ride.

3.3 Protective Gear Recommendations

Always wear a high-quality helmet that fits securely and meets safety standards. Use knee pads and elbow pads for added protection. Reflective clothing or accessories enhance visibility in low-light conditions. Ensure proper fit of all gear to maintain mobility and comfort. Consider wearing gloves for better grip and control. Eye protection, such as goggles, is recommended for off-road or high-speed rides. Prioritize safety with appropriate gear tailored to your riding environment and style.

Assembly and Initial Setup

This section guides you through unboxing, inventory, and step-by-step assembly. Follow instructions carefully to ensure proper setup and functionality of your AIMA Big Sur Bike.

4.1 Unboxing and Inventory

Start by carefully unboxing your AIMA Big Sur Bike and inspecting for any damage. Verify all components, including the frame, wheels, saddle, handlebar, and accessories. Ensure you have all necessary tools and hardware. Organize small parts to avoid loss. Refer to the manual for a detailed inventory list and proceed systematically to ensure everything is accounted for before assembly begins.

4.2 Step-by-Step Assembly Guide

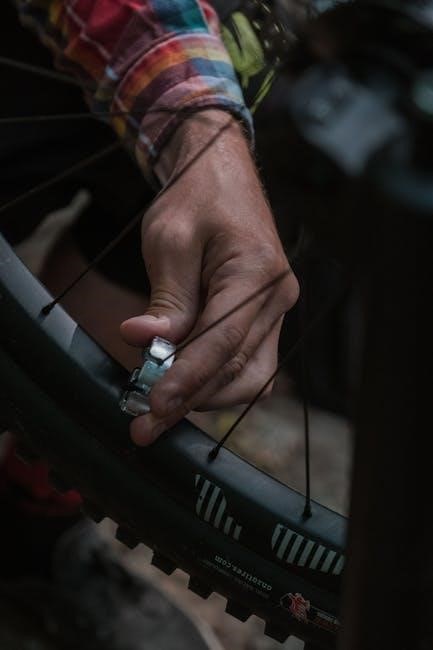
Begin by attaching the handlebars to the stem using the provided Allen key. Tighten all bolts securely but avoid over-tightening. Next, install the front wheel by aligning the quick-release mechanism and ensuring it is properly seated. Mount the saddle and adjust its height and angle for comfort. Use the torque wrench to tighten all bolts according to the specified torque values. Finally, connect the electrical components, such as the motor and display, ensuring all wires are securely plugged in. Refer to the torque specifications chart for precise adjustments.

4.3 Initial Setup and Calibration

After assembly, turn on the display and check all settings. Calibrate the motor by following the on-screen instructions. Ensure the battery is fully charged and test the brakes. Adjust the derailleur for smooth gear shifting. Perform a test ride on a flat surface to verify proper functionality. Check the display settings and customize them according to your preferences. Refer to the user manual for detailed calibration steps and ensure all systems are operational before full use.

Operating the AIMA Big Sur Bike

Power on the bike and ensure all systems are operational. Use the display to monitor speed, battery, and mode. Select the appropriate assist level for your ride. Always follow safety guidelines for a smooth and enjoyable experience.

5.1 Controls and Instrumentation

The AIMA Big Sur features a user-friendly display showing speed, battery level, and riding mode. Controls include a power button, mode selector, and assist level buttons. The bike is equipped with a specially-designed large headlight and integrated rear light with turn signals for enhanced visibility and safety. These controls allow for seamless operation and customization of your riding experience.

5.2 Riding Modes and Assist Levels

The AIMA Big Sur offers multiple riding modes, including Eco, Sport, and Turbo, catering to various terrain and energy efficiency needs. Riders can adjust assist levels via the control panel, with options ranging from minimal to maximum assistance. The bike’s powerful 750W motor adapts seamlessly to selected modes, ensuring a smooth and tailored riding experience. Switching modes is intuitive, allowing riders to optimize performance based on their preferences and conditions.

5.3 Braking and Handling Techniques

Proper braking and handling are crucial for safe and controlled riding. The AIMA Big Sur features TEKTRO hydraulic disc brakes, ensuring reliable stopping power. Riders should apply brakes gradually, especially on uneven terrain. The bike’s fat tires provide excellent stability, but sharp turns require reduced speed. Always maintain a firm grip on the handlebars and adjust your body weight for balance. Practice braking techniques in open spaces to familiarize yourself with the bike’s response.

Maintenance and Care

Regular maintenance is crucial for your AIMA Big Sur Bike. Ensure all components are clean, lubricated, and in good condition to guarantee optimal performance and longevity.

6.1 Regular Maintenance Schedule

Regular maintenance ensures your AIMA Big Sur Bike performs optimally. Check the battery charge level daily, inspect tires for wear, and clean the bike weekly. Lubricate the chain every 100 miles and inspect brakes monthly. Replace brake pads and tires as needed. Check electrical connections and tighten bolts periodically. Refer to the manual for specific schedules and procedures to maintain your e-bike’s performance and longevity.

6.2 Cleaning and Lubrication

Regular cleaning and lubrication are essential for maintaining your AIMA Big Sur Bike. Use a soft cloth and mild detergent to clean the frame, avoiding electrical components. Lubricate the chain every 100 miles with a high-quality chain lube. Clean and inspect the brakes regularly, ensuring proper function. Apply grease to moving parts like pedals and hinges. Keep the bike dry to prevent rust and corrosion, ensuring optimal performance and longevity.

6.3 Battery Care and Charging

Proper care of your AIMA Big Sur Bike’s battery ensures longevity. Charge the battery in a cool, dry place, avoiding extreme temperatures. Use the provided charger to prevent damage; Avoid overcharging; stop once the battery reaches 100%. Store the battery in a cool, dry environment when not in use. Clean the terminals regularly to maintain good connections. Never expose the battery to water or chemicals, as this can cause irreversible damage.

Troubleshooting Common Issues

Identify and resolve common issues like error codes, electrical malfunctions, or mechanical problems. Refer to the manual for diagnostic guides and solutions. Contact support if unresolved.

7.1 Diagnosing Electrical Issues

Begin by checking error codes on the display. Common issues include battery disconnection or loose wiring. Verify connections and ensure the battery is fully charged. Consult the manual for specific error code meanings. If problems persist, inspect the motor, controller, and sensors for damage. Reset the system or update software if necessary; Contact support for advanced troubleshooting or replacement parts. Always ensure safety before riding.

7.2 Solving Mechanical Problems

Inspect the bike for loose bolts, worn brake pads, or misaligned gears. Lubricate the chain and pivot points regularly. Tighten any loose components, especially around the stem and handlebars; Check the tire pressure and brakes for proper function. If gears are misaligned, adjust the derailleur according to the manual. Replace damaged or excessively worn parts immediately to ensure safety and optimal performance. Always refer to the manual for specific torque specifications.

7.3 Error Codes and Solutions

Common error codes on the AIMA Big Sur include E01 (system malfunction), E02 (battery communication issue), and E03 (motor fault). For E01, restart the bike and check connections. For E02, ensure the battery is properly secured and charged. E03 may require professional assistance. Always refer to the manual for specific solutions. If unresolved, contact customer support for further troubleshooting or repair options. Regular updates can prevent such issues.

Accessories and Upgrades

Enhance your AIMA Big Sur with recommended accessories like racks, bags, and lights. Upgrades such as improved brakes or tires can boost performance and versatility. Always ensure compatibility and follow installation guidelines for optimal results. Accessories can be purchased directly from AIMA or authorized retailers, ensuring quality and warranty compliance. Customize your ride to suit your needs.

8.1 Recommended Accessories

Recommended accessories for the AIMA Big Sur include durable racks, water-resistant bags, and high-intensity lights. Fenders and cargo trailers are also popular for added utility. A phone mount or GPS device can enhance navigation. All accessories should be compatible with the Big Sur’s design and specifications. Ensure to purchase from authorized retailers to maintain warranty compliance and guarantee quality. These additions can improve functionality and customize your riding experience.

8.2 Compatible Upgrade Components

For enhancing performance, compatible upgrades for the AIMA Big Sur include high-torque motors, upgraded hydraulic brakes, and advanced gear systems. Custom wheels and tires designed for specific terrains are also compatible. Ensure all upgrades are verified by authorized dealers to maintain warranty and safety standards. Upgrading components should align with the bike’s design specifications to preserve its functionality and reliability. Always consult professional technicians for installation.

8.4 Installing Aftermarket Parts

Installing aftermarket parts on your AIMA Big Sur requires careful consideration. Always use genuine or manufacturer-recommended components to ensure compatibility and safety. Consult the user manual or contact authorized dealers for guidance. Improper installations may void the warranty or compromise performance. Follow proper torque specifications and electrical connections to avoid damage. Test the bike thoroughly after installation to ensure all systems function correctly. Prioritize professional installation for complex modifications.

Warranty and Support

Your AIMA Big Sur Bike is backed by a comprehensive warranty. For details, contact customer support or visit authorized service centers. Read the manual for full terms and conditions.

9.1 Warranty Coverage and Terms

The AIMA Big Sur Bike warranty covers manufacturing defects for specific components. The main frame and motor are typically under warranty for 5 years, while the battery is covered for 2 years. Wearable parts like tires and brakes are excluded. For full details, refer to the official warranty document provided with your purchase or available on the AIMA website.

9.2 Contacting Customer Support

For inquiries or assistance, contact AIMA customer support through their official website. Use the contact form, email, or phone number provided. Support is available to address questions about your Big Sur Bike, maintenance, or warranty. Additionally, the AIMA website offers a resource center with FAQs and downloadable manuals to help resolve common issues promptly and efficiently.

9.3 Service Centers and Repair Options

AIMA Big Sur Bike owners can access authorized service centers for professional maintenance and repairs. These centers are equipped to handle specific parts and models, ensuring reliable service. For convenience, locations and contact details are available on the AIMA website. Additionally, AIMA offers DIY repair kits and genuine parts for users preferring self-maintenance. Always use authorized service centers to maintain your bike’s quality and safety standards.

ender 3 instructions

Unboxing and Initial Setup

Start by carefully unboxing the Ender 3 and verifying all components. Check for the frame, print bed, extruder, motors, power supply, cables, and tools like Allen wrench, screwdrivers, pliers, and USB card. Organize everything on a clean, stable workbench for easy access during assembly.

  • Frame and base assembly
  • Print bed and springs
  • Extruder and print head
  • Motors and pulleys
  • Power supply and cables
  • Tools (Allen wrench, screwdrivers, pliers)
  • USB card with instructions

1.1. Checking the Components and Tools

Begin by carefully unboxing and inventorying all components to ensure nothing is missing or damaged. Verify the presence of the frame, print bed, extruder, motors, power supply, and cables. Check the tools provided, such as Allen wrenches, screwdrivers, and pliers, as they are essential for assembly. Locate the USB card containing the user manual and firmware instructions. Ensure the C7 capacitor is removed from the motherboard if using a BLTouch sensor. Inspect all parts for defects before proceeding.

1;2. Preparing the Workbench

Ensure your workbench is clean, stable, and well-lit. Cover it with a protective layer like cardboard or a silicone mat to prevent damage. Gather all tools and components within easy reach. Verify the workbench is at a comfortable height to avoid strain during assembly. Keep Allen wrenches, screwdrivers, and pliers handy, as they are frequently used. Organize smaller parts in containers to prevent misplacement. A clutter-free workspace ensures a smooth and efficient assembly process for your Ender 3 printer.

Assembly Instructions

Proceed systematically with the Ender 3 assembly, following the guide. Start with the frame, then attach the print head and extruder. Ensure all cables are securely connected. Use essential tools like Allen wrenches and screwdrivers for precise adjustments. A well-organized workspace and careful attention to detail are key for a successful build.

2.1. Frame Assembly Steps

Begin by assembling the frame using the upright profiles and base. Attach the vertical aluminum profiles to the base frame, ensuring they are securely fastened with screws. Tighten all connections firmly to maintain stability. Use an Allen wrench for bolts and a screwdriver for smaller screws. Align the frame carefully to avoid any misalignment, which could affect printer performance. Double-check the instructions for specific orientation and part placements. A sturdy frame is essential for accurate printing results.

  • Attach vertical profiles to the base
  • Secure with screws using Allen wrench
  • Ensure alignment and stability
  • Double-check all connections

2.2. Attaching the Print Head and Extruder

Mount the print head to the Z-axis gantry, ensuring proper alignment with the frame. Secure it using the provided screws and tighten with an Allen wrench. Next, install the extruder by attaching it to the print head. Feed the filament through the extruder, making sure it’s seated correctly. Connect the extruder motor to the motherboard, following the wiring diagram. Double-check all connections for tightness and alignment to ensure smooth operation during printing.

  • Mount print head to Z-axis gantry
  • Secure with screws using Allen wrench
  • Install extruder and feed filament
  • Connect extruder motor to motherboard
  • Verify all connections and alignment

Firmware and Software Setup

Install BLTouch-enabled firmware for auto bed leveling. Flash the firmware via USB using software like Arduino IDE. Configure motherboard settings to ensure compatibility with BLTouch and other components.

  • Download and install BLTouch firmware
  • Flash firmware via USB
  • Configure motherboard settings

3.1. Installing BLTouch Enabled Firmware

Begin by downloading the BLTouch-enabled firmware from Creality’s official website or trusted sources. Extract the firmware files to your computer. Install Arduino IDE and configure it for your Ender 3’s motherboard. Connect the printer to your PC via USB and select the correct COM port. Upload the firmware by clicking “Upload” in Arduino IDE. Ensure the BLTouch sensor is properly connected before flashing to avoid compatibility issues. Follow on-screen instructions to complete the installation successfully.

3.2. Configuring the Motherboard Settings

After installing the firmware, access the motherboard settings via the LCD screen or USB connection. Navigate to the control menu and ensure the BLTouch sensor is recognized. Set the correct input voltage (230V or 115V) to match your region. Enable BLTouch auto bed leveling in the settings. Save the configuration to ensure proper functionality. Verify the motherboard version (e.g., V4.2.7) for compatibility and adjust settings as needed to optimize performance and safety.

Bed Leveling and Calibration

Bed leveling ensures proper print adhesion. Use manual adjustment for basic setup or BLTouch for auto leveling. Tighten screws evenly for a precise calibration, ensuring a perfect first layer every time.

4.1. Manual Bed Leveling Process

Start by preheating the bed to 60°C. Place a sheet of paper on the bed and adjust each corner screw until the paper moves with slight resistance. Tighten each screw in a diagonal pattern to ensure even leveling. Use test prints to fine-tune the bed, ensuring proper adhesion and preventing warping. Repeat as needed for optimal calibration.

4.2. Using BLTouch for Auto Bed Leveling

Install BLTouch-enabled firmware and remove the C7 capacitor for V3.0 models. Mount the BLTouch on the extruder carriage and connect it to the motherboard. Power on the printer and navigate to the BLTouch menu. Select “Auto Leveling” and let the sensor probe the bed. Adjust the Z-offset if needed for proper first-layer height. This process ensures precise calibration without manual intervention, improving print quality and bed adhesion.

First Print Guide

Insert the SD card with pre-sliced models. Navigate the menu to select a test file. Ensure the bed is clean and properly leveled; Load filament, start the print, and monitor the first layer for proper adhesion.

5.1. Preparing the Print File and Slicing

Download your STL file and open it in slicing software like Cura. Select the Ender 3 printer profile and adjust settings such as layer height, infill density, and support material. Ensure the print orientation optimizes material usage and print time. Slice the model and save the G-code file to an SD card. Verify the file name is compatible with the printer and check the preview to ensure proper layer adhesion and print quality.

5.2. Loading Filament and Starting the Print

Preheat the extruder and bed to the recommended temperatures for your filament. Insert the filament into the extruder, guiding it gently until it feeds through. Use the control panel to navigate to the print menu, select your G-code file, and start the print job. Monitor the initial layers to ensure proper adhesion and adjust the bed leveling if necessary. Allow the printer to operate without interruption for optimal results. Always ensure filament is loaded correctly to avoid jams or failed prints.

Maintenance and Troubleshooting

Regularly clean the print bed, lubricate moving parts, and check belt tension. Inspect the nozzle for debris and ensure proper filament flow; Address clogs promptly to avoid damage.

6.1. Regular Maintenance Tasks

Perform routine maintenance to ensure optimal performance. Clean the print bed thoroughly with isopropyl alcohol and lubricate all moving parts, including linear bearings and rails, every 100 hours of printing. Check and tighten all bolts and belts periodically. Inspect the PTFE tubing for signs of wear and replace it if necessary. Regularly update the firmware to access new features and improvements. Always monitor the condition of the nozzle and extruder for proper filament flow and heat distribution.

  • Clean the print bed and frame
  • Lubricate moving parts
  • Tighten bolts and belts
  • Inspect and replace PTFE tubing
  • Update firmware
  • Monitor nozzle and extruder

6.2. Common Issues and Solutions

Address common issues promptly to ensure smooth printing. Bed leveling problems can cause uneven prints; adjust the springs or use BLTouch for auto leveling. Filament jams often occur due to incorrect temperatures; clean the extruder and adjust settings. Noise from the X-axis may indicate loose belts; tighten them firmly. Layer shifting can result from worn pulleys; replace them if necessary. Consult the user manual or online forums for detailed troubleshooting guides.

  • Bed leveling issues: Adjust springs or use BLTouch
  • Filament jams: Clean extruder and adjust temperatures
  • X-axis noise: Tighten belts
  • Layer shifting: Replace worn pulleys

Upgrades and Modifications

Popular upgrades for the Ender 3 include installing a dual gear extruder, PEI or glass bed, and silent stepper motors. These modifications enhance performance and print quality.

7.1. Popular Upgrades for Ender 3

Popular upgrades for the Ender 3 include a dual gear extruder for improved filament grip, a PEI or glass bed for better print adhesion, and silent stepper motor drivers for quieter operation; Many users also opt for a direct drive conversion, which enhances handling of flexible filaments. Additionally, installing a BLTouch auto-bed leveling sensor and upgrading the belts and pulleys can significantly improve print quality and ease of use. These modifications are widely available and relatively easy to install.

  • Dual gear extruder
  • PEI or glass bed
  • Silent stepper motor drivers
  • Direct drive conversion
  • BLTouch sensor

7.2. Installing Upgrades Safely

When installing upgrades, ensure the printer is disconnected from power to prevent electrical shocks. Use appropriate tools like Allen wrenches and screwdrivers. Follow detailed online guides or manufacturer instructions for each upgrade. Test each component after installation to ensure proper functionality. For complex upgrades like direct drive conversions, consider seeking assistance or consulting forums for troubleshooting common issues. Always prioritize safety and precision to maintain your printer’s performance and reliability.

  • Disconnect power before starting
  • Use correct tools (e.g., Allen wrench, screwdrivers)
  • Follow upgrade-specific instructions
  • Test upgrades thoroughly post-installation
  • Seek help for complex modifications

Safety Precautions

Always read the user manual before starting. Avoid using the printer in ways not described to prevent injury or damage. Ensure proper voltage selection (230V/115V) matches your location. Keep flammable materials away and avoid overheating. Supervise children and pets during operation. Follow all safety guidelines to ensure safe and reliable printing experiences.

  • Avoid incorrect usage to prevent harm
  • Set the correct voltage for your region
  • Keep flammable materials away
  • Supervise children and pets

8.1. General Safety Guidelines

Always read the user manual thoroughly before starting. Ensure the printer is placed on a stable, heat-resistant surface away from flammable materials. Keep children and pets away during operation. Avoid touching hot components like the extruder or print bed. Use protective gloves when handling sharp parts. Ensure proper ventilation to avoid inhaling fumes. Regularly inspect cables and connections for damage. Never leave the printer unattended while in operation. Follow all safety precautions to ensure a safe and reliable printing experience.

  • Read the manual carefully
  • Keep the printer away from flammable materials
  • Supervise children and pets
  • Avoid touching hot components
  • Inspect cables and connections regularly

8.2. Avoiding Common Hazards

To ensure safe operation, avoid common hazards like electrical malfunctions, burns, and mechanical injuries. Inspect all cables and connections regularly for damage. Keep hands away from moving parts and hot components like the extruder and print bed. Properly ventilate the workspace to avoid inhaling fumes from filaments. Use protective gloves when handling sharp tools or small parts. Ensure the printer is placed on a stable surface to prevent accidental tipping or damage.

  • Inspect electrical components for damage
  • Keep hands away from hot and moving parts
  • Ensure proper ventilation
  • Use protective gloves
  • Stabilize the printer

Manufacturer Instructions

The Ender 3 user manual provides detailed instructions for assembly, usage, and troubleshooting. Read the manual carefully before starting and follow all safety guidelines to avoid injuries or damage.

Instructions and videos are also available on the provided SD card or USB flash drive. Visit Creality’s official website for additional resources and support.

9.1. Official User Manual Highlights

The official Ender 3 user manual provides comprehensive guidance for assembly, usage, and troubleshooting. It includes detailed diagrams and step-by-step instructions to ensure a smooth setup process. The manual emphasizes safety precautions, such as selecting the correct input voltage (230V or 115V) and avoiding improper usage; Additional resources, including instructional videos, are available on the provided SD card or USB flash drive, along with access to Creality’s official website for further support.

  • Coverage of assembly and usage
  • Troubleshooting tips
  • Safety guidelines
  • Access to digital resources

9.2. SD Card and USB Instructions

The Ender 3 printer includes an SD card and USB flash drive containing essential instructions, diagrams, and videos for assembly and operation. These resources provide step-by-step guides for first-time users, ensuring a smooth setup process. The SD card also includes safety guidelines and troubleshooting tips. Users can access detailed manuals, firmware updates, and software drivers directly from the provided storage devices or by visiting Creality’s official website for additional support.

  • SD card with assembly instructions
  • USB flash drive with manuals
  • Access to firmware updates
  • Safety guidelines

baxi bermuda back boiler manual

The Baxi Bermuda Back Boiler is a reliable, efficient central heating solution designed for installation in living spaces, offering convenience and consistent performance․ Its compact design and user-friendly features make it a popular choice for modern homes․

1․1 Overview of the Baxi Bermuda Back Boiler

The Baxi Bermuda Back Boiler is a compact, efficient central heating unit designed for installation within a builder’s opening in living spaces․ It is a fully automatic, gas-fired, condensing boiler that offers reliable performance and energy efficiency․ Compatible with various firefronts, it combines modern technology with practical design, making it a versatile and convenient heating solution for homes․

1․2 Key Features and Benefits

The Baxi Bermuda Back Boiler offers high energy efficiency, compact design, and compatibility with various firefronts․ It features a fully automatic, condensing operation, ensuring reliable performance and reduced energy consumption․ Its room-sealed, fan-assisted design enhances safety and efficiency․ The boiler is user-friendly, with clear controls and minimal maintenance requirements, making it a practical and efficient heating solution for modern homes․

Installation and Setup

The Baxi Bermuda Back Boiler requires precise installation to ensure optimal performance․ Proper positioning, connections, and adherence to safety guidelines are essential for a safe and efficient setup․

2․1 Pre-Installation Requirements

Before installing the Baxi Bermuda Back Boiler, ensure the site meets all safety and technical standards․ Verify gas supply compatibility, check for adequate ventilation, and confirm the builder’s opening dimensions align with boiler specifications․ Proper preparation ensures a smooth and safe installation process, preventing potential issues down the line․

2․2 Step-by-Step Installation Guide

Begin by preparing the site, ensuring all pre-installation requirements are met․ Unpack the boiler and verify all components are included․ Position the boiler in the builder’s opening, aligning with the fixing notches․ Connect gas and water supplies according to the manual’s diagrams․ Install the flue and ensure proper ventilation․ Finally, test the boiler to confirm proper operation and safety standards․

Safety and Maintenance

Always follow safety guidelines and perform regular checks to ensure optimal performance․ Check flues and seals for leaks and maintain proper ventilation to prevent hazards․

3․1 Safety Precautions and Guidelines

Ensure proper ventilation and follow all safety guidelines in the manual․ Avoid gas leaks by checking connections regularly․ Use approved tools and protect the boiler from extreme temperatures․ Always switch off the boiler before servicing and ensure it is cool․ Refer to the manual for specific precautions and adhere to British Standards for installation and maintenance․ Never tamper with safety devices or bypass controls․ Always follow the manufacturer’s instructions for safe operation․

3․2 Regular Maintenance Tips

Regular maintenance ensures optimal performance and longevity․ Schedule annual servicing by a qualified technician to inspect and clean components․ Check flues and vents for blockages․ Ensure proper ventilation in the room․ Clean the boiler exterior and heat exchanger regularly․ Inspect gas pipes for leaks and tighten connections if necessary․ Follow the manual’s guidelines for filter cleaning and replacement․ Maintain proper water pressure and bleed radiators if needed․ Regular checks prevent issues and ensure efficiency․

Troubleshooting and Fault Finding

The Baxi Bermuda Back Boiler may display error codes or lose heat․ Refer to the fault finding chart in the manual for solutions․ Contact a technician if issues persist․

4․1 Common Issues and Solutions

Common issues with the Baxi Bermuda Back Boiler include error codes, loss of heat, or ignition problems․ Solutions often involve resetting the boiler, checking gas supply, or ensuring proper ventilation․ Refer to the fault finding chart in the manual for specific error code meanings and step-by-step fixes․ If problems persist, contact a certified technician for professional assistance․

4․2 Using the Fault Finding Chart

The fault finding chart in the Baxi Bermuda Back Boiler manual helps diagnose issues by matching error codes to specific problems․ Locate the error code displayed on the boiler, then refer to the chart for detailed troubleshooting steps․ This guide provides solutions or indicates when professional intervention is needed, ensuring efficient resolution of common faults and minimizing downtime․

Technical Specifications

The Baxi Bermuda Back Boiler features compact dimensions for versatile installation, operates on natural gas, and incorporates advanced condensing technology for enhanced energy efficiency and performance․

5․1 Boiler Dimensions and Requirements

The Baxi Bermuda Back Boiler is designed to fit seamlessly into a builder’s opening, with dimensions of 845mm (height), 420mm (width), and 200mm (depth)․ It is room-sealed and fan-assisted, ensuring efficient operation․ The boiler is compatible with natural gas and requires proper ventilation for safe functioning․ Its compact size makes it ideal for installation in living spaces without compromising on performance or safety standards․

5․2 Compatibility with Firefronts and Accessories

The Baxi Bermuda Back Boiler is compatible with specific firefronts, including the Valor Dimension Classica, Dream, and Innova models․ It operates with natural gas and is designed to work seamlessly with approved accessories․ The boiler’s room-sealed, fan-assisted design ensures efficient performance․ Always use compatible parts and accessories to maintain safety and efficiency, as specified in the manual or by Baxi customer support․

Environmental and Efficiency Standards

The Baxi Bermuda Back Boiler meets energy efficiency regulations and is designed to minimize emissions, ensuring high efficiency and reduced environmental impact through its advanced condensing technology․

6․1 Compliance with Energy Efficiency Regulations

The Baxi Bermuda Back Boiler adheres to the Boiler (Efficiency) Regulations 1993 and Directive 92/42/EEC, ensuring it meets stringent energy efficiency standards․ It is certified by Notified Body 0087, confirming its compliance with environmental and efficiency requirements for new hot water boilers․ This certification guarantees that the boiler operates efficiently, reducing energy consumption and environmental impact․

6․2 Condensing Technology and Emissions

The Baxi Bermuda Back Boiler incorporates advanced condensing technology, which captures and reuses heat from flue gases to enhance efficiency․ This innovation significantly reduces emissions, making the boiler eco-friendly․ By minimizing energy waste, it contributes to lower carbon footprints while providing reliable heating performance, aligning with modern environmental standards and promoting sustainable energy use in homes․

User Manual and Documentation

The Baxi Bermuda Back Boiler manual provides essential guidance for installation, operation, and maintenance․ It ensures safe and efficient use, with detailed diagrams and troubleshooting tips․

7․1 Navigating the Baxi Bermuda Back Boiler Manual

The manual is structured for easy navigation, starting with an introduction and safety guidelines․ It includes detailed installation steps, operating instructions, and maintenance tips․ Troubleshooting sections help identify common issues, while technical specifications ensure compatibility with various firefronts and accessories․ The document also provides clear diagrams and fault-finding charts for efficient problem resolution, making it a comprehensive resource for users․

7․2 Downloading and Accessing Additional Resources

Additional resources, including manuals and fault-finding charts, are available on the Baxi website․ Users can access the literature library to download PDF manuals for specific models like the Baxi Bermuda 552․ These resources provide detailed installation guides, troubleshooting tips, and compatibility information, ensuring comprehensive support for optimal boiler performance and maintenance․ Visit the Baxi support page for direct links to these materials․

Warranty and Support

Baxi offers a comprehensive warranty and dedicated customer support․ For inquiries, contact Baxi’s support team or visit their website for additional resources and assistance․

8․1 Warranty Terms and Conditions

The Baxi Bermuda Back Boiler comes with a comprehensive warranty covering parts and labor for a specified period, typically 2-5 years․ Registration and proper installation by a qualified engineer are required․ The warranty meets energy efficiency regulations and covers repairs or replacements due to manufacturing defects․ Exclusions apply for misuse or improper installation․ Full terms are outlined in the manual or on Baxi’s official website․

8;2 Contacting Baxi Customer Support

For assistance with your Baxi Bermuda Back Boiler, visit the official Baxi website or call their customer support team․ Resources, including manuals and troubleshooting guides, are available online․ For direct help, contact via phone or email․ Ensure to have your boiler model and serial number ready for efficient support․ Baxi also offers a literature library for easy access to documentation and guides․

The Baxi Bermuda Back Boiler offers efficient, reliable heating solutions, adhering to safety and environmental standards․ Regular professional servicing ensures optimal performance, longevity, and suitability for modern homes․

9․1 Final Tips for Optimal Performance

For the Baxi Bermuda Back Boiler to perform efficiently, schedule annual professional servicing, ensure proper ventilation, and prevent flue blockages․ Regularly inspect gas connections and clean filters to maintain performance․ Always use genuine Baxi parts for repairs to avoid compatibility issues․ Follow the manual’s guidelines for optimal heating and safety․ Proper maintenance ensures long-term reliability and energy efficiency, keeping your home warm and comfortable year-round․

9․2 Importance of Professional Servicing

Regular professional servicing ensures the Baxi Bermuda Back Boiler operates safely and efficiently․ It helps prevent breakdowns, maintains optimal performance, and prolongs the boiler’s lifespan․ Annual checks by Gas Safe registered engineers are essential for safety, compliance, and warranty validity․ Professional servicing also identifies potential issues early, saving costs and ensuring reliable heating․ Always prioritize qualified technicians for servicing to maintain your boiler’s health and performance․

last day events pdf

This book by Ellen G. White explores end-time prophecies, offering insights into the Sabbath, Sunday crisis, and the remnant church’s role. Download the PDF for a detailed chronological chart of last-day events and spiritual preparation guidance.

1.1 Overview of the Book

Last Day Events, written by Ellen G. White, is a comprehensive guide to understanding end-time prophecies. Published in 1992, it explores themes such as the Sabbath, the Sunday crisis, and the remnant church. The book compiles Ellen White’s writings on the second coming of Christ, the mark of the beast, and the time of trouble. It serves as a spiritual preparation guide, offering insights into Bible prophecies. A PDF version is available for download, making it accessible for further study and reflection on these critical topics.

1.2 Importance of Understanding End-Time Prophecies

Understanding end-time prophecies is crucial for spiritual preparedness and avoiding deception. Ellen G. White’s insights in Last Day Events provide clarity on biblical signs, enabling believers to discern the times. The prophecies reveal God’s plan to protect the faithful during Earth’s final crisis. Grasping these truths ensures readiness for Christ’s return and equips believers to share the message of hope. The PDF resource offers a detailed guide for studying these prophecies, fostering a deeper understanding of God’s ultimate plan for humanity.

Key Themes in Ellen G. White’s Writings

Ellen G. White’s writings emphasize the Sabbath, Sunday crisis, remnant church, and the second coming. Her insights in Last Day Events reveal divine plans and warnings, guiding believers to prepare for Earth’s final events. The PDF provides a comprehensive study guide for understanding these pivotal themes.

2.1 The Sabbath and Its Role in the Last Days

In the last day events PDF, Ellen G. White highlights the Sabbath as a central issue. It symbolizes rest and loyalty to God, contrasting with the world’s divergence. A key end-time marker, the Sabbath will distinguish the faithful, as Sunday laws rise, testing allegiance. The PDF outlines its significance in separating God’s people, Prepare spiritually for this crucial test through study and obedience. The Sabbath’s role in the final crisis is unparalleled, ensuring divine protection and sealing the faithful;

2.2 The Sunday Crisis and Its Significance

The Sunday Crisis is a pivotal end-time event highlighted in Ellen G. White’s writings. It emerges as a direct opposition to the Sabbath, symbolizing a clash between loyalty to God and worldly allegiance. The enforcement of Sunday laws will test humanity’s faith, separating the faithful remnant from the rest. This crisis is central to the final events, as it prepares the stage for the ultimate conflict before Christ’s return. Understanding this phenomenon is crucial for spiritual preparedness and aligning with God’s will. The PDF resources provide deeper insights into its prophetic significance and implications.

2.3 The Remnant Church and Its Mission

The Remnant Church, as described by Ellen G. White, embodies a faithful group that upholds God’s truth, particularly the Sabbath. Their mission is to proclaim the Loud Cry, urging humanity to worship the Creator and reject false systems. This church stands as a beacon of hope, preparing hearts for Christ’s return. The PDF outlines their role in end-time prophecies, emphasizing spiritual readiness and unity among believers. Their work is vital in the final days, ensuring God’s message reaches all nations before the Second Coming.

The Second Coming of Christ

Christ’s return is literal and visible, disproving the secret rapture myth. The PDF outlines signs and preparations, emphasizing a glorious, unmistakable event for all humanity to witness.

3.1 Signs of the Second Coming

Ellen G. White’s writings outline specific signs heralding Christ’s return, such as increased wickedness, natural disasters, and global chaos. These events align with biblical prophecies, signaling His imminent coming. The PDF highlights how these signs serve as a spiritual awakening, urging believers to prepare their hearts and remain vigilant amidst earthly turmoil. Understanding these indicators helps followers of Christ navigate the end times with faith and clarity, guided by prophetic insights from White’s works.

3.2 The Myth of the Secret Rapture

Ellen G. White’s writings challenge the concept of a secret rapture, emphasizing that Christ’s return will be literal and visible to all. The Bible describes a time of tribulation before His coming, not a silent removal of believers. White’s work highlights the seven last plagues and the remnant church’s role, refuting the idea of an invisible rapture. The PDF elaborates on these end-time events, urging believers to remain vigilant and prepared for the final crisis, aligning with biblical prophecy rather than popular theories.

3.3 Christ’s Literal and Visible Return

Ellen G. White’s writings emphasize that Christ’s return will be literal and visible, not a secret event. The PDF highlights His glorious second coming, which will be seen by all, marking the end of sin and the beginning of eternal life. The seven last plagues will precede His arrival, and the remnant church will triumph through faith. White urges believers to remain vigilant, trusting in God’s plan, as the earth is renewed and His people are redeemed, fulfilling biblical prophecy.

The Mark of the Beast and the Seal of God

The Mark of the Beast symbolizes allegiance to earthly powers, while the Seal of God signifies loyalty to divine authority, as outlined in the PDF study guide.

4.1 Understanding the Mark of the Beast

The Mark of the Beast is a symbol of allegiance to earthly powers, contrasting with the Seal of God, which signifies divine loyalty. Ellen G. White’s writings in the PDF highlight its connection to end-time prophecies, emphasizing the spiritual conflict between obedience to God and submission to human systems. The Mark is often linked to Sunday laws and the rejection of the Sabbath, serving as a clarion call for believers to remain faithful amidst growing pressures. Understanding this concept is crucial for spiritual preparedness in the final days.

4.2 The Seal of God and Its Protection

The Seal of God is a divine mark of protection for the faithful, signifying their loyalty to Him. In Ellen G. White’s writings, it is closely tied to the observance of the Sabbath, symbolizing a covenant relationship. This seal safeguards believers during the time of trouble and distinguishes them from those who receive the Mark of the Beast. The PDF provides deeper insights into how this seal is applied and its role in end-time events, offering assurance to God’s people of His enduring protection and promise.

The Time of Trouble and Plagues

The Seven Last Plagues signify God’s final judgments before Christ’s return, while believers are called to prepare spiritually for this tumultuous period, ensuring their faith remains unwavering.

5.1 The Seven Last Plagues

The Seven Last Plagues are a series of divine judgments described in Revelation, marking the final stages of Earth’s history. Ellen G. White’s writings highlight their severity and purpose, emphasizing their role in revealing humanity’s choices. The plagues serve as a call to repentance before Christ’s return, while the remnant church is protected under God’s seal. These events are detailed in the PDF resources, providing a chronological understanding and spiritual preparation for believers.

5.2 Preparing for the Time of Trouble

Ellen G. White emphasizes the importance of spiritual readiness for the time of trouble. Believers are urged to seek a deep connection with God, embrace the seal of God, and remain faithful amidst trials. The remnant church plays a crucial role in this preparation, standing firm on biblical truths. Practical steps include prayer, faith, and separation from sin. The loud cry serves as a clarion call to awaken hearts. By trusting in God’s promises, believers can face the coming crises with confidence and hope, ready to endure until Christ’s return.

The Role of the Loud Cry

The Loud Cry is a powerful message calling humanity to worship the Creator and reject false worship. It awakens hearts to God’s truth, preparing the world for Christ’s return, and is a key mission of the remnant church.

6.1 The Message of the Loud Cry

The Loud Cry is a divine call to worship the Creator, reject false systems, and embrace God’s truth. It emphasizes the Sabbath’s significance, urging repentance and warning against false worship. This message prepares hearts for Christ’s return, as outlined in Ellen G. White’s writings, offering hope and redemption amidst end-time crises. The Loud Cry is a call to awaken spiritually and seek God’s protection, ensuring readiness for the final events before the Second Coming.

6.2 Its Impact on the World

The Loud Cry sparks a global spiritual awakening, calling humanity to worship the Creator and reject false systems. It intensifies the conflict between truth and error, leading to widespread repentance and division. Many embrace God’s truth, while others resist, highlighting the urgency of end-time decisions; This message accelerates the separation between the faithful and the rebellious, preparing the world for Christ’s return and the final judgment, as prophesied in Ellen G. White’s writings.

The Final Events Before the Second Coming

The remnant church’s mission intensifies, proclaiming the Loud Cry worldwide. This period sees the culmination of earth’s history with dramatic events, including the seven last plagues, leading to Christ’s return.

7.1 The Chronology of Last Day Events

The chronology of last-day events, as outlined in Ellen G. White’s writings, includes the remnant church’s mission, the seven last plagues, and the Loud Cry. These events culminate in the fall of Babylon and Christ’s triumphant return. A detailed PDF chart provides a visual timeline, helping believers understand the sequence of end-time prophecies and prepare spiritually for the final crisis. This orderly progression highlights God’s divine plan and intervention in human history.

7.2 The Fall of Babylon

The fall of Babylon symbolizes the collapse of corrupt systems opposing God. Ellen G. White’s writings describe it as a climactic event in end-time prophecies, marked by the exposure of Babylon’s sins and its subsequent destruction. This fall is closely tied to the final plagues and serves as a call for God’s people to separate themselves from evil. The PDF resources provide a detailed study guide, helping believers understand Babylon’s role and its ultimate demise in the last-day events.

The New Earth and Eternal Life

The promise of a new heaven and a new earth highlights God’s plan for eternal life. The faithful will dwell in a renewed world, free from sin and sorrow, living in joy and harmony with Christ forever. Eternal life is the ultimate reward for those who remain faithful through Earth’s final events.

8.1 The Promise of a New Heaven and a New Earth

The Bible promises a transformed world where sin and suffering cease. This renewed creation will be free from pain and death, filled with eternal peace and joy. Revelation 21:4 describes a world where God dwells with humanity, wiping away all tears. Ellen G. White’s writings emphasize this divine plan, offering hope for believers enduring Earth’s final crises. The new heaven and new earth symbolize God’s ultimate triumph and restoration of His original purpose for humanity.

8.2 The Eternal Reward for the Faithful

The faithful will receive an eternal reward, inheriting a heavenly city where righteousness dwells. Ellen G. White emphasizes that believers’ trials are temporary, with eternal glory awaiting them. The eternal reward includes living in the presence of God, free from sin and sorrow. This promise motivates believers to remain faithful despite Earth’s final crises. The PDF study guide highlights the ultimate fulfillment of God’s plan, ensuring the faithful are prepared for their eternal inheritance.

Study Guides and Resources

Access the Last Day Events Study Guide in PDF, Word, or text formats for deeper study. A chronology chart is also available for download, providing a visual timeline of end-time prophecies. These resources help readers understand and prepare for the final events, offering spiritual insights and practical guidance.

9.1 The Last Day Events Study Guide

The Last Day Events Study Guide is a comprehensive resource for understanding Ellen G. White’s writings on end-time prophecies. Available in PDF, Word, and text formats, it includes chapter outlines, discussion questions, and a detailed chronology chart. This guide provides in-depth analysis of key topics such as the Sabbath, the Sunday crisis, and the remnant church. It also offers practical insights for spiritual preparation, making it an essential tool for individual or group study. Download it to deepen your understanding of the final events before Christ’s return.

9.2 Downloadable PDF Resources

Downloadable PDF resources on Last Day Events provide a convenient way to explore Ellen G. White’s insights. These resources include the full text of her writings, chronological charts, and study guides. Many are available for free, offering detailed analysis of end-time prophecies, the Sabbath, and the remnant church. eBook formats are also accessible, ensuring easy access to spiritual guidance. These PDFs are invaluable for personal study or group discussions, helping readers prepare for the final events before Christ’s return.

Last Day Events by Ellen G. White offers profound insights into end-time prophecies, emphasizing the Sabbath, Sunday crisis, and the remnant church. The book urges spiritual preparedness and faith. Downloadable PDFs provide further study materials, ensuring readers are equipped for the final events before Christ’s return. This resource remains vital for understanding God’s plan and eternal promises.

10.1 Summary of Key Points

Last Day Events by Ellen G. White provides a comprehensive overview of end-time prophecies, emphasizing the Sabbath, Sunday crisis, and the remnant church’s mission. It highlights the significance of the second coming, the mark of the beast, and the seal of God. The book also outlines the chronology of final events, including the fall of Babylon and the time of trouble. Study guides and downloadable PDF resources are available for deeper understanding, encouraging spiritual preparedness and faith in God’s eternal promises.

10.2 Encouragement for Further Study

For a deeper understanding of end-time prophecies, explore the Last Day Events PDF, which offers a chronological chart and spiritual preparation guidance. Downloadable resources, such as study guides and eBooks, provide additional insights into Ellen G. White’s writings. Engage with these materials to gain clarity on the Sabbath, the remnant church, and Christ’s return. Embrace this opportunity to strengthen your faith and prepare for the future with confidence and hope.

self-alignment with instruction backtranslation

Self-alignment with instruction backtranslation is a novel approach enabling language models to generate high-quality training data autonomously, enhancing their performance through unsupervised learning techniques.

1.1 Definition of Self-Alignment

Self-alignment refers to a process where language models autonomously generate and refine their own training data, aligning their behavior with specific instructions or tasks. This method leverages the model’s ability to create structured and coherent outputs, enabling it to improve its performance without extensive human supervision. By generating instructions from unlabeled data, self-alignment bridges the gap between supervised and unsupervised learning, fostering more efficient and adaptable language models. This approach is particularly valuable in scenarios where labeled datasets are scarce or expensive to create.

1.2 Overview of Instruction Backtranslation

Instruction backtranslation is a core component of self-alignment, enabling language models to generate high-quality training data autonomously. It involves training a backward model to create instructions from unlabeled text, which are then used to fine-tune the forward model. This process mimics human learning, where models learn to align their outputs with desired tasks. By leveraging unlabeled data, instruction backtranslation reduces reliance on labeled datasets, making it a cost-effective and scalable solution. This technique enhances model adaptability and improves the quality of generated instructions through iterative refinement.

The Process of Self-Alignment

Self-alignment involves training a backward model to generate instructions from unlabeled data, which are then used to fine-tune the forward model, enhancing its task-specific capabilities.

2.1 Training a Backward Model

Training a backward model is the cornerstone of self-alignment with instruction backtranslation. This process involves developing a model that can generate instructions from unlabeled data, effectively reversing the typical language generation workflow. The backward model is trained on web-scale data, learning to predict the most likely instruction that could have led to a given text. This step is crucial as it enables the creation of synthetic training examples, which are then used to fine-tune the forward model. The backward model’s accuracy is validated using metrics like unigram and bigram precision and recall, ensuring high-quality instruction generation. This iterative process refines the model’s ability to align instructions with tasks, enhancing overall performance.

2.2 Generating Instructions from Unlabeled Data

Generating instructions from unlabeled data is a pivotal step in self-alignment with instruction backtranslation. The backward model, once trained, processes large volumes of unlabeled text to produce corresponding instructions. These instructions are then paired with the original text, forming synthetic training examples. This approach leverages web-scale corpora, enabling the creation of diverse and relevant task descriptions. The quality of generated instructions is validated through metrics such as unigram and bigram precision and recall, ensuring linguistic consistency. This method effectively scales supervised training by reducing reliance on human-annotated data, while maintaining high instructional fidelity and alignment with target tasks.

2.3 Fine-Tuning the Model

Fine-tuning the model involves leveraging the synthetic training examples generated from unlabeled data. The backward model, trained to reverse-map text to instructions, creates high-quality synthetic pairs. These pairs are then used to refine the forward model, enhancing its ability to align with target tasks. Fine-tuning improves the model’s performance by exposing it to diverse and relevant training data, ensuring better generalization and alignment with desired outcomes. This step is critical for optimizing the model’s capabilities and preparing it for real-world applications, where accurate and context-specific outputs are essential;

Key Techniques in Instruction Backtranslation

3.2 Bootstrapping Self-Alignment

Bootstrapping self-alignment involves starting with a small, high-quality dataset to generate synthetic examples, iteratively enhancing model performance through self-supervised learning without extensive human intervention.

3.1 Unigram and Bigram Precision and Recall

Unigram and bigram precision and recall are critical metrics for evaluating the quality of generated instructions in self-alignment. Precision measures the proportion of correctly generated tokens, while recall assesses how many correct tokens are produced. For unigrams, this involves single words, and for bigrams, it focuses on word pairs. These metrics ensure alignment between generated and expected outputs, providing insights into model accuracy and consistency. For example, unigram precision might be calculated as 17/17 (perfect), while bigram precision could be 13/16 (0.813). These evaluations are essential for refining instruction backtranslation systems.

Bootstrapping self-alignment is an iterative process that enhances model accuracy by leveraging generated instructions to improve future outputs. This method begins with a small set of seed data and expands by refining the quality of generated instructions over multiple iterations. It plays a pivotal role in improving the alignment between the model’s outputs and desired goals. For instance, studies have shown that bootstrapping significantly boosts the performance of large language models by reducing the need for extensive labeled datasets. This approach is particularly valuable for fine-tuning models in scenarios where labeled data is scarce, enabling more efficient and effective learning processes.

3.3 Principle-Driven Self-Alignment

Principle-driven self-alignment focuses on incorporating specific guidelines and principles during the training process to ensure alignment with desired outcomes. This method emphasizes the use of foundational rules and objectives to guide the model’s behavior, making it more reliable and consistent. By embedding these principles, the model generates instructions that are not only accurate but also aligned with ethical and operational standards. Research highlights that principle-driven approaches enhance the robustness of self-alignment techniques, particularly in complex tasks like code alignment and ESP course development, where adherence to specific guidelines is crucial for achieving optimal results.

Applications of Self-Alignment

Self-alignment enhances large language models, enables code alignment, and supports ESP course development, making models more adaptable and aligned with specific tasks and domains.

4.1 Enhancing Large Language Models

Self-alignment with instruction backtranslation significantly improves large language models (LLMs) by enabling them to generate high-quality training data autonomously. This method involves training a backward model to produce instructions from unlabeled data, which are then used to fine-tune the model. By curating these datasets, LLMs achieve better alignment with their intended tasks, reducing the need for extensive human supervision. This approach not only enhances model performance but also ensures that the generated instructions are contextually relevant and diverse, leading to more robust and adaptable language models capable of handling complex tasks effectively.

4.2 Code Alignment in LLMs

Self-alignment with instruction backtranslation plays a crucial role in improving code alignment within large language models (LLMs). By generating high-quality code snippets through backward models, this method enables LLMs to better understand and replicate programming patterns. The process involves fine-tuning the model on autonomously generated code data, ensuring alignment with specific coding tasks. This approach enhances the model’s ability to handle syntax, semantics, and logical structures in code, making it more effective for programming-related queries. Additionally, it reduces reliance on human-annotated datasets, fostering scalability and efficiency in code-related applications.

4.3 ESP Course Alignment

Self-alignment with instruction backtranslation has shown promise in aligning English for Specific Purposes (ESP) courses with workplace demands. By generating tailored instructions from professional contexts, this method ensures training materials closely match industry-specific needs. The approach reduces reliance on manual curation, enabling efficient adaptation of ESP programs. This alignment enhances learner outcomes by focusing on relevant, real-world language scenarios, making ESP courses more effective and practical for professional environments.

Challenges and Considerations

Self-alignment with instruction backtranslation faces challenges like data quality dependency and balancing human oversight with automation, requiring careful calibration to maintain alignment accuracy and model reliability.

5.1 Limitations of Self-Alignment Methods

Self-alignment methods, while innovative, face limitations such as heavy dependency on data quality and potential biases in generated instructions. Without robust human oversight, models may produce inconsistent or irrelevant training samples, undermining fine-tuning effectiveness. Additionally, the computational demands of training backward models and the need for iterative refinement can pose challenges. These methods also struggle with domain-specific complexities, requiring careful calibration to maintain alignment with intended tasks. Addressing these limitations is crucial for maximizing the potential of self-alignment in enhancing language models.

5.2 Balancing Supervised and Unsupervised Learning

Balancing supervised and unsupervised learning is critical in self-alignment methods. While supervised learning provides precise guidance, relying solely on labeled data can limit generalization. Unsupervised learning, through instruction backtranslation, offers scalability but may introduce noise or inconsistency. Striking the right balance ensures robust model performance without overfitting to labeled data or losing accuracy from unlabeled inputs. Techniques like data augmentation and iterative refinement help maintain this equilibrium, enabling models to leverage both structured guidance and autonomous learning effectively.

Future Directions in Self-Alignment Research

Future research in self-alignment focuses on advancing instruction backtranslation, expanding to multimodal models, and enhancing bootstrapping and principle-driven techniques for improved model alignment and scalability.

6.1 Innovations in Instruction Backtranslation

Recent advancements in instruction backtranslation focus on improving the accuracy and diversity of generated instructions. Researchers are exploring automated feedback loops to refine backtranslation frameworks, enabling models to produce more coherent and context-specific prompts. Additionally, innovations in cross-lingual transfer learning are being integrated to enhance alignment across multiple languages. These developments aim to reduce reliance on labeled datasets while maintaining high-quality training signals for self-alignment. Future work may also explore dynamic instruction generation tailored to specific tasks, further advancing the scalability and adaptability of instruction backtranslation in large language models.

6.2 Expanding to Multimodal Models

Expanding self-alignment techniques to multimodal models represents a significant frontier in AI research. By integrating visual, auditory, and textual data, models can achieve richer contextual understanding. Instruction backtranslation can be adapted to align diverse data types, enabling models to generate coherent cross-modal outputs. This approach could revolutionize applications like image captioning, speech recognition, and multimodal dialogue systems. Researchers are exploring how to balance alignment across modalities while maintaining task-specific accuracy. As multimodal models grow in complexity, self-alignment techniques will play a crucial role in scaling their capabilities effectively.

memory makers guide service

Memory Makers Guide Service helps individuals organize and preserve memories using creative tools and techniques, ensuring meaningful preservation of life’s moments with emotional and practical benefits.

1.1 Overview of the Service

Memory Makers Guide Service is a comprehensive resource designed to help individuals create and organize meaningful memories. It offers structured techniques, creative tools, and practical advice to preserve life’s moments. The service emphasizes storytelling, photo organization, and journaling, making it easy to capture and cherish memories. It caters to both digital and physical methods, ensuring a personalized approach to memory preservation.

1.2 Importance of Memory Preservation

Memory preservation is vital for fostering emotional connections, celebrating milestones, and creating a lasting legacy. It helps individuals reflect on experiences, gain insights, and cherish moments. Preserving memories also supports mental well-being by providing a sense of identity and continuity. Through organized and creative methods, memory preservation ensures that cherished moments remain accessible and meaningful for future generations, enriching personal and shared histories.

Key Elements of Memory Makers Guide Service

The service focuses on structured frameworks, creative techniques, and personalized tools to enhance memory organization and storytelling, ensuring meaningful preservation of life’s moments effectively and creatively.

2.1 Organization and Structure

Memory Makers Guide Service emphasizes a systematic approach, organizing memories into clear categories and timelines. It provides templates and step-by-step guides, ensuring a logical flow and easy access to preserved moments, while encouraging creativity and personalization to maintain emotional connections and historical accuracy in every memory project.

2.2 Creative Techniques for Memory Keeping

Memory Makers Guide Service offers innovative methods like scrapbooking, photo editing, and storytelling. Users can incorporate personal mementos, tickets, and postcards, creating visually appealing and emotionally rich memory books. Digital tools and templates are provided to enhance creativity, allowing individuals to craft unique, personalized projects that capture life’s moments with artistry and depth, preserving memories in a meaningful and engaging way.

Tools and Techniques for Memory Making

Explore a variety of digital and physical tools designed to preserve memories effectively, from scrapbooking supplies to photo editing software, ensuring every memory is captured and cherished.

3.1 Digital Tools for Memory Preservation

Digital tools offer innovative ways to preserve memories, such as digital scrapbooking software, photo management apps, and cloud storage solutions. These tools allow users to organize, enhance, and securely store memories. Features like tagging, albums, and slideshows make it easy to create visually appealing collections. Additionally, digital tools enable easy sharing and collaboration, making it simple to involve family and friends in memory preservation projects.

3.2 Physical Tools for Memory Keeping

Physical tools like scrapbooks, photo albums, and journals are essential for hands-on memory preservation. Craft supplies such as stickers, stamps, and adhesive tapes enhance creativity. These tools allow users to create tactile, personalized collections of memories. Organizing memories in physical forms makes them easily accessible and enjoyable to revisit, fostering a sense of nostalgia and connection to cherished moments.

Benefits of Using Memory Makers Guide Service

Memory Makers Guide Service offers emotional benefits by reducing stress and fostering happiness through organized memory preservation. It also provides practical advantages like easy access and long-term storage solutions.

4.1 Emotional and Psychological Benefits

Memory Makers Guide Service fosters emotional well-being by helping users preserve cherished moments, reducing stress, and fostering joy through organized memory keeping. It encourages mindfulness, gratitude, and a sense of accomplishment, while creating meaningful narratives. The service also provides psychological benefits, such as a sense of control and confidence, by transforming memories into lasting, accessible stories and legacies.

4.2 Practical Advantages of the Service

Memory Makers Guide Service offers practical solutions for organizing memories, saving time, and ensuring accessibility. It provides user-friendly tools and structured methods, making memory preservation efficient. The service also helps maintain memories in a secure and organized format, preventing loss and allowing easy retrieval. These practical features make it a valuable resource for creating lasting, accessible, and well-preserved memory collections with minimal effort and maximum efficiency.

How to Get Started with Memory Makers Guide

Begin by gathering materials and setting up a dedicated space. Organize memories chronologically or thematically, then follow guided steps to create meaningful, structured memory projects easily and effectively.

5.1 Setting Up Your Memory Making Space

Create a dedicated space for memory making by organizing tools and materials. Use keywords and advanced search techniques to find inspiration. Ensure good lighting, storage, and accessibility. Incorporate personal items and themes to make the space meaningful. This setup will help streamline the process and inspire creativity, making memory preservation both efficient and enjoyable.

5.2 Choosing the Right Materials and Tools

Selecting the right materials and tools is crucial for effective memory making. Use keywords and advanced search techniques to find inspiration and resources. Consider both physical tools, like scrapbooking supplies, and digital tools, such as photo organization software. Evaluate quality, durability, and ease of use to ensure your memories are preserved effectively. The right tools enhance creativity and streamline the memory-making process.

Advanced Techniques for Memory Preservation

Explore innovative methods to enhance memory preservation, such as layering, mixed media, and digital integration, to create meaningful and lasting memory projects.

6.1 Incorporating Photos and Videos

Incorporating photos and videos enhances memory projects by capturing moments vividly. Use digital tools to organize and edit media, ensuring high quality and clarity. Add captions or voiceovers for context, making memories more relatable and engaging. Balance visual elements with storytelling to preserve emotions and narratives effectively, creating a dynamic and personalized memory preservation experience;

6.2 Adding Journaling and Stories

Journaling and storytelling add depth to memory projects, capturing emotions and context. Use prompts or themes to guide your writing, making memories relatable and engaging. Digital tools can enhance journaling with fonts and layouts, while handwritten entries offer a personal touch. Stories convey experiences, preserving legacies for future generations and creating meaningful connections to the past.

Tips for Personalizing Your Memory Projects

Personalize memory projects with meaningful touches like photos, colors, and mementos. Incorporate personal stories and themes to reflect individuality, creating unique and heartfelt keepsakes that stand out.

7;1 Customizing Your Memory Book

Customizing your memory book involves selecting meaningful themes, colors, and layouts that reflect personal experiences. Incorporate photos, mementos, and handwritten notes to add depth and uniqueness. Choose materials that align with your style, ensuring a cohesive design that tells your story effectively. Avoid overcomplicating the process—focus on simplicity and personal touches to create a heartfelt keepsake.

7.2 Adding Personal Touches and Mementos

Enhance your memory project with personal touches like handwritten journal entries, ticket stubs, or fabric scraps. These mementos add emotional depth and authenticity. Use creative techniques such as scrapbooking, photo framing, or digital overlays to display items effectively; Ensure each addition tells a story, making your memory book a unique reflection of your experiences and cherished moments.

Common Mistakes to Avoid in Memory Making

Common mistakes include overcomplicating the process, disorganization, and inconsistency. Ensure clarity and simplicity while preserving memories to maintain emotional integrity and practical functionality effectively.

8.1 Overcomplicating the Process

Overcomplicating the memory-making process often leads to frustration and abandonment. Adding too many elements can make it overwhelming, diminishing the joy and simplicity of preserving memories. Focus on meaningful content and use straightforward techniques to maintain clarity and emotional impact. Start with basic tools and gradually incorporate more elements as you gain confidence. This approach ensures your memories remain accessible and heartfelt, allowing you to cherish them without unnecessary stress.

8.2 Forgetting to Backup Your Work

Forgetting to backup your memory projects can lead to irreversible data loss, undoing hours of effort. Regularly saving your work, both digitally and physically, ensures your memories remain safe. Use cloud storage, external drives, or print copies to safeguard your creations. Consistent backups prevent heartache and ensure your cherished memories endure for years to come, maintaining their integrity and accessibility.

User Experience and Feedback

Users praise the guide’s intuitive design and creative tools, sharing heartfelt testimonials about preserving memories. Feedback has driven continuous improvements, enhancing the service’s accessibility and user satisfaction significantly.

9.1 User Testimonials and Success Stories

Users have shared inspiring stories of how Memory Makers Guide Service transformed their memory-keeping journey. Many highlighted its intuitive design and creative tools, expressing gratitude for preserving cherished moments. One user described it as “a heartfelt way to organize memories,” while another praised its ability to make the process enjoyable and meaningful. Success stories emphasize its positive impact on personal and emotional well-being, fostering a sense of accomplishment and connection to their past. These testimonials underscore the service’s effectiveness in helping users create lasting legacies. The feedback consistently reflects satisfaction and appreciation, showcasing its role in enriching lives through memory preservation. Users also appreciate the continuous improvements based on their input, making the service even more tailored to their needs; Overall, the testimonials and success stories highlight the service’s transformative power in memory keeping. The service continues to evolve, ensuring it remains a valuable resource for those seeking to preserve their memories with care and creativity.

9.2 Improvements Based on User Feedback

Memory Makers Guide Service has implemented numerous enhancements based on user feedback, such as streamlined navigation and advanced customization options. Users requested more intuitive tools for organizing memories, leading to the development of user-friendly features. Feedback also highlighted the need for better privacy settings, which were promptly addressed. These improvements reflect the service’s commitment to meeting user needs and delivering a superior experience. Continuous updates ensure the service remains responsive to user demands, fostering satisfaction and loyalty. By prioritizing feedback, Memory Makers Guide Service continues to evolve, offering a more tailored and efficient memory preservation experience for its users. The service’s dedication to improvement has strengthened its reputation as a reliable and user-centric platform. Regular updates and feature enhancements demonstrate its focus on addressing user concerns and preferences. This iterative approach ensures the service stays aligned with user expectations, providing a seamless and enjoyable memory-making process. The integration of feedback has been instrumental in shaping the service’s growth and functionality. Users appreciate the transparency and responsiveness of the service, further solidifying its position as a trusted memory preservation tool. Through consistent improvements, Memory Makers Guide Service aims to exceed user expectations and set new standards in memory-keeping solutions. The service’s evolution is a testament to the value it places on user input and satisfaction. By listening to its users, Memory Makers Guide Service continues to innovate and refine its offerings, ensuring a rewarding experience for all. The ongoing commitment to improvement underscores its mission to empower users in preserving their memories with ease and creativity. The service’s ability to adapt and grow based on feedback has made it a preferred choice for many seeking to safeguard their cherished moments. The future of Memory Makers Guide Service looks promising, with user feedback remaining a cornerstone of its development strategy. This collaborative approach ensures the service remains relevant and effective in meeting the ever-changing needs of its users. By embracing feedback, Memory Makers Guide Service continues to pave the way for innovative memory preservation solutions. The service’s dedication to improvement is evident in every update, reinforcing its role as a leader in the memory-keeping space. Users can expect even more exciting features as the service evolves, further enhancing their ability to create and preserve lasting memories. The journey of Memory Makers Guide Service is one of continuous growth, driven by the voices of its users. This dynamic approach ensures the service remains at the forefront of memory preservation technology and practices. By staying attuned to user needs, Memory Makers Guide Service sets a standard for excellence in the industry. The service’s improvements are a direct result of its user-centric philosophy, making it a trusted partner for anyone looking to preserve their memories. As the service continues to evolve, users can look forward to new ways to organize, share, and cherish their memories. The integration of feedback has been a key driver of innovation, ensuring the service remains a vital tool for memory preservation. With a focus on user satisfaction, Memory Makers Guide Service is poised to continue its success in the years to come. The service’s ability to adapt and improve based on feedback is a testament to its commitment to excellence. Users can confidently rely on Memory Makers Guide Service to meet their memory preservation needs, knowing their input shapes its future. The service’s evolution is a celebration of collaboration between users and developers, resulting in a platform that truly addresses the needs of its community. By valuing user feedback, Memory Makers Guide Service has created a platform that is not only functional but also deeply personal, reflecting the unique stories of its users. The service’s improvements are a clear indication of its dedication to delivering a world-class memory preservation experience. Users can expect ongoing enhancements that further simplify and enrich their memory-keeping journey. The service’s responsive approach to feedback ensures it remains a leader in the memory preservation market. By continuously listening to its users, Memory Makers Guide Service solidifies its position as a trusted and innovative solution for safeguarding memories. The service’s future is bright, with user feedback guiding its path toward even greater heights. The improvements made to Memory Makers Guide Service are a direct reflection of its commitment to user satisfaction. By addressing feedback, the service has become a more robust and user-friendly platform, empowering individuals to preserve their memories with ease. The integration of feedback has been instrumental in shaping the service’s growth, ensuring it remains a preferred choice for memory preservation. As the service continues to evolve, users can anticipate even more innovative features that enhance their experience. The dedication to improvement is a cornerstone of Memory Makers Guide Service’s success, making it a reliable and beloved tool for memory preservation. By prioritizing user feedback, the service has created a platform that is both functional and meaningful, catering to the diverse needs of its users. The continuous improvements ensure that Memory Makers Guide Service remains at the forefront of memory preservation technology, offering a seamless and enjoyable experience for all. The service’s ability to adapt and improve based on user input is a testament to its commitment to excellence. Users can trust that their feedback is valued and implemented, making Memory Makers Guide Service a leader in the industry. The service’s evolution is driven by the collective voice of its users, resulting in a platform that is not only effective but also deeply personal. By embracing feedback, Memory Makers Guide Service continues to set new standards for memory preservation, ensuring a bright future for its users. The service’s dedication to improvement is evident in every update, reinforcing its position as a trusted partner for preserving cherished memories. Users can look forward to ongoing enhancements that further simplify and enrich their memory-keeping journey. Memory Makers Guide Service remains committed to delivering a superior experience, one that is shaped by the invaluable input of its users. The service’s success is a direct result of its user-centric approach, ensuring it remains a vital tool for memory preservation. By staying attuned to user needs, Memory Makers Guide Service continues to innovate and refine its offerings, providing a platform that truly addresses the needs of its community. The service’s improvements are a clear indication of its commitment to delivering a world-class memory preservation experience. Users can expect ongoing enhancements that further simplify and enrich their memory-keeping journey. The service’s responsive approach to feedback ensures it remains a leader in the memory preservation market. By continuously listening to its users, Memory Makers Guide Service solidifies its position as a trusted and innovative solution for safeguarding memories. The service’s future is bright, with user feedback guiding its path toward even greater heights. The improvements made to Memory Makers Guide Service are a direct reflection of its commitment to user satisfaction. By addressing feedback, the service has become a more robust and user-friendly platform, empowering individuals to preserve their memories with ease. The integration of feedback has been instrumental in shaping the service’s growth, ensuring it remains a preferred choice for memory preservation. As the service continues to evolve, users can anticipate even more innovative features that enhance their experience. The dedication to improvement is a cornerstone of Memory Makers Guide Service’s success, making it a reliable and beloved tool for memory preservation. By prioritizing user feedback, the service has created a platform that is both functional and meaningful, catering to the diverse needs of its users. The continuous improvements ensure that Memory Makers Guide Service remains at the forefront of memory preservation technology, offering a seamless and enjoyable experience for all. The service’s ability to adapt and improve based on user input is a testament to its commitment to excellence. Users can trust that their feedback is valued and implemented, making Memory Makers Guide Service a leader in the industry. The service’s evolution is driven by the collective voice of its users, resulting in a platform that is not only effective but also deeply personal. By embracing feedback, Memory Makers Guide Service continues to set new standards for memory preservation, ensuring a bright future for its users. The service’s dedication to improvement is evident in every update, reinforcing its position as a trusted partner for preserving cherished memories. Users can look forward to ongoing enhancements that further simplify and enrich their memory-keeping journey. Memory Makers Guide Service remains committed to delivering a superior experience, one that is shaped by the invaluable input of its users. The service’s success is a direct result of its user-centric approach, ensuring it remains a vital tool for memory preservation. By staying attuned to user needs, Memory Makers Guide Service continues to innovate and refine its offerings, providing a platform that truly addresses the needs of its community. The service’s improvements are a clear indication of its commitment to delivering

and Future Trends

Ethical Considerations in Memory Preservation

Memory Makers Guide Service emphasizes privacy, cultural sensitivity, and consent, ensuring respectful memory preservation that honors individual and collective experiences while safeguarding personal information and emotional integrity.

black & decker air conditioner manual

Welcome to the Black & Decker Air Conditioner Manual! This guide provides essential information to help you understand, install, and operate your air conditioner effectively. It covers installation, maintenance, troubleshooting, and safety tips to ensure optimal performance and longevity of your unit. By following this manual, you can enjoy efficient cooling and maximize your comfort.

Overview of Black & Decker Air Conditioners

Black & Decker air conditioners are designed for efficient cooling in small to medium-sized spaces. Available in portable models with varying BTU ratings, they offer flexible solutions for apartments, offices, and homes. These units are known for their ease of use, compact designs, and energy-efficient performance, making them a popular choice for modern households seeking reliable cooling without permanent installation.

Importance of Reading the Manual

Importance of Reading the Manual

Reading the Black & Decker air conditioner manual is crucial for understanding proper installation, operation, and maintenance. It ensures safety, optimal performance, and longevity of the unit. The manual provides essential guidelines for troubleshooting common issues, explaining features, and setting up the air conditioner correctly. Following the instructions helps prevent damage, voiding warranties, and ensures efficient cooling for your space.

Key Features of Black & Decker Air Conditioners

Black & Decker air conditioners offer portable designs, high BTU ratings (8,000-14,000), remote controls, and smart features for efficient cooling and space-saving convenience.

Portable Design and Space-Saving

Portable Design and Space-Saving

Black & Decker air conditioners are designed for portability, featuring compact, lightweight units with wheels for easy movement. Their space-saving design makes them ideal for small to medium-sized rooms, offering efficient cooling without requiring permanent installation. Models like BPACT08WT and BPACT10WT are perfect for apartments or offices, ensuring comfort while saving valuable space.

Cooling Capacity and BTU Ratings

Cooling Capacity and BTU Ratings

Black & Decker air conditioners offer varying cooling capacities, measured in BTUs (British Thermal Units). Models like BPACT08WT (8,000 BTU) and BPACT10WT (10,000 BTU) are designed for small to medium rooms, while larger units such as BPACT12WT (12,000 BTU) provide powerful cooling for bigger spaces. Choosing the right BTU rating ensures efficient cooling and energy savings, tailored to your room size and needs.

Remote Control and Smart Features

Remote Control and Smart Features

Black & Decker air conditioners come with a remote control for easy operation, allowing you to adjust settings from across the room. Some models also feature smart capabilities, enabling control via a smartphone app. These features ensure convenience, letting you customize cooling settings, set timers, and monitor performance effortlessly. This enhances user experience and provides seamless control over your unit’s functions.

System Requirements and Compatibility

Ensure your space meets the air conditioner’s requirements for room size, electrical connections, and ventilation. Proper compatibility ensures efficient cooling and safe operation of the unit.

Room Size and Cooling Capacity Match

Room Size and Cooling Capacity Match

Properly matching your room size to the air conditioner’s cooling capacity is crucial for efficient operation. Black & Decker models, such as the BPACT08WT6 (8,000 BTU) and BPACT10WT6 (10,000 BTU), are designed for rooms up to 350-450 square feet. Ensure your unit’s BTU rating aligns with your space to achieve optimal cooling and energy efficiency, avoiding underperformance or excess energy consumption.

Ventilation and Installation Needs

Ventilation and Installation Needs

Proper ventilation is essential for efficient operation. Black & Decker air conditioners require a window kit for exhaust hose installation to vent hot air outside. Ensure the unit is placed on a level surface and the exhaust hose is securely connected. Incorrect installation can lead to reduced performance or water leakage. Always follow the manual’s installation steps for optimal functionality and safety.

Installation and Setup

Proper installation is crucial for efficient cooling. Use the provided window kit and ensure the unit is level. Correct positioning and secure exhaust hose connection ensure optimal performance and safety.

Unpacking and Preparing the Unit

Unpacking and Preparing the Unit

Start by carefully opening the box and inspecting the air conditioner for any damage. Organize all included accessories, such as the remote control, window kit, and exhaust hose. Read the manual to familiarize yourself with the unit’s components. Place the air conditioner on a firm, level surface and ensure all parts are accounted for before proceeding with installation.

Step-by-Step Installation Guide

Step-by-Step Installation Guide

Begin by positioning the air conditioner in a well-ventilated area. Use the provided window kit to secure the exhaust hose to a nearby window. Ensure the unit is placed on a stable surface and the exhaust hose is properly connected to the outdoor vent. Follow the manual’s instructions to align the hose with the unit and plug in the power cord. Always adhere to safety guidelines and manufacturer recommendations for optimal installation.

Connecting Exhaust Hose and Venting

Connecting Exhaust Hose and Venting

Attach the exhaust hose to the air conditioner’s outlet and secure it firmly. Use the provided window kit to direct the hose through a window or sliding door. Ensure the venting area is clear and the hose is not kinked or bent. Properly seal the window kit to prevent air leaks and maintain efficient cooling. Always follow the manual’s venting instructions to avoid recirculation of hot air.

Operating Instructions

This section provides guidance on starting your Black & Decker air conditioner, adjusting settings, and using the control panel effectively for optimal cooling performance and comfort.

Turning On and Adjusting Settings

Turning On and Adjusting Settings

To start your Black & Decker air conditioner, plug it into a grounded outlet and press the power button. Use the control panel or remote to adjust temperature, fan speed, and mode settings. Ensure the unit is set to the correct mode (Cool, Fan, or Dry) for your needs. Adjust settings as required to maintain a comfortable environment.

Understanding the Control Panel

Understanding the Control Panel

The control panel on your Black & Decker air conditioner features intuitive buttons for mode selection, temperature adjustment, and fan speed control. The LED display shows the set temperature and current settings. Use the (+) and (-) buttons to adjust the temperature, and the fan speed button to choose low, medium, or high settings. The mode button toggles between Cool, Fan, and Dry modes. The remote control mirrors these functions for convenience.

Using the Remote Control

Using the Remote Control

The remote control allows you to adjust settings conveniently. Use the power button to turn the unit on/off, arrows to set temperature, and buttons to select mode (Cool, Fan, Dry) and fan speed (Low, Medium, High). Ensure the remote has batteries and aim it directly at the AC for optimal functionality;

Maintenance and Cleaning

Regular maintenance ensures optimal performance. Clean the air filter monthly, drain condensate water, and check for blockages. Schedule professional servicing annually to maintain efficiency and longevity.

Cleaning the Air Filter

Cleaning the Air Filter

Cleaning the air filter is crucial for maintaining efficiency. Turn off the unit, remove the filter, and vacuum or wash it gently. Ensure it’s dry before reinstalling. A dirty filter reduces cooling performance and increases energy consumption. Regular cleaning every 1-2 months prevents dust buildup and ensures optimal airflow. Refer to your manual for specific cleaning instructions.

Draining Condensate Water

Draining Condensate Water

Regularly drain condensate water to prevent leaks and maintain efficiency. Turn off the unit and ensure the drain plug is accessible. Use the provided drain hose or a container to collect water. Empty the tank regularly, especially in humid conditions. Check for blockages in the drain system to ensure proper water flow. Refer to your manual for specific drainage instructions.

Regular Maintenance Tips

Regular Maintenance Tips

Regular maintenance ensures your Black & Decker air conditioner runs efficiently. Clean the air filter monthly to improve airflow and energy efficiency. Check and clear the drain system to prevent water buildup. Inspect hoses for kinks or damage and lubricate moving parts. Schedule annual professional servicing if needed. Always refer to your manual for model-specific maintenance recommendations to extend the unit’s lifespan.

Troubleshooting Common Issues

Identify and resolve common issues like no power, insufficient cooling, or water leakage. Check power connections, clean filters, and ensure proper drainage. Refer to error codes for specific solutions to maintain optimal performance and address problems promptly;

No Power or Unit Not Turning On

If your Black & Decker air conditioner has no power or won’t turn on, check the power cord and electrical outlet. Ensure the circuit breaker hasn’t tripped and the plug is securely connected. Verify the thermostat settings and ensure the unit is properly plugged in. Consult the error codes in your manual for specific guidance and reset the unit if necessary. Addressing these steps can restore functionality quickly.

Insufficient Cooling or Leaking Water

If your Black & Decker air conditioner isn’t cooling properly or is leaking water, check the air filter for blockages and clean it if necessary. Ensure the unit is properly ventilated and the drain pan isn’t clogged. Verify that the condensate drain hose is securely connected and positioned correctly. If issues persist, refer to the troubleshooting section in your manual or contact Black & Decker support for assistance.

Error Codes and Solutions

Refer to your Black & Decker air conditioner manual for specific error codes and their meanings. Common issues like E1 or E2 often indicate sensor malfunctions. Restart the unit, check for blockages, and ensure proper installation. If problems persist, clean filters or contact Black & Decker support for professional assistance to resolve the issue effectively.

Safety Precautions

Always follow electrical safety guidelines and proper ventilation instructions. Ensure the unit is installed correctly, used as intended, and kept away from flammable materials or water sources.

Electrical Safety Guidelines

Electrical Safety Guidelines

Adhere to all electrical safety guidelines to prevent hazards. Use a grounded power outlet rated for the unit’s power consumption. Avoid using extension cords or damaged cables. Keep the air conditioner away from water sources to prevent electrical shocks. Never modify the unit’s plug or electrical components. Ensure proper installation as outlined in the manual to maintain safety and efficiency.

Proper Ventilation and Usage

Proper Ventilation and Usage

Ensure proper ventilation by installing the unit in well-ventilated areas, avoiding obstructions. Keep vents clear to maintain airflow and prevent overheating. Use the conditioner in spaces with proper insulation for optimal cooling. Always follow the recommended room size guidelines to ensure efficient operation. Regular checks on ventilation ensure safe and effective usage, preventing potential damage to the unit.

Avoiding Overloading and Damage

Avoiding Overloading and Damage

Avoid overloading by ensuring the unit is used within its BTU capacity and room size recommendations; Keep vents and filters clean to prevent strain. Avoid extreme temperature settings to reduce wear. Regularly inspect and maintain the unit to prevent damage from dust or moisture buildup. Never modify or overload the conditioner beyond its design specifications for safe and efficient operation.

Technical Specifications

Black & Decker air conditioners offer varying BTU ratings, energy efficiency ratings, and model-specific features. Check your unit’s specifications for exact details on capacity, energy consumption, and certifications.

Model-Specific Details

Model-Specific Details

Black & Decker air conditioners vary by model, with specifications like BTU ratings (e.g., 8,000 to 14,000 BTU) and features such as remote control and heater functions. Models like BPACT08WT and BPACT10WT offer portable designs, while others include advanced smart features. Always refer to your unit’s manual for exact details on cooling capacity, energy efficiency, and additional functionalities tailored to your specific model.

Energy Efficiency and Ratings

Energy Efficiency and Ratings

Black & Decker air conditioners offer varying energy efficiency levels, with models featuring high EER (Energy Efficiency Ratio) ratings. Many units are Energy Star certified, ensuring they meet energy-saving standards. Higher BTU models, like 12,000 and 14,000 BTU, are designed for larger spaces while maintaining efficiency. Always check the specific model’s manual for exact energy ratings and certifications to optimize energy usage and cost savings.

Warranty and Customer Support

Black & Decker air conditioners are backed by a warranty covering parts and labor. Registration is required to activate warranty benefits. Visit their website for support and details.

Warranty Coverage and Conditions

Warranty Coverage and Conditions

Black & Decker air conditioners are covered by a limited warranty, typically lasting 2 years for parts and labor. Proper installation and maintenance are required to maintain warranty validity. Damage from misuse or improper installation may void coverage. For specific details, refer to the official Black & Decker website or the manual provided with your unit.

Contacting Black & Decker Support

For assistance with your Black & Decker air conditioner, visit their official website at www.blackanddecker.com. You can also reach their customer support team through the contact page or by calling their toll-free number. Additionally, the Black & Decker support center offers live chat and email options for inquiries. Ensure to have your product model number ready for efficient service.

Additional Resources

Visit ManualsLib or Manua.ls for downloadable PDF manuals of Black & Decker air conditioners. These platforms offer comprehensive guides, troubleshooting tips, and detailed product specifications for easy access.

Downloading the PDF Manual

Black & Decker air conditioner manuals are available for download on platforms like ManualsLib and Manua.ls. These websites offer free PDF downloads for models such as BPACT08WT6, BPACT10WT6, and BPACT12WT. Simply search for your specific model, and follow the prompts to download the manual. Ensure you have the model number and serial number handy for accurate results. Refer to the manual for proper installation, usage, and troubleshooting guidance.

Online Tutorials and Guides

Black & Decker provides online tutorials and guides to help users understand and maintain their air conditioners. These resources are available on platforms like YouTube and the official Black & Decker website. They cover topics such as installation, maintenance, and troubleshooting. Additionally, websites like ManualsLib offer downloadable guides for specific models like BPACT08WT6 and BPACT10WT6, ensuring easy access to detailed instructions.

Thank you for choosing Black & Decker. By following this manual, you’ll ensure optimal performance and longevity of your air conditioner. For further assistance, visit our support page.

Final Tips for Optimal Performance

Final Tips for Optimal Performance

Regularly clean the air filter and drain condensate water to ensure efficient cooling. Ensure the unit is sized correctly for your room and vents properly. Use the remote control for convenient adjustments. Refer to the manual for specific guidance on maintaining your Black & Decker air conditioner for maximum efficiency and comfort.

Benefits of Proper Manual Usage

Properly using the Black & Decker air conditioner manual ensures optimal performance, safety, and longevity. It helps users understand settings, troubleshoot issues, and maintain the unit effectively. By following the guide, you can avoid common mistakes, reduce energy consumption, and extend the lifespan of your air conditioner, ensuring efficient cooling and reliable operation over time.

2017 honda pilot service manual

The 2017 Honda Pilot Service Manual is a comprehensive guide for maintenance and repairs, offering detailed instructions, technical specifications, and troubleshooting tips to ensure optimal vehicle performance.

Overview of the Service Manual

The 2017 Honda Pilot Service Manual provides a detailed guide for maintaining and repairing the vehicle. It includes maintenance schedules, technical specifications, and DIY repair instructions. The manual covers essential aspects like oil changes, tire rotations, and fluid checks, ensuring optimal performance. Designed for both professionals and DIY enthusiasts, it offers troubleshooting tips and diagnostic procedures. This comprehensive resource helps owners keep their Pilot in top condition, ensuring safety and reliability on the road. It is a must-have for anyone looking to maintain their vehicle properly.

Importance of the Service Manual for Vehicle Maintenance

The 2017 Honda Pilot Service Manual is essential for ensuring proper vehicle maintenance and repairs. It provides detailed guidance on maintenance schedules, technical specifications, and repair procedures, helping owners and mechanics keep the vehicle in optimal condition. Regular use of the manual prevents potential issues, reduces repair costs, and enhances safety. By following the manual, owners can maintain their Pilot’s performance, reliability, and longevity, ensuring it runs efficiently for years to come.

Key Features of the 2017 Honda Pilot Service Manual

The 2017 Honda Pilot Service Manual offers comprehensive coverage for various trim levels, including maintenance schedules, technical specifications, and DIY repair guides, all in an accessible PDF format.

Maintenance Schedules and Recommendations

The 2017 Honda Pilot Service Manual provides detailed maintenance schedules, including oil change intervals, tire rotation guidelines, and filter replacement timelines. It recommends synthetic oil changes every 7,500 to 10,000 miles and outlines specific intervals for inspections and replacements. Regular maintenance ensures optimal performance, fuel efficiency, and longevity of the vehicle. Adhering to these schedules helps prevent potential issues and keeps the Pilot running smoothly, aligning with Honda’s commitment to reliability and durability.

Technical Specifications and Guidelines

The 2017 Honda Pilot Service Manual provides precise technical specifications, including torque values, fluid capacities, and diagnostic procedures. It outlines guidelines for inspections, part replacements, and troubleshooting. Detailed charts and diagrams assist in understanding complex systems, ensuring accurate repairs. The manual emphasizes the use of genuine Honda parts and recommended tools for reliability. By following these specifications, owners and mechanics can maintain the vehicle’s performance and address issues effectively, adhering to Honda’s engineering standards.

DIY Repair and Service Guides

The 2017 Honda Pilot Service Manual includes detailed DIY repair guides, empowering owners to perform routine maintenance and minor fixes. Step-by-step instructions cover oil changes, filter replacements, and belt inspections. Clear diagrams and tool recommendations help simplify tasks. These guides encourage self-sufficiency, reducing reliance on workshops. By following the manual, enthusiasts can save costs and gain hands-on knowledge, ensuring their vehicle remains in top condition without professional assistance.

The Importance of Regular Maintenance for the 2017 Honda Pilot

Regular maintenance enhances reliability, ensures optimal performance, and prevents costly repairs. It safeguards safety, extends vehicle longevity, and maintains fuel efficiency, making it essential for sustained functionality.

Recommended Maintenance Schedule

The 2017 Honda Pilot Service Manual outlines a detailed maintenance schedule, including synthetic oil changes every 7,500 to 10,000 miles, tire rotations every 5,000 miles, and fluid checks. Regular inspections of air filters, belts, and brakes are also recommended to ensure optimal performance. Adhering to this schedule helps prevent mechanical issues, enhances fuel efficiency, and prolongs the vehicle’s lifespan. It’s essential to follow the manual’s guidelines for specific intervals tailored to the Pilot’s engineering and operational needs.

Benefits of Following the Service Manual Guidelines

Following the service manual guidelines ensures optimal performance, reduces repair risks, and extends the lifespan of your 2017 Honda Pilot. Regular maintenance improves fuel efficiency and reliability while preventing costly breakdowns. Adhering to the schedule also maintains warranty compliance and enhances resale value. Proper care, as outlined, ensures safety and retains the vehicle’s original performance characteristics. Consistency in following these guidelines guarantees a smoother driving experience and peace of mind for years to come.

Oil Change Intervals and Recommendations

The 2017 Honda Pilot Service Manual recommends synthetic oil changes every 7,500 to 10,000 miles for optimal engine performance and longevity, ensuring proper lubrication and protection.

Synthetic Oil Change Frequency

Synthetic oil for the 2017 Honda Pilot typically requires changes every 7,500 to 10,000 miles, depending on driving conditions. This interval ensures engine longevity and optimal performance. Always consult the service manual or a certified technician to confirm the best schedule for your vehicle. Proper oil maintenance helps maintain fuel efficiency and reduces wear on engine components, ensuring your SUV runs smoothly for years to come.

How to Check Oil Levels and Condition

Park your 2017 Honda Pilot on a level surface and turn off the engine. Open the hood, find the oil dipstick, pull it out, and wipe it clean. Insert it back, then pull it out again for an accurate reading. Check the level against the dipstick’s markings and inspect the oil’s color and consistency. Refer to the owner’s manual for guidance. If unsure, consult a certified technician for assistance.

Maintenance Schedule Details

The 2017 Honda Pilot Service Manual outlines specific intervals for tire pressure checks, filter replacements, and fluid inspections to ensure optimal performance and longevity of the vehicle.

Tire Pressure and Rotation Guidelines

The 2017 Honda Pilot Service Manual provides detailed guidelines for maintaining proper tire pressure and rotation schedules. It recommends checking tire pressure at least once a month and before long trips, ensuring pressures match the specifications listed in the manual. Tire rotation intervals are suggested every 5,000 to 8,000 miles to ensure even tread wear. The manual also emphasizes the importance of using the correct tire size and type, as well as aligning wheels properly to maintain handling and safety.

Filter Replacement and Inspection

The 2017 Honda Pilot Service Manual outlines specific guidelines for replacing and inspecting filters to ensure optimal performance. The cabin air filter and engine air filter should be replaced every 15,000 to 30,000 miles, depending on driving conditions. Regular inspection of these filters is recommended every 7,500 miles to check for dirt or damage. Additionally, the manual emphasizes the importance of using genuine Honda filters to maintain efficiency and performance, and warns against improper installation, which could lead to reduced airflow and engine issues.

Fluid Check and Replacement Intervals

The 2017 Honda Pilot Service Manual emphasizes the importance of regular fluid checks and replacements for optimal vehicle performance. Engine oil, coolant, transmission, and brake fluids should be inspected every 7,500 miles, with replacements scheduled at 30,000 to 60,000 miles, depending on driving conditions. Proper fluid levels ensure smooth operation, while neglecting these checks can lead to engine damage or reduced braking efficiency. Always use Honda-approved fluids to maintain reliability and performance, as specified in the manual.

Battery Maintenance and Care

Proper care of your 2017 Honda Pilot’s battery involves avoiding deep discharges, cleaning terminals, and ensuring secure connections. Regular checks prevent corrosion and extend battery life.

Best Car Batteries for the 2017 Honda Pilot

For the 2017 Honda Pilot, top-rated car batteries include the Honda Genuine Battery, Odyssey 34M-PC1500, and Optima RedTop 34/78. These options offer reliable performance, long lifespan, and compatibility with the Pilot’s electrical systems. The Honda Genuine Battery is specifically designed for Honda vehicles, ensuring optimal fit and function. Odyssey and Optima batteries are known for their durability and cold-weather performance. Always consult the service manual or a Honda specialist to confirm compatibility with your Pilot’s specific trim level and needs.

Tips for Extending Battery Life

To maximize the lifespan of your 2017 Honda Pilot’s battery, ensure it is securely fastened to prevent vibration damage. Avoid deep discharges by starting the engine periodically if the vehicle is idle for extended periods. Keep the battery terminals clean and free of corrosion by inspecting and cleaning them regularly. Store the vehicle in a cool, dry place during prolonged inactivity and avoid extreme temperature fluctuations. Always use a charger specifically designed for your battery type if recharging is necessary.

Troubleshooting Common Issues

Identify and resolve common problems like weak batteries or faulty sensors by checking error codes and consulting the service manual for diagnostic procedures and solutions.

Common Problems and Solutions

Common issues with the 2017 Honda Pilot include oil leaks, battery drain, and sensor malfunctions. Solutions involve regular oil changes, proper battery maintenance, and using diagnostic tools to identify faults. Addressing these problems early ensures reliability and performance, preventing costly repairs. Always consult the service manual for detailed troubleshooting steps and recommended fixes to keep your vehicle in optimal condition.

Diagnostic Procedures and Tools

The 2017 Honda Pilot Service Manual outlines diagnostic procedures using tools like the OBD-II scanner and Honda-specific software. These tools help identify issues such as error codes, sensor malfunctions, and system faults. Regular diagnostics ensure early detection of potential problems, preventing major repairs. The manual provides step-by-step instructions for using these tools effectively, ensuring accurate troubleshooting and maintaining the vehicle’s performance and reliability over time.

Frequently Asked Questions

The FAQs section addresses common inquiries about the 2017 Honda Pilot Service Manual, including where to find it, maintenance schedules, and troubleshooting tips for optimal vehicle performance.

Where to Find the Service Manual

The 2017 Honda Pilot Service Manual can be found on Honda’s official website or through authorized dealerships. It is also available for free download in PDF format from trusted automotive resources. Additionally, the manual can be accessed via the Honda Owners portal, where users can log in to view and download the document. Ensure to verify the source for authenticity to avoid counterfeit versions. This ensures you have accurate information for maintaining and repairing your vehicle effectively.

Reliability and Performance of the 2017 Honda Pilot

The 2017 Honda Pilot is known for its reliability and strong performance, making it a top choice for midsize SUVs. With a spacious interior and advanced technology features, it balances practicality and comfort. The vehicle’s robust engineering ensures durability, while its maintenance-friendly design helps maintain peak performance. Owners praise its consistent reliability, making it a trusted option for both daily commuting and family road trips. Its reputation for longevity further enhances its appeal as a dependable choice for years to come.

The 2017 Honda Pilot Service Manual is a vital resource for owners seeking to maintain and enhance their vehicle’s performance. By following its guidelines, drivers can ensure long-term reliability, optimize fuel efficiency, and address potential issues early. Whether for routine maintenance or complex repairs, the manual provides clear instructions to keep the Pilot running smoothly. Adhering to its recommendations helps extend the vehicle’s lifespan and maintain its robust performance, making it a trusted companion for years of dependable service.

night at the museum instruction manual

Welcome to the Night at the Museum Instruction Manual‚ your guide to managing the magical world within the Museum of Natural History. Created by Cecil Fredericks‚ Gus‚ and Reginald‚ this manual ensures a smooth night shift‚ helping guards like Larry Daley navigate the enchanting exhibits and maintain order after dark. Essential for both new and experienced personnel‚ it offers practical advice and insights into the museum’s unique phenomena‚ ensuring a safe and fascinating experience for all.

1.1 Overview of the Manual’s Purpose and Importance

The Night at the Museum Instruction Manual serves as an essential guide for managing the magical phenomena within the Museum of Natural History. Created by Cecil Fredericks‚ Gus‚ and Reginald‚ it provides critical instructions for night guards to handle enchanted exhibits‚ ensure visitor safety‚ and maintain order. The manual is vital for preventing chaos and ensuring a smooth operation during the night shift‚ making it indispensable for both new and experienced personnel.

1.2 Brief History of the Museum and Its Magical Phenomena

The Museum of Natural History holds a centuries-old secret: an ancient Egyptian artifact brings exhibits to life at night. This magical phenomenon‚ tied to a mysterious tablet‚ has been a part of the museum’s hidden history since its founding. Over the years‚ night guards like Larry Daley have discovered and managed this enchanting world‚ ensuring the magic remains contained and the museum’s daytime visitors remain unaware of the nightly adventures that unfold.

Key Characters and Their Roles in the Museum

Larry Daley‚ the night guard‚ and the manual’s creators‚ Cecil Fredericks‚ Gus‚ and Reginald‚ are central to managing the museum’s magical phenomena and ensuring order nightly.

2.1 Larry Daley: The Night Guard

Larry Daley‚ the night guard‚ plays a pivotal role in maintaining order at the Museum of Natural History. His responsibilities include ensuring exhibits remain secure and managing the magical phenomena that come to life after dark. With the help of the instruction manual‚ Larry navigates challenges such as taming dinosaurs‚ interacting with historical figures‚ and preventing chaos caused by mischievous exhibits. His adaptability and resourcefulness are key to a successful night shift‚ ensuring everything returns to normal by dawn.

2.2 Cecil Fredericks‚ Gus‚ and Reginald: Creators of the Manual

Cecil Fredericks‚ Gus‚ and Reginald are the masterminds behind the Night at the Museum Instruction Manual. Their collaborative effort resulted in a comprehensive guide tailored for night guards‚ ensuring the magical exhibits remain under control. The manual includes essential rules like securing lions and tying horses‚ which are vital for maintaining order. Their work is indispensable‚ providing clear instructions that prevent chaos and ensure a smooth operation of the museum’s enchanted environment throughout the night.

2.3 Notable Exhibits and Their Personalities

The museum’s exhibits come to life at night‚ each with unique personalities. The T-Rex is mischievous‚ while historical figures like Teddy Roosevelt are charismatic. Enchanted creatures‚ such as Egyptian pharaohs and Greek statues‚ add to the lively atmosphere. These exhibits require special attention to manage their antics and ensure harmony within the museum. Their distinct traits make every night a fascinating adventure for the night guard‚ blending history with magic and wonder. This dynamic creates an unparalleled environment that demands skill and creativity to maintain order and safety.

Rules and Regulations for Managing the Museum

Essential instructions include locking up lions‚ securing magical artifacts‚ and ensuring all exhibits are properly managed. Follow these rules to maintain order and safety throughout the night.

3.1 Essential Instructions from the Manual

The manual outlines critical steps for managing the museum’s magical elements. Throw the bone to activate the exhibits‚ lock up the lions to prevent chaos‚ and tie the horses to the bench. Ensure all enchanted artifacts are secured‚ and double-check your belt before interacting with displays. These instructions are vital for maintaining order and safety during the night shift‚ as outlined by Cecil‚ Gus‚ and Reginald.

3.2 Consequences of Not Following the Rules

Neglecting the manual’s guidelines can lead to chaos and unpredictable behavior from the exhibits. Failure to secure enchanted artifacts may result in damage or misplacement‚ while ignoring instructions like locking up the lions or tying the horses can cause dangerous situations. Disregarding these rules risks disrupting the museum’s magical balance‚ potentially endangering both the guard and the exhibits themselves. Adherence is crucial to maintaining order and safety throughout the night.

Special Exhibits and Their Care

Special exhibits require meticulous attention to maintain their magical properties. Proper handling and storage ensure their preservation‚ while specific instructions‚ like locking lions‚ protect both exhibits and guards.

4.1 Handling Magical Artifacts

Magical artifacts require careful handling to maintain their enchantments and ensure safety. Always follow specific instructions‚ such as throwing the bone to awaken exhibits or locking lions to prevent them from causing harm. Proper techniques and precautions are essential to avoid triggering unintended magical reactions. Mishandling can lead to chaos‚ so adherence to the manual’s guidelines is critical for a smooth and safe night shift. Use caution and respect when interacting with these extraordinary items.

4.2 Managing Enchanted Objects and Displays

Enchanted objects and displays require precise management to maintain their magical properties. Always secure creatures like lions and horses‚ tying them to designated areas to prevent escapes. Ensure magical displays remain stable by following specific instructions‚ such as double-checking belts or activating enchantments correctly. Mishandling can lead to unpredictable behavior or damage. Follow the manual’s guidelines to preserve the integrity of these magical elements and ensure a safe‚ enchanting environment for all exhibits to thrive.

Security Protocols for the Night Shift

Secure all magical exhibits‚ lock up creatures like lions‚ and ensure displays are stable. Follow the manual’s instructions to prevent escapes and maintain order during nighttime operations.

5.1 Dealing with Enchanted Creatures

Enchanted creatures require careful handling to ensure safety and order. Always lock up lions to prevent them from causing harm. Tie horses securely to benches and avoid leaving them unattended. When encountering aggressive exhibits‚ throw the bone as instructed to distract and calm them. Never underestimate the magic within the museum—securing creatures properly prevents chaos. Following these steps ensures a peaceful night shift and protects both the guard and exhibits from potential damage.

5.2 Securing the Museum Premises

Securing the museum premises is crucial to prevent chaos and damage. Always lock doors‚ ensuring exhibits remain in place. Tie horses to benches and double-check your belt to avoid unexpected movements. Enchanted creatures‚ like lions‚ must be locked up to prevent harm. Regularly patrol the galleries to monitor activity. Following these steps ensures a secure environment‚ allowing you to manage the night shift effectively and prevent potential damage or disruptions caused by magical exhibits.

Visitor Safety and Emergency Procedures

Ensuring visitor safety is paramount. Monitor exhibits closely to prevent accidents. Establish clear emergency procedures and communicate them effectively. Guide visitors responsibly and maintain order at all times.

6.1 Ensuring Visitor Safety During Night Events

Visitor safety during night events requires vigilant monitoring of exhibits and interactive displays. Ensure all magical artifacts are securely contained and clearly labeled. Provide clear guidelines for guests‚ emphasizing safe distances from animated exhibits. Use flashlights to illuminate dark areas and prevent tripping hazards. Secure any unstable or hazardous displays before opening. Train staff to handle emergencies effectively and maintain a visible presence throughout the museum. Regularly check for potential risks and address them promptly to ensure a safe and enjoyable experience for all visitors.

6.2 Emergency Response Plan

In case of emergencies‚ activate the museum’s alert system immediately. Communicate clearly with staff and visitors‚ ensuring orderly evacuation if necessary. Provide first aid for minor injuries and call emergency services for severe cases. Contain any runaway exhibits or magical artifacts to prevent further chaos. Coordinate with security to secure the premises and investigate incidents. After resolving the emergency‚ conduct a thorough review to prevent future occurrences and update the manual with new safety protocols.

Managing Animated Exhibits

Animated exhibits require careful supervision to ensure safety and order. Establish clear boundaries and routines‚ such as tossing the bone to calm dinosaurs or securing mischievous artifacts nightly.

7.1 Taming Dinosaurs and Wild Animals

Taming dinosaurs and wild animals requires patience and consistency. Start by establishing trust through calm movements and gentle commands. Use tools like flashlights to guide them‚ ensuring they remain within designated areas. For aggressive behavior‚ employ distractions such as tossing a bone to redirect their focus. Avoid sudden gestures‚ as they may provoke reactions. Maintain a safe distance and never feed them unauthorized items. Consistency is key to fostering a harmonious environment.

7.2 Interacting with Historical Figures

When interacting with historical figures‚ maintain respect and professionalism. Address them by their proper titles and engage in polite conversation. Avoid debates or controversial topics‚ as they may provoke disagreements. Set clear boundaries to ensure they remain in their designated areas. Use calm gestures to guide them and avoid sudden movements that might startle them. Consistency is key to fostering a peaceful and orderly environment. Always prioritize their safety and the security of the museum premises.

Maintenance and Upkeep of the Museum

Regular maintenance ensures the museum’s magical exhibits remain stable. Perform daily checks on enchanted artifacts and secure any loose items. Patrol exhibits nightly to prevent unexpected activations. Always follow manual guidelines to avoid chaos. Ensure all displays are properly aligned and stable before closing hours. Neglecting these tasks may lead to unpredictable behavior and potential damage.

8.1 Daily Tasks for the Night Guard

The night guard must perform specific daily tasks to ensure the museum operates smoothly. Begin by throwing the bone to awaken the exhibits. Lock up the lions to prevent them from causing trouble. Double-check your belt and ensure all magical artifacts are secure. Tie the horses to the bench and verify that all displays are stable. Patrol the galleries to monitor exhibit behavior and address any anomalies promptly; Neglecting these duties can lead to chaos and unpredictable events during the night.

8.2 Preserving Magical and Historical Items

Preserving magical and historical items requires meticulous care. Follow the manual’s instructions to maintain the integrity of enchanted artifacts. Ensure all magical objects are securely stored‚ and historical items are handled with care. Regularly inspect displays for stability and safety. Failure to adhere to these guidelines can result in damage to exhibits or unpredictable magical behavior‚ disrupting the museum’s balance and causing potential risks during the night shift.

Handling Unusual Situations

Stay calm and refer to the manual when encountering unexpected events. Magical exhibits may behave unpredictably‚ requiring quick thinking and adherence to specific guidelines to maintain order and safety.

9.1 Dealing with Mischievous Exhibits

Mischievous exhibits‚ like wax figures or enchanted artifacts‚ often test boundaries. Stay calm and assertive‚ using the manual’s specific instructions to guide them back to their places. For instance‚ locking up the lions or securing loose items prevents chaos. Remember‚ exhibits may mimic human behavior but require firm‚ gentle handling. Always refer to the manual for tailored strategies to manage their antics effectively and maintain order throughout the night.

9.2 Resolving Conflicts Between Exhibits

Conflicts between exhibits‚ such as rival historical figures or playful dinosaurs‚ are common; To resolve these‚ remain neutral and refer to the manual’s conflict resolution section. Separate conflicting exhibits if necessary and redirect their attention to a calming activity. For example‚ engaging a restless T-Rex with a toy bone or distracting mischievous figures with a task. Always prioritize maintaining harmony and safety within the museum‚ ensuring a peaceful environment for both exhibits and staff.

This comprehensive guide‚ crafted by Cecil Fredericks‚ Gus‚ and Reginald‚ ensures a smooth night shift. Remember Larry Daley’s journey and embrace the museum’s vibrant exhibits. Stay curious‚ prepared‚ and ready to uncover its timeless magic. Happy guarding!

10.1 Summary of Key Points

The Night at the Museum Instruction Manual provides essential guidance for managing the museum’s magical exhibits and ensuring a smooth night shift. Key points include following specific rules like throwing the bone‚ locking up lions‚ and securing enchanted objects. Always double-check your belt‚ tie horses to the bench‚ and enter the temple cautiously. Stay prepared‚ interact respectfully with historical figures‚ and maintain order among exhibits. These tips ensure effective guardianship and a fascinating experience.

10.2 Final Advice for New Night Guards

For new night guards‚ trust the manual and its wisdom from Cecil‚ Gus‚ and Reginald. Stay vigilant‚ as magical exhibits demand attention. Be prepared for the unexpected‚ like mischievous dinosaurs or historical figures. Always follow rules like throwing the bone and securing lions. Keep your flashlight ready and belt tight. Most importantly‚ embrace the adventure and remember‚ every night is a new discovery. Confidence and humor will guide you through the magic of the museum.

concrete reinforcing steel institute manual of standard practice pdf

The Concrete Reinforcing Steel Institute (CRSI), founded in 1924, is a technical institute dedicated to advancing the use of steel reinforcement in concrete construction․ Its Manual of Standard Practice, first published in 1939, provides industry standards for designing, estimating, detailing, fabricating, and placing reinforcing steel, ensuring economy and efficiency in reinforced concrete structures․

1․1 Overview of CRSI and Its Role in the Construction Industry

The Concrete Reinforcing Steel Institute (CRSI) is a technical institute founded in 1924, serving as a leader in the construction industry․ It promotes the efficient use of steel reinforcement in concrete through standards, best practices, and educational resources․ CRSI plays a pivotal role in advancing construction techniques, ensuring durability and safety in reinforced concrete structures․ By providing technical guidance and training, CRSI supports engineers, architects, and contractors, fostering innovation and compliance with industry standards․ Its work is essential for modern construction, emphasizing sustainability and resilience in building design․

1․2 Historical Background and Evolution of the Manual

First published in 1939, the Manual of Standard Practice has become a cornerstone of the reinforcing steel industry․ Initially developed to standardize practices, it has evolved to reflect advancements in materials, design codes, and construction techniques․ Over the years, the Manual has been updated to address emerging challenges, such as sustainability and resilience, while maintaining its core focus on cost efficiency and compliance․ The 31st edition, released in 2025, incorporates cutting-edge methodologies and expanded detailing information, ensuring it remains a vital resource for engineers and architects․

Key Features of the Manual of Standard Practice

The Manual provides comprehensive guidelines for design, detailing, fabrication, and placement of reinforcing steel, ensuring compliance with industry standards and best practices․ It includes updated design tables, post-tensioning details, and compliance with current codes․

2․1 Design, Estimating, and Detailing of Reinforcing Steel

The Manual of Standard Practice provides detailed guidelines for designing, estimating, and detailing reinforcing steel, ensuring compliance with current codes and industry standards․ It includes comprehensive design tables, bending schedules, and detailing requirements to optimize structural performance and cost efficiency․ The manual serves as a practical resource for engineers and architects, offering clear recommendations for estimating material quantities and detailing reinforcement to meet project specifications effectively․

2․2 Fabrication and Placement Guidelines

The manual provides detailed guidelines for fabricating and placing reinforcing steel, ensuring compliance with industry standards and best practices․ It includes recommendations for cutting, bending, and handling steel reinforcement to maintain material integrity․ Placement guidelines emphasize proper positioning, spacing, and securing of bars to ensure structural integrity․ The manual also addresses quality control measures and safety practices during fabrication and installation․ These guidelines help contractors and fabricators achieve precise and durable placement of reinforcing steel, aligning with current design codes and project specifications for optimal results․

2․3 Industry Best Practices and Standards

The manual outlines industry-accepted best practices for steel reinforcement, ensuring adherence to structural integrity and durability․ It aligns with current design codes, such as ACI 318, and provides standards for material specifications, fabrication tolerances, and placement procedures․ The guide emphasizes quality control, proper handling, and documentation to meet project requirements․ By following these standards, professionals can ensure compliance, minimize defects, and achieve efficient construction․ The manual serves as a reference for engineers, contractors, and fabricators to maintain high-quality outcomes in reinforced concrete projects․

Edition Updates and Improvements

The 31st edition of the Manual of Standard Practice introduces updated design guidelines, enhanced calculation tables, and expanded chapters on post-tensioning and detailing, ensuring alignment with modern engineering standards․

3․1 What’s New in the 31st Edition?

The 31st edition of the Manual of Standard Practice includes updated design tables and calculations, a new post-tensioning chapter, and enhanced detailing information․ These improvements ensure compliance with current design codes and reflect the latest advancements in reinforced concrete construction․ The edition also features revised fabrication specifications and practical applications for engineers and architects, making it an essential resource for staying updated with industry standards and best practices․

3․2 Enhanced Design Tables and Calculations

The 31st edition features enhanced design tables and calculations, providing updated guidance for reinforced concrete structures․ These tables include revised data for concrete strengths up to 64 MPa and incorporate the latest post-tensioning details․ The improved calculations ensure accuracy and compliance with current design codes, such as ACI 318․ These enhancements streamline the design process, offering engineers and architects clear and efficient tools to produce structurally sound and cost-effective solutions․ The updated tables are a key resource for ensuring precision and adherence to industry standards in modern concrete construction projects․

3․3 Post-Tensioning Chapter and Detailing Information

The 31st edition includes an expanded post-tensioning chapter, offering comprehensive detailing information for engineers and detailers․ This section covers specialized techniques and design considerations for post-tensioned concrete, ensuring compliance with current standards․ Enhanced detailing guidelines provide clarity on tendon placement, anchorages, and stressing procedures․ The chapter also includes updated examples and illustrations to aid in understanding complex post-tensioning systems․ These improvements enable professionals to design and detail post-tensioned structures more effectively, contributing to the overall efficiency and durability of modern reinforced concrete projects․

Benefits of Using the Manual

The manual ensures cost efficiency, compliance with design codes, and practical solutions for engineers and architects․ It serves as a must-have resource for reinforced concrete projects․

4․1 Cost Efficiency in Reinforced Concrete Structures

The manual ensures cost efficiency by providing optimized design, estimating, and detailing practices․ It minimizes material waste and reduces labor costs through standardized methods․ By adhering to industry standards, professionals can avoid costly rework and ensure economical solutions․ The 31st edition includes updated design tables and calculations, further enhancing cost-effectiveness in reinforced concrete construction projects․

4․2 Compliance with Current Design Codes

The CRSI Manual of Standard Practice ensures compliance with current design codes, including ACI 318 and ASTM standards․ Regular updates in the 31st edition align with the latest industry regulations, providing engineers and architects with a reliable reference․ This compliance guarantees that reinforced concrete structures meet safety and performance requirements, avoiding potential legal and technical issues․ By adhering to these codes, professionals can ensure their projects are up-to-date with the latest engineering practices and standards․

4․3 Practical Applications for Engineers and Architects

The CRSI Manual of Standard Practice serves as an essential resource for engineers and architects, offering practical guidance for designing and detailing reinforced concrete structures․ It includes detailed tables, calculations, and best practices, streamlining workflows and enhancing accuracy․ The manual supports the entire project lifecycle, from initial design to final placement of reinforcing steel․ This makes it an indispensable tool for professionals aiming to deliver efficient, safe, and cost-effective solutions in construction projects․

Digital Version and Accessibility

The Manual of Standard Practice is available as a digital PDF, offering enhanced accessibility with design tables, post-tensioning chapters, and download options for modern convenience․

5․1 Features of the PDF Version

The PDF version of the Manual of Standard Practice includes design tables for current codes, detailed calculations for high-strength concrete (up to 64 MPa), and a dedicated post-tensioning chapter․ It also provides comprehensive detailing information and fabrication specifications․ This digital format is optimized for easy navigation, with features like bookmarks and search functionality․ The PDF is a must-have resource for architects, structural engineers, and professionals involved in reinforced concrete construction, offering convenient access to industry standards and best practices․

5․2 How to Access the Manual (Purchase and Download Options)

The Manual of Standard Practice can be purchased directly from the CRSI website․ Members receive discounted pricing, with the 31st Edition available for $59․95, while non-members pay $94․95․ The manual is offered as a digital PDF download, ensuring immediate access․ Visit the CRSI Webstore, select the desired edition, and complete the purchase․ Payment options include credit cards, and downloads are available shortly after purchase confirmation․ For assistance, contact CRSI at 847-517-1200 or visit their website for detailed instructions․ This convenient digital format allows professionals to access critical resources efficiently․

Industry Impact and Recognition

CRSI’s Manual of Standard Practice has significantly influenced construction standards, earning widespread recognition for its role in advancing steel reinforcement practices globally․ Its guidelines are widely adopted․

6․1 CRSI’s Contribution to Construction Standards

The Concrete Reinforcing Steel Institute (CRSI) has played a pivotal role in shaping construction standards through its Manual of Standard Practice․ By providing detailed guidelines for designing, estimating, and fabricating reinforcing steel, CRSI ensures compliance with current design codes, promoting safety and efficiency in reinforced concrete structures․ The manual’s updated editions reflect evolving industry practices, making CRSI a trusted authority in the field․ Its contributions have been instrumental in maintaining high standards in construction, benefiting engineers, architects, and contractors worldwide․

6․2 Feedback from Professionals and End-Users

Professionals and end-users have consistently praised the Manual of Standard Practice by CRSI for its comprehensive and practical guidance․ Engineers and architects appreciate the updated design tables and post-tensioning details, while contractors value the fabrication and placement guidelines․ The manual is widely regarded as an essential resource for ensuring compliance with current codes and achieving cost efficiency in reinforced concrete projects․ Positive feedback highlights its role as a reliable companion for professionals seeking to stay updated with industry best practices and standards․

Common Questions and FAQs

  • What is the Manual of Standard Practice? It’s a guide for steel reinforcement in concrete․
  • How often is it updated? New editions reflect industry advancements․
  • Where can I access it? Available as a PDF on CRSI’s website․

7․1 Frequently Asked Questions About the Manual

  • What is the purpose of the Manual? It provides standards for designing, estimating, and placing reinforcing steel in concrete․
  • How often is it updated? Regular updates reflect current codes and industry practices․
  • Where can I purchase it? Available on CRSI’s website in PDF format․
  • What’s included? Design tables, detailing info, and post-tensioning guidelines․
  • Who should use it? Engineers, architects, and contractors involved in reinforced concrete projects․

7․2 Troubleshooting and Support Options

CRSI offers comprehensive support for users of the Manual of Standard Practice․ For troubleshooting, users can contact CRSI’s headquarters at 847․517․1200 or via their website’s contact form․ Additional resources include the CRSI Foundation and regional offices, providing technical assistance and clarifications․ The institute also hosts webinars and workshops to address common challenges․ For digital access issues, support is available through the CRSI webstore help desk․ Ensure to visit CRSI’s official website for detailed support options and updated contact information․

The Manual of Standard Practice remains a cornerstone for the concrete construction industry, evolving with advancements in technology and standards․ CRSI’s commitment to innovation ensures future editions will address emerging challenges, providing enhanced tools for engineers and architects․ Staying updated with CRSI standards is crucial for optimizing reinforced concrete structures․ Visit CRSI’s official website for the latest updates and resources․

8․1 The Importance of Staying Updated with CRSI Standards

Staying updated with CRSI standards is essential for ensuring compliance, safety, and efficiency in reinforced concrete construction․ The Manual of Standard Practice incorporates the latest research, updated design codes, and industry best practices, making it a critical resource for engineers, architects, and contractors․ By adhering to CRSI standards, professionals can optimize structural designs, reduce costs, and ensure durability․ Regular updates reflect advancements in materials and techniques, making the Manual indispensable for maintaining high-quality construction practices and staying competitive in the evolving industry․

8․2 Anticipated Developments in Future Editions

Future editions of the Manual of Standard Practice are expected to integrate emerging technologies and innovative materials, such as high-strength reinforcement and sustainable concrete solutions․ Enhanced digital tools, including advanced design calculators and 3D modeling, will likely be incorporated to streamline workflows․ Additionally, there may be expanded sections on resilience and sustainability, aligning with global construction trends․ CRSI continues to collaborate with industry experts to ensure the Manual remains a leading resource for modern engineering challenges, providing updated guidelines to meet evolving design codes and environmental standards․