ramadan 2024 timetable uk pdf

The Ramadan 2024 Timetable UK PDF provides essential fasting and prayer schedules tailored for Muslims in the UK, ensuring accurate planning and spiritual observance throughout the holy month․

Overview of Ramadan 2024 in the UK

Ramadan 2024 in the UK is expected to begin on Monday, March 11th, and conclude on Wednesday, April 10th, subject to moon sighting confirmation․ The holy month brings a vibrant spiritual and cultural atmosphere across the country, with mosques and communities preparing for fasting, prayer, and charitable acts․ British Summer Time (BST) starting on March 31st will slightly adjust prayer timings, ensuring Muslims adapt to the time change while observing their religious duties diligently․

Importance of a Ramadan Timetable

A Ramadan timetable is crucial for Muslims in the UK to organize their fasting and prayer schedules effectively․ It provides precise timings for Fajr, Dhuhr, Asr, Maghrib, and Isha prayers, as well as Suhoor and Iftar times․ This helps individuals maintain consistency and spiritual discipline throughout the holy month․ Additionally, it aids in planning meals, work, and social activities while adhering to religious obligations, fostering a balanced and focused observance of Ramadan․

Key Details of the Ramadan 2024 Timetable

The Ramadan 2024 Timetable UK PDF outlines essential prayer times, Suhoor, and Iftar schedules, while accounting for British Summer Time adjustments and highlighting Laylat al-Qadr․

Expected Start Date of Ramadan 2024 in the UK

Ramadan 2024 is expected to begin on the evening of Sunday, March 10th, with the first day of fasting starting on Monday, March 11th․ This date is tentative and subject to confirmation through moon sighting, as traditionally practiced in the UK․ The start date may vary slightly depending on sightings in Britain or nearby regions, ensuring alignment with Islamic lunar calendar traditions․

How the Timetable is Calculated

The Ramadan 2024 timetable for the UK is calculated using lunar sightings and astronomical data to determine the start of the holy month․ Mosques and Islamic centers, such as the East London Mosque, use these calculations to set precise prayer and fasting times․ The timetable also accounts for the transition to British Summer Time (BST) on March 31, 2024, ensuring accurate and coordinated schedules for Muslims across the UK․

Prayer Times in the Ramadan 2024 UK Timetable

The timetable provides precise Fajr, Dhuhr, Asr, Maghrib, and Isha prayer times, along with sunrise and sunset times for fasting, adjusted for British Summer Time from March 31, 2024․

Fajr, Dhuhr, Asr, Maghrib, and Isha Prayer Times

The Ramadan 2024 UK Timetable provides precise times for Fajr, Dhuhr, Asr, Maghrib, and Isha prayers, ensuring Muslims can maintain their daily worship schedule․ Fajr begins before dawn, while Isha occurs after sunset․ These timings are calculated based onmoon sightings and local time zones, with adjustments made for British Summer Time starting March 31, 2024․ The timetable also includes sunrise and sunset times to guide fasting hours, helping believers stay organized and spiritually observant throughout Ramadan․

Sunset and Sunrise Times for Fasting

Sunset and sunrise times are crucial for determining fasting hours during Ramadan 2024 in the UK․ The timetable provides exact sunrise times for Fajr and sunset times for Maghrib, marking the start and end of each fast․ With British Summer Time (BST) beginning on March 31, 2024, the schedule adjusts to reflect the time change, ensuring accurate fasting durations․ These timings are calculated based on astronomical data and confirmed by local mosques for reliability․

Important Nights in Ramadan 2024

Ramadan 2024 includes sacred nights like Laylat al-Qadr, marking the Quran’s revelation, and the final ten nights, emphasizing heightened worship and spiritual reflection in the UK․

Laylat al-Qadr and Its Significance

Laylat al-Qadr, the Night of Power, is one of Ramadan’s most sacred moments, marking the revelation of the Quran to Prophet Muhammad (peace be upon him)․ It typically falls during the last ten days, often on an odd night, encouraging believers to intensify their worship and supplications․ Muslims in the UK use the Ramadan 2024 timetable to identify these nights, dedicating them to prolonged prayer, recitation, and reflection․ This night is believed to offer exponential rewards, making it a time for deep spiritual rejuvenation and seeking Allah’s (SWT) mercy and forgiveness․

Night of the Moon Sighting for Eid al-Fitr

The moon sighting for Eid al-Fitr marks the end of Ramadan and the beginning of the new Islamic month․ In the UK, mosques and communities often rely on sightings within Britain or neighboring countries like Morocco, rather than Saudi Arabia․ The Ramadan 2024 timetable PDF includes updates on this process, ensuring believers know when Eid commences․ This night is crucial as it determines the final day of fasting and the start of celebrations, uniting Muslims across the UK in spiritual harmony and joy․

Moon Sighting and Timetable Confirmation

The 2024 Ramadan timetable in the UK is confirmed through moon sightings, often aligned with local observations rather than Saudi Arabia․ British Summer Time adjustments may affect timings․

Role of UK Mosques in Confirming the Timetable

UK mosques play a vital role in confirming the 2024 Ramadan timetable by coordinating moon sightings and ensuring accuracy․ They often base their schedules on local observations rather than Saudi Arabia․ Mosques like Stechford Mosque in Birmingham and the East London Mosque publish detailed timetables, including prayer times and fasting schedules․ These documents are widely distributed online and in print, helping the Muslim community stay organized and spiritually aligned during Ramadan․

Impact of British Summer Time (BST) on Prayer Times

The transition to British Summer Time (BST) on March 31, 2024, affects prayer timings․ Clocks move forward by one hour at 1 am, altering sunrise and sunset times․ This shift impacts fasting schedules, with Fajr and Maghrib prayers occurring earlier․ Muslims must adjust their timetables to align with the new daylight hours, ensuring accurate fasting and prayer times throughout Ramadan․ This adjustment requires careful planning to maintain spiritual observance․

Downloading the Ramadan 2024 Timetable PDF

The Ramadan 2024 Timetable PDF is available for free download from official UK mosque websites and trusted Islamic platforms, ensuring easy access for personal and communal use․

Where to Find the Official UK Ramadan Timetable

The official Ramadan 2024 Timetable for the UK can be found on trusted Islamic websites like East London Mosque, MCB, and Islamic Relief․ Many local mosques also provide downloadable PDF versions tailored to specific regions․ Additionally, websites such as Islamic Relief UK and East London Mosque offer free access to these timetables, ensuring accurate and reliable fasting and prayer times for Muslims across the UK․

How to Use the PDF for Daily Planning

The Ramadan 2024 Timetable UK PDF is an essential tool for daily planning․ It provides precise prayer times, sunrise/sunset hours, and key dates like Laylat al-Qadr․ Users can print or download the PDF for easy access, ensuring they stay organized․ The timetable also includes fasting times and reminders for Suhoor and Iftar, helping individuals maintain their spiritual routines effectively throughout the holy month․

Preparing for Ramadan 2024

Preparing for Ramadan involves spiritual reflection, health planning, and organizing schedules․ Muslims stockpile essentials, adjust routines, and engage in communal events to maximize the holy month’s blessings and observance․

Health and Spiritual Tips for Observing the Fast

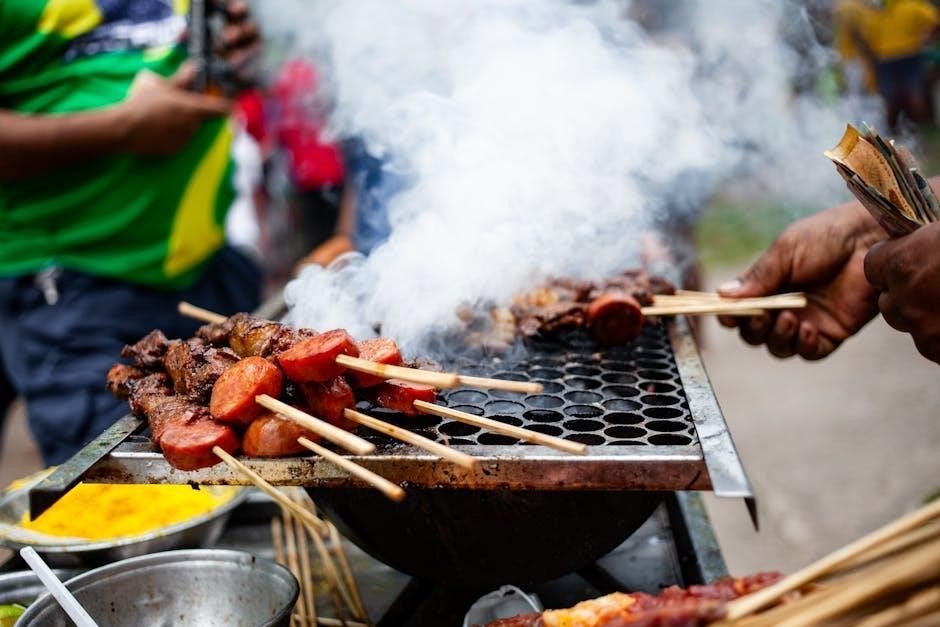
Staying hydrated and eating balanced meals during Suhoor and Iftar is crucial․ Prioritize nutrient-rich foods and avoid overexertion․ Spiritually, maintain consistent prayer times, engage in Quran recitation, and reflect on faith․ Seek community support for motivation and avoid extremes in fasting․ Ensure adequate rest to maintain energy levels throughout Ramadan․ Balancing physical and spiritual well-being enhances the fasting experience and fosters a deeper connection with faith․

Community Events and Prayer Gatherings

Mosques across the UK organize special Ramadan events, including Tarawih prayers and communal iftars․ Community centers host lectures and Quran recitation sessions․ Many gatherings foster unity, with local organizations providing meals for those in need․ Eid al-Fitr celebrations often feature outdoor prayers and cultural festivities․ Participating in these events strengthens spiritual bonds and promotes a sense of togetherness among Muslims during the holy month․

Eid al-Fitr Celebrations in the UK

Eid al-Fitr in the UK is expected on April 10th or 11th, 2024, marking the end of Ramadan․ Muslims gather for congregational prayers, followed by cultural festivities and family gatherings․

Expected Date of Eid al-Fitr 2024

Eid al-Fitr 2024 is anticipated to fall on April 10th or 11th, subject to moon sighting confirmation․ This marks the end of Ramadan, with final dates announced by UK mosques post-sighting․

Prayer and Celebration Arrangements

Eid al-Fitr celebrations in the UK will feature multiple congregational prayers, known as Jamaat, starting as early as 7am․ Mosques nationwide will organize these prayers, followed by community events, feasts, and charity activities․ The festivities emphasize spiritual reflection, family gatherings, and acts of kindness․ Detailed schedules for prayers and events will be shared by local mosques, ensuring a joyful and united celebration across the UK․

May Ramadan 2024 bring blessings, peace, and spiritual growth to all․ The UK timetable serves as a vital guide for fasting, reflection, and community bonding throughout the holy month․

Final Thoughts on Observing Ramadan 2024 in the UK

May Ramadan 2024 bring blessings, peace, and spiritual growth to all Muslims in the UK․ The holy month is a time for reflection, fasting, and strengthening faith․ Utilize the Ramadan 2024 timetable to stay organized and mindful of prayer and fasting times․ Engage in community events and seek support from local mosques to enhance your spiritual journey․ Wishing everyone a productive and fulfilling Ramadan, filled with compassion, gratitude, and togetherness․

contrato de renta gratis para imprimir pdf

A rental contract is a legally binding agreement outlining terms between landlord and tenant. It ensures clarity on responsibilities, rent, and property use, fostering trust and accountability.

1.1 What is a Rental Contract?

A rental contract is a legal agreement between a landlord and tenant, outlining the terms of property use, rent, and responsibilities. It ensures clarity on both parties’ obligations, preventing disputes. The contract typically includes details like property description, payment terms, and duration, serving as a binding document for both parties.

1.2 Importance of Having a Written Rental Agreement

A written rental agreement provides legal protection for both landlords and tenants, ensuring all terms are clear and mutually agreed upon. It helps prevent misunderstandings, defines responsibilities, and serves as evidence in case of disputes. Having a formal document fosters trust and accountability, making it essential for a smooth rental experience.

Key Elements of a Rental Contract

A rental contract outlines tenant and landlord details, property description, rent terms, payment methods, security deposits, and specific clauses like duration, maintenance, and termination conditions.

2.1 Tenant and Landlord Information

This section requires accurate details of both parties, including full names, addresses, and contact information. It ensures both tenant and landlord are identifiable, creating a clear line of responsibility and communication. Proper identification helps prevent disputes and ensures the contract is legally binding. Including this information is essential for accountability and formal recognition of the agreement.

2.2 Property Description

This section details the rental property, including its full address, type, and key features; It specifies the number of bedrooms, bathrooms, and any additional amenities like parking or a garden. Accurate description ensures clarity and prevents disputes, confirming both parties agree on the property’s condition and contents. This detail is crucial for a clear understanding of the rental agreement.

2.3 Rent and Payment Terms

This section outlines the rent amount, payment methods, and due dates. It specifies whether rent is monthly or annually, accepted payment forms, and late fee policies. Clarity on payment terms ensures timely payments and avoids disputes, setting clear expectations for both landlord and tenant regarding financial obligations and responsibilities. This transparency is vital for a smooth tenancy.

2.4 Security Deposit and Fees

The security deposit serves as a guarantee for fulfilling tenant obligations. It is typically refunded at the end of the tenancy, provided the property is returned in satisfactory condition. The contract should specify the deposit amount, payment methods, and conditions for its return. Additional fees, such as late payment charges, should also be clearly outlined to avoid disputes.

Benefits of Using a Free Rental Contract PDF

A free rental contract PDF offers cost savings, time efficiency, and legal compliance. It provides a professional framework for agreements, ensuring clarity and minimizing potential disputes between landlords and tenants.

3.1 Cost-Effective Solution

Using a free rental contract PDF eliminates the need for expensive legal fees or purchasing templates. It provides an accessible and affordable way to create professional agreements, ensuring both landlords and tenants can establish clear terms without financial burden. This cost-effective solution is ideal for individuals seeking to formalize their rental arrangements efficiently and economically.

3.2 Time-Saving Template

A free rental contract PDF serves as a time-saving template, offering a pre-designed structure that simplifies the creation process. By eliminating the need to draft a contract from scratch, users can quickly fill in necessary details, ensuring efficiency and accuracy. This template helps streamline rental agreements, saving valuable time for both landlords and tenants.

3.3 Compliance with Legal Requirements

A free rental contract PDF ensures compliance with legal requirements, protecting both landlords and tenants. It adheres to local laws and regulations, covering essential clauses like rent, duration, and termination terms. This guarantees a legally binding agreement, reducing potential disputes and ensuring all parties meet their obligations under the law. Regular updates keep the template aligned with legal standards;

How to Download and Customize a Rental Contract PDF

Download a free rental contract PDF from trusted sources, then customize it by filling in tenant, property, and payment details to tailor it to your specific needs.

4.1 Steps to Download the Template

To download a rental contract PDF, visit trusted websites offering free templates. Search for “contrato de renta gratis para imprimir PDF,” select a suitable template, review its content, and download it in PDF or Word format. Ensure the template matches your needs before customizing it with specific details.

4.2 Customizing the Template for Specific Needs

After downloading, customize the template by filling in personal details, property description, and specific terms. Specify rent amount, payment methods, and due dates. Include security deposit details, duration, and any additional clauses. Ensure all sections align with local laws and the agreed terms between landlord and tenant. Save the customized document for final review.

Important Clauses to Include

Essential clauses include duration of tenancy, maintenance responsibilities, termination conditions, and dispute resolution. These sections ensure clarity and legal protection for both landlords and tenants.

5.1 Duration of the Tenancy

The rental contract should clearly specify the tenancy duration, including start and end dates. This protects both parties by defining the rental period and renewal or termination clauses, ensuring clarity and preventing disputes over the lease term.

5.2 Maintenance and Repair Responsibilities

The rental contract should outline clear maintenance and repair responsibilities. Typically, the tenant is responsible for general upkeep, while the landlord handles structural repairs. This ensures both parties understand their obligations, preventing disputes. The contract should also specify handling of damages and required notifications, fostering accountability and preserving the property’s condition throughout the tenancy period.

5.3 Termination Conditions

A rental contract must specify termination conditions, including notice periods and acceptable reasons for early termination. Both parties may agree to terminate the agreement mutually. If the tenant breaches terms, the landlord can terminate the contract. The tenant must vacate the property by the agreed date, leaving it in good condition. The landlord is typically required to return the security deposit as per the contract terms.

5.4 Dispute Resolution

A rental contract should outline clear dispute resolution methods to address potential conflicts. Mediation or arbitration can be specified as preferred approaches. Both parties must agree on the process, ensuring fair resolution. Legal action may be an option if other methods fail. The contract should comply with local laws to protect both tenant and landlord rights during disputes.

Top Websites for Free Rental Contract Templates

Popular websites offer free rental contract PDFs, such as legal template platforms and real estate resources, providing customizable and legally compliant agreements for download.

6.1 Reliable Sources for Downloading Templates

Websites like LegalForms, LawDepot, and TemplateLab offer free rental contract PDFs. These platforms provide customizable templates that meet legal standards, ensuring compliance and ease of use.

Avoiding Common Mistakes in Rental Contracts

Common errors include omitting essential clauses like maintenance responsibilities or termination terms. Always ensure the contract aligns with local laws and is thoroughly customized for each property.

7.1 Overlooking Legal Requirements

Many individuals fail to include essential legal clauses, such as security deposit protocols or termination procedures. Ensuring compliance with local rental laws is crucial to avoid disputes and legal issues.

7.2 Not Including Specific Terms

Omitting details like rent payment methods, property maintenance responsibilities, or tenant rights can lead to misunderstandings. Including specific terms ensures clarity and protects both parties from potential disputes. Always outline clear expectations to avoid ambiguity.

Legal Considerations

A rental contract must comply with local laws and regulations to ensure legal validity. Both parties must sign the agreement, making it legally binding and enforceable in court.

8.1 Ensuring the Contract is Legally Binding

A rental contract is legally binding when it complies with local laws, includes clear terms, and is signed by both landlord and tenant. Witnesses may add validity.

8.2 Adherence to Local Laws and Regulations

A rental contract must comply with local laws and regulations to ensure validity. Jurisdiction-specific requirements, such as tenant rights and eviction procedures, must be included. Failure to adhere to these laws can result in legal disputes or void the agreement. Always consult legal professionals to verify compliance with regional tenancy acts and regulations.

How to Fill Out the Contract

Review and complete all sections carefully, ensuring accuracy in tenant, landlord, and property details. Include rent, deposit, and signature fields. Legal consultation recommended for binding agreements.

9.1 Step-by-Step Guide

Gather all necessary information, including tenant and landlord details. 2. Fill in the property description and rental terms. 3. Specify rent, payment methods, and due dates. 4. Include security deposit details and any additional fees. 5. Outline maintenance responsibilities and lease duration. 6. Add signature fields for both parties and witnesses. 7. Review and ensure all clauses are understood before signing.

A free rental contract PDF provides a convenient and legally secure way to establish tenant-landlord agreements, ensuring clarity and mutual understanding for all parties involved effectively.

10.1 Final Tips for Using a Free Rental Contract PDF

Always customize templates to suit specific needs and ensure clarity. Verify local laws and have all parties sign the document. Keep a copy for records and ensure compliance with legal requirements for a smooth tenancy experience.

sock loom instructions

Sock loom knitting is a versatile and accessible method for creating custom-fit socks. It uses a loom to weave yarn into fabric, offering a unique alternative to traditional needle knitting. Perfect for beginners and experienced crafters alike, it allows for personalized styles and cozy results.

Choosing the Right Sock Loom

Selecting the appropriate sock loom is essential for achieving professional-looking results. With various types of looms available, including round, oval, and square options, it’s important to consider your project’s specific needs. Round looms are ideal for toe-up socks, while oval or square looms offer versatility for different stitch patterns.

Loom size plays a critical role in ensuring proper fit. Sock looms come in different peg counts, which determine the circumference of the sock. Choose a loom that matches your desired sock size, whether it’s for adults or children. Additionally, consider the yarn weight and stitch complexity, as these factors influence the loom’s compatibility.

Personal preference also matters. Some crafters prefer the portability of smaller looms, while others opt for larger ones for quicker projects. Beginners may benefit from starter kits or looms with built-in guides for ease of use. Always check reviews or tutorials to ensure the loom aligns with your skill level and project goals.

Ultimately, the right loom will enhance your knitting experience, making the process enjoyable and rewarding.

Materials Needed for Sock Loom Knitting

To begin your sock loom knitting project, you’ll need a few essential materials. First and foremost, a sock loom is required—available in round, oval, or square designs. The type of loom you choose will depend on the style of socks you want to create.

Yarn is another critical component. Fingering weight yarn is ideal for socks, but you can also experiment with bulky yarn for thicker, warmer options. A tapestry needle is necessary for weaving in ends and sewing seams. Additionally, a measuring tape is handy for ensuring the correct fit and monitoring progress.

Stitch markers or small clips can help mark increases, decreases, or specific patterns. While optional, they simplify the process, especially for beginners. Some crafters also use locking stitch markers or even nail polish to temporarily mark pegs on the loom. Double-pointed knitting needles (size 1 or 2) may be needed for finishing touches or sewing seams.

Lastly, ensure you have a consistent yarn weight and proper gauge to achieve the desired texture and fit. These materials are widely available at craft stores or online, making it easy to get started with your sock loom knitting journey.

Casting On Techniques

Casting on is the first step in sock loom knitting, setting the foundation for your project. The most common method is the e-wrap cast-on, which involves wrapping the yarn around the loom’s pegs in a specific pattern. Start by securing the yarn to the first peg, then loop it around each subsequent peg, creating a consistent tension. This method works well for most sock patterns and ensures a stretchy cuff.

For a more invisible join, some knitters prefer the long-tail cast-on, though it can be trickier on a loom. Alternatively, the figure-8 cast-on is another popular choice, wrapping the yarn in a figure-eight pattern around the pegs. Regardless of the method, maintaining even tension is crucial to avoid a tight or loose cuff;

Once the yarn is cast on, gently pull it to ensure it’s not too tight or too loose. Using a stitch marker or small clip can help mark the starting point. Proper casting on ensures a smooth knitting process and a professional finish. With practice, you’ll master the technique, making your sock loom projects seamless and enjoyable.

Knitting the Basic Sock Structure

Once the yarn is cast on, the next step is to begin knitting the body of the sock. Start by bringing the working yarn to the first peg and pulling it gently to create the first stitch. For a basic sock, use the e-wrap method, wrapping the yarn around each peg in a consistent manner. Begin with a ribbed cuff by alternating between knit and purl rows, which provides elasticity and a comfortable fit.

After completing the cuff, transition to stockinette stitch for the main body of the sock. Maintain even tension as you work row after row, using the loom’s pegs as a guide. Periodically measure the sock against your foot or a sizing chart to ensure proper fit. For added organization, use stitch markers to mark increases or decreases, especially around the heel and toe areas.

As you approach the toe, prepare for shaping by gradually decreasing stitches. Use a tapestry needle to weave in ends and keep the fabric neat. The process is straightforward, and with practice, you’ll develop a rhythmic flow, making the sock structure second nature. Proper tension and attention to detail are key to a professional-looking result.

Shaping the Heel and Toe

Shaping the heel and toe is a critical part of sock loom knitting, ensuring a comfortable and proper fit. Begin by knitting the heel flap, typically using a smaller number of stitches than the rest of the sock. This is achieved by working back and forth on a specific set of pegs, creating a dense fabric for durability. Use a tapestry needle to pick up additional stitches around the heel flap, ensuring a seamless transition to the heel shaping.

For the toe, gradually decrease stitches to form a tapered shape. This is done by working fewer pegs in each row or using techniques like the Kitchener stitch to close the toe neatly. Maintain symmetry by decreasing evenly on both sides of the sock. Use locking stitch markers to keep track of decreases and ensure alignment. Proper shaping requires careful attention to tension and stitch count to avoid puckering or looseness.

Regularly measure the sock against your foot or a sizing chart to ensure the heel and toe fit snugly. This step is crucial for both functionality and comfort. With practice, shaping the heel and toe becomes intuitive, allowing you to craft custom-fit socks with ease.

Binding Off the Socks

Binding off is the final step in sock loom knitting, where you secure the last row of stitches to complete the sock. The most common method is the Kitchener stitch, which creates an invisible and flexible closure. To do this, use a tapestry needle to graft the remaining stitches together, ensuring the toe lies flat and comfortable.

Another method is the e-wrap cast-off, which involves lifting stitches off the loom in a specific sequence. This technique is straightforward but slightly less elastic than the Kitchener stitch. Regardless of the method, it’s important to maintain even tension to prevent the cuff from being too tight or too loose.

A tapestry needle and a length of yarn are essential tools for binding off. Some knitters also use a yarn tail to weave in ends afterward. Properly securing the last stitches ensures durability and a professional finish. Binding off is a satisfying step, as it marks the completion of your hand-knit socks. With practice, this process becomes quick and effortless, allowing you to enjoy the fruits of your labor.

Sizing and Fit Considerations

Sizing and fit are crucial for comfortable and functional hand-knit socks. Properly measuring your foot and understanding the stretch of the yarn ensures a snug yet comfortable fit. Most patterns include sizing charts, but it’s important to adjust based on your specific foot shape and preferred sock height.

To achieve the best fit, measure your foot’s circumference and length. Use a flexible measuring tape to determine these dimensions accurately. Compare them to the sizing chart provided in your pattern or adjust the number of stitches and rows accordingly. Adding or subtracting stitches can help customize the fit without compromising the sock’s structure.

When knitting, try the sock on periodically to ensure it fits well. Use locking stitch markers to mark increases or decreases, making it easier to track your progress. Yarn weight and type also play a role in fit, as thicker yarns create bulkier socks, while finer yarns offer a more tailored look. By paying attention to these details, you can craft socks that are both comfortable and flattering.

Exploring Stitch Patterns and Variations

Stitch patterns add creativity and diversity to your sock loom knitting projects. From simple textures like ribbing and stockinette to intricate designs such as cables and lace, the possibilities are endless. Each pattern offers a unique aesthetic and feel, allowing you to customize your socks to suit any style or occasion.

One of the most popular variations is the ribbed cuff, which provides elasticity and a snug fit at the top of the sock. For a more decorative look, try incorporating lace patterns, which add a delicate and airy texture. Cable stitches are another great option, creating a dimensional and visually striking design. You can also experiment with colorwork by alternating yarn colors to create stripes, Fair Isle motifs, or other multi-color designs.

When exploring these variations, consider the yarn weight and stitch definition. Thicker yarns work well for bold textures, while finer yarns are ideal for intricate patterns. Swatching is essential to ensure the pattern looks as intended. By experimenting with different stitches, you can create unique and personalized socks that reflect your creativity and skill.

Common Mistakes and Troubleshooting

When starting with sock loom knitting, it’s easy to encounter issues that can frustrate your progress. One of the most common mistakes is incorrect tension, which can lead to socks that are either too tight or too loose. To fix this, ensure you maintain consistent yarn tension throughout the project and swatch before starting to gauge your stitches accurately.

Another frequent error is misaligning stitches during the heel or toe shaping. This can result in uneven fabric or holes. To avoid this, use locking stitch markers or small pieces of scrap yarn to mark key points and keep track of your progress. Additionally, double-check your pattern instructions for specific shaping techniques.

Sometimes, beginners may forget to leave enough yarn for seaming or binding off. Always measure your yarn supply and reserve a small amount for finishing. If you encounter dropped stitches or misaligned rows, gently work them back into place using a tapestry needle before proceeding.

Lastly, gauge inaccuracy is a common issue. Regularly measure your work to ensure it matches the pattern’s specifications. If needed, adjust your loom or yarn weight to achieve the correct fit. By addressing these issues early, you can create well-fitting, professional-looking socks with ease. Patience and practice are key to mastering sock loom knitting!

Tips for Beginners

Starting with sock loom knitting can be exciting, but it’s important to begin with the right approach. Always start with a simple project and practice basic stitches before moving to intricate patterns. Use locking stitch markers to keep track of your progress, especially when shaping the heel or toe. This will help you avoid misaligning stitches and ensure a smooth workflow.

Watch tutorial videos to understand the e-wrap cast-on and kitchener stitch, essential for sock loom knitting. Measure your gauge regularly to ensure your stitches are consistent, as this directly affects the fit of your socks. Don’t be afraid to unravel and restart if something doesn’t look right—practice builds skill and confidence.

Keep your yarn organized by winding it into a ball or using a yarn bowl to prevent tangles. Start with a small project, like a single sock, to familiarize yourself with the loom and stitches before committing to a pair. Finally, be patient with yourself—sock loom knitting is a skill that improves with time and practice. Happy knitting!

Caring for Your Hand-Knit Socks

Proper care ensures your hand-knit socks remain soft, durable, and comfortable for years. Always wash them by hand using mild detergent and cold water to prevent yarn damage or shrinkage. Gently swish the socks in the water, avoiding agitation that could cause pilling or stretching.

Reshape the socks while they are damp to maintain their original fit. Lay them flat on a clean towel to air-dry away from direct sunlight or heat, as this can cause fading or yarn degradation. Avoid machine washing or drying, as the friction and heat can damage the fibers and weaken the stitches.

For storage, keep your socks in a cool, dry place to prevent moisture buildup. Avoid using fabric softeners or bleach, as these can strip the yarn of its natural oils and softness. By following these care tips, you can enjoy your hand-knit socks for many seasons to come.

Optional: For extra protection, consider using a fabric refresher spray or natural fibers like wool, which have inherent antibacterial properties. This will keep your socks fresh and extend their lifespan.

Congratulations on completing your journey into the world of sock loom knitting! With the skills and knowledge you’ve gained, you’re now equipped to create cozy, personalized socks for yourself and your loved ones. Remember, practice makes perfect, so keep experimenting with different yarns, stitch patterns, and loom types to refine your craft.

As you move forward, consider exploring advanced techniques like cabling, lacework, or colorwork to add unique touches to your socks. Don’t hesitate to join online knitting communities or watch video tutorials for inspiration and troubleshooting tips. Many crafters find joy in sharing their projects and learning from others.

If you’re eager to take your skills to the next level, try designing your own patterns or gifting your creations to friends and family. There’s no better way to spread the joy of handmade crafts than by sharing your passion with others. Keep knitting, and happy crafting!

bike frame size guide

Choosing the right bike frame size is crucial for comfort, safety, and performance. Our guide explains methods to determine your perfect fit, ensuring enjoyable rides.

Understanding Bike Frame Size Basics

Bike frame size is determined by height, inseam, and standover height. Proper fit ensures comfort, control, and efficiency, with frame size measured from seat tube to bottom bracket.

What is Bike Frame Size and Why is it Important?

Bike frame size refers to the measurement of a bike’s frame, typically from the seat tube to the bottom bracket. Proper sizing ensures optimal comfort, safety, and performance. A well-fitted frame allows for efficient pedaling, better control, and reduces the risk of discomfort or injury. It is crucial for all riders, as an ill-fitting bike can lead to poor posture, strain, and reduced efficiency. Understanding frame size is essential for selecting the right bike, whether for casual rides or competitive cycling, ensuring a enjoyable and safe riding experience.

Key Measurements: Height, Inseam, and Standover Height

Accurate measurements are essential for determining the correct bike frame size. Height is a primary factor, as it helps narrow down the frame size range. Inseam (inside leg length) is critical for ensuring proper standover height, the distance from the ground to the top tube. Measure inseam by standing barefoot and measuring from the crotch to the floor. Standover height ensures safety and comfort, preventing discomfort or injury. For road bikes, multiply inseam in centimeters by 0.665, and for mountain bikes, by 0.575. Convert measurements to inches by dividing by 2.54. These measurements ensure a perfect fit, optimizing comfort and performance.

Methods to Determine the Correct Bike Frame Size

Use inseam measurement, bike frame size charts, or advanced calculations to find your ideal fit. These methods consider height, riding style, and bike type for optimal performance.

Method 1: Using Inseam Measurement

Measure your inseam by standing against a wall with feet 6-8 inches apart, marking the highest point inside your leg. Use this to determine standover height, ensuring 1-2 inches of clearance for road bikes or 2-4 inches for mountain bikes. This method is reliable for assessing frame size, as it directly relates to your body proportions and riding comfort. Inseam-based sizing is particularly useful for ensuring proper clearance and avoiding discomfort or safety issues. It works across various bike types, making it a practical starting point for cyclists of all levels.

Method 2: Bike Frame Size Charts for Adults and Kids

Bike frame size charts are a popular and straightforward method for determining the right frame size. These charts typically use height and inseam measurements to recommend frame sizes for adults and kids. For adults, charts often categorize frame sizes based on height ranges, while kids’ charts may focus on age and leg length. Road, mountain, and hybrid bikes have different sizing standards, so it’s essential to use the correct chart for your bike type. By matching your measurements to the chart, you can find a frame size that ensures comfort and optimal performance.

When using a chart, ensure your measurements are accurate and consult a professional if unsure. This method is especially helpful for kids, as it accounts for growth and varying inseam lengths. Always double-check the chart’s compatibility with your bike type for the best fit.

Method 3: Advanced Bike Frame Size Calculation

For precise sizing, the advanced bike frame size calculation uses specific formulas based on your inseam and height. Multiply your inseam in centimeters by 0.575 for mountain bikes, 0.665 for road bikes, or 0.645 for hybrid bikes. Convert measurements to inches by dividing by 2.54 if needed. This method ensures a tailored fit, especially for performance-oriented riders. It factors in frame geometry and riding style, offering a more customized approach than standard charts.

Accurate measurements are crucial for this method. While it provides a high level of precision, it’s best suited for experienced riders or those seeking optimal performance. Always verify calculations with professional guidance for the best results.

Bike Frame Size Charts for Different Bike Types

Explore detailed size charts tailored for mountain, road, and hybrid bikes, ensuring the perfect fit based on your inseam, height, and riding style preferences.

Mountain Bike Frame Size Chart

Mountain bike frame sizes vary based on inseam and riding style. To determine your size, measure your inseam and multiply by 0.575 for the ideal frame size in inches. For example, an inseam of 30 inches results in a 17.25-inch frame. Standover height is critical for safety and comfort, ensuring 1-2 inches of clearance. Mountain bikes often range from 14 to 22 inches, catering to riders of all heights. Use size charts specific to your bike type, such as cross-country, trail, or downhill, as geometries differ. Proper fit ensures better control, efficiency, and enjoyment on the trails. Always test ride if possible to confirm comfort and handling.

Road Bike Frame Size Chart

Road Bike Frame Size Chart

To determine your road bike frame size, measure your inseam in centimeters and multiply by 0.665. This calculation provides the ideal frame size in centimeters. For example, an inseam of 80 cm results in a 53.2 cm frame. Road bikes typically range from 45 cm to 63 cm, catering to various rider heights. Standover height should allow 1-2 cm of clearance for comfort and safety. Use size charts specific to road bikes, as they differ from other bike types. Proper fit ensures optimal performance, efficiency, and comfort during long rides. Always test ride if possible to confirm the best fit for your body and riding style.

Hybrid Bike Frame Size Chart

Hybrid bikes combine elements of road and mountain bikes, offering a versatile option for various riding conditions. To determine the correct frame size, measure your inseam in centimeters and multiply by 0.645. For example, an inseam of 76 cm results in a 49.22 cm frame. Hybrid bikes often use a size range of small, medium, large, and extra-large, corresponding to rider heights. Standover height should allow 1-2 inches of clearance for safety and comfort. Use hybrid-specific charts, as sizing differs from road or mountain bikes. Proper fit ensures a balance of comfort, efficiency, and control, making hybrid bikes ideal for commuting and casual rides. Always test ride if possible.

Factors Influencing Bike Frame Size

Factors such as standover height, inseam, riding style, and bike type influence frame size. Proper fit ensures comfort, safety, and optimal performance for all riders.

Riding Style and Comfort Preferences

Riding style and personal comfort preferences significantly impact bike frame size selection. Aggressive riders may prefer a smaller frame for better handling, while relaxed or recreational riders might opt for a larger frame to prioritize comfort. Standover height and handlebar reach are critical factors, as they influence control and posture. Riders seeking an upright position may choose a frame with a taller standover height, whereas those prioritizing speed and aerodynamics might prefer a lower, more streamlined fit. Ultimately, balancing performance goals with comfort ensures a enjoyable and efficient riding experience tailored to individual needs and preferences.

Importance of Inseam Length for Standover Height

Inseam length is a critical measurement for determining standover height, ensuring proper clearance between the rider and the bike frame. This measurement helps maintain safety and control, especially when dismounting. Standover height is the distance from the ground to the top of the bike’s top tube, directly influenced by inseam length. For optimal fit, the standover height should allow a slight clearance, typically 1-2 inches for road bikes and slightly more for mountain bikes. Measuring inseam accurately ensures the bike frame size aligns with the rider’s body, providing a safer and more comfortable riding experience tailored to their specific needs and preferences.

How to Measure a Bike Frame

Measure the seat tube length from the bottom bracket to the top of the seat tube for accurate sizing. This ensures proper fit and optimal performance.

Seat Tube Length and Bottom Bracket Measurement

The seat tube length is a critical measurement for determining bike frame size. It is measured from the center of the bottom bracket to the top of the seat tube. This measurement helps ensure proper fit and comfort. For road bikes, this length is typically measured in centimeters, while mountain bikes often use inches. Accurate measurement is essential, as it directly impacts standover height and overall bike sizing. Use a tape measure or ruler to measure precisely, ensuring the bike fits your inseam and riding style. Always refer to the manufacturer’s sizing chart for specific guidelines, as variations can occur between brands.

Common Mistakes to Avoid When Sizing a Bike

When sizing a bike, common mistakes include relying solely on height without considering inseam length, ignoring standover height, and not test-riding the bike. Many riders assume universal sizing across brands, but frame sizes can vary. Failing to account for riding style, such as aggressive vs. comfortable positions, can lead to poor fit. Overlooking the importance of proper inseam measurement for standover clearance is another error, potentially affecting safety. Lastly, some riders skip consulting sizing charts or professional fitters, leading to mismatched bikes. Avoid these mistakes by measuring accurately, using sizing guides, and testing bikes in person for optimal comfort and performance.

The Role of Proprietary Bike Fitting Algorithms

Proprietary bike fitting algorithms, like the Body Fit tool by sixthreezero, revolutionize bike sizing by considering multiple factors beyond basic measurements. These advanced systems analyze height, weight, and riding habits to recommend the perfect bike. Unlike traditional sizing charts, they prioritize comfort and safety by adjusting for personal preferences, such as a more upright position or easier handling. By incorporating individualized data, these algorithms reduce the complexities of sizing, especially for e-bikes and hybrid models. They also address the limitations of standard charts, offering a more holistic approach to fitting. This technology ensures a tailored experience, enhancing both performance and enjoyment for riders of all levels.

Special Considerations for Women’s Bike Sizing

While bike frame sizing is largely universal, women-specific models often feature design tweaks for better ergonomics. These include narrower handlebars, shorter reach, and saddles designed for comfort. However, frame size charts remain similar for both genders, as inseam and height measurements are consistent. Women’s bikes may prioritize comfort and upright riding positions, but the sizing process remains rooted in standard measurements. Brands offer tailored options to suit different body types, but the core sizing principles apply equally to men and women. Ensuring a proper fit is essential for comfort and performance, regardless of gender-specific design elements.

e prime 3 manual pdf

The E-Prime 3 Manual PDF serves as a comprehensive guide for designing and running behavioral experiments using E-Prime’s suite of tools, including E-Studio and E-Merge.

Overview of E-Prime Suite

The E-Prime Suite is a powerful set of applications designed for creating, running, and analyzing behavioral experiments. It includes E-Studio, a graphical environment for experiment design, and E-Merge, a tool for data management and analysis. The suite supports precise stimulus timing and integrates seamlessly with external devices like EEG systems and response boxes. Its programmable experiments and compatibility with third-party tools make it a versatile choice for researchers. E-Prime 3.0 also offers a library of sample paradigms and How-To videos for easier implementation.

Importance of the E-Prime 3 Manual

The E-Prime 3 Manual is essential for users to maximize the suite’s capabilities, providing detailed instructions for designing experiments, troubleshooting, and integrating external devices. It offers step-by-step guides and best practices, ensuring efficient use of E-Studio and E-Merge. The manual is crucial for both beginners and advanced users, covering topics like programmable experiments and data analysis. By following the manual, researchers can optimize their workflows and achieve precise, reliable results in their studies. This resource is indispensable for anyone utilizing E-Prime 3.0.

E-Studio: Experiment Design Environment

E-Studio is a powerful tool within the E-Prime suite, enabling users to design and create behavioral experiments through an intuitive graphical interface, simplifying complex experimental setups.

Graphical Interface and Workflow

The graphical interface of E-Studio provides an intuitive workflow for designing experiments. Users can drag-and-drop stimuli, set timing parameters, and define trial sequences. The interface simplifies the creation of complex experimental designs by visually organizing tasks and conditions. This workflow streamlines the development process, allowing researchers to focus on experimental logic rather than coding. The manual details how to navigate this interface effectively, ensuring efficient experiment construction and minimizing errors.

Building Custom Experiments

The E-Prime 3 Manual provides detailed guidance on creating custom experiments tailored to specific research needs. It emphasizes utilizing E-Studio’s tools to design experiments from scratch, including setting up stimuli, defining trial structures, and incorporating conditional logic. The manual also covers advanced features like programmable experiments and precise stimulus timing, enabling researchers to build complex paradigms with ease. By following the manual’s instructions, users can ensure their experiments are both accurate and efficient, meeting the demands of various behavioral studies. This section is essential for those aiming to maximize E-Prime’s capabilities.

E-Merge: Data Analysis Application

The E-Prime 3 Manual highlights E-Merge as a powerful tool for merging and managing data from experiments, enabling advanced analysis and integration with external systems seamlessly.

Merging and Managing Data

E-Merge is E-Prime’s data management component, designed to streamline the process of merging and organizing experimental data. It allows users to import multiple data files, filter, and consolidate datasets efficiently. The application supports advanced data handling, including automated cleanup and formatting for analysis. With a user-friendly interface, E-Merge ensures accurate and consistent data preparation. It also supports integration with external devices like EEG and response boxes, enabling seamless data consolidation. This tool is essential for maintaining data integrity and preparing datasets for further analysis.

Advanced Data Analysis Techniques

E-Prime 3 supports sophisticated data analysis methods, enabling researchers to extract meaningful insights from experimental data. Techniques include advanced filtering, statistical computations, and data visualization tools. The E-Merge application facilitates complex data merging and manipulation, while integration with third-party tools enhances analytical capabilities. The manual provides detailed guidance on implementing these techniques, ensuring precise and efficient data processing. By leveraging these features, users can perform robust analyses tailored to their research needs, making E-Prime 3 a powerful tool for behavioral science studies.

Key Features of E-Prime 3

E-Prime 3 offers programmable experiments, precise stimulus timing, and seamless integration with external devices like EEG systems and response boxes, enhancing experimental design flexibility and accuracy.

Programmable Experiments and Stimulus Timing

E-Prime 3 allows users to create highly customizable experiments with precise control over stimulus presentation and timing. This feature ensures accurate synchronization of visual, auditory, or tactile stimuli, crucial for behavioral research. The programmable nature enables researchers to tailor experiments to specific study requirements, enhancing flexibility and adaptability. With E-Prime, precise timing is achievable, which is essential for tasks like reaction time measurement. This capability, combined with integration options for external devices, makes E-Prime a robust tool for advanced experimental design.

Integration with External Devices (e.g., EEG, Response Boxes)

E-Prime 3 seamlessly integrates with external devices such as EEG systems, response boxes, and DAQ devices, enhancing data collection capabilities. This integration allows researchers to synchronize physiological measurements with experimental stimuli, providing a more comprehensive understanding of participant responses. Compatibility with National Instruments hardware further extends E-Prime’s functionality, ensuring precise data acquisition and analysis. This feature-rich integration capability makes E-Prime an ideal choice for multimodal research, enabling efficient and accurate data collection across diverse experimental setups.

Troubleshooting and Debugging

Troubleshooting and debugging are essential for resolving issues in E-Prime experiments. The manual provides guidance on identifying and fixing common errors, ensuring smooth experiment execution.

Common Issues and Solutions

Common issues in E-Prime 3 include timing inaccuracies, device integration problems, and data collection errors. Solutions involve recalibrating devices, updating drivers, and verifying experiment logic. Ensuring precise stimulus timing requires checking system settings and hardware synchronization. For integration issues, consult compatibility guides and update firmware. Data errors often stem from incorrect merge settings or incomplete E-Merge configurations. Regularly reviewing the manual and applying best practices can prevent these issues, ensuring reliable experiment execution and accurate data collection.

Best Practices for Experiment Design

Adhering to best practices in E-Prime 3 ensures robust experiment design and reliable data collection. Start by defining clear research objectives and structuring experiments logically. Utilize E-Studio’s graphical interface to design tasks with precise timing and stimuli. Validate experiments through pilot testing and debug using E-Prime’s tools. Documenting each step enhances reproducibility. Regularly update software and hardware to maintain performance. Following these guidelines ensures experiments run smoothly, yielding accurate and consistent results. Always refer to the E-Prime 3 manual for detailed optimization strategies.

Integration with Third-Party Tools

E-Prime 3 seamlessly integrates with third-party tools, enhancing experimental capabilities. It supports devices like EEG systems, Tobii Eyetracker, and National Instruments hardware, ensuring precise data collection and analysis.

Linking with Tobii Eyetracker and Neuroscan Systems

E-Prime 3 supports integration with Tobii Eyetracker and Neuroscan systems, enabling synchronized data collection for advanced research. The manual provides detailed guidance for linking these devices, ensuring precise synchronization of eye-tracking and neurophysiological data. This integration enhances experimental design by combining behavioral and physiological measurements. Researchers can leverage these tools for comprehensive insights into cognitive processes. The setup process is streamlined, with step-by-step instructions available in the E-Prime 3 Manual PDF, making it accessible for both novice and experienced users to implement seamlessly.

DAQ Support and National Instruments Compatibility

E-Prime 3 offers robust DAQ (Data Acquisition) support, enabling precise data collection from external devices. The manual details compatibility with National Instruments hardware, ensuring seamless integration for researchers. This feature allows for synchronized data acquisition across various experimental setups. The guide provides step-by-step instructions for configuring DAQ devices and troubleshooting common issues. With National Instruments’ DAQ support, E-Prime 3 enhances experimental design by enabling the capture of high-precision data from diverse sources, making it a powerful tool for research applications.

Getting Started Guide

The E-Prime 3 Manual PDF includes a step-by-step tutorial for beginners, guiding users through the creation of a reaction time experiment with clear, actionable instructions.

Step-by-Step Tutorial for Beginners

The E-Prime 3 Manual PDF offers a detailed step-by-step tutorial designed for newcomers to the software. This guide walks users through the fundamentals of creating a reaction time experiment, covering essential features and tools. It provides clear instructions on designing experiments, using E-Studio, and implementing basic functionalities; The tutorial also includes best practices for experiment design and troubleshooting common issues. By following the guide, users can quickly grasp the core concepts of E-Prime and start building their own experiments with confidence. Additional resources, like sample paradigms, are available to further assist learners.

Creating a Reaction Time Experiment

The E-Prime 3 Manual PDF provides a detailed guide for creating a reaction time experiment, a common task in behavioral research. The manual outlines how to set up the experiment structure, define stimuli, and configure response collection. It also covers timing accuracy, essential for precise data collection. Users can integrate external devices like response boxes for enhanced functionality. The guide includes steps for testing and refining the experiment before deployment. By following the manual’s instructions, researchers can efficiently design and execute reaction time experiments with E-Prime 3.

Resources and Downloads

Access the E-Prime 3 Manual PDF, sample paradigms, and How-To videos through the official website or National Instruments’ support section for comprehensive guidance and tools.

Accessing the E-Prime 3 Manual PDF

The E-Prime 3 Manual PDF is readily available for download on the official E-Prime website and National Instruments’ support page.

Users can also find sample paradigms and How-To videos to complement their learning experience, ensuring they have all the tools needed for successful experiment design.

Additional Materials (e.g., Sample Paradigms, How-To Videos)

Beyond the manual, users can access sample paradigms and How-To videos to enhance their learning experience.

These resources provide practical examples and step-by-step guidance for designing experiments, ensuring a smoother workflow.

The E-Prime 3.0 Experiment Library also offers pre-built templates, reducing the time spent on creating custom experiments from scratch.

Additionally, compatibility with third-party tools like Tobii Eyetracker and Neuroscan systems is well-documented, making integration seamless.

witch guide

Modern witchcraft is a dynamic, evolving practice blending ancient traditions with contemporary beliefs. It emphasizes personal growth, healing, and harnessing energy to manifest desires, offering a holistic path for those seeking empowerment and harmony in modern life.

1.1 What is Modern Witchcraft?

Modern witchcraft is a blend of ancient traditions and contemporary practices, focusing on personal growth, healing, and energy work. It emphasizes spirituality, self-empowerment, and harmony with nature. Practitioners use tools like crystals, herbs, and runes, adapting rituals to suit modern lifestyles. This versatile craft encourages individuals to connect with their inner power, fostering a holistic approach to life. It’s a dynamic, inclusive practice that evolves with societal changes while honoring its roots.

1.2 The Evolution of Witchcraft in the Modern Era

Modern witchcraft has evolved significantly, blending ancient traditions with contemporary practices. Today, it embraces diversity, inclusivity, and adaptability, allowing practitioners to tailor rituals to modern lifestyles. The rise of digital platforms has made witchcraft more accessible, with online communities and resources flourishing. This era emphasizes personal empowerment, healing, and connection to nature, while integrating new tools and philosophies. Modern witchcraft continues to grow, appealing to a broad audience seeking spirituality and self-expression in a fast-changing world.

History of Witchcraft

Witchcraft’s history spans centuries, rooted in ancient cultures and traditions. It has evolved through eras of persecution, revival, and modern adaptation, shaping its diverse practices and beliefs.

2.1 Traditional Witchcraft: Origins and Practices

Traditional witchcraft traces its origins to ancient, culturally specific practices, often tied to nature and folklore. These practices varied by region, emphasizing local deities, seasonal rituals, and herbalism. Early traditions focused on survival and community well-being, with rituals centered around agriculture and natural cycles. Practices included divination, spellcasting, and healing, passed down through generations. Traditional witchcraft was deeply rooted in cultural identity and local customs, forming the foundation for modern witchcraft’s diverse expressions.

2.2 The Transition from Traditional to Modern Witchcraft

The shift from traditional to modern witchcraft reflects evolving cultural and societal influences. Historical practices, rooted in folklore and localized customs, have adapted to contemporary beliefs and global accessibility. Modern witchcraft embraces diversity, blending various traditions and incorporating new tools like crystals and tarot. This transition has democratized access to witchcraft, fostering a more inclusive and individualized approach. It balances ancient wisdom with fresh perspectives, making the craft relevant to today’s world while respecting its origins.

Basics of Witchcraft

Witchcraft is a practice rooted in energy manipulation, intention, and willpower. It involves rituals, spells, and tools to align energies, focusing on harmony, growth, and self-discovery.

3.1 Key Concepts and Principles

Modern witchcraft revolves around energy manipulation, intention, and willpower. Core principles include the law of threefold return, harmony with nature, and ethical practice. It emphasizes balance, personal responsibility, and self-awareness. The craft encourages connecting with universal energy, respecting all living beings, and fostering growth through rituals and spells. Understanding these principles is essential for aligning actions with positive outcomes and maintaining harmony in magical and mundane life;

3.2 Essential Tools for Modern Witchcraft

Crystals, herbs, and candles are fundamental tools in modern witchcraft. Crystals amplify energy and intentions, while herbs are used in spells, rituals, and divination. Candles represent the element of fire, aiding in focus and manifestation. Other essential tools include wands for channeling energy, athames for casting circles, and pentacles or chalices for grounding and balance. Divination tools like runes and tarot cards also play a crucial role in guiding practices and decisions.

Magical Practices

Modern witchcraft encompasses spellcasting, rituals, and energy work. These practices focus on intention-setting, harnessing lunar phases, and using tools like crystals and herbs to manifest change and balance.

4.1 Spells and Rituals: A Beginner’s Guide

Spells and rituals are foundational practices in modern witchcraft, helping to focus intent and manifest change. Begin with simple spells using candles, herbs, or crystals, aligning with moon phases for enhanced energy. Rituals create sacred spaces for connection and transformation. Start small, trust the process, and adapt practices to personal beliefs and goals. Tools like wands or athames can channel energy, while clear intention and visualization amplify effects. Patience and consistency are key to mastering these powerful magical techniques.

4.2 Moon Phase Magic: Harnessing Lunar Energy

Moon phase magic taps into the lunar cycle’s transformative power, aligning spells and rituals with nature’s rhythm. The New Moon signifies new beginnings, ideal for setting intentions, while the Full Moon is perfect for releasing negativity and amplifying energy. Waxing moons support growth, and waning phases facilitate letting go. By synchronizing practices with lunar energies, witches can enhance spell effectiveness and deepen their connection to the natural world, creating powerful, harmonious magic.

Divination Techniques

Divination techniques, such as tarot cards, runes, and scrying, offer insights into the past, present, and future. These tools enhance spellcasting, guide decision-making, and connect practitioners to higher energies, providing clarity and deeper understanding of the universe and personal destiny.

5.1 Runes: A Comprehensive Guide to Reading and Using Them

Runes are an ancient divination tool, each symbol representing specific energies and wisdom. Used for guidance, spellcasting, and decision-making, runes connect practitioners to deeper truths. Casting runes involves spreads like the Three-Ray layout, while interpretations blend intuition and symbolism. They enhance spellwork and commune with spirits, offering clarity and insight. Runes are versatile, aiding in personal growth, magical practices, and understanding life’s complexities, making them a powerful tool in modern witchcraft.

5.2 Tarot and Oracle Cards in Witchcraft

Tarot and oracle cards are powerful tools for divination, self-reflection, and spellcasting. Tarot decks, with their structured symbolism, offer deep insights, while oracle cards provide direct, intuitive messages. Both guide decision-making, enhance spellwork, and connect practitioners to higher consciousness. Using cards in rituals or daily practice fosters clarity and alignment with magical intentions. Their versatility makes them indispensable for modern witches seeking guidance, transformation, and empowerment in their spiritual and magical journeys.

Herbal and Crystal Magic

Herbal and crystal magic blend nature’s potency with spellwork, enhancing rituals and divination. Herbs and crystals are versatile tools for healing, protection, and manifesting desires, essential in modern witchcraft.

6.1 Herbs in Witchcraft: Spells, Rituals, and Divination

Herbs are integral to witchcraft, used in spells, rituals, and divination for their magical and medicinal properties. From enhancing intuition to manifesting desires, herbs like chamomile and sage are employed in various practices. They can purify spaces, attract positive energy, and promote healing. Incorporating herbs into witchcraft allows practitioners to connect deeply with nature, channeling its power for transformative outcomes and fostering a holistic approach to magic and spirituality.

6.2 Crystals: Properties, Uses, and Charging Techniques

Crystals are powerful tools in witchcraft, each possessing unique properties for healing, protection, and manifestation. From amplifying intentions to absorbing negative energy, crystals like quartz and amethyst are used in spells and rituals. To enhance their effectiveness, crystals are charged under moonlight, through smudging, or by burying them in the earth. Proper care ensures their energy remains potent, making them invaluable allies in magical practices, rituals, and spiritual growth.

Creating a Sacred Space

Creating a sacred space involves setting intentions, cleansing, and charging the area with crystals or herbs. Smudging with sage or palo santo purifies energy, fostering harmony and focus for rituals.

7.1 Setting Up Your Altar

Setting up your altar is a sacred ritual that reflects your personal practice. Start by cleansing the space with sage or palo santo to remove negative energy. Choose a quiet, dedicated area and cover it with a meaningful cloth. Arrange essential tools like your wand, chalice, and athame in a way that feels intuitive. Incorporate crystals, herbs, or seasonal items to connect with nature and amplify your intentions. This space becomes a focal point for rituals, spells, and meditation, fostering a deep connection to your craft.

7.2 Cleansing and Protecting Your Space

Cleansing and protecting your space is essential for maintaining positive energy. Use smudging with sage or palo santo to purify the area. Sound healing, like ringing bells, can also clear stagnant energy. To protect your space, set clear intentions or use crystals like black tourmaline or salt. Regular cleansing ensures a safe and sacred environment for rituals and spells, fostering a strong connection to your practice and promoting harmony within your space.

The Modern Witch Community

The modern witch community thrives online, with forums, social media, and virtual covens fostering connection and knowledge sharing among practitioners of all levels and traditions.

8.1 Online Communities and Forums

Online communities and forums have become vital hubs for modern witches to connect, share knowledge, and grow in their craft. Platforms like Reddit’s r/Wicca, specialized witchcraft forums, and social media groups offer spaces for discussion, resource sharing, and support. These communities often host virtual rituals, workshops, and events, making it easier for witches worldwide to participate and learn from one another.

Such forums also provide a sense of belonging for those who may not have access to local covens or witchcraft circles. They foster collaboration, creativity, and mutual support, helping practitioners navigate their spiritual journeys with confidence and clarity.

8.2 Covens: Joining or Creating Your Own

Ethics and Safety in Witchcraft

Modern witchcraft emphasizes ethical practice, ensuring harm to none. Adhering to the Rule of Three and respecting free will is crucial. Safety in rituals and spellcasting is paramount, requiring clear intention and awareness of potential consequences.

9.1 The Importance of Ethical Practice

Ethical witchcraft is rooted in responsibility and respect for all life. The Rule of Three and the Wiccan Rede guide actions, ensuring harm to none. Practitioners must respect free will and avoid manipulation. Intentions should be pure, and energy used wisely. Unethical practices can lead to negative consequences, both personally and collectively. Maintaining integrity fosters trust and harmony within the witchcraft community, promoting a balanced and positive magical journey.

9.2 Safety Tips for Spellcasting and Rituals

Ensure a clean and sacred space before spellcasting to prevent negative energy interference. Use protective techniques like grounding or casting a circle. Familiarize yourself with tools and ingredients to avoid accidents. Perform rituals during appropriate moon phases for optimal results. Be mindful of your intentions, as they shape the energy you manifest. Keep spells focused and avoid overextending your energy. Respect natural elements and never invoke forces beyond your control. Always close rituals properly to release residual energy safely.

Getting Started on Your Witchcraft Journey

Begin by setting clear intentions and studying the basics of witchcraft. Start with simple practices, such as grounding and centering, to connect with your energy. Experiment with basic spells and rituals using common tools like candles and herbs. Seek guidance from reputable resources, such as books or online communities, to build a strong foundation for your craft.

10.1 Recommended Books and Resources

Begin your journey with essential books like The Modern Guide to Witchcraft by Skye Alexander, offering comprehensive insights into spells, rituals, and modern practices. The Modern Witchcraft Introductory Boxed Set is another valuable resource, providing a foundational guide, spell book, and tools for beginners. Online communities, such as forums and social media groups, are also great for connecting with other witches and gaining knowledge. These resources will help you build a strong foundation and deepen your understanding of the craft.

10.2 Building a Daily Practice

Establishing a daily practice helps deepen your connection to witchcraft. Start with small rituals, such as meditation, journaling, or setting intentions. Incorporate seasonal observations and moon phase magic to align with natural cycles. Consistency is key, allowing you to nurture your inner power and stay attuned to the craft. Even simple acts, like lighting a candle or sipping herbal tea with intention, can create meaningful routines. Over time, these practices will become second nature, fostering personal growth and harmony in your life.

graphic design manual armin hofmann

Armin Hofmann’s Graphic Design Manual is a seminal guide that lays the groundwork for understanding fundamental design principles. First published in 1965, it offers a methodical approach to graphic design challenges, emphasizing point, line, and shape as core elements. The book is celebrated for its clarity and timeless relevance, making it a benchmark for designers seeking to master the economic use of color and typography. Its revised editions continue to inspire contemporary practices, ensuring its enduring influence in the field.

Overview of the Book and Its Significance

Armin Hofmann’s Graphic Design Manual is a groundbreaking resource that has become a cornerstone of graphic design education and practice. Originally published in 1965, the book introduced a methodical approach to solving design challenges, emphasizing the fundamental elements of graphic form: point, line, and shape. Hofmann’s work is renowned for its clarity and precision, offering insights into the economic use of color and typography. The manual’s significance lies in its ability to bridge theory and practice, providing practical exercises and case studies that help designers develop their skills. Over the years, the book has been revised to adapt to contemporary design trends and technological advancements, ensuring its relevance in the digital age. Its influence extends globally, with multi-lingual editions making it accessible to a wide audience. Today, it remains a vital tool for both students and professionals, solidifying its place as a classic in the field of graphic design.

Historical Context and Background

Armin Hofmann’s Graphic Design Manual emerged during a pivotal moment in graphic design history, reflecting the evolution of modernist principles in the mid-20th century. Hofmann, a Swiss designer and educator, was influenced by the International Typographic Style, which emphasized clarity, simplicity, and functional design. His work at the Basel School of Design played a crucial role in shaping his approach, which he documented in the manual. First published in 1965, the book was a response to the growing need for structured design education and practical guidance. Its innovative approach quickly established it as a foundational text, influencing generations of designers. The manual’s historical significance is further underscored by its adaptation over the years, with revised editions incorporating contemporary technologies and design practices while maintaining Hofmann’s core principles. This evolution ensures its continued relevance, making it a timeless resource in the ever-changing landscape of graphic design.

Core Principles of Graphic Design Explored in the Manual

Armin Hofmann’s Graphic Design Manual explores fundamental principles such as point, line, and shape, emphasizing structure, composition, and the economic use of color and typography to create visually cohesive designs.

The Fundamental Elements of Graphic Form: Point, Line, and Shape

Armin Hofmann’s Graphic Design Manual places a strong emphasis on the foundational elements of graphic form: point, line, and shape. These elements are presented as the building blocks of visual communication, essential for creating clear and effective designs. A point, as Hofmann explains, is the simplest form of visual expression, representing a precise location or focus. Lines, on the other hand, define direction, movement, and relationships between elements. Shapes, whether geometric or organic, add complexity and depth to compositions. Hofmann demonstrates how these elements can be combined and manipulated to achieve balance, harmony, and visual impact. By mastering these basics, designers can create designs that are both aesthetically pleasing and functionally effective. Hofmann’s approach is methodical, ensuring that even the most complex designs are rooted in these fundamental principles.

Structure, Composition, and the Economic Use of Color and Fonts

Armin Hofmann’s Graphic Design Manual emphasizes the importance of structure and composition in creating visually effective designs. Hofmann advocates for a systematic approach to arranging elements, ensuring clarity and balance. He stresses the need for hierarchy in composition, guiding the viewer’s eye through the design. Color and typography are treated as powerful tools that must be used sparingly and with purpose. Hofmann’s philosophy revolves around the “economic use” of these elements, where every color choice and font selection serves a clear function. He demonstrates how to apply color to evoke emotions without overwhelming the viewer and how to choose fonts that enhance readability and aesthetic appeal. This approach ensures designs remain clean, professional, and impactful, aligning with Hofmann’s belief that simplicity is the foundation of effective communication.

The Evolution of the Graphic Design Manual

Armin Hofmann’s Graphic Design Manual has evolved significantly since its 1965 debut. Revised editions adapt timeless principles to modern design practices, ensuring its relevance in the digital age, while maintaining its foundational influence.

The Original 1965 Edition and Its Innovative Approach

First published in 1965, Armin Hofmann’s Graphic Design Manual revolutionized the field by introducing a systematic approach to design challenges. It emphasized the fundamental elements of graphic form—point, line, and shape—as the foundation for creating clarity and structure. The book’s innovative approach lay in its methodical analysis of image and form, exploring their inherent laws and applications. Hofmann’s reliance on these basics, combined with the economic use of color and typography, set a new standard for graphic design education and practice. The 1965 edition was groundbreaking, offering designers a clear framework to tackle complex visual problems. Its influence was immediate, establishing it as a benchmark for design excellence. The manual’s concise and visually oriented presentation made it accessible to a broad audience, cementing its status as a seminal work in the evolution of graphic design.

The Revised Editions and Their Adaptation to Contemporary Design

The revised editions of Armin Hofmann’s Graphic Design Manual reflect the evolution of design principles while maintaining the book’s core philosophy. These updates ensure the manual remains relevant in the digital age, addressing contemporary challenges and technological advancements. New sections explore the application of Hofmann’s timeless ideas to modern design tools and practices. The economic use of color and fonts, a hallmark of Hofmann’s approach, is recontextualized for today’s designers. The revised editions also incorporate fresh case studies and practical exercises, providing learners with hands-on experience. By bridging the gap between traditional and digital design, Hofmann’s manual continues to inspire new generations of designers. Its adaptability underscores the universal relevance of its principles, making it an indispensable resource for both educators and practitioners in the field.

Key Features of the Manual

Armin Hofmann’s Graphic Design Manual emphasizes fundamental elements like point, line, and shape, while analyzing image and form. It includes practical exercises and case studies, offering a comprehensive guide for designers to refine their skills effectively.

Analysis of Image and Form: Their Inherent Laws and Applications

Armin Hofmann’s Graphic Design Manual meticulously explores the fundamental elements of image and form, uncovering their inherent laws and applications. Hofmann emphasizes the importance of understanding the basic components—point, line, and shape—as the building blocks of graphic design. He delves into the principles of balance, contrast, and harmony, demonstrating how these elements interact to create visually compelling compositions. The manual also examines the economic use of color and typography, showcasing how simplicity and clarity can enhance communication. Through practical exercises and case studies, Hofmann guides designers in applying these principles to real-world challenges. His approach bridges theory and practice, making complex concepts accessible. This section underscores Hofmann’s belief that mastering the basics is essential for creating effective and timeless designs, ensuring the manual’s relevance across generations of designers.

Practical Exercises and Case Studies for Designers

Armin Hofmann’s Graphic Design Manual is renowned for its practical exercises and case studies, designed to help designers apply theoretical concepts to real-world challenges. These exercises, often inspired by Hofmann’s own teaching methods, encourage experimentation with fundamental elements like point, line, and shape. The manual includes specific tasks that guide designers in exploring the interplay of color, typography, and composition, fostering a deeper understanding of visual communication. Case studies drawn from Hofmann’s student projects and professional work illustrate how these principles can be effectively implemented. The exercises are structured to progressively build skills, from basic form exploration to complex compositional problems. This hands-on approach allows designers to test ideas, refine techniques, and develop a systematic way of thinking. By bridging theory and practice, Hofmann’s manual remains an invaluable resource for both emerging and experienced designers, offering practical insights that enhance creative problem-solving abilities. The inclusion of real-world examples further enriches the learning experience, making the manual a comprehensive toolkit for graphic design education and practice.

Influence of the Manual on Contemporary Graphic Design

Armin Hofmann’s Graphic Design Manual remains a benchmark for contemporary design, inspiring modern practices with its timeless principles of form, color, and typography. Its ideas continue to shape today’s digital and print designs.

How Hofmann’s Ideas Shape Modern Graphic Design Practices

Armin Hofmann’s principles, as outlined in his Graphic Design Manual, have profoundly influenced contemporary graphic design. His emphasis on fundamental elements—point, line, and shape—and the economic use of color and typography continues to inspire designers. Hofmann’s approach to structure and composition is widely adopted in modern design, encouraging clarity and precision. His ideas on minimalism and grid systems remain foundational, guiding digital and print designs alike. The manual’s revised editions have adapted these timeless concepts to modern technologies, ensuring their relevance in the digital age. Hofmann’s work bridges traditional and contemporary practices, making his manual an essential resource for designers seeking to balance creativity with functional design. His legacy is evident in the way his principles are applied to branding, web design, and motion graphics, ensuring his influence endures in the ever-evolving field of graphic design.

The Manual’s Relevance in the Digital Age

Armin Hofmann’s Graphic Design Manual remains remarkably relevant in the digital age, offering timeless principles that transcend traditional mediums. While originally focused on print design, Hofmann’s emphasis on fundamental elements like point, line, and shape continues to guide digital designers. The manual’s revised editions have seamlessly integrated modern technologies, ensuring its concepts apply to web design, motion graphics, and digital interfaces. Hofmann’s approach to structure, composition, and the economic use of color and typography is equally vital in creating responsive and user-friendly designs. The manual’s focus on clear communication and visual hierarchy aligns with contemporary demands for intuitive digital experiences. As a result, it remains a cornerstone for designers adapting to new tools and platforms while staying true to foundational principles. Hofmann’s work continues to inspire innovation, proving that good design is timeless, regardless of the medium.

Armin Hofmann’s Graphic Design Manual stands as a testament to the enduring principles of graphic design. First published in 1965, it has evolved to remain a vital resource in the digital age. Hofmann’s emphasis on fundamental elements like point, line, and shape, along with his economic use of color and typography, continues to inspire designers. The manual’s revised editions have successfully adapted to contemporary technologies, ensuring its relevance for modern practitioners. Its practical exercises and case studies provide invaluable insights for both students and professionals. Hofmann’s work bridges the gap between traditional and digital design, proving that timeless principles are the foundation of innovation. Today, the Graphic Design Manual is not just a historical milestone but a living guide that shapes the future of graphic design.

pentair microbrite manual

Welcome to the Pentair MicroBrite Manual‚ your guide to installing‚ operating‚ and maintaining the MicroBrite Color LED Light for pools and spas․ This manual provides essential information to ensure safe and effective use of the product‚ covering installation steps‚ operational features‚ and maintenance tips to enhance your aquatic experience․

1․1 Overview of the MicroBrite Color LED Light

The MicroBrite Color LED Light is a compact‚ energy-efficient solution designed to enhance pool and spa lighting․ It offers vibrant colors and preprogrammed lighting effects‚ providing exceptional brilliance and uniformity․ Compatible with Pentair automation systems‚ it can be installed horizontally or vertically‚ making it versatile for various pool designs․ Its IP68 rating ensures durability‚ and it operates on 12 VAC for safe‚ low-voltage use․

1․2 Importance of Reading the Manual

Reading the Pentair MicroBrite manual is crucial for proper installation‚ operation‚ and maintenance․ It provides safety precautions‚ installation guidelines‚ and troubleshooting tips‚ ensuring optimal performance and longevity of the product․ Adhering to the manual’s instructions helps prevent damage and ensures compliance with safety standards‚ maximizing the benefits of your MicroBrite Color LED Light for a safe and enjoyable experience․

Installation of the MicroBrite Color LED Light

The MicroBrite Color LED Light is designed for easy installation in pools and spas․ It can be mounted horizontally or vertically in shallow depths‚ ensuring compatibility with various designs․ Proper installation requires adherence to safety guidelines and electrical requirements to ensure optimal performance and longevity of the product․

2․1 Step-by-Step Installation Process

Begin by preparing the mounting location‚ ensuring it is clean and dry․ Install the junction box and connect the light fixture‚ following the wiring diagram․ Mount the MicroBrite light horizontally or vertically‚ securing it firmly․ Connect the electrical supply‚ ensuring compliance with the 12 VAC requirement․ Test the light to confirm proper operation and seal all connections to maintain IP68 water resistance․

2․2 Compatibility with Pool and Spa Designs

The MicroBrite Color LED Light is designed to seamlessly integrate with various pool and spa designs‚ offering flexibility in installation․ Its compact size allows for shallow mounting as low as 10 cm‚ making it suitable for diverse aquatic settings․ The light’s versatility ensures it complements both modern and traditional designs‚ enhancing visual appeal while providing reliable performance in any water feature․

2․3 Horizontal and Vertical Mounting Options

The MicroBrite Color LED Light offers flexible installation with both horizontal and vertical mounting options‚ ensuring compatibility with diverse pool and spa designs․ Its compact design allows for seamless integration into various aquatic features‚ providing aesthetic versatility while maintaining optimal lighting performance in both orientations․

Operating the MicroBrite Color LED Light

Operating the MicroBrite Color LED Light is straightforward‚ with manual control via a wall-mount switch and compatibility with Pentair automation systems for enhanced functionality and convenience․

3․1 Manual Control via Wall-Mount Switch

The MicroBrite Color LED Light can be easily controlled using a standard wall-mount switch‚ allowing users to manually turn the light on/off and select between preprogrammed colors and shows․ Multiple lights can be connected via a junction box for synchronized operation‚ providing a seamless and customizable lighting experience for pools and spas․

3․2 Preprogrammed Color Shows and Fixed Colors

The MicroBrite Color LED Light offers 5 predetermined fixed colors and 7 preprogrammed color shows‚ providing vibrant and dynamic lighting effects․ Users can easily switch between these modes to enhance the ambiance of their pool or spa․ The fixed colors ensure consistent illumination‚ while the color shows create a visually striking experience‚ perfect for various settings and moods․

3․3 Compatibility with Pentair Automation Systems

The MicroBrite Color LED Light seamlessly integrates with Pentair’s automation systems‚ including the IntelliBrite Controller and ControlBrite technology․ This compatibility allows for advanced control over lighting effects‚ enabling synchronized color changes and customizable schedules․ Users can easily manage their pool and spa lighting through a centralized system‚ enhancing convenience and creating a cohesive aquatic environment․

Safety Instructions and Warnings

Always follow safety guidelines to avoid hazards․ Ensure proper installation and operation as per the manual․ Avoid installing in hazardous locations or near flammable materials․ Keep electrical components dry and secure․ Regularly inspect the system for damage or wear․ Follow all local electrical codes and manufacturer recommendations for safe usage․

4․1 Important Safety Precautions

Adhere to all safety guidelines to ensure safe operation․ The MicroBrite light is IP68 rated for water resistance but must be installed correctly to avoid hazards․ Ensure the light is powered by a 12 VAC system and avoid installing in hazardous locations․ Keep electrical components dry and secure․ Regularly inspect the system for damage or wear․ Follow all local electrical codes and manufacturer recommendations for safe usage․

4․2 IP68 Water Resistance and Installation Requirements

The MicroBrite Color LED Light features an IP68 rating‚ ensuring optimal water resistance for underwater use․ Proper installation requires a fitting depth of at least 10 cm and a secure connection to avoid water ingress․ Ensure all electrical connections are made by a licensed professional and comply with local regulations․ Regular maintenance is essential to uphold the IP68 rating and ensure long-term reliability․

Maintenance and Replacement

Regular maintenance ensures optimal performance․ Clean the lens periodically and inspect electrical connections․ Replace worn-out components promptly․ Consult the manual for detailed replacement procedures or contact support for assistance․

5․1 Routine Maintenance Tips

Regularly clean the MicroBrite lens to prevent mineral buildup and ensure vibrant light output․ Inspect electrical connections for wear or corrosion․ Replace any damaged components promptly to maintain performance․ Use a soft cloth and mild detergent for cleaning‚ avoiding abrasive materials that could scratch the surface․ Schedule annual inspections to ensure all parts are functioning optimally․

5․2 Replacement Process for the MicroBrite Light

To replace the MicroBrite Light‚ first disconnect power at the circuit breaker․ Remove the old light by detaching it from its mounting clips․ Install the new light‚ ensuring secure fastening․ Reconnect electrical connections carefully‚ avoiding any damage․ Turn the power back on and test the light to confirm proper operation․ Always follow safety guidelines during replacement․

Troubleshooting Common Issues

Identify common issues like flickering or color inconsistencies․ Check connections‚ ensure proper installation‚ and reset the light if necessary․ Consult the manual for specific solutions․

6․1 Diagnosing Light Malfunctions

Identify issues like flickering or dimming by checking electrical connections and ensuring proper installation․ Verify the power supply and junction box connections․ If issues persist‚ consult the manual for troubleshooting steps or reset the light to restore functionality․ Ensure all components meet the 12 VAC electrical requirements for optimal performance․

6․2 Resetting the MicroBrite Light

To reset the MicroBrite Light‚ turn off the power supply at the breaker for 10 seconds․ Ensure all connections are secure and meet the 12 VAC requirement․ If issues persist‚ consult the manual for detailed troubleshooting steps or contact Pentair support for assistance․ Proper resetting ensures optimal performance and longevity of the LED light system․

Compatibility with Other Pentair Systems

The MicroBrite Light seamlessly integrates with Pentair automation systems‚ including the IntelliBrite Controller and ControlBrite‚ ensuring synchronized lighting and enhanced pool ambiance through advanced control options․

7․1 Integration with IntelliBrite Controller

The MicroBrite Light integrates effortlessly with the IntelliBrite Controller‚ allowing users to control lighting effects‚ color transitions‚ and brightness levels seamlessly․ This integration enhances pool and spa ambiance by synchronizing lighting with other system features‚ offering a cohesive and customizable experience․ The controller provides advanced options for programming and adjusting MicroBrite settings‚ ensuring optimal performance and visual appeal․

7․2 Coordination with ControlBrite Automation

The MicroBrite Light seamlessly integrates with ControlBrite Automation‚ offering synchronized lighting effects and color transitions․ This coordination allows for easy control of multiple lights through a centralized system‚ enhancing pool ambiance․ The system ensures smooth operation and customization of lighting settings‚ providing a cohesive and visually appealing experience for any pool setting‚ perfect for creating a stunning atmosphere every time․

Color Options and Lighting Effects

The MicroBrite offers 5 fixed colors and 7 preprogrammed shows‚ providing vibrant lighting effects to enhance pool ambiance and create stunning visual experiences with ease․

8․1 Fixed Color Modes

MicroBrite offers 5 fixed color modes‚ providing consistent and vibrant lighting options for your pool or spa․ These preprogrammed colors enhance ambiance‚ allowing you to set the perfect mood with options like blue‚ green‚ and red․ Easily control them via a manual switch or integrate with Pentair automation systems for seamless‚ efficient operation‚ transforming your aquatic space with brilliant‚ long-lasting color displays․

8․2 Preprogrammed Color Shows

MicroBrite offers 7 preprogrammed color shows‚ creating dynamic transitions and patterns to enhance your pool or spa ambiance․ These shows provide vibrant‚ synchronized color changes‚ adding visual interest and energy to your aquatic space․ Easily accessible via manual control or automation systems‚ these preprogrammed displays allow you to enjoy a variety of lighting effects with minimal effort‚ delivering a personalized and engaging experience․

Technical Specifications

The MicroBrite operates at 12 VAC‚ ensuring energy efficiency and safety․ With an IP68 rating‚ it offers superior water resistance․ Designed for versatility‚ it fits shallow installations and integrates seamlessly with Pentair automation systems‚ providing reliable performance and advanced lighting control options for pool and spa setups․

9․1 Electrical Requirements (12 VAC)

The MicroBrite Color LED Light operates on 12 VAC‚ ensuring energy efficiency and safety․ Designed for low voltage systems‚ it requires a compatible transformer and must be installed by a licensed electrician․ The 12 VAC system supports seamless integration with Pentair automation systems‚ such as IntelliBrite and ControlBrite‚ while maintaining optimal performance and energy efficiency for pool and spa lighting․

9․2 Dimensions and Fitting Depth

The MicroBrite Color LED Light is designed for versatility‚ with compact dimensions suitable for various pool and spa installations․ It can be installed horizontally or vertically‚ requiring a minimum fitting depth of 10 cm‚ ensuring compatibility with different aquatic designs․ Its sleek profile enhances visual appeal while maintaining functionality and durability in underwater environments․

User Guides and Additional Resources

Access the full Pentair MicroBrite manual online for detailed instructions․ For further assistance‚ contact Pentair support or explore additional resources like ControlBrite automation and IntelliBrite integration guides;

10․1 Accessing the Full Manual Online

The complete Pentair MicroBrite manual is available online at the official Pentair website․ Visit www․pentair․com to download the PDF guide‚ which includes detailed installation steps‚ troubleshooting tips‚ and technical specifications․ This resource ensures you have all the information needed for optimal use and maintenance of your MicroBrite Color LED Light for pools and spas․

10․2 Contact Information for Support

For assistance with your Pentair MicroBrite Color LED Light‚ contact Pentair customer support at 800-831-7133․ You can also visit their official website at www․pentair․com for additional resources‚ FAQs‚ and support options․ Their team is available to address any questions or concerns regarding installation‚ operation‚ or maintenance of your MicroBrite lighting system․

Visual Enhancements for Pool and Spa

The MicroBrite Color LED Light enhances your pool and spa’s visual appeal with vivid colors and dynamic lighting effects‚ creating an inviting and luxurious ambiance for any setting․

11․1 Design Benefits of MicroBrite Lighting

The MicroBrite Color LED Light offers stunning design benefits‚ including vivid color options and dynamic lighting effects that elevate your pool and spa’s aesthetic appeal․ Its compact size and versatile mounting options ensure seamless integration with various pool designs‚ while its energy-efficient technology enhances visual brilliance without compromising performance‚ creating a luxurious ambiance for any setting․

11․2 Enhancing Ambiance with Color Variations

MicroBrite lighting transforms your pool and spa with vibrant color variations‚ creating a captivating ambiance․ Choose from fixed colors or preprogrammed shows to match your mood‚ whether it’s a serene evening or an energetic gathering․ The customizable options allow you to effortlessly transition between settings‚ ensuring a dynamic and visually stunning experience that enhances the beauty of your aquatic space․

Final Thoughts and Conclusion

The Pentair MicroBrite manual provides a comprehensive guide to unlocking your pool and spa’s full potential․ With its brilliant colors and user-friendly features‚ MicroBrite enhances your aquatic experience‚ ensuring safety‚ durability‚ and visual appeal for years to come․ Explore its capabilities to create a stunning ambiance that elevates your outdoor space․

12․1 Summary of Key Features

The MicroBrite Color LED Light offers 5 fixed colors and 7 preprogrammed shows‚ providing vibrant pool and spa illumination․ Designed for 12 VAC operation‚ it features IP68 water resistance‚ ensuring durability․ Compatible with Pentair automation systems like IntelliBrite and ControlBrite‚ it allows seamless integration․ Mountable horizontally or vertically‚ it enhances aquatic spaces with energy-efficient‚ long-lasting LED technology‚ delivering exceptional brilliance and color consistency․

12․2 Encouragement to Explore Full Potential

Take full advantage of the MicroBrite Color LED Light by exploring its vibrant color options‚ preprogrammed shows‚ and automation capabilities․ Experiment with different settings to create unique ambiance for every occasion․ Discover how its compatibility with Pentair systems can elevate your pool and spa experience‚ ensuring you unlock all the features designed to enhance your aquatic enjoyment and outdoor lifestyle․

media and culture 13th edition pdf free

being a key resource. This text examines the evolving media landscape, emphasizing digital convergence and its cultural impact. It addresses critical issues like media literacy, helping students navigate the complexities of modern communication. By understanding media’s role in shaping perceptions, this resource equips learners to critically engage with information in a rapidly changing world.

The 13th edition highlights the intersection of media and culture, offering insights into historical developments and contemporary trends. It emphasizes the importance of media literacy in decoding messages and understanding their influence on societal values. With a focus on accessibility, this text remains a cornerstone for students seeking to comprehend the dynamic interplay between media and culture in the digital age.

Overview of Media and Culture

The intersection of media and culture is a dynamic and evolving field that shapes societal norms, values, and individual identities. Media serves as a reflection of culture, influencing how people perceive and interact with the world. In the 13th edition of Media & Culture, key themes such as digital convergence, media literacy, and the cultural impact of technology are explored. This resource highlights how media platforms, from traditional outlets like newspapers and television to digital spaces like social media, play a pivotal role in shaping cultural narratives. Understanding this relationship is essential for critically engaging with the content that surrounds us, enabling individuals to navigate the complexities of modern communication effectively.

The Evolution of Media

The evolution of media has transformed how information is disseminated and consumed. From traditional print and broadcast media to digital platforms, each advancement has reshaped communication. The 13th edition of Media & Culture details this journey, highlighting the shift from one-way communication to interactive, multimedia experiences. Digital media has democratized information, enabling global access and fostering diverse perspectives. This transformation has not only changed how we consume media but also influenced cultural exchange and societal norms. Understanding this evolution is crucial for navigating the complexities of modern communication effectively.

Media Literacy and Its Importance

Media literacy empowers individuals to critically analyze and interpret media messages, fostering informed decision-making in a digitally saturated world. It is essential for understanding and navigating modern communication effectively.

Understanding Media Literacy

Media literacy refers to the ability to critically analyze, evaluate, and create media messages across various platforms. It involves understanding how media content is produced, distributed, and consumed, as well as recognizing the inherent biases, perspectives, and cultural contexts embedded within. This skill is essential in today’s digital age, where individuals are bombarded with information from multiple sources. By fostering critical thinking, media literacy enables people to discern credible information from misinformation, making informed decisions. It also empowers individuals to engage actively with media, rather than passively consuming it, and to create meaningful content that reflects their own voices and perspectives.

Developing media literacy involves acquiring skills such as identifying propaganda, analyzing visual and textual elements, and recognizing the impact of media on culture and society. It encourages individuals to question the intentions behind media messages and to consider the broader social, political, and economic contexts in which they are created. Ultimately, media literacy is a tool for empowerment, enabling individuals to navigate the complexities of modern communication effectively and responsibly.

Key Concepts in Media Literacy

Key concepts in media literacy include critical thinking, analysis of media messages, and recognition of bias. It involves understanding how media represents different cultures, genders, and social groups, as well as identifying propaganda and misinformation. Media literacy also emphasizes the importance of questioning the purpose and intent behind media content, whether it is to inform, persuade, or entertain. Additionally, it explores the role of visual and textual elements in shaping meaning and the impact of media on public opinion and cultural norms.

By examining these concepts, individuals can better navigate the complexities of modern communication, making informed decisions about the media they consume and create. This skill is increasingly vital in a world saturated with information, enabling individuals to engage critically and responsibly with media.

Media and Culture in the Digital Age

Digital media platforms have revolutionized cultural exchange, enabling global connectivity and instant access to information. This era fosters diverse voices and perspectives, reshaping traditional cultural narratives.

However, it also presents challenges, such as information overload and privacy concerns, requiring critical engagement to navigate the evolving media landscape effectively.

The Impact of Digital Media on Culture

Digital media has profoundly transformed cultural landscapes, enabling unprecedented global connectivity and cultural exchange. It has democratized access to information, fostering diverse voices and perspectives. However, this shift has also raised concerns about cultural homogenization and the erosion of traditional practices. The rise of social media platforms has created new avenues for cultural expression but also amplified issues like misinformation and privacy breaches. The convergence of media platforms has blurred boundaries between local and global cultures, creating a complex, interconnected world. As digital media continues to evolve, its impact on culture remains a critical area of study and reflection.

Navigating this dynamic landscape requires a nuanced understanding of how digital media shapes cultural identities and societal values. By fostering media literacy, individuals can critically engage with digital content, preserving cultural diversity while embracing innovation.

Convergence of Media Platforms

The convergence of media platforms has revolutionized how content is created, distributed, and consumed. Traditional boundaries between text, audio, and visual media have blurred, creating a seamless experience across digital devices. This integration enables users to access diverse content from a single platform, fostering a more interconnected media landscape. The rise of digital media has accelerated this convergence, making it easier for audiences to engage with multimedia content.

Understanding media convergence is essential for media literacy, as it highlights the interconnected nature of modern communication. By recognizing how different media forms intersect, individuals can better navigate and critically analyze the information they encounter in this dynamic, converged environment.

Mass Media and Popular Culture

Mass media significantly influences popular culture, driving trends, entertainment, and societal values. It reflects and shapes cultural identity, adapting to shifts in cultural norms and preferences.

The Relationship Between Media and Popular Culture

The relationship between media and popular culture is deeply intertwined, with media serving as a primary driver of cultural trends and values. From movies and music to social media, media platforms shape societal norms, influencing how people perceive and engage with the world. Popular culture, in turn, reflects and amplifies these media narratives, creating a dynamic interplay. Media outlets often draw inspiration from cultural movements, while also setting new trends that define generations. This symbiotic relationship highlights the power of media in shaping identity, entertainment, and societal discourse, making it a cornerstone of modern cultural expression and evolution.

Cultural Periods and Media Influence

Cultural periods are profoundly shaped by media, which reflects and amplifies societal values and trends. From the print era to digital media, each period has been defined by the dominant communication technologies of its time. Historical events, such as the Civil Rights Movement, were influenced by media coverage that brought attention to social injustices. Similarly, the rise of digital media has created new cultural phenomena, reshaping how people consume information and connect globally. Media not only documents cultural shifts but also drives them, making it a central force in shaping identity and societal change across generations. Understanding this relationship is key to grasping the evolution of culture in tandem with media advancements.

Advertising and Commercial Culture

Advertising and commercial culture are central to the business of mass media, shaping consumer behavior through persuasive techniques and framing messages to influence public perception and market trends.

The Business of Mass Media

The business of mass media revolves around economic structures, revenue streams, and ownership models that sustain media industries. Advertising is a cornerstone, generating billions annually through persuasive techniques that influence consumer behavior. Media conglomerates dominate the landscape, often prioritizing profit over public interest. The rise of digital platforms has disrupted traditional revenue models, with streaming services and online ads reshaping how media companies operate. Understanding the business side is crucial for grasping how media content is produced, distributed, and consumed. This section explores the financial dynamics of mass media, including the role of commercial culture and its impact on media messaging and societal influence.

Public Relations and Framing the Message

Public relations (PR) involves strategically crafting and disseminating messages to shape public perception, build relationships, and maintain organizational reputations. It relies on understanding audiences, media platforms, and cultural contexts to deliver tailored communications. PR professionals use persuasive techniques, storytelling, and ethical framing to influence opinions and behaviors. In the digital age, PR has evolved to leverage social media, data analytics, and multimedia content for more targeted and impactful campaigns. Ethical considerations, such as transparency and accuracy, are critical to maintaining trust. This section explores how PR professionals frame messages to align with organizational goals while addressing societal values and expectations.

By analyzing case studies and industry practices, students gain insights into the role of PR in modern communication, highlighting its intersection with media, culture, and public discourse.

Accessing Educational Resources

Students can access free PDFs of academic textbooks like Media & Culture, 13th Edition through platforms like annas-archive.org or open textbook initiatives, reducing educational costs significantly;

How to Find Free PDFs of Academic Textbooks

Finding free PDFs of academic textbooks, such as Media & Culture, 13th Edition, can be achieved through various online platforms. Websites like annas-archive.org and open textbook initiatives offer free access to educational materials. Additionally, platforms like Quizlet provide flashcards and study resources that may include excerpts or summaries from textbooks. Some users also share free PDF versions of textbooks on forums or social media groups. However, it’s important to verify the credibility and legality of these sources to ensure compliance with copyright laws. Open textbooks, which are licensed for free use, are another reliable option for accessing high-quality educational content without cost.

Open Textbooks and Their Benefits

Open textbooks offer a cost-effective and flexible alternative to traditional academic materials. They are freely available under licenses that allow users to read, download, and modify content without restrictions. Platforms like OpenStax and Project Gutenberg host thousands of open textbooks, including titles like Media & Culture, 13th Edition. These resources reduce financial barriers for students, enabling equal access to quality education. Open textbooks also empower educators to customize content to meet specific curriculum needs. By promoting collaboration and innovation, open textbooks play a vital role in democratizing education and fostering lifelong learning opportunities for all.

Media and Society

Media and Society explores how media profoundly shapes societal perceptions, cultural values, and social interactions. It examines the role of media in reflecting and influencing collective norms and behaviors.

The Role of Social Values in Communication

, highlights how media serves as a mirror of societal values, impacting perceptions of identity, morality, and justice. By examining the interplay between media and culture, this text emphasizes the importance of understanding how social values are communicated and how they evolve over time. This insight is crucial for fostering critical thinking and ethical communication in a diverse, media-driven world.

Media Coverage of National and Global Issues

, explores how media coverage of events like the coronavirus pandemic and political crises reflects and shapes societal responses. The text highlights the responsibility of media in providing balanced and accurate coverage, while also addressing challenges like misinformation and bias. By examining these dynamics, the book equips readers to critically analyze media’s role in shaping global and national discourse.

blank multiplication table pdf

Welcome to the world of learning with Blank Multiplication Tables! These tools are designed to help students master multiplication facts through interactive and visual practice․ Available as PDFs, they offer a flexible way to engage with math skills, whether at home or in the classroom․ Blank charts allow learners to fill in multiplication facts, making the process both educational and enjoyable․ Discover how these resources can transform math practice into an effective and fun experience for everyone!

Overview of Blank Multiplication Tables

Blank Multiplication Tables are educational tools designed to help students learn and practice multiplication facts․ Available in various grid sizes like 10×10, 12×12, and 15×15, these charts provide a structured format for filling in multiplication results․ They are often downloaded as PDFs for easy printing and use in classrooms or at home․ These tables are customizable, allowing learners to focus on specific number ranges and practice multiplication in a visually organized way․

Importance of Using Blank Multiplication Charts

Using Blank Multiplication Charts is essential for effective math learning․ These tools enhance memory retention by allowing students to actively engage with multiplication facts․ They provide a clear, visual structure that simplifies complex concepts, making them ideal for both classroom and home use․ Regular practice with these charts builds confidence and fluency in math skills, preparing students for more advanced arithmetic operations․

Benefits of Blank Multiplication Tables

Blank Multiplication Tables offer numerous advantages for learning math․ They improve retention, encourage active engagement, and build confidence in multiplication skills․ Regular use enhances fluency and accuracy․

Improved Retention and Recall of Multiplication Facts

Filling out Blank Multiplication Tables helps reinforce memory and ensures long-term retention of multiplication facts․ By actively engaging with the charts, students develop a stronger grasp of numerical relationships․ Repeated practice strengthens recall, making complex calculations more intuitive․ The visual structure of the tables also aids in recognizing patterns, further enhancing understanding and fluency in math skills․ This method is particularly effective for building a solid foundation in multiplication․

Encouraging Active Learning and Engagement

Blank Multiplication Tables foster active learning by allowing students to take control of their practice․ Unlike passive methods, filling in the charts requires hands-on participation, making the learning process more engaging․ This interactive approach helps students stay focused and motivated, as they see their progress firsthand․ The tactile experience of writing down answers also enhances understanding, making these charts a valuable tool for developing math skills in a dynamic and effective way․

Building Confidence in Math Skills

Blank Multiplication Tables empower students to gain confidence in their math abilities․ By gradually filling in the charts, learners can track their progress and celebrate small victories․ This sense of achievement boosts self-esteem, reducing anxiety around multiplication․ The structured format provides clarity, helping students feel more secure in their understanding․ With consistent practice, these tools enable learners to approach math with renewed confidence and a positive mindset, fostering long-term success in their academic journey․

Formats and Sizes of Blank Multiplication Tables

Blank Multiplication Tables are available in various formats, including PDF and SVG, with standard sizes like 10×10, 12×12, 15×15, and 20×20․ Special formats include highlighted squares and color-coded options for enhanced learning․

Standard Grid Sizes (10×10, 12×12, 15×15, 20×20)

Blank Multiplication Tables are offered in a variety of standard grid sizes, including 10×10, 12×12, 15×15, and 20×20․ These sizes cater to different learning needs, from basic to advanced multiplication practice․ The 12×12 grid is particularly popular in educational settings, while larger grids like 15×15 and 20×20 provide extended practice for older students․ All grids are available in PDF format, making them easy to download and print for both home and classroom use․

Special Formats (Highlighted Squares, Color-Coded Options)

Blank Multiplication Tables are available in special formats to enhance learning․ Some charts feature highlighted squares, such as perfect squares along the diagonal, while others offer color-coded options to differentiate between numbers or highlight specific patterns․ These designs make the charts visually engaging and help students focus on key areas․ Color-coded options can also assist in identifying multiples of certain numbers, like 5 or 10, making practice sessions more interactive and effective․

Black and White vs․ Colorful Designs

Blank multiplication tables are available in both black and white and colorful designs, catering to different learning preferences․ Classic black and white charts are simple and ideal for those who prefer a no-frills approach, while colorful designs add visual appeal and engagement․ Some charts feature highlighted squares or color-coded patterns to make learning more interactive․ Both options are available as PDFs, ensuring versatility for home or classroom use․ Choose the style that best suits your learning or teaching needs!

Downloading and Printing Blank Multiplication Tables

Blank multiplication tables are widely available in PDF and SVG formats, making them easy to download and print․ Many websites offer free printable options, suitable for both home and classroom use․ Choose from various sizes, such as 10×10 or 12×12 grids, to meet your needs․ Simply select, download, and print to create a handy learning tool for mastering multiplication facts!

Availability in PDF and SVG Formats

Blank multiplication tables are readily available for download in PDF and SVG formats, ensuring high-quality printing and versatility․ These files are designed to be user-friendly, with options for standard sizes like 10×10 or 12×12 grids․ Many websites offer free printable versions, often in A4 format, making them accessible for both home and classroom use․ Some charts feature special designs, such as highlighted squares or color-coded options, to enhance learning․ Downloading and printing these resources is simple, allowing educators and students to utilize them effectively for practicing multiplication facts․

Free Printable Options for Home and Classroom Use

Blank multiplication tables are available as free printable PDFs, making them a cost-effective solution for math practice․ These resources are ideal for both home and classroom settings, offering flexibility for educators and parents․ Many websites provide printable charts in various sizes, such as 10×10 or 12×12 grids, ensuring they meet diverse learning needs․ With convenient downloads, these tools are easily accessible, promoting math fluency and engagement for students of all ages and skill levels․ Their versatility makes them a valuable asset for any learning environment․

Using Blank Multiplication Tables for Learning

Blank multiplication tables are an excellent tool for interactive learning, helping students build a strong foundation in multiplication facts through hands-on practice and visualization․

Step-by-Step Guide to Filling in the Charts

Start by selecting the appropriate grid size (e․g․, 10×10 or 12×12) based on the learner’s skill level․
Begin with the multiplication facts the learner is most familiar with, filling in the corresponding cells․
Use the table’s structure to identify patterns and relationships between numbers․
Encourage learners to verify their answers using a completed chart or calculator․
Gradually fill in more challenging facts, building confidence and fluency in multiplication skills․
Regular practice with these charts reinforces retention and recall of multiplication facts effectively․

Integrating Blank Charts into Daily Math Practice

Incorporate blank multiplication charts into daily routines by setting aside a few minutes for focused practice․ Use the charts to reinforce specific multiplication facts or as a tool for homework review․ Encourage learners to fill in a few cells each day, gradually increasing difficulty․ Pair the charts with interactive activities, such as flashcards or games, to create a well-rounded learning experience․ Consistency is key to building fluency in multiplication skills․

Examples of Blank Multiplication Tables

Explore various blank multiplication table PDFs, such as 12×12, 15×15, or 20×20 grids․ These charts offer customizable options, including highlighted squares or color-coded designs, catering to different learning styles and preferences․ Perfect for both classroom and home use, they provide a structured yet flexible way to practice multiplication facts․ Choose the size that best suits your learning needs and start mastering multiplication today!

12×12 Blank Multiplication Chart

The 12×12 blank multiplication chart is a popular tool for learning multiplication facts up to 144․ Available as a PDF download, it features a grid layout with rows and columns numbered from 1 to 12․ Students can fill in the products to reinforce their understanding․ This chart is ideal for focused practice, allowing learners to concentrate on specific multiplication facts․ Its clear design makes it easy to track progress and identify areas needing improvement․ Perfect for both classroom and home use, the 12×12 chart is a versatile resource for mastering multiplication skills․

15×15 Blank Multiplication Grid

The 15×15 blank multiplication grid offers a comprehensive way to practice multiplication facts up to 15×15, resulting in products up to 225․ Available as a PDF or high-resolution SVG, this grid is ideal for advanced learners or those needing additional practice․ Some versions feature highlighted squares, such as perfect squares or multiples of 5 and 10, to aid pattern recognition․ This versatile tool supports students in building a strong foundation for higher-level math concepts, making it a valuable resource for both classroom and home use․

Blank multiplication tables are invaluable tools for mastering math skills, offering flexibility and engagement for learners of all levels․ Their effectiveness in education is undeniable, making them a timeless resource for home and classroom use․

Final Thoughts on the Effectiveness of Blank Multiplication Tables

Blank multiplication tables are proven to enhance learning by providing a structured yet flexible approach to mastering multiplication facts․ They cater to diverse learning styles, making math practice engaging and accessible․ Available in various formats like PDF, these charts are ideal for both home and classroom use․ Their ability to promote active learning and reinforce math skills ensures they remain a valuable educational resource for students of all ages․

Additional Resources

Explore recommended websites offering free blank multiplication tables in PDF and SVG formats․ These resources provide customizable charts for effective math practice, suitable for all learning needs․

Recommended Websites for Downloading Blank Multiplication Charts

Several websites offer high-quality blank multiplication charts for download․ Memozor․com provides a variety of formats, including A4-sized PDFs with standard grid sizes like 10×10, 12×12, and 15×15․ Teach-nology․com features customizable charts with options for color-coding and highlighting․ Additionally, DadsWorksheets․com offers free printable PDFs in black and white or colorful designs․ These websites cater to both classroom and home use, ensuring accessible tools for math practice․