nikon f100 instruction manual

Welcome to the Nikon F100 Instruction Manual, your comprehensive guide to mastering this professional SLR camera․ This manual covers key features, controls, and advanced functions to enhance your photography experience․ Designed for both beginners and experts, it ensures optimal use of the F100’s capabilities, including its Multi-CAM1300 autofocus system and dynamic AF modes․ Reading this manual thoroughly will help you unlock the full potential of your camera․

Overview of the Nikon F100 Camera

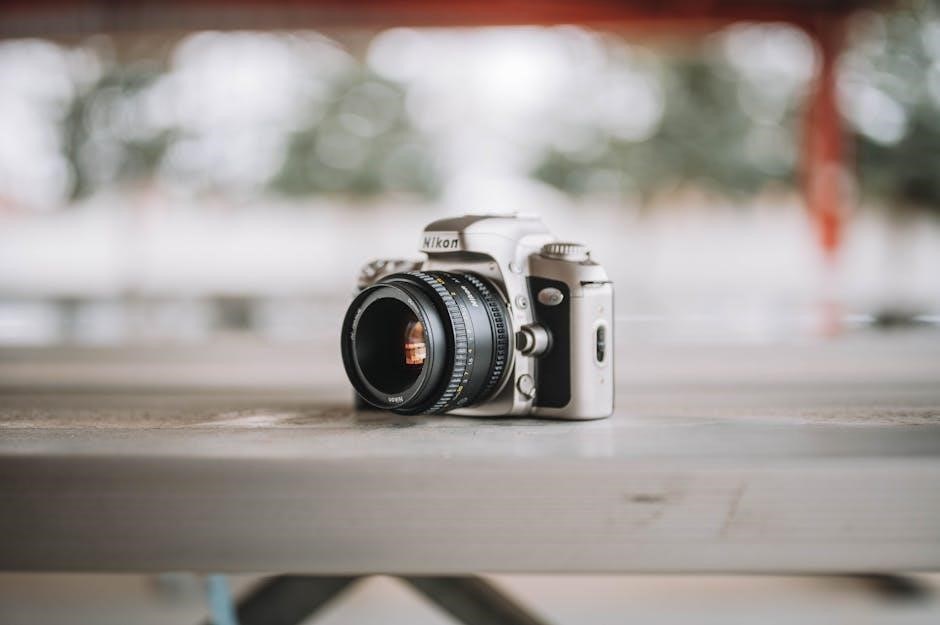
The Nikon F100 is a professional 35mm SLR camera renowned for its durability and weather-sealed design․ It features the advanced Multi-CAM1300 autofocus system with five-area autofocus for precise and fast focusing․ Compatible with a wide range of Nikon lenses and accessories, the F100 supports continuous shooting at up to 4․5 frames per second with the MB-10 battery grip․ Its ergonomic design and intuitive controls make it a versatile tool for photographers, offering manual and automatic modes for enhanced creativity and control over lighting and composition; The F100 also integrates seamlessly with Nikon’s Speedlight flash systems, including the SB-80DX and SB-28, for advanced lighting solutions․ This camera is a testament to Nikon’s commitment to innovation and reliability, catering to both professionals and enthusiasts seeking high-quality results in various shooting conditions․

Importance of Reading the Manual

Reading the Nikon F100 instruction manual is essential to fully understanding and utilizing the camera’s advanced features; It provides detailed guidance on operating modes, customization options, and troubleshooting common issues․ The manual ensures you maximize the camera’s potential, from its autofocus system to flash compatibility․ By familiarizing yourself with the manual, you can explore creative possibilities and maintain optimal performance․ Keep it handy for quick reference and to troubleshoot any challenges you encounter while shooting․

Key Features of the Nikon F100

The Nikon F100 boasts advanced flash technology, compatibility with Speedlight models like SB-80DX, and continuous shooting capabilities, making it a versatile tool for professional photographers and enthusiasts alike․

Multi-CAM1300 Autofocus System

The Nikon F100’s Multi-CAM1300 autofocus system delivers exceptional performance, featuring five focus areas with cross-type sensors for enhanced accuracy․ This advanced system supports dynamic AF, enabling precise subject tracking and continuous shooting․ With its rapid response and versatility, the Multi-CAM1300 ensures sharp focus in various lighting conditions, making it ideal for professional photographers seeking reliability and speed․

Advanced Flash Technology

The Nikon F100 features advanced flash technology, offering compatibility with high-performance Speedlight models like the SB-80DX, SB-28/28DX, and SB-27․ These units provide precise flash control, enabling enhanced creativity and versatility in various lighting conditions․ The system supports wireless flash operation, multiple flash units, and advanced metering, ensuring professional-grade results․ This technology expands the camera’s capabilities, making it ideal for photographers seeking superior illumination control and flexibility in their work․

Getting Started with the Nikon F100

Welcome to the Nikon F100․ Start by installing batteries and checking power levels to ensure proper function․ Familiarize yourself with initial factory settings to begin shooting effortlessly․

Installing Batteries and Checking Power

Begin by installing the required batteries in the Nikon F100․ Open the battery compartment and insert the batteries according to the polarity markings․ Close the compartment securely․ Turn on the camera and check the power level using the LCD panel or viewfinder․ Ensure the batteries are fully charged or replace them if the power level is low․ Proper battery installation is essential for optimal camera performance and metering accuracy․ Always use fresh or fully charged batteries for reliable operation․

Initial Factory Settings

The Nikon F100 comes with predefined factory settings optimized for general photography; These settings include configurations for autofocus, metering modes, and flash synchronization․ To restore the camera to its original factory settings, refer to the manual for specific instructions․ Resetting ensures consistent performance and serves as a baseline for custom adjustments․ Always consult the manual for guidance on resetting or modifying these settings to suit your photography needs․

Understanding the Camera Controls

The Nikon F100’s controls are designed for intuitive operation․ The Focus Mode Selector and Command Dials provide easy access to key functions, enabling precise adjustments․ Custom settings allow personalization, ensuring a tailored photography experience․

Focus Mode Selector and Command Dials

The Focus Mode Selector on the Nikon F100 allows switching between Manual Focus, Single AF, and Continuous AF modes․ The Command Dials provide quick access to aperture, shutter speed, and exposure compensation․ Together, they offer intuitive control, enabling precise adjustments and seamless operation during shooting․ Their ergonomic design ensures easy handling, making it simple to customize settings for optimal results in various photography situations․

Custom Settings and Personalization

The Nikon F100 offers extensive customization options, enabling photographers to tailor camera settings to their preferences․ The Command Dials can be set to control either aperture or shutter speed, enhancing shooting flexibility․ Additionally, the camera allows customization of autofocus modes and metering options, optimizing performance for various scenarios․ The instruction manual provides detailed guidance on adjusting these settings, ensuring photographers can personalize their experience effectively for better control․

Shooting Modes and Exposure Control

The Nikon F100 offers various shooting modes, including Shutter-Priority Auto and Manual, providing precise control over exposure settings․ These modes, combined with dynamic AF, enhance creative photography;

Shutter-Priority Auto and Manual Modes

In Shutter-Priority Auto mode, the F100 allows you to set the shutter speed while the camera automatically adjusts the aperture․ This is ideal for controlling motion and depth of field․ Manual mode offers full control over both shutter speed and aperture, enabling precise adjustments for creative results․ Both modes are accessible via the Sub-Command Dial, providing flexibility for various lighting conditions and artistic expression․ This ensures optimal exposure in diverse photography scenarios․

Dynamic AF and Continuous Shooting

The Nikon F100 features Dynamic AF, enhancing autofocus performance during continuous shooting․ This mode predicts subject movement, ensuring sharp images in high-speed sequences․ The camera achieves up to 4․5 frames per second in continuous shooting mode, making it ideal for capturing action․ Dynamic AF seamlessly integrates with the Multi-CAM1300 system, allowing precise subject tracking․ This combination delivers rapid and accurate focus acquisition, even with moving subjects, ensuring crisp results in dynamic photography situations․

Autofocus and Metering Systems

The Nikon F100 employs the Multi-CAM1300 autofocus system, offering cross-ranged five-area AF for precise subject tracking․ Its advanced metering systems, including 3D Matrix Metering, ensure accurate exposure control in various lighting conditions․

Cross-Ranged Five-Area Multi-CAM1300

The Nikon F100 features the Multi-CAM1300 autofocus system, delivering fast and precise focusing with its cross-ranged five-area sensor configuration․ This advanced system excels in dynamic shooting situations, offering superior subject tracking and enhanced accuracy․ The five focus areas work seamlessly to ensure sharp images, even when subjects are in motion or positioned off-center․ This technology is a cornerstone of the F100’s performance, enabling photographers to capture decisive moments with confidence and clarity․

Dynamic AF for Enhanced Performance

Dynamic AF on the Nikon F100 improves autofocus performance by predicting subject movement, ensuring sharp images in continuous shooting modes․ The system dynamically adjusts focus points based on subject speed and direction, reducing blur and misfocus․ This feature is particularly effective in sports and wildlife photography, where capturing fleeting moments is crucial․ Combined with the Multi-CAM1300 sensor, Dynamic AF elevates the F100’s capabilities, making it a reliable choice for demanding shooting scenarios․

Flash and External Accessories

The Nikon F100 supports advanced flash systems, including compatibility with Speedlight models like SB-80DX, SB-28, and SB-27․ These accessories expand the camera’s flash capabilities for various lighting needs, ensuring precise control and enhanced creativity in different shooting scenarios․

Compatibility with Nikon Speedlight Models

The Nikon F100 seamlessly integrates with various Nikon Speedlight models, including the SB-80DX, SB-28/28DX, and SB-27․ These flashes offer advanced features like TTL metering and wireless operation, enhancing flexibility in lighting setups․ The camera’s hot shoe and sync terminal ensure reliable flash connectivity, allowing photographers to achieve professional results in diverse lighting conditions․ This compatibility makes the F100 a versatile tool for creative and precise flash photography․

Using the SB-80DX, SB-28/28DX, and SB-27

The SB-80DX, SB-28/28DX, and SB-27 Speedlights are fully compatible with the Nikon F100, offering enhanced flash capabilities․ The SB-80DX features a built-in bounce card and wide-angle diffuser, while the SB-28/28DX includes a zoom head for precise coverage․ The SB-27, with its compact design, is ideal for on-camera use․ These Speedlights support TTL auto-flash, enabling accurate exposure control and creative lighting options, making them essential accessories for professional photographers using the F100․

Advanced Features and Functions

The Nikon F100 boasts advanced features like Dynamic AF and continuous shooting modes, enhancing your photography experience with precise control and versatility for professional results․

Viewfinder and LCD Display

The Nikon F100 features a high-eyepoint viewfinder with 100% frame coverage, ensuring precise composition․ The built-in diopter adjustment allows for personalized focus․ The LCD display provides essential shooting information, including mode, aperture, and shutter speed, while the top LCD panel offers quick access to settings․ These features enhance shooting efficiency and customization, making the F100 a versatile tool for photographers seeking both accuracy and convenience in their workflow․

Program Modes and Shooting Options

The Nikon F100 offers versatile program modes, including Program, Shutter-Priority, Aperture-Priority, and Manual, catering to both automatic and manual shooting preferences․ These modes provide flexibility for various lighting conditions and creative control․ Additional shooting options include Dynamic AF and continuous shooting, enhancing performance in dynamic situations․ Customization settings allow photographers to tailor the camera to their preferences, ensuring optimal results in diverse photography scenarios․

Troubleshooting and Maintenance

Regular maintenance ensures optimal performance․ Clean the camera body and viewfinder․ Check for firmware updates․ Refer to the manual for solutions to common issues like error codes or shutter malfunctions;

Common Issues and Solutions

Common issues with the Nikon F100 include battery drain, autofocus malfunctions, and error codes․ For battery drain, check power settings or replace batteries․ Autofocus issues may require sensor cleaning․ Error codes like “Err” indicate problems; reset the camera or consult the manual․ Regular cleaning of the viewfinder and lenses prevents debris buildup․ Ensure firmware is updated for optimal performance․ Refer to the manual for detailed troubleshooting guides․

Cleaning and Care Tips

Regular cleaning and proper care ensure the Nikon F100’s longevity․ Use a soft, dry cloth to wipe the viewfinder, LCD, and camera body․ Avoid harsh chemicals or abrasive materials․ Clean lenses with a microfiber cloth and lens cleaning solution․ Store the camera in a dry, cool place to prevent moisture damage․ Use a protective case when not in use․ For detailed maintenance, consult the manual to ensure optimal performance and preserve your equipment․

Downloading and Accessing the Manual

The Nikon F100 instruction manual is available for free download as a PDF from Nikon’s official website or trusted platforms like manualzilla․ Access online viewing options for convenience․

PDF Download Options and Resources

The Nikon F100 instruction manual is readily available for download as a PDF from Nikon’s official website, trusted platforms like manualzilla, or photography resource sites․ The manual spans 112 pages, providing detailed guidance on camera features, settings, and troubleshooting․ Users can access it in multiple languages, including English and German․ Ensure to download from reputable sources to avoid low-quality scans․ This PDF guide is essential for mastering the F100’s advanced features and optimizing its performance․

Online Viewing and Reference Guides

The Nikon F100 instruction manual can be viewed online through Nikon’s official website or trusted platforms like manualzilla․ This convenient option allows users to access the guide without downloading, ensuring quick reference․ The manual is available in multiple languages, including English and German, and covers detailed sections like camera controls, shooting modes, and troubleshooting․ Online viewing is ideal for quick access to specific information, making it a valuable resource for photographers․

Additional Resources and Support

Nikon offers comprehensive software tools like Nikon View and Transfer for image management․ Compatible accessories and equipment enhance functionality, with detailed support available on Nikon’s official website․

Nikon Software and Transfer Tools

Nikon provides advanced software solutions for efficient image management․ Nikon View and Transfer tools enable seamless image downloading and organization․ These programs support batch processing, tagging, and editing․ Nikon View 5 offers enhanced features for advanced users, while Nikon Transfer 2 simplifies file management․ Compatible with the F100, these tools enhance your workflow and ensure optimal performance; Visit Nikon’s official website for detailed guides and software downloads tailored to your camera․

Compatible Accessories and Equipment

The Nikon F100 supports a wide range of accessories to enhance its functionality․ Compatible Nikon Speedlight models like the SB-80DX, SB-28/28DX, and SB-27 provide advanced flash capabilities․ Additional equipment includes remote controls, tripods, and specialized lenses for diverse photography needs․ For detailed compatibility and usage, refer to Nikon’s official resources or the instruction manual, ensuring optimal performance with genuine Nikon accessories and equipment․

celf 5 manual pdf

The CELF-5 manual is a comprehensive guide for assessing language skills in children. It provides standardized tests and observational tools to identify language disorders and strengths‚ aiding speech-language pathologists in diagnosis and intervention planning.

Overview of the CELF-5 Assessment

The CELF-5 assessment is a standardized tool designed to evaluate language skills in children and adolescents. It includes a Screening Test to identify students who may require further assessment. The Observational Rating Scale (ORS) documents classroom behaviors and interactions. The test comprises Record Forms for age ranges 5–8 and 9–21‚ along with a Reading and Writing Supplement for older students. It aims to identify language and literacy disorders while documenting strengths and weaknesses. The CELF-5 is widely used by speech-language pathologists to inform intervention strategies and support academic success. Its design ensures comprehensive evaluation of linguistic abilities‚ providing valuable insights for educators and clinicians.

Importance of the CELF-5 Manual for Speech-Language Pathologists

The CELF-5 manual is an essential resource for speech-language pathologists (SLPs)‚ providing standardized methods to assess and interpret language skills in children. It enables SLPs to identify language disorders‚ document progress‚ and inform intervention strategies. The manual offers practical guidelines for administration‚ scoring‚ and interpretation‚ ensuring accurate and reliable results. By using the CELF-5‚ professionals can support clinical decision-making‚ guide individualized education plans‚ and monitor therapeutic outcomes. Its comprehensive approach helps SLPs address diverse linguistic needs‚ making it a cornerstone tool in speech-language pathology practice. The manual also serves as a valuable resource for collaborating with educators and parents to foster effective communication strategies.

Structure of the CELF-5

The CELF-5 consists of multiple components‚ including core tests‚ screening tools‚ and observational rating scales. These elements work together to comprehensively assess language skills and interpret results effectively.

Components of the CELF-5 Assessment

The CELF-5 assessment includes various components designed to evaluate different aspects of language abilities. Core tests focus on areas like sentence comprehension and word structure‚ while the Screening Test identifies students needing further evaluation. The Observational Rating Scale (ORS) documents classroom behaviors and interactions‚ providing insights into functional language skills. Additional materials‚ such as the Reading and Writing Supplement‚ cater to specific age ranges‚ ensuring a comprehensive evaluation. Together‚ these components offer a detailed understanding of a student’s language strengths and weaknesses‚ aiding in accurate diagnosis and tailored intervention strategies.

CELF-5 Screening Test: Purpose and Administration

The CELF-5 Screening Test is designed to quickly identify students who may require further language assessment. It is administered to individuals or groups‚ typically in educational settings‚ to flag potential language difficulties. The test evaluates core language skills‚ such as sentence comprehension and word structure‚ through age-appropriate tasks. Administration is straightforward‚ with clear instructions for examiners to ensure reliability. Results help determine whether a student should be referred for a comprehensive evaluation. This tool is particularly useful for speech-language pathologists and educators to detect early signs of language delays or disorders‚ ensuring timely intervention and support.

Key Features of the CELF-5 Manual

The CELF-5 manual includes updated norms‚ a stimulus book for sentence comprehension‚ and guidelines for age-range administration. It also features metalinguistics assessments and improved scoring methods.

Stimulus Book Picture Format for Sentence Comprehension

The CELF-5 manual includes a stimulus book with pictures designed to support sentence comprehension tasks. These visuals provide clear‚ age-appropriate scenarios to aid in assessing language skills. The format ensures consistency and fairness in administration‚ aligning with age-range guidelines. Figure 3.6 illustrates the layout‚ showcasing how images correlate with test items to evaluate understanding effectively.

Guidelines for Age-Range Administration

The CELF-5 manual provides specific guidelines for administering tests across different age ranges. These guidelines ensure assessments are tailored to the developmental level of each child. For instance‚ younger children may require simpler instructions‚ while older children can handle more complex tasks. The manual outlines time limits and item difficulty progression‚ ensuring accurate and fair evaluation. Adhering to these guidelines helps speech-language pathologists obtain reliable results‚ making it easier to identify language strengths and weaknesses effectively.

Administration and Scoring

The CELF-5 manual outlines standardized administration procedures and scoring methods. These ensure accurate assessment of language skills‚ providing reliable and valid results for diagnostic purposes.

Step-by-Step Administration Guidelines

The CELF-5 manual provides detailed‚ step-by-step administration guidelines to ensure accurate and reliable assessment results. Begin by preparing all necessary materials‚ including test forms and stimulus books. Administer the screening test first to identify students who may require further evaluation; For core tests‚ follow the specified order and timing to maintain standardization. Introduce each task clearly‚ using examples and practice items to ensure comprehension. Score responses immediately‚ adhering to criteria outlined in the manual. Use the Observational Rating Scale (ORS) to document classroom behaviors and language use. Finally‚ interpret results by comparing scores to age-based norms‚ ensuring consistent and valid outcomes. Retesting should follow guidelines to avoid practice effects.

Scoring Methods and Interpretation of Results

Scoring the CELF-5 involves calculating raw scores for each subtest‚ which are then converted to standard scores based on age-based norms. Interpretation guidelines help determine if scores fall within typical or atypical ranges. The manual provides criteria for identifying strengths and weaknesses‚ allowing for a comprehensive understanding of a child’s language abilities. Composite scores offer a holistic view of language performance‚ while the Observational Rating Scale (ORS) adds qualitative insights. Results are interpreted in the context of normative data‚ enabling professionals to make informed decisions about diagnosis and intervention. Accurate scoring and interpretation are crucial for reliable assessment outcomes‚ ensuring effective support for children with language challenges.

Clinical Applications of the CELF-5

The CELF-5 is widely used to identify language disorders‚ document strengths and weaknesses‚ and guide targeted interventions‚ making it a valuable tool for speech-language pathologists in clinical and educational settings.

Identifying Language and Literacy Disorders

The CELF-5 is a critical tool for identifying language and literacy disorders in children. It provides standardized measures to assess various aspects of language skills‚ including comprehension‚ expression‚ and phonological awareness. By evaluating these areas‚ speech-language pathologists can detect specific deficits and determine the presence of disorders such as dyslexia or developmental language disorder. The assessment also helps differentiate between language difficulties and other conditions‚ ensuring accurate diagnoses. Additionally‚ the CELF-5 offers insights into a child’s strengths‚ which can guide targeted interventions. Its comprehensive approach allows clinicians to link assessment results directly to treatment strategies‚ making it an essential resource for supporting children with language and literacy challenges. Regular use of the CELF-5 ensures early identification and effective monitoring of progress over time.

Documenting Patterns of Relative Strengths and Weaknesses

The CELF-5 manual emphasizes the importance of documenting patterns of relative strengths and weaknesses in children’s language and literacy skills. This approach helps clinicians understand the nuances of a child’s abilities‚ identifying areas where they excel and areas requiring support. By analyzing these patterns‚ speech-language pathologists can develop targeted interventions that build on strengths while addressing weaknesses. The CELF-5 provides standardized measures to compare a child’s performance to peers‚ ensuring accurate documentation. This detailed profile aids in creating personalized treatment plans and monitoring progress over time. Documenting these patterns also supports collaboration among educators and parents‚ fostering a cohesive approach to helping children achieve their full potential. This systematic documentation is a cornerstone of effective language and literacy intervention.

Special Considerations

The CELF-5 manual highlights special considerations‚ such as using the Observational Rating Scale (ORS) for classroom behaviors and retesting guidelines for short-term assessments‚ ensuring accurate and fair evaluations.

Use of the Observational Rating Scale (ORS)

The Observational Rating Scale (ORS) in the CELF-5 manual is a valuable tool for assessing a student’s language behaviors in real-world settings. It allows professionals to document how well a student manages classroom interactions‚ adheres to curriculum expectations‚ and demonstrates social communication skills. The ORS is particularly useful when there are concerns about a student’s language performance or when identifying specific contexts where challenges arise. By providing qualitative insights‚ it complements quantitative test results‚ offering a more comprehensive understanding of a student’s language abilities. This dual approach ensures a holistic evaluation‚ aiding in tailored intervention strategies and support plans.

Retesting Advice for Short-Term Assessments

Retesting with the CELF-5 within a short period requires careful consideration to ensure accurate and reliable results. The manual advises against frequent retesting to minimize practice effects and maintain test validity. If retesting is necessary‚ it is recommended to wait an appropriate interval‚ as specified in the guidelines‚ to allow for natural language development or intervention effects to emerge. Additionally‚ the rationale for retesting should be clearly documented to ensure it aligns with the student’s progress or changing circumstances. By adhering to these guidelines‚ professionals can ensure that retesting provides meaningful insights into a student’s language abilities without compromising the assessment’s integrity or reliability.

Resources and Support

The CELF-5 manual offers supplementary materials‚ including record forms and online resources‚ to support accurate administration and interpretation. Additional tools are available on the Pearson Clinical website.

CELF-5 Manual Supplements and Additional Materials

The CELF-5 manual is accompanied by various supplementary materials designed to enhance assessment accuracy. These include Record Forms for different age ranges‚ such as 5-8 and 9-21‚ which provide structured spaces for documenting responses and scoring. Additionally‚ a Reading and Writing Supplement is available for older children‚ offering tasks that assess literacy skills in conjunction with language abilities. These materials ensure comprehensive evaluation and are available in both paper and digital formats. They are accessible through the official Pearson Clinical website‚ making it convenient for professionals to obtain and utilize them effectively in their practice.

Online Resources for CELF-5 Administration and Interpretation

The CELF-5 offers a range of online resources to support effective administration and interpretation. The official Pearson Clinical website provides access to scoring guides‚ webinar recordings‚ and training modules to enhance clinicians’ skills. These resources include step-by-step instructions for administering tests and interpreting results accurately. Additionally‚ online forums and tutorials are available to address common challenges and best practices. Webinars‚ such as those presented by experts like Adam Scheller‚ PhD‚ focus on advanced topics like metalinguistics and language sample analysis. These digital tools ensure that speech-language pathologists (SLPs) can efficiently and confidently use the CELF-5 to assess and support children’s language development.

m984a4 wrecker tm pdf

The M984A4 Wrecker is a heavy-duty recovery vehicle part of the HEMTT series‚ designed by Oshkosh Defense for extreme recovery missions‚ offering exceptional power and terrain adaptability.

1.1 Overview of the M984A4 Wrecker

The M984A4 Wrecker is a heavy-duty recovery vehicle in the HEMTT series‚ designed for extreme recovery missions. With 8×8 mobility‚ it offers exceptional power and versatility‚ capable of recovering vehicles over 10 tons. Its advanced winch system and robust design ensure reliability in challenging environments. The NSN 2320-01-534-2245 identifies this model‚ with the TM 9-2320-342-10-1 providing operational guidance. It is a critical asset for military and heavy-duty recovery operations worldwide.

1.2 Importance of the TM (Technical Manual)

The TM 9-2320-342-10-1 is essential for M984A4 Wrecker operations‚ providing detailed instructions for safe and effective use. It covers maintenance‚ troubleshooting‚ and operational procedures‚ ensuring operators can maximize vehicle performance. Adhering to TM guidelines is crucial for reliability‚ safety‚ and longevity of the wrecker. This manual is a vital resource for military personnel and maintenance crews‚ offering comprehensive guidance for all aspects of the vehicle’s operation and care.

Technical Specifications of the M984A4 Wrecker

The M984A4 Wrecker‚ part of the HEMTT A4 series‚ features a powerful engine‚ capable of recovering vehicles over 10 tons‚ with enhanced maneuverability for challenging terrains.

2.1 Engine Performance and Capabilities

The M984A4 Wrecker is powered by a robust engine designed for heavy-duty operations‚ delivering exceptional torque and horsepower. Its cooling system ensures optimal performance in high-temperature environments‚ while its fuel efficiency supports extended recovery missions. The engine’s capabilities enable the wrecker to handle challenging terrains and recover vehicles exceeding 10 tons‚ making it a reliable asset for military operations.

2.2 Axle and Suspension System

The M984A4 Wrecker features a robust axle and suspension system designed for durability and load capacity. Its heavy-duty axles provide stability during recovery operations‚ while the suspension ensures smooth maneuverability across uneven terrains. This system is engineered to handle the vehicle’s weight and external loads‚ making it capable of operating effectively in challenging environments.

2.3 Dimensions and Weight Specifications

The M984A4 Wrecker has specific dimensions and weight specifications that enable its operational efficiency. It measures approximately 26 feet in length‚ 8 feet in width‚ and 10 feet in height‚ with a curb weight of around 20 tons. These dimensions and weight capacities ensure stability during recovery missions and allow for optimal maneuverability in various operational environments.

Operational Capabilities

The M984A4 Wrecker excels in recovery operations‚ offering versatility for challenging scenarios and adaptability across diverse terrains‚ ensuring effective vehicle recovery in demanding environments.

3.1 Recovery Missions and Scenarios

The M984A4 Wrecker is designed to handle a wide range of recovery missions‚ including extrication of stuck or damaged vehicles‚Winch-based recovery in challenging terrains‚ and high-capacity towing up to 40 tons. Its robust system ensures reliability in extreme environments‚ making it a critical asset for military and heavy-duty applications. The vehicle’s versatility allows it to adapt to various recovery scenarios‚ ensuring mission success.

3.2 Maneuverability and Terrain Adaptability

The M984A4 Wrecker excels in maneuverability‚ featuring an 8×8 drivetrain for enhanced traction on diverse terrains. Its robust axle and suspension system enable smooth operation in challenging environments‚ such as muddy‚ sandy‚ or rocky surfaces. Designed for versatility‚ the wrecker can navigate remote areas with ease‚ ensuring recovery missions are executed efficiently in both on-road and off-road conditions.

3.3 Maximum Weight Capacity for Recovery

The M984A4 Wrecker is capable of recovering vehicles weighing over ten tons (9072 kg)‚ making it highly effective in heavy-duty recovery operations. Its powerful winch and robust engineering ensure safe and efficient lifting‚ even in challenging conditions. This capacity is critical for military and recovery missions‚ enabling the wrecker to handle oversized and heavily laden vehicles with precision and reliability.

Maintenance and Repair Procedures

Regular maintenance is essential for optimal functionality. The TM provides detailed procedures for unit-level‚ direct support‚ and general support maintenance and repair‚ ensuring reliability and extending service life.

4.1 Unit-Level Maintenance

Unit-level maintenance for the M984A4 Wrecker involves routine inspections‚ lubrication‚ and minor repairs to ensure readiness. Soldiers perform daily checks‚ inspecting tires‚ brakes‚ and fluid levels. They also clean and lubricate moving parts‚ such as the winch system and suspension components. The TM provides detailed procedures for these tasks‚ ensuring issues are identified and corrected early. Regular maintenance prevents major malfunctions and extends the vehicle’s operational life‚ maintaining its recovery capabilities and safety standards.

4.2 Direct Support Maintenance

Direct support maintenance for the M984A4 Wrecker involves advanced diagnostics and repairs beyond unit-level capabilities. Technicians perform in-depth troubleshooting‚ repair or replace faulty components like hydraulic systems‚ and conduct thorough inspections of critical systems such as the winch‚ engine‚ and transmission. The TM provides detailed procedures for these tasks‚ ensuring adherence to safety and operational standards. Specialized tools and expertise are required to maintain the wrecker’s performance and reliability in demanding environments.

4.3 General Support Maintenance

General support maintenance for the M984A4 Wrecker involves more complex overhauls and repairs‚ typically conducted at centralized facilities. This includes major component replacements‚ such as engine overhauls‚ transmission rebuilds‚ and winch system upgrades. The TM provides detailed procedures for disassembly‚ inspection‚ and reassembly of critical systems. Specialized tools and expertise are required to ensure compliance with safety and performance standards‚ as outlined in TM 9-2320-342-10-1.

Safety Guidelines and Precautions

The M984A4 Wrecker’s TM emphasizes critical safety warnings to prevent accidents‚ including proper winch operation‚ load securing‚ and equipment inspection. Always wear protective gear and follow guidelines.

5.1 Critical Safety Warnings

The M984A4 Wrecker’s TM highlights critical safety warnings to ensure safe operation. Proper winch operation‚ load securing‚ and equipment inspections are essential. Operators must avoid overloading‚ ensure stable ground conditions‚ and wear protective gear. Failure to follow guidelines can result in accidents‚ injuries‚ or equipment damage. Always adhere to the TM’s safety precautions to minimize risks during recovery missions. These warnings are repeated to emphasize their importance for operational safety.

5.2 Operating Safety Tips

Operators of the M984A4 Wrecker must conduct thorough pre-operation checks‚ ensuring all systems function properly. Always maintain three points of contact when entering or exiting the vehicle. Wear personal protective equipment‚ including hard hats and gloves‚ during recovery operations. Ensure proper winch cable routing and avoid overloading. Keep bystanders at a safe distance and communicate clearly with the recovery team. Regular maintenance and adherence to TM guidelines are crucial for safe and effective operations.

Design and Key Features

The M984A4 Wrecker features a robust design with an advanced winch system‚ enhanced mobility‚ and durability‚ enabling heavy-duty recovery operations in challenging environments.

6.1 Winch System and Its Functionality

The M984A4 Wrecker’s winch system is a central feature‚ designed for heavy-duty recovery operations. It offers a high load capacity and automatic tension control‚ ensuring smooth and precise operation. The winch’s functionality includes rapid deployment‚ emergency operation modes‚ and adjustable speed settings‚ making it highly reliable in critical recovery scenarios. These advanced features enhance the wrecker’s ability to handle challenging terrain and recover heavy vehicles efficiently.

6.2 Enhanced Mobility and Durability

The M984A4 Wrecker features an 8×8 axle configuration‚ providing exceptional traction and stability on diverse terrains. Its advanced suspension system ensures smooth operation in rugged environments‚ while the high-strength frame enhances durability. The vehicle’s all-wheel drive capability and specialized tires further improve mobility‚ allowing it to navigate challenging conditions with ease. These design elements ensure the wrecker remains operational in demanding scenarios‚ maintaining its structural integrity and performance over time.

Historical Background and Development

The M984A4 Wrecker was developed as part of the HEMTT series by Oshkosh Defense‚ evolving from earlier models to meet modern military recovery needs with enhanced capabilities.

7.1 Evolution of the HEMTT Series

The HEMTT series‚ including the M984A4 Wrecker‚ was developed by Oshkosh Defense beginning in the 1980s to provide a versatile and mobile platform for military logistics. Initially designed for cargo transport‚ the series evolved to include specialized variants like the wrecker‚ incorporating advanced engineering for recovery operations. Continuous upgrades enhanced power‚ electronics‚ and adaptability‚ ensuring the HEMTT series remains a critical asset for modern military operations‚ with the M984A4 representing its latest advancement in recovery capabilities.

7.2 Role in Military Operations

The M984A4 Wrecker plays a critical role in military operations by providing heavy-duty recovery capabilities‚ ensuring mission continuity. It excels in challenging environments‚ recovering vehicles up to 10 tons‚ and supports logistics with its versatility. As part of the HEMTT A4 series‚ it is engineered for extreme performance‚ making it indispensable for field operations and military readiness.

Accessories and Optional Equipment

The M984A4 Wrecker supports various accessories‚ including brake shoe kits and MTVR MK36 Wrecker Kits‚ with NSN 2320-01-534-2245‚ ensuring enhanced functionality and maintenance support.

8.1 Special Tools and Equipment

The M984A4 Wrecker utilizes specialized tools‚ including the MTVR MK36 Wrecker Kit and Brake Shoe Kits‚ designed for heavy-duty recovery operations. These tools enhance the vehicle’s recovery capabilities‚ ensuring efficient and safe operations. The MTVR MK36 Wrecker Kit (NSN 2510-01-613-8315) is specifically engineered for the M984A4‚ providing advanced recovery solutions. These tools are critical for maintaining peak performance in challenging environments.

8.2 Available Upgrades and Modifications

The M984A4 Wrecker can be upgraded with enhanced winch systems‚ improved axle components‚ and advanced braking systems. Modifications include installing specialized recovery gear and communication equipment. These upgrades ensure the vehicle remains adaptable to evolving operational needs‚ maintaining its effectiveness in various recovery scenarios. Regular updates are detailed in the TM 9-2320-342-10-1‚ ensuring operators can maximize the vehicle’s performance and durability.

Technical Manual (TM) Overview

TM 9-2320-342-10-1 provides comprehensive operational and maintenance guidance for the M984A4 Wrecker‚ approved for public release‚ ensuring safe and effective vehicle operation and upkeep.

9.1 TM 9-2320-342-10-1 Details

TM 9-2320-342-10-1 is the operator’s manual for the M984A4 Wrecker‚ published in October 2008. It provides detailed operational procedures‚ maintenance guidance‚ and parts information. This manual is part of a two-volume set‚ with Volume 1 focusing on operational aspects. It is approved for public release‚ making it accessible for military personnel and authorized users. The manual is essential for ensuring proper vehicle operation and maintenance‚ adhering to safety standards and operational protocols.

9.2 Importance of Adhering to TM Guidelines

Adhering to the guidelines in TM 9-2320-342-10-1 is crucial for ensuring the safe and effective operation of the M984A4 Wrecker. The manual provides critical safety warnings‚ operational procedures‚ and maintenance schedules that prevent accidents and equipment damage. Following these guidelines ensures compliance with military standards‚ maintains operational readiness‚ and prolongs the vehicle’s service life. Proper adherence also minimizes downtime and reduces the risk of costly repairs‚ ensuring the wrecker remains reliable in high-stress environments.

The M984A4 Wrecker‚ detailed in TM 9-2320-342-10-1‚ is a cornerstone of military recovery operations. Its blend of power‚ maneuverability‚ and durability makes it indispensable for challenging missions. By following the TM’s guidelines‚ operators ensure safety‚ efficiency‚ and longevity of the vehicle. This manual is essential for maintaining peak performance‚ underscoring the wrecker’s critical role in modern military logistics and operational success.

bitlife model audition guide

BitLife’s modeling career offers a creative and lucrative path, allowing players to navigate auditions, fashion weeks, and building a reputation as a supermodel. This guide provides strategies and tips to excel in this competitive field, helping you understand the mechanics and requirements for success.

Overview of Modeling Profession in BitLife

In BitLife, the modeling profession is a dynamic and rewarding career path that allows players to explore the fashion world. To become a model, you must purchase the Model Job Pack and meet specific requirements, such as high “Looks” stats. The career involves attending auditions, taking headshots, and understanding client preferences. Starting with local gigs, you can progress to elite opportunities as your reputation grows. Success in modeling depends on mastering audition mechanics, including the Attitude, Poise, and Quirkiness sliders, and building a strong social media presence to attract more lucrative offers.

Why Pursue a Modeling Career in BitLife?

Pursuing a modeling career in BitLife offers numerous benefits, including high earning potential, opportunities for fame, and the chance to participate in prestigious events like Fashion Week. It allows players to express their creativity and build a unique character identity. With the right strategy, modeling can lead to significant financial rewards and open doors to elite gigs. Additionally, the career path is both challenging and engaging, making it a standout choice for players seeking a dynamic and fulfilling experience in the game.

Requirements to Become a Model in BitLife

  • High “Looks” stat is essential for success.
  • Specific age and gender requirements apply.
  • Purchasing the Model Job Pack is mandatory.

Importance of High “Looks” Stat

A high “Looks” stat is crucial for success in BitLife modeling, as it directly impacts audition outcomes and career progression. Agencies prefer models with attractive appearance, making it easier to secure prestigious gigs. To improve your chances, focus on maintaining a high “Looks” stat through genetics, gym workouts, and plastic surgery if necessary. This stat is foundational for unlocking elite opportunities and advancing in the competitive modeling world.

Age and Gender Requirements for Modeling Jobs

In BitLife, modeling jobs often have specific age and gender requirements. Players can typically start modeling careers in their late teens, with opportunities expanding as they gain experience. Certain agencies may prefer male or female models, depending on the gig. Age restrictions vary, with some jobs open to younger models and others requiring more maturity. Understanding these criteria helps tailor your approach to auditions, ensuring you meet the employer’s preferences and increase your chances of landing the role.

Purchasing the Model Job Pack

To unlock the modeling career in BitLife, players must purchase the Model Job Pack. This can be accessed through the BitLife Marketplace, found by tapping the three-line menu button in the top-left corner of the main screen. Once there, select the Model Job Pack to unlock modeling opportunities. Alternatively, players can purchase the Boss Mode pack, which includes all job packs, offering even more career flexibility. This initial investment is essential to begin your journey as a model in the game, allowing access to auditions and gigs.

Preparing for Model Auditions

Preparing for model auditions involves taking headshots, researching company preferences, and mastering attitude, poise, and quirkiness sliders to significantly boost your chances of success.

How to Take Headshots

Taking headshots is a crucial step in starting your modeling career in BitLife. To do this, navigate to the “Modeling” tab and select the headshot option. Timing and customization are key—ensure your character’s appearance aligns with the desired aesthetic. High “Looks” stats significantly improve the quality of your headshots, making them more appealing to casting directors. Customize hairstyles, makeup, and outfits to match the style you’re aiming for. This step lays the foundation for successful auditions and helps build your character’s portfolio as a potential model.

Researching the Company’s Preferences

Researching the company’s preferences is vital to increase your chances of passing auditions in BitLife. Each modeling agency or client has specific requirements, such as gender, age, or model type. Understanding these preferences allows you to tailor your approach and headshots to match their expectations. For example, some companies may favor a certain look or style, while others might prioritize diversity. By aligning your character’s appearance and attitude with the company’s tastes, you can significantly improve your audition outcomes and stand out as a desirable candidate in the modeling world.

Understanding the Audition Process

Understanding the audition process in BitLife involves mastering slider mechanics for attitude, poise, and quirkiness. Local auditions start simple, while elite ones demand precision and flair.

Local vs. Elite Auditions

In BitLife, local auditions are more accessible and require less experience, offering smaller payouts. They serve as a stepping stone to build your character’s portfolio and confidence. Elite auditions, however, are highly competitive, demanding precise slider adjustments and higher stats. These auditions unlock international opportunities, larger earnings, and greater fame. Success in local auditions is crucial for unlocking elite gigs, as they often require a proven track record and higher reputation in the modeling world. Balancing both types is key to advancing your modeling career effectively.

Audition Mechanics and Slider System

BitLife’s audition system relies on a slider mechanism for Attitude, Poise, and Quirkiness. Each audition prompt requires specific slider adjustments to match the client’s expectations; Players must analyze the description carefully to determine the optimal settings. For example, a prompt asking for “As Quirky as Possible” demands maxing Quirkiness while minimizing Attitude and Poise. Success depends on accurately aligning the sliders with the client’s preferences, making this system both challenging and strategic. Mastering these adjustments is essential for passing auditions and advancing in the modeling career.

Strategies for Passing Auditions

Mastering the slider system and understanding client preferences are key to success. Aligning Attitude, Poise, and Quirkiness with audition prompts ensures higher chances of passing and advancing in the modeling career.

Mastering Attitude, Poise, and Quirkiness Sliders

Success in BitLife modeling auditions hinges on precise slider adjustments. Attitude, Poise, and Quirkiness must align with the audition’s specific demands. High Quirkiness often works for eccentric prompts, while Poise excels in professional settings. Attitude is crucial for bold, confident looks. Analyze the audition description carefully and adjust sliders accordingly to match the desired vibe. This balance increases your chances of impressing casting directors and landing prestigious modeling gigs.

Common Audition Prompts and Recommended Answers

BitLife modeling auditions present various prompts requiring specific responses. For example, “As Quirky as Possible” demands maxing Quirkiness (100), while “As Much Attitude as Possible” requires high Attitude (100). Other prompts like “Professional and Polished” favor high Poise (100). Matching the right slider combination to the prompt ensures success; Referencing a compiled guide of audition answers helps players align their responses with casting directors’ expectations, increasing the likelihood of landing modeling gigs and advancing their career.

Advanced Tips for Success

Maximizing your social media presence and building a strong reputation are key to unlocking elite modeling opportunities and higher earnings in BitLife.

Improving Your Character’s Social Media Presence

Enhancing your character’s social media presence is vital for modeling success in BitLife. Regularly post high-quality content, use relevant hashtags, and engage with followers to boost popularity. Maintain a positive online image by avoiding controversial or negative actions. A strong social media profile increases your visibility to modeling agencies and elite opportunities, helping you land higher-paying gigs and advance your career. Consistent activity and strategic posting are key to building a reputable and in-demand model persona.

Building a Reputation in the Modeling Industry

Building a strong reputation in BitLife’s modeling industry requires consistent success in auditions and gigs. Accept high-quality jobs, deliver exceptional performances, and maintain professionalism. Avoid negative actions that could harm your image. As your reputation grows, you’ll unlock elite auditions and higher-paying opportunities. A solid reputation also increases your chances of being noticed by top agencies and brands, helping you rise to fame. Regularly landing successful gigs and avoiding controversy will solidify your character as a trusted and sought-after model in the competitive world of BitLife fashion.

Mastering BitLife’s modeling auditions and building a strong reputation require persistence and strategy. Stay focused, adapt to client preferences, and continuously improve your character’s skills for long-term success.

Final Tips for Becoming a Successful BitLife Model

To excel as a BitLife model, focus on maximizing your “Looks” stat and tailoring headshots to client preferences. Master audition sliders by adjusting Attitude, Poise, and Quirkiness based on prompts. Build a strong social media presence to boost fame and unlock elite gigs. Stay persistent, as success in modeling requires time and adaptability. Continuously update your strategy to align with the game’s evolving mechanics and client demands. With dedication and the right approach, your BitLife character can become a renowned supermodel, dominating runways and fashion events.

nikon d3100 user manual

The Nikon D3100 is an entry-level DSLR camera designed for photography enthusiasts. It features a 14.2 MP sensor‚ EXPEED 2 image processing‚ and HD video recording capabilities.

1.1 Overview of the Nikon D3100

The Nikon D3100 is a versatile entry-level DSLR camera designed for photography enthusiasts. It features a 14.2 MP DX-format APS CMOS sensor‚ EXPEED 2 image processing‚ and HD video recording. Lightweight and user-friendly‚ it offers advanced features like 11-point AF and Guide Mode‚ making it ideal for both beginners and experienced photographers seeking high-quality images and creative control.

1.2 Key Features of the Nikon D3100

The Nikon D3100 boasts a 14.2 MP DX-format APS CMOS sensor‚ delivering sharp images with vivid colors. It features the EXPEED 2 image processing engine‚ an 11-point AF system for precise focus‚ and Full HD video recording. Additionally‚ it includes Guide Mode for beginners and advanced modes like P‚ S‚ A‚ and M for creative control‚ catering to both novice and experienced photographers effectively.

1.3 Importance of the User Manual

The Nikon D3100 user manual is essential for unlocking the camera’s full potential. It provides detailed guidance on operating modes‚ customization options‚ and troubleshooting. Whether you’re a novice or an advanced photographer‚ the manual ensures you understand all features‚ enabling you to capture stunning images and videos effectively. Regularly referencing it helps maximize your photography experience and creativity with the D3100.

Key Features and Specifications

The Nikon D3100 features a 14.2 MP DX-format APS CMOS sensor‚ EXPEED 2 image processor‚ and 11-point AF system. It supports full HD video recording‚ ISO 100-3200‚ and various shooting modes for versatility. Built-in Guide Mode simplifies photography‚ making it ideal for both beginners and advanced users seeking high-quality images and videos with ease.

2.1 14.2 MP DX-Format APS CMOS Sensor

The Nikon D3100’s 14.2 MP DX-format APS CMOS sensor captures vibrant‚ detailed images. Its compact size ensures portability while delivering high-quality photos with excellent color accuracy and low noise‚ enhancing overall performance for photographers of all levels‚ from casual to professional use.

2.2 EXPEED 2 Image Processing Engine

The EXPEED 2 image processing engine enhances the D3100’s performance‚ offering faster operation and improved image quality. It ensures vivid colors‚ reduced noise‚ and efficient battery life‚ making it ideal for capturing sharp‚ detailed images in various lighting conditions‚ from bright daylight to low-light environments‚ with minimal grain and maximum clarity.

2.3 11-Point AF System

The Nikon D3100 features an 11-point AF system‚ providing fast and precise autofocus performance. With 11 focus points‚ it ensures sharp images by accurately tracking subjects‚ even in motion. The system is highly responsive‚ delivering reliable focus acquisition in various lighting conditions‚ making it ideal for capturing dynamic scenes with ease and clarity.

2.4 Full HD Video Recording

The Nikon D3100 supports Full HD video recording at 1080p resolution‚ capturing stunning movies with rich colors and sharp details. It allows frame rates of 24‚ 25‚ and 30 fps‚ providing flexibility for cinematic or smooth motion footage. The built-in microphone enhances audio quality‚ making it an excellent choice for videographers seeking professional-grade video capabilities in an entry-level DSLR.

Getting Started with the Nikon D3100

Unboxing‚ charging the battery‚ and inserting the memory card are the first steps. Initial setup includes setting the language‚ date‚ and time for proper camera operation and customization.

3.1 Unboxing and Accessories

The Nikon D3100 comes with essential accessories‚ including the camera body‚ 18-55mm VR kit lens‚ rechargeable battery‚ charger‚ neck strap‚ and lens caps. The user manual is also provided for guidance. These items ensure a smooth start for photography enthusiasts‚ covering basic needs for capturing high-quality images right out of the box.

3.2 Charging and Inserting the Battery

Charge the EN-EL14 battery using the provided charger until the indicator light turns green. Insert the battery into the camera’s battery compartment‚ ensuring it clicks securely into place. Use only the Nikon-approved charger for optimal performance and safety. A fully charged battery provides up to 550 shots‚ making it ready for extended photography sessions.

3.3 Memory Card Setup and Formatting

Insert the memory card into the camera’s card slot‚ ensuring it clicks securely into place. Use the camera’s menu to format the card‚ which deletes all data and optimizes it for the D3100. The camera supports SD‚ SDHC‚ and SDXC cards. Always format the card in the camera to ensure compatibility and avoid data loss. Confirm formatting by selecting “Yes” in the menu.

3.4 Initial Camera Setup

After inserting the memory card‚ navigate to the camera’s menu to format it. Use the multi-selector to scroll through options and confirm formatting. Set the camera’s date‚ time‚ and language using the menu system. Ensure the battery is fully charged before use. Familiarize yourself with basic settings like autofocus mode and metering. Perform a quick check to ensure all settings are configured correctly.

Shooting Modes

The Nikon D3100 offers various shooting modes to suit different photography needs‚ including Auto‚ Programmed Auto (P)‚ Shutter-Priority (S)‚ Aperture-Priority (A)‚ Manual (M)‚ and Guide Mode for enhanced creativity and control.

4.1 Auto Mode

In Auto Mode‚ the Nikon D3100 automatically adjusts settings like exposure‚ focus‚ and ISO for effortless photography. Designed for beginners‚ it simplifies capturing sharp‚ well-exposed images without manual adjustments. The camera handles scene detection‚ ensuring optimal results in various lighting conditions‚ making it ideal for quick shots and everyday photography.

4.2 Programmed Auto (P) Mode

Programmed Auto (P) Mode offers a balance between simplicity and control. The camera automatically sets aperture and shutter speed for optimal exposure‚ but users can adjust settings like ISO sensitivity‚ white balance‚ and flash. This mode is ideal for photographers who want to explore manual controls without fully managing aperture and shutter speed‚ providing flexibility while maintaining ease of use.

4.3 Shutter-Priority (S) Mode

Shutter-Priority (S) Mode allows users to set the shutter speed manually‚ while the camera automatically adjusts the aperture for proper exposure. This mode is perfect for capturing motion effects‚ such as freezing fast-moving subjects or creating motion blur. It’s ideal for sports‚ action‚ and artistic photography‚ giving photographers control over time while ensuring balanced exposure through automatic aperture adjustment.

4.4 Aperture-Priority (A) Mode

Aperture-Priority (A) Mode lets photographers manually select the aperture‚ controlling depth of field‚ while the camera automatically adjusts the shutter speed for optimal exposure. This mode is excellent for portrait photography‚ where a shallow depth of field isolates subjects‚ and for landscapes‚ where a wide depth of field keeps everything sharp. It offers creative control over focus and lighting.

4.5 Manual (M) Mode

Manual (M) Mode provides full control over both aperture and shutter speed‚ allowing photographers to fine-tune exposures to their creative vision. This mode is ideal for experienced users who want precise control in challenging lighting conditions. The camera displays suggested aperture and shutter speed values but does not adjust them automatically‚ giving complete freedom to the photographer.

4.6 Guide Mode

Guide Mode simplifies photography by providing step-by-step assistance‚ making it ideal for beginners. It offers easy-to-follow instructions for adjusting settings like brightness‚ color‚ and focus‚ helping users capture stunning images without prior expertise. This mode guides photographers through complex adjustments‚ ensuring high-quality results while teaching fundamental techniques.

4.7 Live View Shooting

Live View Shooting allows you to preview your shots on the LCD screen‚ enabling precise framing and focus. It’s particularly useful for manual focusing and video recording. This feature enhances creativity by letting you see the exact composition before capturing the image‚ ensuring accurate results and improving overall shooting experience.

Camera Settings and Customization

Customize your Nikon D3100 to suit your photography style. Adjust ISO sensitivity‚ white balance‚ and picture controls for optimal image quality. Personalize menu options to streamline your workflow and enhance creativity.

5.1 ISO Sensitivity Settings

Adjust the ISO sensitivity on your Nikon D3100 to manage noise and exposure. The camera offers a range of ISO settings from 100 to 6400‚ allowing you to shoot in various lighting conditions. Lower ISOs are ideal for bright settings‚ while higher ISOs enable shooting in low light. Customizing these settings ensures optimal image quality in any environment.

5.2 White Balance Settings

Adjust the white balance on your Nikon D3100 to ensure accurate color representation in different lighting conditions. The camera offers Auto‚ Daylight‚ Fluorescent‚ Incandescent‚ Cloudy‚ and Shade presets. Use Preset Manual to set a custom white balance for precise control. This feature enhances color accuracy and minimizes unwanted color casts in your photos‚ ensuring natural-looking results in any lighting environment.

5.3 Picture Controls

The Nikon D3100 offers customizable Picture Controls to tailor image settings. Options include Standard‚ Neutral‚ Vivid‚ Monochrome‚ Portrait‚ and Landscape. These controls adjust sharpness‚ contrast‚ and color to suit your style. Use Monochrome for black-and-white photos or Vivid for enhanced colors. Customize settings to refine your creative vision and achieve consistent results across your photography projects with precision and ease.

5.4 Customizing Menu Options

Customize the Nikon D3100’s menu options to suit your preferences. Personalize button assignments‚ manage frequently used settings‚ and organize menu items for quick access. This feature streamlines your workflow‚ allowing you to focus on creativity. Use the Custom Setting Menu to tailor controls like AE-L/AF-L‚ configure autofocus modes‚ and optimize camera behavior for your unique shooting style and needs.

Playback and Reviewing Photos

Playback mode allows you to review photos on the LCD screen. Access full-frame images‚ detailed photo information‚ and basic editing options like trimming and copying. Use the Display Mode to enhance image review.

6.1 Full-Frame Playback

Full-frame playback allows viewing images in their entirety on the LCD screen. Use the multi selector to scroll through photos. Press Zoom In for a detailed view and Zoom Out to fit the image on screen. This feature ensures optimal image review and quick access to your captured moments.

6.2 Photo Information Display

The photo information display provides detailed metadata for each image. View settings like shutter speed‚ aperture‚ ISO‚ and white balance. Histograms are available to assess exposure accuracy. Use the multi selector to navigate through different information screens‚ ensuring precise control over your photography and enhancing your understanding of each captured moment.

6.3 Editing Photos in Camera

The Nikon D3100 allows basic photo editing directly on the camera. Features include red-eye reduction‚ trimming‚ and converting RAW images to JPEG. Use the retouch menu for quick adjustments‚ enabling you to enhance your photos without needing a computer‚ making it a convenient option for on-the-go photo refinement and sharing.

Advanced Photography Techniques

Explore advanced modes like Focus‚ Exposure Compensation‚ Active D-Lighting‚ and Burst Mode for enhanced creativity and control over your photography with the Nikon D3100.

7.1 Focus Modes

The Nikon D3100 offers versatile focus modes‚ including Single-Servo AF (AF-S) for stationary subjects and Continuous-Servo AF (AF-C) for moving subjects. Manual focus (MF) is also available for precise control. These modes ensure sharp images in various shooting conditions‚ whether capturing stills or dynamic action. Use the 11-point AF system for accurate and fast focus acquisition.

7.2 Exposure Compensation

Exposure compensation adjusts the brightness of images by +5 to -5 EV in 1/3 EV increments. Accessible via the shooting information display‚ it’s ideal for correcting underexposed or overexposed shots. Use it to enhance high-contrast scenes or achieve creative effects. Press the exposure compensation button and adjust with the command dial for precise control over your images’ lighting.

7.3 Active D-Lighting

Active D-Lighting enhances shadow and highlight details in high-contrast scenes. It’s accessible via the shooting menu and offers settings from low to high. This feature preserves natural colors and textures‚ reducing overexposure in bright areas and revealing details in dark regions‚ ensuring balanced exposure without post-processing. It’s ideal for capturing images with rich tonal ranges and depth.

7.4 Burst Mode Shooting

The Nikon D3100’s burst mode allows continuous shooting at approximately 3 frames per second. This feature is ideal for capturing fast-moving subjects in sports or wildlife photography. To activate‚ set the release mode selector to the continuous shooting option. The camera will shoot sequentially until the shutter is released or the buffer is full‚ depending on memory card speed and settings.

Video Recording

The Nikon D3100 supports HD video recording at 1080p (24fps) and 720p (30fps). Videos are recorded in H.264 format‚ ensuring high-quality footage. The camera allows manual focus and exposure control during recording‚ enhancing creative flexibility. The user manual provides detailed instructions for optimizing video settings and achieving professional results.

8.1 HD Video Recording

The Nikon D3100 captures HD video in 1080p (24fps) and 720p (30fps)‚ delivering crisp and detailed footage. The camera supports H.264 compression‚ reducing file sizes while maintaining quality. Users can manually adjust aperture‚ shutter speed‚ and ISO for customized results. The built-in microphone records stereo sound‚ and optional external mics enhance audio quality. Shooting in live view mode allows precise framing and focus control‚ making HD video recording both accessible and professional-grade for photographers and videographers.

8.2 Movie Settings

The Nikon D3100 offers customizable movie settings‚ including frame rates (24fps or 30fps)‚ resolutions (1080p or 720p)‚ and compression formats (H.264). Users can manually adjust aperture‚ shutter speed‚ and ISO for precise control. The camera also supports external microphones for enhanced audio quality‚ allowing for professional-grade sound recording.

Additional settings include autofocus during filming‚ live view framing‚ and electronic VR for stabilization‚ ensuring smooth and high-quality video capture tailored to creative needs.

8.3 Editing Movies

The Nikon D3100 allows basic movie editing directly on the camera. Users can trim unwanted footage from the beginning or end of a clip. Additionally‚ selected frames can be saved as still images. While editing options are limited‚ they provide a convenient way to refine your videos before transferring them to a computer for further editing.

Maintenance and Troubleshooting

Regularly cleaning the camera’s sensor and lens ensures optimal performance. Updating firmware and understanding common error messages helps troubleshoot issues effectively.

9.1 Cleaning the Camera

Regular cleaning of the Nikon D3100’s sensor‚ mirror‚ and lens is essential for maintaining image quality. Use a soft brush or blower bulb to remove dust. Avoid touching the sensor or mirror. For stubborn spots‚ use a cleaning solution and swabs. Clean the lens with a microfiber cloth and avoid using harsh chemicals. Always store the camera in a dry‚ clean environment to prevent damage.

9.2 Updating Firmware

Updating the Nikon D3100’s firmware enhances performance and fixes issues. Download the latest firmware from Nikon’s official website. Format a memory card and transfer the update. Insert the card and follow on-screen instructions. Ensure the camera is fully charged and avoid interruptions during the update to prevent damage or corruption.

9.3 Common Error Messages

The Nikon D3100 may display error messages like “ERR” or “For” indicating issues such as lens communication problems or memory card errors. Refer to the user manual or Nikon support for specific solutions. Ensure the camera and lens are clean‚ and memory cards are formatted properly to resolve these common issues effectively and maintain optimal performance.

bosch silence plus 50 dba manual

The Bosch Silence Plus 50 dBA dishwasher offers quiet operation at 50 decibels, making it ideal for noise-sensitive environments. With energy-efficient cycles and advanced cleaning technology, it ensures spotless dishes while minimizing energy consumption. Available as a PDF manual, it guides users through installation, operation, and maintenance for optimal performance.

Overview of the Dishwasher and Its Key Features

The Bosch Silence Plus 50 dBA dishwasher combines quiet operation with powerful cleaning. It features multiple wash cycles, including Sparkle and Crystal Dry, for optimal results. With ENERGY STAR certification, it ensures energy efficiency. Key features include Precision drying, QuietClose® door, and a third rack for extra capacity. Its sanitize option and advanced sensors enhance performance and hygiene.

Importance of the Manual for Optimal Usage

The manual is essential for understanding the dishwasher’s features, troubleshooting, and maintenance; It provides detailed instructions for installation, operation, and care, ensuring safe and efficient use. By following the guidelines, users can optimize performance, extend appliance lifespan, and resolve common issues. The PDF manual also offers energy-saving tips and error code explanations for enhanced functionality and convenience.

Safety Instructions for Installation and Operation

The manual outlines essential safety measures to prevent accidents and ensure proper function. Always read the instructions before installation and operation to avoid hazards like electrical shocks or improper usage. Follow guidelines for handling detergent, avoiding extreme temperatures, and using genuine parts to maintain safety and efficiency.

General Safety Warnings and Precautions

Always follow the manual to ensure safe operation. Avoid exposing the dishwasher to extreme temperatures or water splashes. Keep children away from the appliance during operation. Use only recommended detergents and avoid overloading. Ensure proper installation and electrical connections to prevent hazards. Regularly inspect and maintain the appliance to avoid malfunctions. Refer to the safety section for detailed precautions.

Electrical Requirements and Connections

The Bosch Silence Plus 50 dBA dishwasher requires a 220-240V AC power supply at 50/60 Hz with a protective earth conductor. Ensure the appliance is connected to a correctly installed socket. The voltage and frequency must match the specifications to avoid electrical issues. Refer to the manual for detailed wiring and connection guidelines to ensure safe and proper installation.

Child Safety Features and Locks

The Bosch Silence Plus 50 dBA dishwasher includes a child safety lock to prevent accidental operation. This feature ensures the appliance cannot be started by children, enhancing kitchen safety. The manual provides instructions for activating and deactivating the lock, offering peace of mind for families with young children while maintaining ease of use.

Installation Guide

Ensure the Bosch Silence Plus 50 dBA dishwasher is installed by a qualified technician. Connect it to a 220-240V, 50/60 Hz power supply with proper earthing. Level the appliance to ensure stable operation and optimal performance, following the manual instructions for a seamless setup.

Preparing the Site for Installation

Before installing the Bosch Silence Plus 50 dBA dishwasher, ensure the site is clear and level. Connect to a 220-240V, 50/60 Hz power supply with a protective earth conductor. Secure the appliance to prevent movement and ensure proper ventilation. Check for water supply lines and drainage proximity to facilitate smooth installation as per the manual guidelines.

Step-by-Step Installation Process

Install the Bosch Silence Plus 50 dBA dishwasher by first positioning it level on the floor. Connect the water supply lines to the designated ports, ensuring no leaks. Attach the drain hose securely to the dishwasher and sink drain. Plug the power cord into a grounded outlet. Follow the manual instructions to complete the installation accurately and safely.

Leveling the Dishwasher for Proper Functioning

Ensure the Bosch Silence Plus 50 dBA dishwasher is leveled for optimal performance and drainage. Use the adjustable feet to align the unit evenly on the floor. Check leveling with a spirit level, adjusting as needed. Proper leveling ensures stable operation, prevents vibrations, and maintains efficient water drainage during cycles. Follow the manual for precise adjustments.

Operating the Dishwasher

Experience efficient cleaning with the Bosch Silence Plus 50 dBA dishwasher, featuring multiple wash cycles and quiet operation. Designed for ease of use, it ensures optimal performance while maintaining low noise levels, making it ideal for daily use. Follow the manual for specific cycle selections and settings to maximize cleaning results.

Understanding the Control Panel and Settings

The Bosch Silence Plus 50 dBA dishwasher features an intuitive control panel with buttons and an LCD display. Users can easily select from multiple wash cycles, adjust temperature settings, and activate options like delay start or sanitize. The panel provides clear status updates, ensuring seamless operation. Refer to the manual for detailed instructions on customizing settings for optimal performance.

Wash Cycles and Options Explained

The Bosch Silence Plus 50 dBA dishwasher offers multiple wash cycles, including Heavy Duty, Normal, and Light/China, catering to varying soil levels. Additional options like Delay Start, Sanitize, and Extra Dry enhance flexibility. The manual details each cycle’s benefits, ensuring users can select the perfect setting for their needs, optimizing cleaning performance and energy efficiency.

Tips for Loading Dishes Efficiently

For optimal performance, load dishes facing inward and arrange bowls and plates toward the center. Utensils should be placed in designated holders, and large items like pots should not block spray arms. Use the third rack for small items and ensure the detergent dispenser is accessible. Refer to the manual for specific Bosch-recommended layouts and diagrams.

Maintenance and Care

Regularly clean the filter and drain to ensure optimal performance. Check and maintain seals, and dry the dishwasher after use to prevent moisture buildup and odors.

Cleaning the Filter and Drain

Regularly clean the filter and drain to ensure optimal performance. Check and clean the filter after each use to prevent food particles from clogging the dishwasher. Periodically inspect and clean the drain to avoid blockages. Bosch recommends drying the dishwasher after use to prevent moisture buildup and odors. Proper maintenance ensures efficient cleaning and prevents poor drainage.

Regular Maintenance Tasks

Perform regular maintenance to keep your Bosch Silence Plus 50 dBA dishwasher running efficiently. Descaling is recommended in hard water areas to remove mineral buildup. Run a cleaning cycle with a dishwasher cleaner every 1-2 months to maintain hygiene. Check and clean spray arms for blockages. Regular upkeep ensures optimal performance, prevents odors, and extends the appliance’s lifespan.

Drying the Dishwasher After Use

After each use, leave the dishwasher door slightly ajar to allow moisture to evaporate, preventing mold and odors. Wipe down the door seals and surfaces regularly to remove water droplets. For optimal drying, run a cleaning or drying cycle as specified in the manual. This helps maintain hygiene and ensures efficient performance over time.

Troubleshooting Common Issues

Identify and resolve common problems like poor cleaning or noise using the manual’s troubleshooting section. Check filters, ensure proper loading, and reset the dishwasher if necessary for optimal performance.

Identifying and Solving Common Problems

Common issues with the Bosch Silence Plus 50 dBA dishwasher include error codes, poor cleaning results, or excessive noise. Refer to the troubleshooting section in the manual for solutions. Check filters, ensure proper detergent use, and verify water temperature settings. Resetting the dishwasher or checking for blockages can often resolve these issues quickly and effectively.

Understanding Error Codes and Alarms

The Bosch Silence Plus 50 dBA dishwasher displays error codes like E15 or E01 to indicate specific issues. These codes, found in the manual, help diagnose problems such as water supply errors or sensor malfunctions. Refer to the troubleshooting guide for detailed explanations and step-by-step solutions to restore normal operation and ensure optimal performance.

Resetting the Dishwasher

Resetting the Dishwasher

To reset the Bosch Silence Plus 50 dBA dishwasher, turn it off, unplug it, and wait 30 seconds before plugging it back in. This process clears minor glitches. For specific models, consult the manual for detailed reset instructions to ensure proper restoration of default settings and functionality.

Technical Specifications

The Bosch Silence Plus 50 dBA dishwasher features a 50 dBA noise level, ensuring quiet operation. It offers energy-efficient performance and is designed with compact dimensions for seamless integration into any kitchen. The dishwasher has a capacity suitable for average households and operates with optimized water and energy consumption for eco-friendly use.

Noise Level and Energy Efficiency

The Bosch Silence Plus 50 dBA dishwasher operates at an ultra-quiet 50 dBA noise level, ensuring minimal disruption in home environments; It is designed with energy-efficient technology to minimize power consumption while delivering superior cleaning performance. This eco-friendly design makes it an ideal choice for energy-conscious households seeking both quiet operation and reduced utility costs.

Dimensions and Capacity

The Bosch Silence Plus 50 dBA dishwasher features dimensions of 820x450x550 mm, making it ideal for standard kitchen layouts. It offers a capacity of 16 place settings, ensuring ample space for dishes, glasses, and utensils. These measurements and capacity make it a practical choice for modern households seeking efficient dishwashing solutions without compromising kitchen aesthetics or functionality.

Water and Energy Consumption Details

The Bosch Silence Plus 50 dBA dishwasher operates efficiently, consuming minimal water and energy. It uses up to 7.25 psi (50 kPa) water pressure and 2.6 gallons per minute. The maximum water temperature is 140°F (60°C). Designed for energy efficiency, it balances performance with eco-friendly operation, ensuring reduced water and energy usage while maintaining superior cleaning results.

Environmental Considerations

The Bosch Silence Plus 50 dBA dishwasher is designed with eco-friendly features to minimize environmental impact. It offers energy-efficient cycles and responsible water usage, aligning with sustainable practices. Proper disposal of packaging and recycling of old appliances are encouraged to support environmental conservation.

Eco-Friendly Features and Benefits

The Bosch Silence Plus 50 dBA dishwasher incorporates eco-friendly features like energy-efficient wash cycles and water conservation technology. These designs reduce energy consumption and water usage, promoting sustainability. The dishwasher’s environmentally responsible engineering helps lower utility bills while maintaining superior cleaning performance, making it a greener choice for modern kitchens.

Proper Disposal of Packaging and Old Appliances

Ensure environmentally responsible disposal by recycling packaging materials like cardboard and plastic. For old appliances, donate or recycle them through authorized centers. Check local regulations for hazardous waste disposal. Properly managing waste helps reduce environmental impact and supports sustainability efforts. Bosch encourages eco-conscious practices throughout the product lifecycle.

Warranty and Customer Support

Your Bosch Silence Plus 50 dBA dishwasher comes with a 1-year warranty for parts and labor. For assistance, contact Bosch customer service at (800) 944-2904 or visit their official website for online support and downloadable manuals.

Warranty Coverage and Terms

The Bosch Silence Plus 50 dBA dishwasher is backed by a 1-year warranty covering parts and labor. For detailed terms and conditions, visit the official Bosch website or contact customer support at (800) 944-2904. Ensure to have your appliance’s model number ready for accurate assistance.

Contacting Bosch Customer Service

Bosch customer support is available for inquiries and assistance. Call (800) 944-2904 or chat online with a representative. Visit the official website for more details. Ensure to have your appliance’s model number ready for efficient support. Online resources and manuals are also accessible for troubleshooting and maintenance guidance.

Online Resources and Manuals

Bosch provides comprehensive online resources, including downloadable PDF manuals, for the Silence Plus 50 dBA dishwasher. Visit the official Bosch website to access model-specific guides, troubleshooting tips, and user manuals in multiple languages. These resources ensure optimal appliance performance and address common issues efficiently.

The Bosch Silence Plus 50 dBA dishwasher combines quiet efficiency with advanced features, ensuring excellent performance. Referencing the manual enhances user experience, optimizing its eco-friendly and noise-reducing capabilities effectively.

The Bosch Silence Plus 50 dBA dishwasher delivers quiet operation at 50 decibels, ensuring minimal noise during cycles. Its energy-efficient design and advanced cleaning technology provide superior performance while reducing water and energy consumption. Multiple wash cycles, including an eco-friendly mode, cater to various needs. The sleek design integrates seamlessly into modern kitchens, offering both functionality and style for optimal dishwashing results.

Final Tips for Maximizing Performance

Regularly clean the filter and check water hardness to optimize wash results. Load dishes efficiently, ensuring proper water flow. Use recommended detergent doses and select cycles based on load size and soil level. Run cleaning cycles periodically to maintain performance. Refer to the PDF manual for detailed care instructions to ensure long-lasting efficiency and quiet operation.

wilds of eldrain draft guide

Welcome to our comprehensive guide to Wilds of Eldraine (WOE) Draft, a fairy-tale-inspired set packed with innovative mechanics like Adventures, Food Tokens, and Bargain․ Learn strategies, key cards, and archetypes to dominate your next draft․ Updated for 06/10/2025, this guide covers everything from synergies to color rankings, ensuring you’re prepared for the wild ride ahead․

Key Mechanics in Wilds of Eldraine

Wilds of Eldraine introduces mechanics like Adventures, Food Tokens, Bargain, Roles, and Celebration, enhancing gameplay with versatility and strategy, alongside Enchanting Tales for added depth․

2․1․ Adventures

Adventures return from Throne of Eldraine, offering versatility by combining an ability and a creature in one card; They provide a “two-for-one” potential, enhancing card efficiency․ In Limited, Adventures shine by enabling early-game interactions and late-game threats․ Prioritize drafting them to maximize synergy and value, as they can act as removal or generate card advantage, making them crucial in competitive builds․

2․2․ Food Tokens

Food Tokens return from Throne of Eldraine, providing card advantage through sacrificing creatures․ They enable extra draws and enhance Sacrifice synergies, complementing Adventures and Bargain․ Key for strategies requiring card draw and long-game dominance, Food Tokens are essential for maximizing value in Wilds of Eldraine, making them a versatile and powerful resource in competitive builds․

2․3․ Bargain

Bargain introduces a new layer of strategic depth, allowing players to sacrifice a Role token to cast spells at a discounted rate․ This mechanic enhances flexibility in gameplay, enabling more aggressive plays and synergies with Adventures and Food Tokens․ Mastering Bargain is crucial for optimizing card advantage and executing powerful combos in Wilds of Eldraine, making it a key mechanic to leverage effectively․

2․4․ Roles

Roles are a new mechanic in Wilds of Eldraine, enabling creatures to gain additional abilities when specific conditions are met․ This dynamic feature enhances versatility, allowing creatures to adapt their roles during gameplay․ Roles synergize well with Adventures and Food Tokens, creating powerful combinations that can shift the tide of battles, making them a strategic highlight in the set․

2․5․ Celebration

Celebration is a mechanic that triggers when specific conditions are met, often during combat or when creatures enter the battlefield․ It adds flavor and strategic depth, rewarding players for building synergistic decks․ While not central to every archetype, Celebration enhances certain strategies, making it a delightful addition to Wilds of Eldraine’s gameplay without overshadowing core mechanics․

Top-Tier Archetypes

Mono Red, Boros, Rakdos, and Golgari dominate as top-tier archetypes, each excelling through aggressive strategies, synergistic plays, and efficient use of Food Tokens and removal spells․

3․1․ Mono Red

Mono Red is a formidable archetype, thriving on aggressive creatures and efficient removal․ Cards like Imodane’s Recruiter and Frantic Firebolt enable quick starts, while Food Tokens sustain late-game pressure․ Initially underrated, it became a top pick as players recognized its potential for explosive starts and high damage output, making it a strong contender in Wilds of Eldraine drafts․

3․2․ Boros

Boros is a top-tier archetype, excelling with aggressive creatures and efficient removal․ White’s synergy with red amplifies early-game pressure, while Food Tokens provide sustain․ Cards like Hamlet Glutton and cheap removal enable Boros to dominate boards, making it highly effective against aggressive decks and a strong choice for players seeking a balanced yet powerful strategy in Wilds of Eldraine drafts․

3․3․ Rakdos

Rakdos is a formidable archetype, combining powerful sacrifice synergy with disruptive elements․ Cards like Twisted Sewer-Witch and Rats enable explosive starts, while Food Tokens and Bargain enhance late-game potential․ Its flexibility allows adaptation to various metas, making it a strong choice for players seeking aggressive yet resilient strategies in Wilds of Eldraine drafts․

3․4․ Golgari

Golgari is a mid-tier archetype that thrives on Food Token synergy and removal spells․ Cards like Hamlet Glutton excel against aggressive decks, while Food generators and card draw ensure sustained pressure․ Its ability to adapt to metas makes it a solid choice for players seeking a balanced, midrange strategy in Wilds of Eldraine drafts․

Mid-Tier Archetypes

Gruul, Izzet, and Green-Based Multicolor archetypes offer balanced strategies, blending aggression with control․ Gruul’s big creatures and Izzet’s spell synergies shine, while Green-Based Multicolor leverages mana flexibility for midrange success․

4․1․ Gruul

Gruul emerges as a mid-tier archetype, excelling when red remains open and green is accessible․ It thrives on big creatures and efficient burn spells, with Torch the Tower being a key pickup․ The deck balances aggression with interaction, making it versatile․ While not the most powerful, Gruul’s consistency and ability to scale into the late game make it a solid choice for drafters․

4․2․ Izzet

Izzet offers versatile draft potential, excelling in both tempo and control strategies․ Key cards like Aquatic Alchemist and Flick a Coin define the archetype․ Frantic Firebolt shines in spell-heavy builds, while Vantress Transmuter addresses large threats․ The archetype rewards synergy, particularly with Unruly Catapult and Curiosity combos, making it a dynamic, if challenging, mid-tier choice for drafters․

4․3․ Green-Based Multicolor

Green-Based Multicolor decks thrive on versatility, leveraging powerful enablers like Brave the Wilds and Prophetic Prism․ This archetype excels when balancing big creatures with mana-fixing tools, allowing for ambitious builds․ While the potential is high, success hinges on mana consistency and strategic card selection, making it a mid-tier choice that rewards careful planning and draft strategy․

Lower-Tier Archetypes

Lower-tier archetypes like Selesnya, Orzhov, Dimir, Simic, and Azorius struggle with consistency and card advantage, often requiring specific conditions to perform well in the Wilds of Eldraine draft format․

5․1․ Selesnya

Selesnya is a beatdown archetype that excels when drafting aggressive, low-to-the-ground creatures with high power․ However, it often struggles in the late game due to a lack of reach and card draw․ Without strong synergies or late-game threats, Selesnya decks can run out of steam, making them less consistent compared to top-tier archetypes․ Proper card selection is crucial to mitigate these weaknesses․

5․2; Orzhov

Orzhov focuses on stacking cheap enchantments to build incremental value․ Cards like Hopeless Nightmare and Hopeful Vigil shine, while Stockpiling Celebrant becomes a key pickup․ This archetype requires careful deck building, as it relies on synergy between enchantments and creatures․ While it can be powerful, inconsistent card quality makes it less competitive compared to top-tier strategies, often struggling to close games against faster decks․

5․3․ Dimir

Dimir excels with counterspells and cheap removal, optimizing control strategies․ Adaptability is key; switch to tempo if needed․ Cards like Hatching Plans and The Princess Takes Flight shine with bargain synergies․ Focus on building a reactive deck that thrives in longer games, ensuring you have the right balance of interaction and card advantage․

5․4․ Simic

Simic struggles as a midrange deck but thrives with a U-shaped mana curve, blending early and late-game strengths․ Key cards like Brave the Wilds and Prophetic Prism enable multicolor strategies; While challenging to build, Simic can compete when draft opens up, offering a unique blend of adaptability and card advantage through synergistic plays and mana fixing․

5․5․ Azorius

Azorius is considered one of the weaker archetypes in Wilds of Eldraine, often unplayable unless the draft is wide open․ It lacks strong individual cards and synergies, making it hard to justify drafting․ While it can occasionally work with flyers and counterspells, its overall performance is underwhelming compared to other color combinations in the set․

Build-Around Cards and Synergies

Build-around cards require specific synergies to shine․ Drafting supporting cards early ensures maximum impact․ Focus on cohesive strategies to unlock their full potential in WOE․

6․1․ Cursed Courtier

Cursed Courtier is a powerful build-around card that thrives with the Bargain mechanic․ By sacrificing a Role token, it becomes a formidable threat․ Drafting supporting cards early, like token generators, is crucial to maximize its potential․ When enabled, it can swing games dramatically, making it a high-reward payoff in a dedicated deck․ Its synergy with Bargain makes it a key target for drafters aiming to exploit this mechanic․

6․2․ Hatching Plans and The Princess Takes Flight

Hatching Plans and The Princess Takes Flight form a potent synergy, offering immense value when paired with Bargain cards․ These cards shine in decks built around their combined potential, but their effectiveness drops sharply without supporting pieces․ Prioritizing their early picks and drafting complementary cards is essential to unlock their full power and create a cohesive gameplan․

Color Rankings and Combinations

In Wilds of Eldraine, color combinations play a crucial role in draft success․ Boros emerges as the top-tier combination, excelling in aggressive strategies․ Rakdos follows closely, leveraging powerful synergy, while Golgari offers defensive strength․ Mid-tier options like Gruul and Izzet provide versatility, though they require precise drafting․ Lower-tier colors like Selesnya and Orzhov struggle without specific support, making adaptability key to optimizing your deck’s potential․

Draft Strategy and Tips

Adaptability is key in WOE drafts․ Focus on synergies, evaluate pack dynamics, and avoid overcommitting early․ Prioritize versatile cards and build around strong openings for consistent success․

8․1․ Early Picks and Build-Arounds

Early picks in Wilds of Eldraine drafts should prioritize versatile cards and potential build-arounds․ Focus on high-impact cards like Twisted Fealty or Hatching Plans that offer synergy․ These picks set the foundation for your deck’s strategy․ Build-around cards like Cursed Courtier require early commitment, so secure them early to maximize their potential․ Adapt as the draft progresses to support your build․

8․2․ Managing Pack Dynamics

Adapt to the draft’s direction by identifying overpicked archetypes and adjusting your strategy․ Pay attention to signals like frequent passes of certain colors or cards, indicating heavy drafting in those areas․ Be prepared to pivot if your initial plan is being cut off․ Maintain flexibility to secure key synergies in later packs, ensuring a cohesive deck build․

8․3․ Signaling and Adaptation

In Wilds of Eldraine Draft, signaling is key to understanding others’ strategies․ Pay attention to passed cards and tableaux to identify popular archetypes․ Adapt by pivoting to underdrafted colors or synergies․ Balance commitment to your plan with flexibility to seize new opportunities, ensuring your deck remains cohesive and competitive throughout the draft process;

8․4․ Sideboarding Strategies

Sideboarding in Wilds of Eldraine requires precision, especially in best-of-three matches․ Save removal spells like Gnawing Crescendo for key threats and adapt based on opponents’ strategies․ Manage Food tokens to sustain long games and swap cards to address specific matchups․ Focus on optimizing your deck for each opponent, ensuring versatility while maintaining your game plan’s core strengths․

Key Cards to Watch For

Focus on high-impact cards like Gnawing Crescendo, powerful removal spells, and Food generators to gain a strategic advantage in Wilds of Eldraine draft matches․

9․1․ Gnawing Crescendo

Gnawing Crescendo is a powerful group pump spell that significantly bolsters your creatures, making it a key card to prioritize in Wilds of Eldraine drafts․ Its ability to provide a substantial boost to multiple creatures can swing games in your favor, especially in aggressive archetypes․ Drafters should be vigilant for this card, as it can elevate your board presence and create overwhelming threats․

9․2; Removal Spells

Removal spells are crucial in Wilds of Eldraine, enabling you to maintain board control and prevent opponents from snowballing․ Efficient removal like Moment of Valor and Cooped Up can neutralize threats like Hamlet Glutton effectively․ Prioritizing these spells ensures you can manage the board and execute your game plan without being overwhelmed by aggressive strategies or large creatures․

9․3․ Food Generators

Food generators are essential for maintaining card advantage and enabling synergies in Wilds of Eldraine․ Cards that produce Food Tokens provide sustain, life gain, and opportunities to cast spells or activate abilities․ These tokens are particularly valuable in aggressive decks, allowing you to maintain momentum while also supporting controlling strategies․ Prioritize Food generators to fuel your gameplan and outlast opponents․

The Impact of Bonus Sheet Cards

Food generators are crucial in Wilds of Eldraine, providing sustain and enabling key synergies․ These cards produce Food Tokens, which offer life gain, card advantage, and fuel for abilities․ Prioritizing Food generators ensures consistent pressure in aggressive decks and supports controlling strategies, making them a cornerstone of many successful builds in the format․

Winning Strategies Against Top Archetypes

Adapt your strategy to counter top archetypes like Boros and Golgari․ Focus on disrupting their key synergies and maintaining board control with efficient removal and lifegain sources․

11․1․ Beating Boros

Boros decks thrive on aggressive creatures and anthem effects, so focus on early removal and life gain to stabilize․ Use cards like Gnawing Crescendo to counter their synergy․ Prioritize efficient removal spells to clear their board, then transition into bigger threats to outscale them․ Adapt by saving key removal for their highest-impact creatures to disrupt their game plan effectively․

11․2․ Beating Golgari

To overcome Golgari, focus on disrupting their Food Token generation and removing their big creatures․ Use early-game removal to clear their board and prevent them from ramping into threats like Hamlet Glutton; Employ mass removal or board wipes to reset their advantage․ If playing aggressively, aim to end the game quickly before they establish dominance․ In slower matchups, rely on counterspells and card draw to outvalue them․ Adapt your strategy by sideboarding removal or enchantment destruction to target their key cards, ensuring you manage your life total effectively to avoid being outlasted․

Power Rankings of Archetypes

  1. Boros: Top-tier archetype with exceptional synergy and aggressive potential․
  2. Rakdos: Strong performer, excels at tempo and midrange strategies․
  3. Golgari: Resilient and punishing, thrives against aggressive decks․
  4. Gruul: Mid-tier, relies on curve and removal to succeed․
  5. Izzet: Versatile but inconsistent, excels in tempo or control builds․
  6. Selesnya: Aggressive but lacks late-game punch․
  7. Orzhov: Value-based, struggles without early enchantments;
  8. Dimir: Control-oriented, requires strong counters and removal․

These rankings reflect archetype performance in Wilds of Eldraine Draft, emphasizing synergy and adaptability․

Common Pitfalls and Mistakes to Avoid

  • Mana Management: Overextending into too many colors without proper fixing can lead to inconsistent games․
  • Blocking Decisions: Poor blocking can result in unnecessary creature loss, especially against tricks and removal․

13․1․ Blocking Decisions

Blocking decisions are crucial in Wilds of Eldraine Draft․ Misjudging when to block can lead to unnecessary creature loss, especially against tricks and removal spells․ Overcommitting to a block can backfire, while underestimating an opponent’s combat tricks can cost you the game․ Always weigh the risks and prioritize protecting your most impactful creatures․ Cheap creatures like rats often serve as ideal fodder to preserve your threats․

13․2․ Mana Management

Effective mana management is vital in Wilds of Eldraine Draft; With multicolor decks prevalent, ensuring smooth mana curves prevents crucial late-game stalls․ Overextending on early mana-intensive plays can backfire, while underestimating the need for mana fixers like Prophetic Prism can hinder your strategy․ Balance your plays to maintain consistent pressure without overcommitting, as opponents can capitalize on your missteps, especially in synergy-driven matchups․

precision radio controlled clock instructions

Precision radio controlled clocks offer accurate timekeeping via atomic signals, ensuring automatic synchronization and daylight saving adjustments. They feature alarms, temperature displays, and low-maintenance operation, ideal for reliable time management.

What is a Precision Radio Controlled Clock?

A precision radio-controlled clock is a timekeeping device that synchronizes with atomic clock signals for hyper-accurate time display. It automatically adjusts for daylight saving changes and leap years, ensuring reliability. These clocks receive signals from transmitters like MSF (UK) or WWVB (US), guaranteeing synchronization. They are low-maintenance, as they update automatically, with battery installation often triggering the initial sync process.

Benefits of Using a Radio Controlled Clock

A radio-controlled clock offers unparalleled accuracy by synchronizing with atomic clock signals, eliminating manual adjustments. It automatically handles daylight saving changes and leap years, ensuring seamless operation. This technology minimizes errors and provides reliable timekeeping, while features like alarms and temperature displays enhance usability, making it a practical and efficient choice for everyday use.

Installation and Setup

Install batteries, place the clock near a window for optimal signal reception, and let it automatically synchronize with the atomic signal for precise timekeeping.

Battery Installation

Insert fresh AA or AAA alkaline batteries, ensuring correct polarity as indicated in the compartment. Avoid using rechargeable batteries. Secure the compartment tightly. The clock will automatically search for the radio signal and display the time once batteries are installed properly. Ensure batteries are inserted correctly to prevent functionality issues and maintain optimal performance.

Initial Setup and Automatic Time Synchronization

After battery installation, the clock automatically seeks the MSF radio signal, typically within 3-12 minutes. Place the clock near a window for optimal signal reception. The display will flash during synchronization. Once synchronized, the clock shows the correct time and automatically adjusts for daylight saving changes, ensuring precision and convenience without manual intervention.

Time Setting Instructions

The clock automatically synchronizes with the MSF radio signal, ensuring precise timekeeping. For manual setting, switch to time mode and adjust hours and minutes using the respective buttons, following the manual for guidance.

Automatic Time Synchronization via Radio Signal

The clock automatically synchronizes with the MSF radio signal, transmitted at 60 kHz from the National Physical Laboratory. It receives the signal 12 times daily, ensuring precise timekeeping. The process typically takes 3-12 minutes, during which the clock adjusts to the correct time. This feature also handles daylight saving time transitions automatically, eliminating manual adjustments and ensuring accuracy. The signal is controlled by atomic clocks, guaranteeing reliability.

Manual Time Setting

To set the time manually, locate the “SET” or “MODE” button. Press and hold it to enter time-setting mode. Use the hour and minute adjustment buttons to cycle through values. Ensure you’re in the correct mode, often indicated by a blinking display. Confirm your settings with the “SET” button. Check the format (12 or 24-hour) and adjust as needed. If errors occur, reset by powering off and on or following manual instructions.

Alarm Functions

Set daily alarms with ease using the alarm button. The snooze function ensures gentle waking. Note: Full alarm functionality may require successful radio signal reception post-battery installation.

Setting Daily Alarms

To set a daily alarm, switch to alarm mode using the designated button. Use the hour and minute buttons to select your preferred wake-up time. Press SET to confirm. The snooze function can be activated by pressing the snooze button after the alarm sounds. Note: Full alarm functionality may require successful radio signal reception post-battery installation.

Using the Snooze Function

Press the Snooze/Light button to activate the snooze feature, which temporarily silences the alarm for 5-10 minutes. The snooze function allows you to delay waking up without turning off the alarm entirely. Press the button again to extend the snooze period. Note that the alarm will resume until manually turned off, ensuring you are not oversleeping.

Signal Reception and Optimization

To optimize signal reception, place the clock near a window and avoid areas with metal structures or electronic devices that may cause interference.

Ensuring Optimal Radio Signal Reception

To ensure optimal radio signal reception, place the clock near a window or in an open area. Avoid locations with metal structures, electronics, or power stations, as these can interfere with the signal. Keep the clock away from railways, high-voltage cables, and concrete buildings. Experiment with different locations to find the strongest signal strength for accurate time synchronization.

Troubleshooting Poor Signal Reception

If the clock struggles to receive a signal, ensure it is placed away from metal objects, electronics, and high-voltage areas. Avoid locations like basements or concrete buildings. Move the clock near a window or outdoors to improve reception. If issues persist, check for local interference or obstructions. Allow the clock time to search for the signal, as reception may take a few minutes.

Maintenance and Care

Regular cleaning with a soft cloth is essential. Store without batteries when not in use. Avoid direct sunlight, extreme temperatures, and humidity. Use non-rechargeable batteries correctly.

Cleaning and Battery Replacement

Clean the clock with a soft cloth or paper towel, avoiding corrosive cleaners. Replace batteries promptly when the LCD dims. Use non-rechargeable batteries correctly, ensuring proper polarity. Do not mix old or different battery types. Battery replacement is needed when the display becomes dim. Store the clock without batteries when not in use to maintain functionality and longevity.

Environmental Considerations for Clock Longevity

To ensure longevity, avoid direct sunlight, extreme temperatures, and high humidity. Place the clock near a window for optimal signal reception, but not in areas like bathrooms or poolside. Avoid locations with metal structures or power stations, as they can interfere with signal reception. Store the clock in a stable environment to maintain accurate timekeeping and overall performance.

Troubleshooting Common Issues

Address synchronization failures by relocating the clock near a window. If alarms malfunction, reset the clock or replace batteries. Ensure proper signal reception and battery installation for optimal functionality.

Resolving Time Synchronization Problems

If your clock fails to synchronize, ensure it is placed near a window for optimal signal reception. Avoid areas with metal structures or electronic interference. Reset the clock by removing the batteries for 30 seconds. Reinstall batteries and allow 3-12 minutes for signal reception. If issues persist, check for firmware updates or contact customer support for further assistance.

Addressing Alarm Malfunctions

If the alarm malfunctions, ensure it is enabled and the volume is set correctly. Check that the time and alarm settings are accurate. If issues persist, reset the clock by removing the batteries for 30 seconds. Reinstall batteries and allow the clock to resynchronize. If problems continue, contact customer support for further troubleshooting or potential firmware updates.

Understanding the Technology

Precision radio-controlled clocks synchronize with atomic signals, ensuring accuracy and automatic adjustments. They eliminate manual setting via advanced signal decoding, linked to atomic timekeeping.

How Radio-Controlled Clocks Work

Precision radio-controlled clocks receive atomic clock signals via a built-in receiver, decoding time codes to set accurate time and date. Signals like MSF (UK) transmit continuously, ensuring synchronization. Upon battery insertion, the clock automatically searches for and decodes the signal, adjusting to the correct time within minutes. This technology eliminates manual adjustments, providing precise timekeeping aligned with atomic standards.

The Role of Atomic Clocks in Signal Transmission

Atomic clocks generate hyper-accurate time signals, transmitted via radio waves from locations like Anthorn, UK. These signals, such as MSF, are regulated to deviate less than one second in 10 million years. They ensure precision radio-controlled clocks automatically synchronize, maintaining flawless time accuracy and automatically adjusting for daylight saving changes without user intervention.

Advanced Features and Customization

Precision radio-controlled clocks offer customizable alarms, snooze functions, and backlight options for enhanced user experience. Some models include temperature displays and adjustable settings, ensuring personalized convenience while maintaining precise timekeeping accuracy.

Using the Backlight and Temperature Display

The backlight illuminates the LCD display for better visibility in low light. Press the SNOOZE/LIGHT button to activate it for 5 seconds. The temperature display shows room temperature, enhancing functionality. These features improve usability without compromising battery life, ensuring your clock remains functional and convenient for daily use.

Customizing Alarm and Time Settings

Customize your alarm by switching to the ALARM position and using the HOUR/MONTH/WAVE and MIN/DATE/COLOUR buttons to set desired times. The alarm tone lasts for 1 minute, with a snooze feature for added convenience. Adjust time settings manually in the TIME mode, ensuring precise control over your clock’s functionality to suit your daily routine and preferences.

Customer Support and Resources

For assistance, contact the customer help line at 0121 524 1400 or email customerservicepeershardy.co.uk. Visit www.precisiontimekeeping.com for manuals, resources, and additional support options.

Contacting Customer Service

For inquiries or issues, contact the customer support team at 0121 524 1400 (Monday to Friday, 9:00 AM to 5:00 PM). You can also email customerservicepeershardy.co.uk for assistance. Visit www.precisiontimekeeping.com for additional resources, manuals, and support options. Ensure to dispose of used units and batteries ecologically, as indicated in the product guidelines.

Accessing Online Manuals and Additional Resources

Visit www.precisiontimekeeping.com for comprehensive guides, manuals, and troubleshooting tips. Additional resources, including user manuals, are available on platforms like manualslib.com. For further assistance, email customerservicepeershardy.co.uk or refer to the product’s official website for detailed support materials and operational guidance.

2013 chevy equinox owners manual

Welcome to the official owner’s manual for the 2013 Chevrolet Equinox. This comprehensive guide provides essential information for safe and efficient operation of your vehicle.

1.1 Overview of the Manual’s Structure

The 2013 Chevy Equinox Owners Manual is divided into 11 main sections‚ covering introduction‚ features‚ maintenance‚ troubleshooting‚ and more. It includes detailed diagrams‚ step-by-step instructions‚ and essential vehicle information to ensure safe and optimal operation. The manual is structured logically‚ making it easy to navigate and find specific guidance for owners.

1.2 Importance of Reading the Manual

Reading the 2013 Chevy Equinox Owners Manual is crucial for understanding vehicle features‚ safety systems‚ and maintenance requirements. It provides tips for maximizing fuel efficiency and troubleshooting common issues. By familiarizing yourself with the manual‚ you can ensure safe operation‚ optimize performance‚ and extend the lifespan of your vehicle. Regular reference helps prevent costly repairs and enhances ownership experience.

Key Features of the 2013 Chevy Equinox

Discover the 2013 Chevy Equinox’s versatility‚ offering a range of engine options‚ a spacious interior‚ and advanced technology features. Perfect for families and daily commuters alike.

2.1 Engine Options and Performance

The 2013 Chevy Equinox offers two engine options: a 2.4L four-cylinder and a 3.6L V6‚ delivering 182 horsepower and 264 horsepower respectively. Both engines are paired with a six-speed automatic transmission for smooth acceleration and efficient fuel economy‚ ensuring a responsive and versatile driving experience.

2.2 Interior and Exterior Design

The 2013 Chevy Equinox features a sleek exterior with chrome accents and alloy wheels‚ while the interior offers premium materials‚ ample cargo space‚ and seating for five. The design emphasizes comfort and practicality‚ with fold-flat rear seats and a versatile cargo area‚ making it ideal for both daily commuting and family adventures.

2.3 Technology and Infotainment Systems

The 2013 Chevy Equinox features an advanced infotainment system with a touchscreen display‚ Bluetooth connectivity‚ and USB ports for seamless device integration. The system supports navigation‚ voice commands‚ and premium audio options‚ ensuring an enhanced driving experience with modern convenience and connectivity at your fingertips.

Maintenance and Service Schedule

Regular maintenance is crucial for optimal performance. Follow recommended intervals for oil changes‚ tire rotations‚ and inspections to ensure longevity and reliability of your 2013 Chevy Equinox.

3.1 Recommended Maintenance Intervals

The 2013 Chevy Equinox requires regular maintenance to ensure optimal performance. Key intervals include oil changes every 5‚000 to 7‚500 miles‚ tire rotations every 7‚500 miles‚ and brake inspections every 15‚000 miles. Fluid checks and filter replacements are also essential. Follow the schedule in your manual to prevent wear and tear‚ ensuring your vehicle runs smoothly and reliably over time.

3.2 Oil Change and Fluid Requirements

Regular oil changes are essential for maintaining your 2013 Chevy Equinox. Use 5W-20 or 5W-30 synthetic oil‚ with a capacity of approximately 4.5 quarts. Check coolant‚ transmission‚ and brake fluids during each oil change. Adhere to these guidelines to ensure optimal engine performance and extend the life of your vehicle.

3.3 Tire Care and Rotation

Proper tire maintenance ensures safety and longevity. Rotate tires every 5‚000 to 8‚000 miles using the recommended pattern. Check tire pressure monthly‚ including the spare‚ and before long trips. Maintain the recommended pressure of 35 PSI for front tires and 35 PSI for rear tires. Inspect for wear and damage‚ replacing tires when tread depth reaches 1/16 inch.

Understanding the Instrument Panel and Controls

The instrument panel features a speedometer‚ tachometer‚ fuel gauge‚ and temperature gauge. Controls for climate‚ audio‚ and cruise are centrally located for easy access and intuitive operation.

4.1 Dashboard Overview

The dashboard of the 2013 Chevrolet Equinox is designed for functionality and ease of use. It includes a central infotainment system‚ climate controls‚ and a driver information center. Gauges for speed‚ RPM‚ fuel‚ and temperature are clearly visible‚ while buttons for cruise control and hazard lights are within easy reach for safe operation.

4.2 Climate Control Systems

The 2013 Chevrolet Equinox features a dual-zone automatic climate control system‚ allowing driver and passenger to set individual temperatures. Manual controls include buttons for fan speed‚ temperature adjustment‚ and air distribution. The system also includes air conditioning‚ heater‚ and defrost functions for optimal comfort. Rear vents are available for enhanced passenger comfort.

4.3 Safety Features and Indicators

The 2013 Chevrolet Equinox is equipped with advanced safety features‚ including a comprehensive airbag system‚ Anti-Lock Braking System (ABS)‚ and Electronic Stability Control (ESC). Dashboard indicators monitor these systems‚ providing alerts for issues like airbag malfunctions or ESC engagement. These features work together to enhance vehicle safety and driver confidence under various driving conditions.

Safety Features and Precautions

The 2013 Chevy Equinox is designed with advanced safety features to protect occupants. Always follow precautions and guidelines outlined in this section to ensure optimal safety performance.

5.1 Airbag System and Safety Belts

The 2013 Chevy Equinox is equipped with a sophisticated airbag system and safety belts to protect occupants during collisions. The airbags deploy in stages to minimize injury‚ while safety belts ensure proper restraint. Regular inspection and proper use of these features are crucial for maximizing their effectiveness and ensuring passenger safety in all driving conditions.

5.2 Anti-Lock Braking System (ABS)

The 2013 Chevy Equinox features an Anti-Lock Braking System (ABS) designed to prevent wheel lock-up during hard braking‚ enhancing vehicle control and reducing stopping distances. ABS automatically modulates brake pressure to maintain tire traction‚ ensuring safer stops on various road surfaces. A dashboard warning light alerts drivers if the system detects any issues requiring attention.

5.3 Electronic Stability Control (ESC)

The 2013 Chevy Equinox is equipped with Electronic Stability Control (ESC)‚ which enhances vehicle stability by automatically adjusting engine power and applying selective braking to individual wheels. This system helps reduce skidding and improves control during sharp turns or slippery road conditions. A dashboard indicator light illuminates when ESC is actively stabilizing the vehicle or if a malfunction is detected.

Troubleshooting Common Issues

This section helps identify and resolve common problems with your 2013 Chevy Equinox. It provides guidance on diagnosing warning lights‚ addressing mechanical concerns‚ and resetting systems.

6.1 Diagnosing Warning Lights

Understanding dashboard indicators is crucial for maintaining your 2013 Chevy Equinox. This section explains how to identify and interpret warning lights‚ such as engine‚ ABS‚ or ESC alerts. Refer to the manual for specific symbols‚ their meanings‚ and recommended actions. Addressing these indicators promptly helps prevent potential issues and ensures your vehicle operates safely and efficiently.

6.2 Solving Common Mechanical Issues

Addressing common mechanical issues in your 2013 Chevy Equinox ensures optimal performance. Check for irregular noises‚ fluid leaks‚ or reduced efficiency. Consult the manual for guidance on resolving issues like faulty brakes‚ uneven tire wear‚ or transmission concerns. Regular inspections and timely repairs help maintain reliability and prevent costly damages over time;

6.3 Resetting the System

Resetting your 2013 Chevy Equinox’s system can resolve issues like warning light malfunctions or computer glitches. Turn the ignition to “ON‚” press and hold the trip reset button‚ then cycle the ignition off and on. For specific resets‚ like oil change reminders‚ follow the manual’s guidance. Always consult the manual for precise instructions to avoid errors.

Fuel Efficiency and Performance Tips

Optimize your 2013 Chevy Equinox’s fuel efficiency by maintaining proper tire pressure‚ driving consistently‚ and avoiding aggressive acceleration. Regular maintenance and using cruise control on highways can enhance performance and economy.

7.1 Maximizing Fuel Economy

To maximize fuel economy in your 2013 Chevy Equinox‚ ensure proper tire inflation‚ remove extra weight‚ and drive smoothly. Use cruise control on highways and avoid idling. Regular oil changes and maintaining the recommended engine performance also contribute to optimal fuel efficiency and lower emissions. These practices help extend your vehicle’s fuel range and overall performance.

7.2 Driving Techniques for Better Performance

For optimal performance‚ accelerate smoothly and maintain consistent speeds. Avoid aggressive driving and sudden acceleration‚ as they reduce fuel efficiency. Use cruise control on highways to maintain a steady speed. Properly timed gear shifts and avoiding idling also enhance performance. These techniques ensure your 2013 Chevy Equinox operates efficiently and delivers a smooth driving experience.

Customization and Accessories

Explore available accessories for your 2013 Chevy Equinox‚ including roof racks‚ cargo organizers‚ and interior trim upgrades‚ to enhance functionality and personalize your vehicle’s style.

8.1 Available Accessories for the 2013 Chevy Equinox

The 2013 Chevy Equinox offers a variety of accessories‚ including roof racks‚ cargo nets‚ bike carriers‚ and interior trim kits. These options enhance functionality and allow owners to customize their vehicle to suit their lifestyle‚ ensuring a perfect blend of practicality and personal style for daily driving or adventure.

8.2 Installing Aftermarket Parts

Installing aftermarket parts on your 2013 Chevy Equinox can enhance its performance and appearance. Always consult the owner’s manual or manufacturer’s guidelines to ensure compatibility. Proper installation by a certified technician is recommended to maintain safety and warranty validity. Choose high-quality parts that meet OEM specifications for optimal functionality and reliability.

Warranty and Support Information

Your 2013 Chevy Equinox is backed by a comprehensive warranty. For details on coverage‚ visit Chevrolet’s official website or contact their customer support team directly.

9.1 Understanding the Vehicle Warranty

The 2013 Chevy Equinox warranty provides coverage for repairs and replacements of defective parts. It includes a 3-year/36‚000-mile basic warranty and a 5-year/100‚000-mile powertrain warranty. For full details‚ refer to the manual or contact Chevrolet support. Proper maintenance ensures warranty validity‚ so keep records of all services. Understanding your warranty helps protect your investment and ensures peace of mind.

9.2 Contacting Chevrolet Customer Support

Chevrolet offers multiple ways to contact customer support. Visit their official website for live chat‚ email assistance‚ or phone support at 1-800-CHEVY-CARE. You can also access online resources‚ FAQs‚ and service scheduling through their portal. For immediate help‚ call their 24/7 roadside assistance. Ensure to have your VIN ready for faster service. Their team is ready to assist with any questions or concerns.

Downloading the Digital Version of the Manual

The 2013 Chevrolet Equinox owner’s manual is available for free download in PDF format. Access it online‚ view in full screen‚ or save it to your device for convenience.

10.1 Steps to Access the PDF Manual

To access the 2013 Chevrolet Equinox owner’s manual‚ visit the official Chevrolet website or trusted third-party sources. Select your vehicle’s model year‚ and download the PDF version for free. Ensure compatibility with your device for easy viewing and reference‚ as this manual is designed to be user-friendly and accessible anytime‚ anywhere.

10.2 Benefits of the Digital Manual

The digital version of the 2013 Chevrolet Equinox owner’s manual offers convenience and accessibility. It can be downloaded to your smartphone‚ tablet‚ or computer‚ allowing easy access anytime. The PDF format enables quick searches and zooming for detailed information. Additionally‚ digital storage saves space and reduces the risk of losing the manual‚ ensuring it’s always available for reference.

Congratulations! This manual provides essential insights for optimal vehicle performance. Keep it in your vehicle for quick reference and enjoy a seamless driving experience with your 2013 Chevy Equinox.

11.1 Final Tips for Owners

Regularly review your owner’s manual to stay informed about maintenance‚ features‚ and safety. Keep the manual in your vehicle for easy access. Follow recommended maintenance schedules and address issues promptly. Explore customization options to enhance your driving experience. Stay updated with the latest Chevrolet resources and support for optimal performance and longevity of your 2013 Chevy Equinox.

11.2 Staying Updated with the Latest Information

To ensure your 2013 Chevy Equinox runs optimally‚ stay informed by visiting Chevrolet’s official website for updates. Subscribe to newsletters and follow official social media channels for the latest tips and recalls. Regularly check for software updates and maintenance reminders. Access the digital manual online for the most current information‚ ensuring your vehicle remains safe and performs at its best.

brother mfc l8900cdw manual

The Brother MFC-L8900CDW manual is a comprehensive guide designed to help users optimize their printer’s performance. It covers setup‚ features‚ and troubleshooting‚ ensuring efficient operation for both beginners and experienced users.

1.1 Overview of the Printer and Its Features

The Brother MFC-L8900CDW is a color laser all-in-one printer offering duplex printing‚ wireless networking‚ and mobile printing via Brother Web Connect. Its high-yield toners (3‚000 pages black‚ 1‚800 pages color) suit high-volume environments. Robust security features‚ versatile connectivity options‚ and a user-friendly interface make it ideal for offices seeking efficient and secure document management solutions.

1.2 Importance of the Manual for Optimal Usage

The manual is essential for understanding the printer’s advanced features‚ troubleshooting common issues‚ and ensuring proper setup. It provides detailed guidance on wireless networking‚ duplex printing‚ and security settings. Without the manual‚ users may miss critical configurations‚ leading to suboptimal performance. Regularly referring to it helps maintain efficiency‚ resolve errors‚ and extend the printer’s lifespan.

Downloading the Brother MFC-L8900CDW Manual

Visit Brother’s official website‚ navigate to the support section‚ and search for the MFC-L8900CDW model. Download the manual as a PDF for easy access and reference.

2.1 Steps to Download the Manual from Brother’s Official Website

Visit Brother’s official support website and navigate to the “Manuals & Guides” section. Search for the MFC-L8900CDW model‚ select the desired document type‚ and choose your language. Click the “Download” button to save the manual as a PDF. Ensure you have Adobe Acrobat installed to view the file. Follow these steps for quick access to the guide.

2.2 Alternative Sources for the Manual

Besides Brother’s official website‚ the MFC-L8900CDW manual can be found on third-party sites offering free downloads. Online forums and communities often share user-contributed guides; Additionally‚ Brother’s support page provides direct links to FAQs‚ troubleshooting‚ and manual downloads‚ ensuring accessibility even if the official site is unavailable. These sources are convenient alternatives for quick access to the manual.

Contents of the Brother MFC-L8900CDW Manual

The manual provides a detailed guide‚ including setup instructions‚ operational tips‚ troubleshooting solutions‚ and FAQs‚ ensuring comprehensive coverage for optimal printer usage and maintenance.

3.1 Quick Setup Guide

The quick setup guide provides step-by-step instructions for unpacking‚ connecting‚ and powering on the printer. It covers basic installation of toner cartridges‚ loading paper‚ and initial network setup. The guide also includes driver installation steps and tips for first-time users to ensure a smooth and hassle-free setup process.

3.2 Detailed User Guide

The detailed user guide offers in-depth instructions for utilizing advanced features‚ custom settings‚ and maintenance routines. It provides comprehensive explanations of the printer’s functionalities‚ including wireless networking‚ duplex printing‚ and security settings. This section is ideal for users seeking to maximize their printer’s capabilities and troubleshoot specific issues beyond the quick setup process.

3.3 Troubleshooting Section

The troubleshooting section addresses common issues like paper jams‚ connectivity problems‚ and error messages. It provides step-by-step solutions and FAQs to resolve printing‚ scanning‚ and networking difficulties. Detailed guides help users identify and fix problems‚ ensuring minimal downtime. This section is essential for diagnosing and resolving technical issues efficiently‚ keeping the printer running smoothly.

Installing the Printer Using the Manual

The manual guides through unboxing‚ physical setup‚ and software installation‚ ensuring a smooth and efficient setup process for all users step-by-step.

4.1 Unboxing and Physical Setup

The manual provides detailed steps for unboxing and physically setting up the Brother MFC-L8900CDW. Users are guided through connecting cables‚ installing toner cartridges‚ and loading paper trays. Clear instructions ensure proper placement and alignment for optimal performance. The process is designed to be straightforward‚ making it easy for users to prepare the printer for first-time use efficiently.

4.2 Software and Driver Installation

The manual guides users through installing the necessary software and drivers for the Brother MFC-L8900CDW. It outlines step-by-step instructions for downloading drivers from Brother’s official website or using the included CD. The process ensures compatibility with various operating systems and enables wireless and network connections. Proper driver installation is essential for unlocking all printer features and ensuring seamless performance.

FAQs and Common Questions

This section addresses frequently asked questions and common issues related to the Brother MFC-L8900CDW manual‚ providing straightforward solutions and troubleshooting tips for optimal printer usage.

5.1 Frequently Asked Questions About the Manual

Common questions about the Brother MFC-L8900CDW manual include how to download it‚ navigate its contents‚ and understand specific features. Users often ask about troubleshooting sections‚ driver installation guides‚ and language availability. The manual also addresses wireless setup‚ paper jam solutions‚ and software updates‚ ensuring comprehensive support for all printer functionalities and user needs;

5.2 Common Issues and Solutions

The Brother MFC-L8900CDW manual addresses frequent issues like paper jams‚ connectivity problems‚ and print quality. Solutions include resetting the printer‚ updating drivers‚ and cleaning internal components. It also provides troubleshooting steps for network errors and toner cartridge issues‚ ensuring users can resolve common problems efficiently and maintain optimal printer performance.

Advanced Features Explained in the Manual

The manual details advanced features like wireless networking‚ duplex printing‚ and security settings‚ explaining how to configure and utilize them for enhanced productivity and efficiency.

6.1 Wireless Networking Setup

The manual provides a detailed guide for setting up wireless networking on the Brother MFC-L8900CDW. It instructs users to turn on the printer‚ access the Network menu via the control panel‚ and select the wireless setup option. Users are prompted to choose their Wi-Fi network (SSID) from the available list and enter the network password using the on-screen keyboard. Once connected‚ the manual advises installing the appropriate printer drivers from Brother’s official website to enable wireless printing from computers and mobile devices. Additionally‚ it mentions the option to use Brother’s mobile app for enhanced wireless functionality. Troubleshooting tips are also included in case of connection issues‚ ensuring a smooth setup process for all users.

6.2 Duplex Printing and Scanning

The manual explains how to enable duplex printing and scanning on the Brother MFC-L8900CDW. For duplex printing‚ users can select the “Print on Both Sides” option in the printer driver settings. For scanning‚ the duplex scan feature allows automatic two-sided scanning‚ which is ideal for documents like ID cards or double-sided pages. The manual also provides guidance on adjusting settings for optimal results‚ ensuring efficient and high-quality two-sided printing and scanning operations.

6.3 Security Settings and Admin Features

The manual details the Brother MFC-L8900CDW’s security settings‚ including Secure Print for confidential documents and network security options to protect against unauthorized access. Admin features allow users to set restrictions‚ manage user accounts‚ and monitor usage. The guide provides step-by-step instructions to configure these settings‚ ensuring enhanced privacy and control over printer operations in shared environments.

Troubleshooting Tips from the Manual

The manual provides solutions for common issues like paper jams‚ connectivity problems‚ and print quality. It guides users through diagnostic steps to resolve errors quickly and effectively.

7.1 Paper Jam and Printing Issues

The manual offers clear solutions for resolving paper jams and common printing issues. It provides step-by-step guidance to identify and fix problems like misfeeds or blank pages. Users are advised to check paper quality‚ alignment‚ and toner levels. Detailed troubleshooting steps ensure quick resolution‚ minimizing downtime and ensuring smooth operation.

7.2 Connectivity and Network Problems

The manual addresses common connectivity issues‚ such as failed network connections or slow printing speeds. It provides troubleshooting steps to resolve wireless and wired setup problems. Users can learn how to reset network settings‚ reinstall drivers‚ or update firmware. Detailed guidance ensures stable connections and uninterrupted printing‚ even in complex network environments.

Driver and Software Downloads

Visit Brother’s official website to download the latest drivers‚ firmware‚ and software for the MFC-L8900CDW. Ensure optimal performance by installing updates regularly.

8.1 Latest Driver Versions for Different OS

Brother provides latest drivers for the MFC-L8900CDW‚ compatible with Windows‚ macOS‚ and Linux. Visit the official Brother support website to download drivers tailored to your operating system‚ ensuring optimal performance and functionality across all platforms.

8.2 Additional Software Tools for Enhanced Functionality

The Brother MFC-L8900CDW manual highlights additional software tools like Brother Web Connect and Brother Image Viewer‚ enhancing productivity. These tools enable seamless document management‚ wireless printing‚ and scanning directly from mobile devices. Compatible with Windows‚ macOS‚ and mobile platforms‚ they provide advanced features for efficient workflow management and document sharing.

Maintenance and Upkeep Guidelines

The Brother MFC-L8900CDW manual provides essential maintenance tips to ensure optimal performance. Regular cleaning‚ toner replacement‚ and firmware updates help prevent issues and maintain efficiency.

9.1 Cleaning and Regular Maintenance Tips

Regular cleaning and maintenance are crucial for the Brother MFC-L8900CDW’s longevity. Use a soft cloth to wipe the scanner glass and remove dust from the printer exterior. Clean the paper trays and toner cartridge area to prevent jams. Check and replace worn parts like the fuser unit as recommended. Schedule periodic print head cleaning to maintain print quality and ensure smooth operation.

9.2 Updating Firmware and Software

Regularly updating firmware and software ensures the Brother MFC-L8900CDW runs efficiently. Visit the official Brother support website to check for the latest versions. Use the printer’s control panel to access the settings menu‚ select Firmware Update‚ and follow on-screen instructions. Keeping the printer updated improves performance‚ adds new features‚ and enhances security. Always use genuine Brother updates for reliability.

Official Brother Support Resources

Visit Brother’s official support website for comprehensive resources‚ including FAQs‚ troubleshooting‚ and contact options. The site also offers online communities and forums for user interaction and assistance.

10.1 Contact Information and Support Channels

For assistance‚ visit Brother’s official support website at support.brother.com. You can access FAQs‚ troubleshooting‚ and contact details. Brother also offers a support line for direct inquiries. Additionally‚ their online community and forums provide peer-to-peer support and solutions. These resources ensure comprehensive assistance for MFC-L8900CDW users‚ addressing technical and operational queries effectively.

10.2 Online Community and Forums

B Brother’s online community and forums offer a platform for users to discuss and resolve issues related to the MFC-L8900CDW. Members can share experiences‚ ask questions‚ and access solutions from experts and fellow users. These forums are a valuable resource for troubleshooting‚ tips‚ and updates. Visit support.brother.com to explore the community and enhance your printer’s performance.

User Reviews and Feedback

Users have praised the Brother MFC-L8900CDW manual for its clarity and thoroughness‚ while the printer’s high-volume capabilities and wireless features are highly rated. Check reviews for insights.

11.1 User Experiences with the Manual

Users have found the Brother MFC-L8900CDW manual to be helpful and comprehensive‚ with clear instructions for setup and troubleshooting. Many appreciate its detailed guidance for advanced features like wireless networking‚ though some note it can be overwhelming for beginners. Overall‚ the manual is highly rated for its ability to enhance printer functionality and user satisfaction.

11.2 Ratings and Recommendations

The Brother MFC-L8900CDW manual has received positive ratings from users‚ with many praising its clarity and detailed instructions. It is often recommended for its ability to simplify complex features. While some users find the manual lengthy‚ the majority agree it is essential for maximizing the printer’s capabilities. Overall‚ it is highly recommended for both novice and advanced users seeking optimal performance.

The Brother MFC-L8900CDW manual is an essential resource for maximizing printer performance‚ ensuring smooth operation‚ and resolving issues efficiently. It provides comprehensive guidance for all user needs‚ enhancing productivity and satisfaction.

12.1 Summary of Key Points

The Brother MFC-L8900CDW manual provides a comprehensive guide for setup‚ operation‚ and troubleshooting. It covers essential features like wireless networking‚ duplex printing‚ and security settings. The manual also includes detailed maintenance tips and firmware updates. By following the manual‚ users can optimize printer performance‚ resolve common issues‚ and enhance productivity. It serves as a valuable resource for both beginners and advanced users.

12.2 Final Tips for Maximizing Printer Performance

Regularly clean and maintain your printer to ensure optimal output and prevent issues. Keep firmware updated for the latest features and security. Monitor toner levels to avoid interruptions and ensure consistent quality. Use wireless networking for efficient connectivity; Print in draft mode to save toner and speed up tasks. Check for driver updates to maintain performance and compatibility.