ford fiesta manual 2011

The 2011 Ford Fiesta Manual is a comprehensive guide covering essential information about the vehicle’s features, maintenance, and operation. It helps owners understand and utilize their car effectively, ensuring optimal performance, safety, and longevity.

Overview of the Ford Fiesta 2011 Model

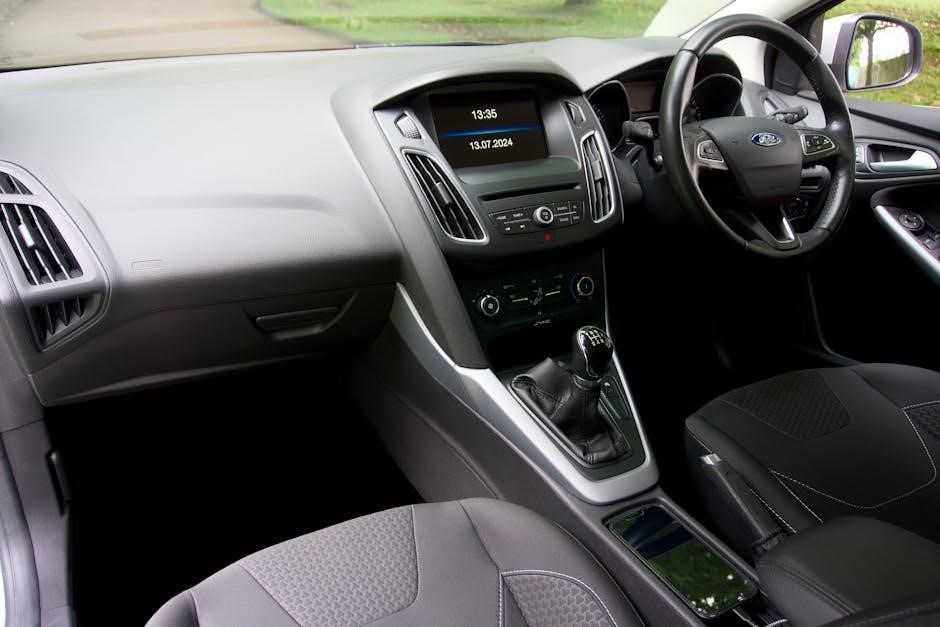
The 2011 Ford Fiesta is a compact car available in sedan and hatchback body styles, offering a blend of fuel efficiency and affordability. It features a modern design, advanced safety technologies, and a user-friendly interface. The model is equipped with a range of engine options, including a 1.6L Duratec® I-4 engine, delivering balanced performance and economy. Its compact size makes it ideal for urban driving, while its comfortable interior ensures a pleasant ride. The Fiesta also boasts a 5-star safety rating, highlighting its commitment to driver and passenger protection. With its versatile design and practical features, the 2011 Ford Fiesta remains a popular choice for everyday commuting and beyond.

Importance of the Owner’s Manual

The owner’s manual for the 2011 Ford Fiesta is an indispensable resource for car owners, providing detailed insights into the vehicle’s operation, maintenance, and features. It ensures that drivers can maximize their driving experience by understanding the car’s capabilities and proper usage. The manual includes essential information on safety features, troubleshooting, and scheduled maintenance, helping owners address common issues and prevent potential problems. By referring to the manual, users can optimize fuel efficiency, ensure longevity of the vehicle, and enhance overall performance. Additionally, it serves as a guide for utilizing advanced technologies and understanding diagnostic codes, making it a vital tool for both new and experienced drivers.

Furthermore, the manual emphasizes the importance of adhering to recommended maintenance schedules and using genuine Ford parts to maintain the vehicle’s reliability and safety standards. It also highlights proper usage of safety equipment, such as airbags and seat belts, to ensure occupant protection. Overall, the 2011 Ford Fiesta owner’s manual is a comprehensive guide that empowers owners to make informed decisions and enjoy a hassle-free driving experience.

Key Features and Specifications

The 2011 Ford Fiesta offers a compact design, fuel efficiency, and affordability in sedan and hatchback styles. Its manual provides detailed specs and features for optimal performance.

Engine and Performance Details

The 2011 Ford Fiesta is equipped with a range of efficient engines, including the 1.4L and 1.6L Duratec petrol engines and the 1.4L Duratorq diesel engine. These options deliver excellent fuel economy and performance. The petrol engines produce between 80-120 horsepower, while the diesel variant offers enhanced torque for improved fuel efficiency. The 5-speed manual transmission ensures smooth shifting and responsive acceleration, making the Fiesta ideal for both city driving and highway cruising. Advanced technologies like Variable Valve Timing optimize power delivery and reduce emissions. With its lightweight design and refined engine tuning, the Fiesta provides a balance of agility and reliability, catering to drivers seeking a practical yet engaging vehicle.

Transmission and Handling

The 2011 Ford Fiesta features a smooth and responsive 5-speed manual transmission, designed to optimize fuel efficiency and driving dynamics. The manual gearbox provides precise control, while the optional hill start assist ensures easy starts on inclines. The Fiesta’s electric power steering offers excellent responsiveness and reduces effort at low speeds, making city driving effortless. The suspension system, tuned for balance, delivers a comfortable ride while maintaining sporty handling characteristics. These features combine to create a driving experience that is both engaging and practical, making the Fiesta a standout in its class for maneuverability and driver satisfaction.

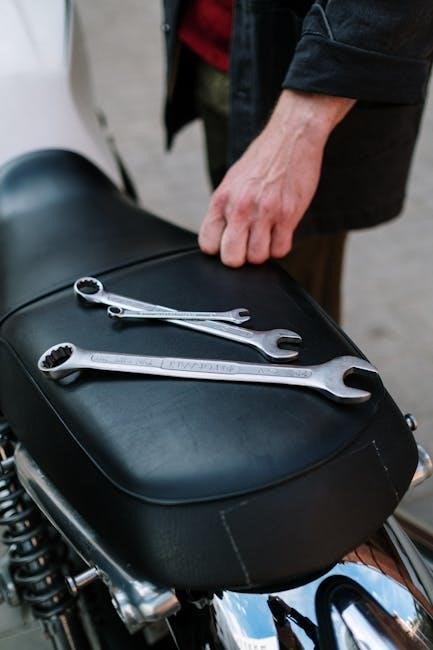
Maintenance and Repair

Regular maintenance is crucial for optimal performance and longevity. Always use Ford Original Parts for reliability. Consult the manual for scheduled services and DIY repair guidance.

Scheduled Maintenance Requirements

Regular maintenance is essential to ensure the longevity and performance of your 2011 Ford Fiesta. The owner’s manual outlines specific intervals for oil changes, tire rotations, and fluid checks. It is recommended to follow the schedule strictly to prevent mechanical issues. Key tasks include replacing the air filter every 15,000 miles and checking brake pads every 10,000 miles. Additionally, the manual advises inspecting belts and hoses at 50,000 miles to avoid unexpected breakdowns. Using Ford Original Parts ensures reliability and adherence to safety standards. Neglecting scheduled maintenance can lead to costly repairs and reduced fuel efficiency. Always refer to the manual for detailed guidelines and recommendations tailored to your vehicle’s needs.

Common Repairs and DIY Tips

The 2011 Ford Fiesta may require common repairs such as replacing the air filter, checking spark plugs, and addressing minor electrical issues. DIY enthusiasts can perform these tasks using the manual’s detailed instructions. Regular oil changes and tire rotations are also essential for maintaining performance. For more complex issues, like transmission problems, consulting the manual or a professional is recommended. Using Ford Original Parts ensures reliability and safety. Additionally, troubleshooting guides in the manual can help identify and resolve common faults, such as dashboard warning lights or irregular engine noises. Proper DIY practices can save money and extend the vehicle’s lifespan. Always refer to the manual for specific repair guidelines and safety precautions.

Safety Features and Precautions

The 2011 Ford Fiesta is equipped with advanced safety technologies, including airbags and electronic stability control. Proper use of safety equipment, like seat belts, is crucial for passenger protection. Regular maintenance ensures all safety systems function optimally, reducing accident risks. Always follow the manual’s guidelines for safe vehicle operation and repairs to maintain reliability and driver confidence.

Advanced Safety Technologies

The 2011 Ford Fiesta features cutting-edge safety technologies designed to enhance driver and passenger protection. Advanced systems include dual-stage airbags, Electronic Stability Control (ESC), and Anti-lock Braking System (ABS). These technologies work together to prevent accidents and reduce injury risk. The ESC helps maintain vehicle stability during sharp turns or slippery roads, while ABS ensures optimal braking performance. Additionally, the Fiesta includes a robust body structure to absorb and distribute crash forces effectively. Hill Start Assist is another innovative feature, preventing rollback when starting on an incline. These advanced safety technologies not only meet stringent safety standards but also provide peace of mind for drivers and occupants, making the Ford Fiesta a reliable choice for safe and confident driving.

Proper Usage of Safety Equipment

Proper use of safety equipment in the 2011 Ford Fiesta is crucial for maximizing occupant protection. Always wear seat belts correctly, ensuring they are securely fastened and properly adjusted; Airbags are designed to work in conjunction with seat belts, so never disable them or place objects near deployment areas. Child safety seats should be installed according to the manual’s guidelines, ensuring they are securely anchored and positioned correctly. Regularly inspect safety equipment for damage or wear, and follow the manual’s recommendations for maintenance. Familiarize yourself with the location and operation of emergency features like the hazard lights and first aid kit. By adhering to these guidelines, you can ensure optimal safety for all passengers while driving the Ford Fiesta.

Troubleshooting Common Issues

Troubleshooting Common Issues

Identify and resolve common issues using diagnostic tools and the manual’s guidance. Address error codes, unusual noises, or performance problems promptly to maintain your vehicle’s reliability and safety.

Understanding Diagnostic Codes

Diagnostic codes are crucial for identifying issues in your 2011 Ford Fiesta. The car’s onboard diagnostics (OBD-II) system generates codes when it detects a problem. These codes, such as P1299, indicate specific malfunctions, like engine overheating. The manual provides a list of common codes and their meanings, helping you pinpoint issues quickly. Using a code reader or scan tool, you can retrieve these codes from the vehicle’s computer. Once identified, refer to the manual for guidance on repairs or troubleshooting steps. Addressing these codes promptly prevents minor issues from becoming major problems. Regularly checking and understanding diagnostic codes ensures your Fiesta runs smoothly and maintains its performance over time. Always consult the manual or a professional if unsure about a code’s meaning or solution.

Addressing Frequently Reported Problems

The 2011 Ford Fiesta may experience common issues that owners can address with the help of the manual. One frequently reported problem is the DTC P1299, which indicates potential engine overheating, even when temperatures appear normal. Another issue is the manual transmission’s gear whine, which may be mitigated by using higher-quality oil or adjusting driving habits. Some owners have also noted hesitation after throttle body replacements, suggesting the need for proper TPS calibration. The manual provides troubleshooting steps, such as checking the cooling system for P1299 or verifying throttle body installation. Regular maintenance, like oil changes and system checks, can prevent these issues. Always refer to the manual for specific repair guidance to ensure your Fiesta runs smoothly and reliably. Prompt attention to these problems helps avoid more severe damage and maintains optimal performance.

dododuck professional q78 digital voice recorder manual pdf

Welcome to the Dododuck Professional Q78 Digital Voice Recorder, a premium device designed for capturing high-quality audio in lectures, meetings, and professional settings․ With advanced features like voice-activated recording and extended battery life, this recorder offers unmatched convenience and reliability for all your audio needs․

Overview of the Device

The Dododuck Professional Q78 Digital Voice Recorder is a high-performance audio recording device designed for professional and everyday use․ It features advanced voice-activated recording, extended battery life, and ample storage capacity․ The device is lightweight, portable, and equipped with intuitive controls, making it ideal for lectures, meetings, and interviews․ Its sleek design and user-friendly interface ensure effortless operation, while the included manual provides comprehensive guidance to maximize its functionality․

Importance of the Manual

This manual is essential for understanding and optimizing the use of the Dododuck Professional Q78 Digital Voice Recorder․ It provides detailed instructions for setting up, operating, and troubleshooting the device, ensuring users can fully utilize its advanced features․ The manual covers everything from basic functions to complex settings, helping users achieve high-quality recordings and maintain the device’s performance․ Referencing the manual ensures a seamless experience and maximizes the recorder’s potential for professional and personal needs․

Key Features and Specifications of the Dododuck Q78

The Dododuck Q78 offers voice-activated recording, extended battery life, and robust storage and connectivity options, making it a professional-grade device ideal for lectures, meetings, and high-quality audio capture․

Voice-Activated Recording

The Dododuck Q78 features intelligent voice-activated recording, automatically starting and pausing based on ambient sound levels; This function ensures efficient recording by capturing only spoken content, reducing unnecessary audio and preserving storage․ The sensitivity can be adjusted to suit different environments, making it ideal for lectures, meetings, and interviews․ This feature enhances productivity by minimizing manual operation and ensuring high-quality, relevant recordings every time․

Extended Battery Life

The Dododuck Q78 boasts an impressive extended battery life, ensuring uninterrupted recording sessions․ With a high-capacity rechargeable battery, it supports up to 24 hours of continuous recording on a single charge․ This feature is perfect for long lectures, meetings, or field recordings, eliminating the need for frequent recharging․ The energy-efficient design maximizes productivity, making it a reliable choice for professionals requiring all-day audio capture without interruptions․

Storage Capacity and Connectivity

The Dododuck Q78 offers ample storage capacity, supporting up to 32GB of internal memory and expandable via microSD cards․ Its connectivity options include USB and Bluetooth, enabling seamless file transfers to computers and devices․ The recorder also features a built-in speaker for instant playback, making it versatile for both recording and reviewing audio on the go․ This combination of storage and connectivity ensures efficient management of your recordings, catering to both personal and professional needs․

Getting Started with the Dododuck Q78

Unbox and charge your Q78 before first use․ Follow the manual for initial setup, ensuring proper activation of voice recording and connectivity features for optimal performance․

Unboxing and Basic Setup

Upon unboxing, ensure the package includes the recorder, USB cable, user manual, and earphones․ Charge the device using the provided cable until the battery is fully powered․ Power on the recorder and navigate through the menu to set language, time, and date․ Familiarize yourself with the buttons and functions․ For optimal use, review the manual to understand voice-activated recording and storage settings․ Proper setup ensures smooth operation and enhances your recording experience․

Charging the Device

To charge the Dododuck Q78, connect the provided USB cable to the device and a power source․ The red indicator light will blink during charging and turn off when fully charged․ Ensure the battery is fully powered before first use for optimal performance․ Avoid using non-original cables to maintain device integrity․ Refer to the manual for detailed charging instructions and safety precautions to prolong the battery life․

Initial Configuration

After unboxing, turn on the Dododuck Q78 by sliding the power switch․ Set the date and time to ensure proper file organization․ Familiarize yourself with the voice-activated and normal recording modes․ Insert a memory card if needed, and format it via the menu․ Select your preferred language and adjust sensitivity settings for voice activation․ Refer to the manual for detailed steps to customize settings and optimize performance for your specific needs․

Recording Modes and Functions

The Dododuck Q78 offers versatile recording modes, including normal and voice-activated options, ensuring high-quality audio capture in various settings․ Additional functions enhance user convenience and efficiency․

Normal Recording

Normal recording on the Dododuck Q78 is initiated by switching to the power-on position without voice activation․ The red indicator blinks during recording, ensuring continuous audio capture․ To save, push the switch to the power-off position, preserving the file․ This mode is ideal for uninterrupted sessions, offering reliable performance for lectures, meetings, or interviews․ The device ensures high-quality audio with minimal setup, making it user-friendly for all recording needs․

Voice-activated recording on the Q78 automatically detects ambient sound, initiating recording when audio surpasses a set threshold․ This feature minimizes silence gaps, optimizing storage and reducing manual oversight․ Sensitivity levels adapt to environments, ensuring clear capture of voices while suppressing background noise․ Ideal for hands-free use, this mode enhances efficiency in meetings, interviews, and lectures, delivering precise recordings with ease and reliability․

Saving and Managing Recordings

Saving recordings on the Dododuck Q78 is straightforward: press the switch to the power-off position during recording to save the file․ The device organizes files in dated folders for easy access․ To delete recordings, press and hold the delete button during playback․ For managing files, connect the recorder to a computer using the original data cable to transfer or organize recordings externally․ This ensures your audio files are securely stored and easily accessible for future use or sharing․

Playback and Navigation

The Dododuck Q78 offers seamless playback with easy navigation․ Users can fast forward, rewind, or delete files using intuitive button controls․ LED indicators provide clear feedback during operations․

Listening to Recordings

To listen to recordings, simply press the play button․ The Q78 features clear audio playback with adjustable volume․ Use the navigation buttons to skip or rewind․ LED indicators show playback status․ For enhanced privacy, connect headphones via the 3․5mm jack․ The device supports fast forward and rewind functions for efficient review․ Manage files easily by deleting unwanted recordings during playback․ This ensures a seamless and user-friendly experience for all your audio needs․

Fast Forward and Rewind

The Dododuck Q78 allows easy navigation through recordings with fast forward and rewind functions․ Press and hold the ‘- ‘ button to rewind or the ‘+ ‘ button to fast forward during playback․ The blue light flashes during rewind, indicating the function is active․ This feature enables quick skimming through long recordings, making it ideal for reviewing important segments without listening to the entire file; It enhances efficiency and user convenience during playback sessions․

Deleting Files

To delete a single recording, press and hold the ‘-‘ button during playback․ The blue light will flash once to confirm the file has been deleted․ For deleting all files, press and hold both ‘-‘ and ‘+’ buttons simultaneously during playback․ The red light flashes quickly to indicate all files are being deleted․ This feature allows users to manage storage efficiently and remove unwanted recordings directly from the device․ Ensure important files are backed up before deleting․

Troubleshooting Common Issues

If the device is unresponsive, restart it by holding the power button for 10 seconds․ For recording issues, ensure the microphone is not obstructed․ Connectivity problems? Try reconnecting the device to your computer using the original cable․ Visit the official support page for further assistance and firmware updates․

Device Not Responding

If the Dododuck Q78 is unresponsive, restart it by holding the power button for 10 seconds․ Ensure the battery is fully charged and avoid overcharging․ Check for firmware updates, as outdated software may cause malfunctions․ If issues persist, perform a factory reset by connecting the device to a computer and selecting “Restore Factory Settings․” Back up important files before resetting․ For unresolved issues, contact technical support or refer to the official PDF manual for detailed troubleshooting steps․

Recording or Playback Problems

If experiencing issues with recording or playback, ensure the device is properly charged and formatted․ Check the volume settings and verify that no earphones are connected during recording․ For audio quality problems, enable noise reduction or adjust sensitivity levels․ If files are corrupted, reformat the device after backing up data․ Refer to the PDF manual for detailed troubleshooting steps to resolve recording or playback malfunctions effectively․

Connectivity Issues

If experiencing connectivity issues, ensure the device is properly connected using the original data cable․ Try a different USB port or restart your computer․ If the device isn’t recognized, format the recorder and reconnect․ Ensure the device is in the correct mode (e․g․, MSC or MTP)․ For persistent issues, refer to the PDF manual for driver installation or restore factory settings after backing up data․

Maintenance and Care

Regularly clean the device with a soft cloth and store it in a dry place․ Avoid extreme temperatures and ensure proper handling to maintain performance․ Check for firmware updates to keep your Dododuck Q78 running smoothly and efficiently․

Updating Firmware

Regular firmware updates are essential for optimal performance․ Connect your Q78 to a computer, download the latest update from the official website, and follow on-screen instructions․ Use the original USB cable to ensure a stable connection․ Before updating, backup important recordings to avoid data loss․ Updates may improve voice recognition, battery life, and connectivity․ Allow the process to complete without interrupting the device․ This ensures all new features and fixes are properly installed․

Cleaning and Storage

Regularly clean the Q78 using a soft, dry cloth to remove dust and fingerprints․ Avoid harsh chemicals or liquids, as they may damage the device․ For storage, place the recorder in a protective case or pouch to prevent scratches․ Store it in a cool, dry environment away from direct sunlight․ Before long-term storage, charge the battery to 50% to maintain its health․ Ensure all connectors are clean and free from debris for optimal performance when in use․

Factory Reset

To perform a factory reset on the Dododuck Q78, connect the device to a computer using the original data cable․ Navigate to the device’s settings, select the “Factory Reset” option, and confirm․ This will restore the recorder to its default settings, deleting all recordings and configurations․ Ensure all important files are backed up before resetting, as this process is irreversible․ The factory reset helps resolve software issues and restores optimal performance․

Frequently Asked Questions (FAQs)

Explore common queries about the Dododuck Q78, including setup, recording modes, connectivity, and troubleshooting․ Find solutions to maximize your device’s performance and resolve issues efficiently․

Common User Queries

Users often inquire about activating voice recording, extending battery life, and managing storage․ They also seek solutions for connectivity issues and troubleshooting steps when the device isn’t responding․ Additionally, questions about updating firmware, formatting recordings, and performing factory resets are frequent․ Some users ask about noise reduction capabilities and compatibility with external devices․ These queries highlight the need for clear guidance to ensure optimal use of the Dododuck Q78’s advanced features․

Technical Support Options

For assistance with the Dododuck Q78, users can access the official website for FAQs, email support, and live chat․ The comprehensive manual and troubleshooting guides are available online․ Additionally, the help center offers detailed solutions for common issues․ Visit the manufacturer’s site to explore these resources and ensure seamless use of your digital voice recorder․

Thank you for choosing the Dododuck Professional Q78 Digital Voice Recorder․ With its advanced features and user-friendly design, this device is perfect for professional and personal use․ Explore its full potential and enjoy high-quality recordings with ease․ For any further assistance, refer to the manual or contact technical support․

Maximizing the Potential of the Dododuck Q78

To fully utilize the Dododuck Q78, explore its advanced features like voice-activated recording and extended battery life․ Regularly update the firmware to access new functionalities and ensure optimal performance․ Experiment with different recording modes to suit your needs, such as lectures or interviews․ Organize your files efficiently using the device’s storage options, and consider using external accessories for enhanced audio quality․ By mastering these techniques, you can unlock the Q78’s full potential for professional-grade recordings․

Final Tips for Effective Use

For optimal use of the Dododuck Q78, explore its advanced features like voice-activated recording and extended battery life․ Regularly update firmware to enhance performance and access new features․ Organize recordings efficiently using folders and tags․ Use original accessories for reliable connectivity and audio quality․ Clean the device regularly to maintain functionality․ Always backup important files before formatting or resetting․ By following these tips, you can ensure a seamless and productive experience with your Dododuck Q78 voice recorder․

char broil smoker manual

Welcome to the Char-Broil Digital Electric Smoker manual! This guide provides essential instructions for safe operation‚ assembly‚ and maintenance. Learn to unlock your smoker’s full potential with ease.

Overview of the Char-Broil Digital Electric Smoker

The Char-Broil Digital Electric Smoker is a versatile and user-friendly appliance designed for effortless smoking. Featuring advanced digital controls‚ it allows precise temperature management between 100°F and 350°F. The smoker includes a spacious cooking area‚ ideal for accommodating various meats‚ vegetables‚ and other dishes. Its robust construction ensures durability and consistent performance. With a focus on ease of use‚ this smoker is perfect for both beginners and experienced cooks. It also offers multiple cooking methods‚ including time-based and meat probe options‚ to achieve perfect results. The digital interface provides clear feedback‚ making it easy to monitor and adjust settings for optimal flavor and texture.

Importance of Following the Smoker Manual

Adhering to the Char-Broil Smoker manual is crucial for safe operation and optimal performance. Failure to follow guidelines can result in property damage or personal injury. The manual provides essential safety precautions‚ such as proper assembly and ignition procedures‚ to ensure hazard-free use. It also outlines maintenance routines to extend the smoker’s lifespan. By following the instructions‚ users can avoid common issues and achieve consistent cooking results. Ignoring the manual may void warranties or lead to unsafe conditions. Always consult the official guide for troubleshooting and best practices to enhance your smoking experience and ensure reliability year after year.

Safety Precautions and Guidelines

Ensure safety by placing the smoker on a heat-proof surface‚ maintaining proper ventilation‚ and keeping it away from flammable materials. Never overload or leave unattended.

General Safety Tips for Operating the Smoker

Ensure a safe cooking experience by following essential safety guidelines. Always place the smoker on a heat-proof‚ level surface outdoors‚ away from flammable materials. Maintain proper ventilation to avoid carbon monoxide buildup. Never leave the smoker unattended while in operation. Keep children and pets at a safe distance. Avoid overloading the smoker‚ as this can lead to uneven heating. Use protective gear like gloves and eyewear when handling hot components. Regularly inspect cords and connectors for damage. Avoid moving the smoker while it is in use or still hot. Follow all manufacturer recommendations to prevent accidents and ensure optimal performance.

Specific Safety Instructions for Ignition and Use

Adhere to ignition and operational safety protocols to ensure a hazard-free experience. Before starting‚ ensure the smoker is on a stable‚ heat-resistant surface. Keep the area clear of leaves or debris. Never use accelerants like lighter fluid‚ as they can damage components. Follow the ignition sequence outlined in the manual to avoid gas buildup. Always light the smoker in a well-ventilated area‚ away from open windows or doors. If the smoker malfunctions‚ turn it off immediately and contact customer support. Avoid using damaged cords or connectors‚ as they pose fire risks. Never operate the smoker in confined spaces or during strong winds. Proper ignition and use practices are crucial for safety and performance.

Assembly and Initial Setup

Begin by unpacking and inventorying all components. Follow the step-by-step assembly instructions carefully. Ensure proper setup‚ including attaching legs‚ aligning panels‚ and connecting electrical components securely.

Unpacking and Inventory of Smoker Components

Start by carefully unpacking the smoker and all accessories. Ensure all components‚ such as the smoker body‚ lid‚ shelves‚ and electrical elements‚ are included. Refer to the manual’s inventory list to verify completeness. Check for any visible damage or missing parts. Organize smaller items like screws and connectors in a safe place to avoid loss. Inspect each component for proper condition before proceeding; This step ensures a smooth assembly process and prevents delays. Properly unpacking and inventorying is crucial for a successful setup experience with your Char-Broil Digital Electric Smoker.

Step-by-Step Assembly Instructions

Begin by assembling the smoker’s base and legs‚ ensuring all bolts are securely tightened. Next‚ attach the main body and lid‚ aligning the hinges properly. Connect the electrical components‚ including the control panel and heating element‚ following the manual’s wiring diagram. Install the shelves and racks‚ making sure they fit snugly into their designated slots. Finally‚ attach the chimney and vent system to ensure proper ventilation. Double-check all connections for stability and tightness. Once assembled‚ place the smoker on a level‚ heat-resistant surface. Refer to the manual for specific alignment and tightening instructions to complete the setup successfully.

Cooking with the Char-Broil Smoker

Explore the art of low-and-slow cooking with the Char-Broil Smoker. Easily control smoke and temperature to achieve tender‚ flavorful results. Perfect for brisket‚ ribs‚ and more.

Understanding the Smoke Setting and Temperature Control

The smoke setting allows you to maintain consistent smoke levels‚ while temperature control ensures precise cooking. Use the digital interface to set desired smoke levels and temperatures‚ achieving optimal results for various meats. Proper ventilation and regular monitoring are crucial for maintaining control. Adjustments can be made during cooking to fine-tune smoke intensity and temperature‚ ensuring your dishes are perfectly cooked every time. This feature-rich system simplifies the smoking process‚ making it accessible for both beginners and experienced cooks to achieve professional-grade outcomes effortlessly.

Cooking Methods: Time and Temp vs. Meat Probe

The Char-Broil smoker offers two primary cooking methods: Time and Temp‚ and Meat Probe. The Time and Temp method allows you to set specific cooking durations and temperatures‚ ideal for consistent results. Conversely‚ the Meat Probe method uses internal meat temperature for precision‚ ensuring meat is cooked to a safe and desirable doneness. Choose the Time and Temp method for uniform cooking‚ or switch to the Meat Probe for hands-off monitoring. Both methods ensure delicious outcomes‚ but the Meat Probe is particularly recommended for larger cuts of meat. Always monitor temperatures and adjust as needed for optimal results. Proper use enhances flavor and texture‚ making every dish exceptional.

Maintenance and Troubleshooting

Regularly clean the smoker‚ inspect for damage‚ and store properly. Address issues like uneven heating or digital control malfunctions promptly for optimal performance and longevity. Troubleshoot effectively.

Proper Cleaning and Maintenance of the Smoker

Regular cleaning is essential for optimal performance and longevity. After each use‚ clean food debris and wipe surfaces with a damp cloth. Line the charcoal pan with heavy-duty aluminum foil for easy cleaning. Punch holes in the foil for proper ventilation. Deep clean periodically by removing grease buildup and scrubbing grates. Check for wear and tear on components like gaskets and replace as needed. Ensure proper storage in a dry‚ protected area when not in use. Refer to the manual for specific maintenance schedules and safety guidelines to keep your smoker in excellent condition.

Common Issues and Solutions for Optimal Performance

Ensure your Char-Broil smoker operates smoothly by addressing common issues. If the smoker isn’t heating evenly‚ check for proper ventilation and clean the vents. For connectivity problems with digital models‚ restart the device and ensure a stable power supply. If the meat probe isn’t accurate‚ calibrate it according to the manual. Grease buildup can cause performance issues‚ so clean the smoker regularly. For temperature fluctuations‚ ensure the lid is sealed properly and adjust the smoke setting as needed. Refer to the troubleshooting section in the manual for detailed solutions and maintain your smoker to prevent recurring problems.

Additional Resources and Recipes

Access the official Char-Broil smoker manual for detailed guides and troubleshooting. Explore recommended recipes and cooking tips to enhance your smoking experience and subscribe for updates.

Accessing the Official Char-Broil Smoker Manual

The official Char-Broil Digital Electric Smoker manual is available for free download on the Char-Broil website. This comprehensive guide includes detailed assembly instructions‚ safety precautions‚ and troubleshooting tips. It also covers cooking methods‚ temperature control‚ and maintenance procedures. To access the manual‚ visit the Char-Broil support page‚ select your smoker model‚ and download the PDF. Ensure you refer to the official manual for accurate information tailored to your specific smoker model. Additional resources‚ such as recipe guides and cooking tips‚ are also available to enhance your smoking experience.

Recommended Recipes and Cooking Tips

Explore a variety of delicious recipes and expert cooking tips to enhance your smoking experience. Char-Broil offers a range of mouthwatering ideas‚ from classic brisket and ribs to innovative vegetarian dishes. Visit the official Char-Broil website for recipe guides tailored to your smoker model. Subscribe to their newsletter for weekly updates‚ including new recipes‚ cooking techniques‚ and promotional offers. For a perfect smoke‚ ensure you follow the temperature and time guidelines outlined in your manual. Experiment with different wood flavors and seasonings to create unique tastes. Whether you’re a novice or a pro‚ these resources will help you achieve smoked perfection every time.

papablic sterilizer manual

Welcome to the Papablic Sterilizer Manual, your guide to safe and effective sterilization for baby items. This manual ensures proper use, highlights key features, and provides troubleshooting tips for optimal performance.

What is the Papablic Sterilizer?

The Papablic Sterilizer is an innovative electric steam sterilizer and dryer designed for baby items like bottles, nipples, and pump parts. It uses steam to deeply sanitize and hot air to dry, ensuring a complete clean. Made from BPA-free materials, it’s safe for everyday use. Compact and user-friendly, the Papablic Sterilizer offers a efficient solution for parents seeking to maintain hygiene and convenience. Its advanced design ensures thorough sterilization and drying, making it a reliable choice for baby care essentials.

Why Use the Papablic Sterilizer?

The Papablic Sterilizer is a must-have for parents seeking a reliable, efficient, and safe way to sterilize baby items. Its 3-in-1 functionality—sterilizing, drying, and deodorizing—ensures a complete clean with minimal effort. Designed with safety in mind, it uses steam to deeply sanitize items and hot air to dry them thoroughly. The BPA-free construction and user-friendly design make it ideal for daily use. By streamlining the sterilization process, the Papablic Sterilizer saves time and provides peace of mind, ensuring baby items are always clean and ready for use.

Key Features and Benefits of the Papablic Sterilizer

The Papablic Sterilizer offers a 3-in-1 solution, combining efficient sterilization, drying, and deodorizing. Its steam technology ensures deep sanitization, while the BPA-free design prioritizes safety for baby items.

Complete Clean: Sterilize, Dry, and Deodorize

The Papablic Sterilizer offers a 3-in-1 solution for a complete clean. With one simple operation, it sterilizes using steam, dries with hot air, and naturally deodorizes. This ensures baby items are not only free from bacteria but also dry and fresh. The sterilizer eliminates 99.9% of germs and bacteria, providing peace of mind for parents. Its advanced design allows for thorough sanitization, drying, and odor removal, making it ideal for bottles, nipples, pacifiers, and other baby essentials. This all-in-one function saves time and ensures a hygienic environment for your baby.

Compatibility with Various Baby Items

The Papablic Sterilizer is designed to accommodate a wide range of baby essentials, including bottles, nipples, pacifiers, and breast pump parts. Its spacious interior ensures that items of different shapes and sizes can be sterilized efficiently. The sterilizer is compatible with BPA-free plastics and other safe materials commonly used in baby products. Always check the user manual of the items you wish to sterilize to confirm compatibility and ensure optimal results. This versatility makes it a practical solution for parents with diverse baby care needs.

Easy-to-Use Design and Operation

The Papablic Sterilizer features an intuitive design that simplifies the sterilization process. With a user-friendly interface and straightforward controls, it allows for seamless operation. The sterilizer includes a comprehensive manual with step-by-step instructions and visual guides to ensure easy assembly and first-time use. Its one-touch operation and automatic features, such as steam sterilization and drying cycles, make it hassle-free for parents. The manual also provides clear guidelines for loading items and selecting the right settings, ensuring a stress-free experience for users of all familiarity levels.

Understanding the Papablic Sterilizer Manual

This section provides a detailed overview of the manual, emphasizing its role in guiding users through safe and effective sterilization processes for baby items, ensuring optimal results.

Importance of Reading the Manual Before Use

Reading the Papablic Sterilizer Manual is crucial for ensuring safe and effective operation. It outlines compatibility with baby items, proper assembly, and essential safety precautions to prevent accidents. The manual also provides guidance on sterilization cycles, maintenance, and troubleshooting common issues. By following the instructions, users can maximize the lifespan of the sterilizer and ensure optimal cleaning results. Proper usage helps maintain the quality of baby items and guarantees a hygienic environment for your child.

Step-by-Step Guide to Assembly and First Use

Begin by carefully unpacking and assembling the Papablic Sterilizer according to the included instructions. Ensure all components are securely fitted. Next, add distilled water to the reservoir as directed. Place baby items like bottles, nipples, and pacifiers in the sterilizer basket, avoiding overcrowding. Choose the appropriate cycle using the control panel and start the sterilization process. Once complete, allow items to cool before removing them. Regularly check and refill water levels for consistent performance. This process ensures a safe and efficient first use, providing a hygienic environment for your baby.

Safety Precautions and Warnings

Always follow the Papablic Sterilizer Manual guidelines. Ensure proper ventilation, avoid overheating, and keep the device out of children’s reach. Regular maintenance prevents hazards and ensures safe operation.

Ensuring Safe Operation for Baby Items

To ensure safe operation, always check the user manual of items before sterilizing. Verify compatibility with the Papablic Sterilizer to avoid damage. Use distilled water for optimal sterilization results. Regularly clean the sterilizer to maintain hygiene and efficiency. Avoid overloading the unit, as this can hinder steam circulation and affect sterilization quality. Ensure all parts are dry before storing to prevent mold growth. Follow the manufacturer’s guidelines for temperature settings and cycle times to guarantee safe and effective sterilization of baby items. Proper maintenance ensures longevity and safety of the device.

Preventing Accidents and Hazards

To prevent accidents, always follow the Papablic Sterilizer manual guidelines. Ensure the unit is placed on a stable, heat-resistant surface away from children. Avoid touching hot surfaces during operation. Use distilled water to prevent mineral buildup and maintain efficiency. Never overload the sterilizer, as this can cause uneven steam distribution. Keep the power cord away from water and heat sources. Regularly inspect for damage or wear and tear. Store the sterilizer in a cool, dry place when not in use. Proper precautions ensure safe and reliable operation.

Maintenance and Cleaning of the Papablic Sterilizer

Regularly clean the sterilizer with a damp cloth and descale to remove mineral buildup. Ensure all parts are dry after use to maintain hygiene and efficiency.

How to Clean the Sterilizer Regularly

To maintain your Papablic Sterilizer, start by unplugging it and allowing it to cool. Use a soft, damp cloth to wipe down the exterior and interior. For tougher stains, mix equal parts water and white vinegar on a cloth and gently scrub. Avoid abrasive cleaners or bleach, as they may damage the components. Regular descaling is also recommended to remove mineral buildup, ensuring optimal performance. Always refer to the manual for specific cleaning instructions tailored to your model.

Tips for Long-Term Maintenance

Regular descaling every 1-2 months prevents mineral buildup, ensuring efficient operation. Store the sterilizer in a dry, cool place when not in use. Check and replace worn-out seals to maintain steam integrity. Avoid using harsh chemicals, as they can damage the sterilizer’s components. For optimal performance, run a cleaning cycle every 20 uses. Always follow the manual’s guidelines for maintenance to extend the lifespan of your Papablic Sterilizer and ensure it continues to provide safe and effective sterilization for your baby items.

Troubleshooting Common Issues

  • Check for mineral buildup and descale regularly to prevent malfunctions.
  • Ensure proper water levels and ventilation for efficient operation.
  • Refer to the manual for error code solutions and maintenance tips.

Identifying and Resolving Common Problems

Common issues with the Papablic Sterilizer include mineral buildup, insufficient water levels, and error codes. To resolve these, descale regularly, check water levels, and refer to the manual for error code solutions. Ensure proper ventilation and avoid overloading the sterilizer. Clean the steam vent and drying fan for optimal performance. If issues persist, contact customer support. Regular maintenance and adherence to guidelines can prevent most problems, ensuring efficient and safe sterilization for your baby items.

The Papablic Sterilizer Manual provides essential guidance for safe and efficient use. By following the manual, you ensure longevity and effective sterilization, making it a valuable investment for a healthier, happier baby.

Maximizing the Lifespan of Your Papablic Sterilizer

Regular cleaning and proper maintenance are key to extending the life of your Papablic Sterilizer. Use distilled water to prevent mineral buildup and ensure optimal performance. Always check the compatibility of items before sterilization to avoid damage. Follow the manual’s guidelines for assembly and operation to maintain efficiency. Store the sterilizer in a dry, cool place when not in use. By adhering to these tips, you can enjoy years of reliable service from your Papablic Sterilizer, making it a worthwhile investment for your baby’s health and safety.

Why the Papablic Sterilizer is a Great Investment

The Papablic Sterilizer is a great investment for any parent seeking a reliable and efficient solution for baby care. Its ability to sterilize, dry, and deodorize in one cycle makes it a time-saving essential. Designed with safety and durability in mind, it ensures long-term performance. Regular maintenance and proper care can extend its lifespan, providing years of dependable service. Its compatibility with various baby items and easy operation make it a versatile and practical choice, offering peace of mind for parents who prioritize their baby’s health and safety.

About the Brand and Product Line

Papablic is a trusted brand specializing in innovative baby care products, offering high-quality solutions like sterilizers, dryers, and accessories designed for safety and efficiency.

Overview of Papablic and Its Commitment to Quality

Papablic is a renowned brand dedicated to creating innovative, safe, and efficient baby care products. Specializing in sterilizers, dryers, and accessories, Papablic prioritizes quality and durability, ensuring every product meets high safety standards. Their commitment to excellence is reflected in BPA-free materials and rigorous testing processes. By focusing on user-friendly designs and advanced technology, Papablic aims to make parenting easier while maintaining trust and satisfaction. Their reputation as a reliable brand stems from continuous innovation and a customer-centric approach, making them a preferred choice for parents worldwide.

Exploring Other Papablic Products for Baby Care

Beyond the sterilizer, Papablic offers a range of baby care products designed for convenience and safety. Their Mini Portable UV Light Sterilizer is perfect for on-the-go use, ensuring germ-free surfaces anywhere. Additionally, Papablic provides high-quality baby bottles, breast pumps, and accessories, all made from BPA-free materials. These products are crafted with a focus on ease of use and baby comfort, reflecting Papablic’s dedication to supporting parents in all aspects of caregiving. Their product line is a testament to their commitment to innovation and quality.

innova 3320 manual pdf

Welcome to the Innova 3320 Manual PDF, your comprehensive guide to mastering the Innova 3320 Auto-Ranging Digital Multimeter. This manual provides detailed instructions for safe and effective use, covering features, testing procedures, and troubleshooting tips. Designed for automotive, household, and electrical applications, it ensures accurate measurements and optimal device performance. Explore its capabilities and unlock professional-grade diagnostics with ease.

Overview of the Innova 3320 Multimeter

The Innova 3320 is a versatile auto-ranging digital multimeter designed for automotive, household, and electrical applications. It measures AC/DC voltage, current, resistance, diodes, and continuity with precision. Built with safety in mind, it features overload protection across all ranges to prevent damage. Its user-friendly interface and clear display make it ideal for professionals and DIY enthusiasts. This tool is essential for diagnosing circuits, testing batteries, and ensuring electrical systems function efficiently and safely.

Importance of the Manual for Effective Use

The Innova 3320 manual is crucial for unlocking the full potential of your multimeter. It provides essential safety precautions, operational guidelines, and troubleshooting tips. By following the manual, users can ensure accurate measurements, prevent device damage, and maintain safety. The detailed instructions cover testing procedures for voltage, current, resistance, and more, making it an indispensable resource for both professionals and DIY enthusiasts to achieve precise and reliable results in various applications.

Safety Precautions and Warnings

The Innova 3320 manual emphasizes critical safety precautions and warnings to prevent electric shock and personal injury, ensuring safe and proper use of the multimeter.

General Safety Guidelines

The Innova 3320 manual outlines essential safety guidelines to ensure safe operation. Always follow warnings on the device to avoid electric shock or injury. Use the multimeter strictly for its intended purposes and avoid hazardous environments. Never exceed the rated specifications, and keep the device away from water. Regularly inspect the test leads and ensure all connections are secure. Proper adherence to these guidelines ensures reliable performance and user safety during measurements and diagnostics.

Specific Warnings on the Device

The Innova 3320 manual emphasizes specific warnings on the device to prevent electric shock or injury. Pay attention to warnings stamped on the front and rear of the meter’s case, as they are critical for safe operation. Ignoring these warnings can lead to severe consequences. Always follow the guidelines outlined in the manual to ensure proper and safe use of the multimeter during measurements and diagnostics.

Features and Specifications of the Innova 3320

The Innova 3320 is an auto-ranging digital multimeter designed for precision and ease of use. It measures AC/DC voltage, current, resistance, diodes, and continuity with overload protection and a backlit LCD for clear results.

Auto-Ranging Capability

The Innova 3320 features an advanced auto-ranging system, eliminating the need to manually select measurement ranges. This functionality enhances efficiency by automatically adjusting to the optimal scale for accurate readings. It supports AC/DC voltage, current, resistance, and continuity testing, ensuring precise measurements without user intervention. The auto-ranging capability simplifies operation, making it ideal for beginners and professionals alike. This feature, combined with overload protection, ensures reliable performance across various applications.

Measurement Capabilities (Voltage, Current, Resistance, etc.)

The Innova 3320 multimeter offers versatile measurement capabilities, including AC/DC voltage, current, resistance, diode testing, and continuity. It provides accurate readings for automotive circuits, household electrical systems, and electronic devices. With its wide range of measurement functions, this device is suitable for both professional and DIY applications. The multimeter’s ability to test batteries, wiring, and fuses ensures comprehensive diagnostic solutions, making it an essential tool for troubleshooting and maintenance tasks across various industries. Its precision and reliability enhance productivity in any setting.

Controls and Indicators

The Innova 3320 features a range switch, function selector, and LCD display with green, yellow, and red LEDs for clear status indication. The COM terminal ensures safe connections.

Understanding the Multimeter Controls

The Innova 3320 multimeter features intuitive controls, including a function selector for mode selection (Voltage, Current, Resistance, etc.) and a range switch for manual or auto-ranging. The COM terminal ensures proper probe connections, while the VΩ terminal is used for voltage, current, and resistance measurements. LEDs provide visual feedback for continuity testing, and the backlit LCD display enhances readability. Understanding these controls is essential for precise and safe measurements across automotive and electrical applications.

Interpreting the Display and LEDs

The Innova 3320 features a backlit LCD display showing measurements up to 2000 counts. Green, yellow, and red LEDs indicate continuity test results. The display includes icons for mode selection (Voltage, Current, Resistance, etc.). LEDs flash rapidly for open circuits and stay lit for closed circuits. The display also shows battery status and overload warnings. Understanding these indicators ensures accurate readings and safe operation during automotive, electrical, and household applications. Proper interpretation enhances diagnostic efficiency and user confidence.

Preparation and Caution Before Use

Ensure safety by following guidelines in the Innova 3320 Manual PDF. Avoid hazards like electric shock by checking for damage and using correct test leads. Always adhere to warnings to prevent device damage or personal injury during measurements. Proper preparation enhances accuracy and safety in automotive, electrical, and household applications.

Initial Setup and Calibration

Before using the Innova 3320, ensure proper setup and calibration for accurate measurements. Start by inspecting the device for damage and ensuring all components, such as test leads, are securely connected. Install the correct battery type as specified in the PDF manual. Familiarize yourself with the multimeter’s controls and functions, such as auto-ranging and mode selection. Calibration may not be required for basic use, but always refer to the manual for specific instructions to maintain precision and safety during operation.

Pre-Use Checks and Safety Measures

Before using the Innova 3320, perform essential pre-use checks to ensure safe operation. Inspect the multimeter and test leads for damage or wear. Verify that all connections are secure and free from corrosion. Always set the multimeter to the correct function and range before measurement. Adhere to the device’s CAT rating for voltage measurements and avoid exceeding its specifications. Pay attention to all safety warnings and guidelines outlined in the PDF manual to prevent electric shock or device damage.

Testing Procedures

The Innova 3320 allows precise measurement of AC/DC voltage, current, and resistance. It also tests diodes and continuity, ensuring accurate diagnostics for automotive and electrical systems, following safety guidelines and proper range settings for reliable results.

Voltage Measurement (AC/DC)

The Innova 3320 enables precise measurement of both AC and DC voltage, catering to automotive and household applications. With its auto-ranging feature, the multimeter automatically selects the appropriate scale for accurate readings. To measure voltage, set the dial to the DC or AC voltage function, connect the probes to the circuit, and ensure the multimeter is set to the correct range. Always use the correct probe inputs and follow safety guidelines to avoid electrical hazards. This feature is essential for diagnosing electrical issues in vehicles and home systems, providing reliable results for troubleshooting.

Current Measurement (AC/DC)

The Innova 3320 supports both AC and DC current measurement, essential for automotive diagnostics and household electrical systems. It offers a range of up to 10A for DC and 10A for AC, ensuring accurate readings. Select the appropriate function and use the correct input terminals to avoid damage. Always prioritize safety by following the manual’s guidelines for current measurement to prevent electrical hazards. This feature is vital for troubleshooting circuits and verifying the integrity of electrical systems.

Resistance, Diode, and Continuity Testing

The Innova 3320 enables precise testing of resistance, diodes, and continuity, crucial for diagnosing electrical circuits. Use the Ohms function for resistance measurement, while the Diode Test mode checks for proper semiconductor operation. Continuity Testing with an audible buzzer helps identify short circuits or faulty connections. These features are essential for automotive and household troubleshooting, ensuring efficient and accurate diagnostics. Always refer to the manual for specific procedures to ensure reliable results and safe operation.

Applications of the Innova 3320

VERSATILE and reliable, the Innova 3320 excels in automotive circuit diagnostics, household electrical systems, and vehicle battery testing, making it a must-have tool for various diagnostic needs.

Automotive Circuit Testing

The Innova 3320 is ideal for automotive circuit testing, enabling users to diagnose electrical systems, test batteries, and measure voltage, current, and resistance in vehicles. Its auto-ranging capability simplifies troubleshooting, while overload protection ensures safety. Perfect for professionals and DIYers, it helps identify issues in wiring, circuits, and automotive components efficiently. The manual provides detailed guidance on testing procedures, ensuring accurate and reliable results for car maintenance and repair tasks.

Household and Electrical Applications

The Innova 3320 is versatile for household and electrical tasks, enabling users to safely measure voltage, current, and resistance in home circuits. Its auto-ranging feature simplifies diagnostics for electrical outlets, appliances, and wiring. The manual provides clear guidance for testing GFCI outlets, circuit breakers, and fuses, ensuring reliable results. Perfect for homeowners and electricians, it supports efficient troubleshooting and maintenance of electrical systems, promoting safety and precision in everyday applications.

Troubleshooting and Maintenance

The section provides solutions for common issues, maintenance tips, and calibration guidance to ensure optimal performance and extend the lifespan of your Innova 3320 multimeter.

Common Issues and Solutions

Addressing common issues with the Innova 3320 ensures optimal performance. Inaccurate readings may result from faulty leads or incorrect range settings. Blown fuses can occur due to overload; replace them with the specified rating. Battery drain issues can be resolved by turning off the auto-power-off feature when not needed. For display malfunctions, check connections and ensure proper calibration. Regularly clean the terminals and verify probe integrity for accurate measurements and extended device longevity.

Maintenance Tips for Longevity

Regular maintenance ensures the Innova 3320 performs optimally. Clean the terminals and probes with a soft cloth and mild solvent to prevent corrosion. Store the multimeter in a dry, cool place, away from direct sunlight. Avoid extreme temperatures and physical stress. Calibrate the device periodically as outlined in the manual. Replace blown fuses with the correct rating and keep spare fuses handy. Proper care extends the lifespan and accuracy of your Innova 3320 multimeter.

Warranty and Customer Support

The Innova 3320 is backed by a limited warranty covering defects in materials and workmanship. For inquiries or support, contact Innova Electronics through their official website or customer service.

Warranty Information

The Innova 3320 is covered by a limited warranty that protects against defects in materials and workmanship. The warranty period is specified in the PDF manual, ensuring coverage for a defined duration. For any warranty-related inquiries or claims, users can contact Innova Electronics through their official website or customer support channels. The manual also provides details on how to access warranty services and the process for filing claims, ensuring hassle-free support for users.

Contacting Innova Support

For any inquiries or assistance regarding the Innova 3320, users can contact Innova Electronics directly through their official website or customer support channels. The PDF manual provides detailed contact information, including email, phone, and online support forms. Additionally, the manual directs users to the official Innova website for the most up-to-date support resources, ensuring quick and reliable assistance for troubleshooting or warranty-related matters.

Downloading the Innova 3320 Manual PDF

The Innova 3320 Manual PDF is readily available for free download on websites like ManualsLib and Manualzz. Simply search, select, and download for easy access to the guide.

Steps to Access the Manual Online

To access the Innova 3320 Manual PDF, visit trusted websites like ManualsLib or Manualzz. Search for “Innova 3320 Manual” and select the PDF from the results. Click the download button, follow the site’s prompts, and save the file to your device. Ensure the source is reliable to avoid incorrect or outdated information. This process is quick, straightforward, and provides instant access to the guide for easy reference.

Free PDF Download Options

The Innova 3320 Manual PDF is widely available for free download from trusted sources like ManualsLib, Manualzz, and official Innova support websites. Simply search for “Innova 3320 Manual PDF” and select a reliable source. Most platforms offer direct downloads without registration, ensuring quick and easy access; These free resources provide the same comprehensive guide as the original, making it convenient for users to reference the manual anytime, anywhere.

The Innova 3320 Manual PDF is an essential resource for mastering your multimeter. By following its guidelines, you’ll ensure safe, effective, and precise measurements in various applications.

Final Thoughts on the Innova 3320 Manual

The Innova 3320 Manual is a thorough guide that empowers users to utilize their multimeter effectively. It covers safety, features, and testing procedures, ensuring accurate measurements. The manual’s clear instructions make it accessible for both professionals and beginners, enhancing diagnostic capabilities in automotive and household applications. By adhering to its guidelines, users can maximize the device’s potential while maintaining safety and efficiency.

Encouragement for Safe and Effective Use

Always follow the Innova 3320 Manual guidelines to ensure safe and effective use of your multimeter. Explore its features, such as auto-ranging and multiple measurement capabilities, to enhance your diagnostic skills. Regularly check leads and settings before testing to avoid errors. Proper handling and storage will extend the device’s longevity. Familiarize yourself with the manual to optimize your experience and achieve accurate, reliable results in automotive, electrical, and household applications.

first alert co detector manual

Welcome to the First Alert CO Detector Manual. This guide provides essential information for understanding and safely operating your Carbon Monoxide (CO) Alarm. Thank you for choosing First Alert.

This manual is crucial for ensuring proper installation, maintenance, and usage of your CO detector. It outlines key features, safety guidelines, and compliance with regulatory standards for optimal protection.

By reading this manual carefully, you’ll gain the knowledge needed to maximize your safety and the performance of your First Alert CO detector. Always keep this manual handy for future reference.

1.1 Importance of Understanding the Manual

Understanding this manual is crucial for ensuring your First Alert CO detector functions correctly. It provides vital safety information, installation guidelines, and maintenance tips to maximize protection. Proper use helps prevent CO incidents and ensures compliance with safety standards, safeguarding your home and family effectively.

1.2 Overview of the First Alert CO Detector

The First Alert CO Detector is a state-of-the-art device designed to detect dangerous levels of carbon monoxide in your home. It features advanced sensing technology, a digital display, and a silence button for convenience. UL certified, it provides reliable early warnings, ensuring your family’s safety with enhanced accuracy and functionality.

Key Features of the First Alert CO Detector

The First Alert CO Detector offers advanced features like a digital display, silence button, and smart integration. It provides accurate CO level detection, ensuring reliable protection for your home and family with cutting-edge technology and user-friendly design.

2.1 Combination Smoke and Carbon Monoxide Alarm

The First Alert CO detector uniquely combines smoke and carbon monoxide detection in one unit, offering dual protection against two deadly threats. It ensures early warnings for both fire and CO leaks, providing comprehensive safety with intelligent sensing technology that minimizes false alarms, making it a vital addition to any home’s safety system.

2.2 Intelligent Sensing Technology

The First Alert CO detector features advanced intelligent sensing technology designed to reduce nuisance alarms. It accurately monitors CO levels over time, detecting both fast-rising and continuous low-level CO presence. This technology ensures reliable alerts for dangerous conditions while minimizing false alarms, enhancing overall safety and user experience.

2.3 Digital Display and Silence Feature

The First Alert CO detector includes a digital display showing real-time CO levels in parts per million (ppm). The silence feature allows temporary muting of non-emergency alarms. This ensures clear visibility of CO concentrations and reduces unnecessary disturbances, while maintaining critical safety alerts for dangerous conditions. The display and silence button enhance user convenience and safety.

Installation and Placement Guidelines

Proper installation and placement of your First Alert CO detector ensure optimal performance. Follow the manual’s guidelines for location recommendations and installation steps to maximize safety and reliability.

3.1 Recommended Locations for CO Detectors

Install CO detectors on every level of your home and near sleeping areas to ensure early detection. Place detectors at least 5 feet away from fuel-burning appliances and avoid areas near windows or doors to prevent drafts from interfering with sensor accuracy. Always follow the manufacturer’s guidelines for optimal placement.

3.2 Installation Steps for Hardwire and Battery Models

For hardwire models, turn off power at the circuit breaker, then connect wires as per the manual. Mount the detector and restore power. For battery models, insert batteries, attach the mounting bracket, and secure the detector. Ensure all connections are tight and test the alarm after installation. Refer to the manual for specific details.

3.4 Importance of Proper Placement Height

Install CO detectors between 2-5 feet above the floor to ensure accurate detection, as CO gas can stratify at varying heights. Avoid placing near vents, windows, or direct sunlight, as this may cause inaccurate readings. Proper height placement ensures the detector effectively monitors air quality and provides reliable alerts for safety.

Maintenance and Troubleshooting

Regularly clean the detector and test its functionality to ensure reliability. Check battery expiration dates and replace as needed. Address any issues promptly to maintain optimal performance and safety.

4.1 Cleaning the Detector and Battery Contacts

Regular cleaning is essential for maintaining your CO detector’s performance. Use a soft brush or cloth to gently remove dust from the grille and sensor. Clean battery contacts with a slightly damp cloth to ensure proper electrical connection. Avoid using harsh chemicals or liquids, as they may damage the device. Always clean the detector before installing new batteries to prevent interference. This simple maintenance step ensures accurate detection and reliable operation, keeping your home safe from potential CO threats.

  • Clean the grille and sensor with a soft brush or cloth.
  • Wipe battery contacts with a damp cloth to remove corrosion.
  • Avoid harsh chemicals to prevent damage.
  • Clean before installing new batteries for optimal performance.

4.2 Replacing Batteries and Checking Expiry Dates

Always use non-rechargeable batteries for your CO detector. Check battery expiry dates and replace them every 6-12 months or when the low-battery alert sounds. Ensure the detector is turned off before replacing batteries to avoid false alarms. Dispose of old batteries safely and test the unit after installation to confirm proper function.

  • Use non-rechargeable batteries for reliability.
  • Replace batteries when the low-battery alert sounds.
  • Test the detector after battery replacement.
  • Dispose of old batteries safely.

Regular battery checks ensure continuous protection against CO threats.

4.3 Troubleshooting Common Issues

Common issues with your CO detector may include false alarms or failure to sound. Ensure the detector is clean and free from dust. Check for proper power supply and battery installation. Verify the unit is mounted correctly and not near vent outlets. If issues persist, reset the detector or contact customer support for assistance.

  • False alarms: Clean the detector and check for dust buildup.
  • No alarm sound: Ensure batteries are installed correctly and not expired.
  • Reset the detector if it fails to respond to CO levels.

Regular maintenance and troubleshooting ensure reliable performance and safety.

Understanding Carbon Monoxide Alerts

5.1 Types of CO Alarms (Fast Rise and Continuous Detection)

CO alarms detect dangerous levels through two modes: fast rise (sudden spikes, like a faulty furnace) and continuous detection (slow leaks from appliances). Both ensure early warnings for safety.

  • Fast Rise: Triggers for rapid CO increases, often from malfunctioning combustion devices.
  • Continuous Detection: Alerts if CO levels remain elevated over time, indicating a slow leak.

Both modes provide critical protection against CO poisoning.

CO alarms detect dangerous levels through two modes: fast rise (sudden spikes, like a faulty furnace) and continuous detection (slow leaks from appliances). Both ensure early warnings for safety.

  • Fast Rise: Triggers for rapid CO increases, often from malfunctioning combustion devices.
  • Continuous Detection: Alerts if CO levels remain elevated over time, indicating a slow leak.

Both modes provide critical protection against CO poisoning, ensuring timely alerts for varying threats.

5.2 Responding to CO Alarm Notifications

Upon hearing the CO alarm, immediately evacuate the premises and move to fresh air. Check for symptoms like dizziness or headache. Open windows and doors to ventilate the area. Do not re-enter until authorities confirm it’s safe. Contact emergency services promptly.

  • Evacuate: Leave the building quickly and safely.
  • Call Emergency Services: Report the incident for professional assessment.
  • Do Not Re-enter: Stay outside until cleared by professionals.

Never ignore the alarm; CO is odorless and deadly.

5.3 Identifying Potential Sources of CO

Carbon monoxide sources include faulty furnaces, water heaters, generators, and idling vehicles. Ensure proper ventilation and maintenance of fuel-burning appliances. Inspect chimneys and vents annually. Avoid running engines in attached garages or near windows.

  • Fuel-burning appliances: Check for leaks or blockages.
  • Generators: Never use indoors or in enclosed spaces.
  • Vehicle exhaust: Keep garages well-ventilated.

Regular inspections can help prevent CO buildup and ensure safety.

Compliance with Safety Standards

This section covers UL certification, regulatory compliance, and adherence to safety standards. Regular testing ensures functionality and meets safety requirements outlined in the manual.

6.1 UL Certification and Regulatory Requirements

All First Alert CO detectors are UL-certified, meeting rigorous safety and performance standards. Compliance with UL 217 and UL 2034 ensures reliable detection and response to carbon monoxide threats. Adherence to these standards guarantees your detector operates effectively and safely under various conditions, providing peace of mind for your home and family.

6.2 Ensuring Proper Functionality Through Regular Testing

Regular testing ensures your First Alert CO detector functions properly. Test the alarm weekly using the Test/Reset button. Vacuum the sensor monthly to remove dust. Replace batteries annually or as indicated. Always test in environments free from CO sources. Refer to the manual for detailed testing procedures and guidelines.

Smart Features and Connectivity

The First Alert CO detector offers smart features like integration with home systems and remote alerts via the First Alert app, ensuring convenience and safety.

7.1 Integration with Smart Home Systems

The First Alert CO detector seamlessly integrates with smart home systems, enabling enhanced safety and convenience. Compatible with existing networks, it connects via Bluetooth, ensuring real-time notifications and control through the First Alert app. This feature allows for a connected system, providing peace of mind and advanced monitoring capabilities.

7.2 Remote Alerts via the First Alert App

Receive instant remote alerts through the First Alert app when CO levels rise. This feature sends notifications to your smartphone or tablet, enabling quick action from anywhere; Real-time monitoring ensures peace of mind, even when you’re not at home. Stay informed and safe with alerts delivered directly to your device.

7.3 Interconnectivity with Other First Alert Devices

First Alert devices seamlessly interconnect, creating a unified safety network. When one alarm detects CO or smoke, all connected devices activate, ensuring comprehensive coverage. This interconnectivity enhances emergency responses, providing whole-home protection. Compatibility with other First Alert products ensures a coordinated alert system, offering maximum safety and peace of mind for your household.

Battery and Power Management

First Alert CO detectors offer sealed battery models and hardwired options with battery backup. Use non-rechargeable batteries for optimal performance and ensure regular testing for reliability and safety.

8.1 Understanding Sealed Battery Models

First Alert sealed battery models feature non-replaceable batteries designed to last the detector’s lifetime. The CO710 model, for example, has a 10-year sealed battery. These batteries cannot be removed or replaced, ensuring continuous protection without maintenance. Replace the entire unit after the battery expires for optimal safety and compliance.

8.2 Battery Backup Systems for Hardwired Models

Hardwired First Alert CO detectors include a battery backup system, ensuring continuous operation during power outages. Models like the SC9120B use a 120V AC power input with a battery backup; This system provides reliable protection by maintaining functionality even when the main power supply is interrupted, ensuring safety and peace of mind.

8.3 Best Practices for Battery Replacement

Always use non-rechargeable batteries as specified in the manual. Clean battery contacts before installation to ensure proper connection. Check battery expiry dates to avoid premature failure. Replace batteries during Daylight Saving Time changes or every six months. Test the detector after replacement to confirm it’s functioning correctly.

Emergency Procedures

If your CO alarm sounds, evacuate immediately, open windows for ventilation, and contact emergency services. Do not re-enter until authorities confirm it’s safe. Stay calm and follow evacuation procedures outlined in this manual.

9.1 What to Do If the CO Alarm Sounds

If the CO alarm sounds, stay calm, evacuate immediately, and open windows for ventilation. Move to a safe location outside, then contact emergency services. Never ignore the alarm; it indicates a potential threat requiring immediate attention. Failure to respond can lead to severe health risks or death. Follow evacuation procedures outlined in this manual.

9;2 Evacuation and Ventilation Steps

Immediately evacuate the premises and move to fresh air outside. Open windows and doors to ventilate the area, but only if it’s safe to do so. Do not use elevators. Assemble at a designated safe location and ensure all household members are accounted for. Do not re-enter the building until authorities confirm it’s safe.

9.3 Contacting Emergency Services

If your CO alarm sounds, immediately call your local emergency number or 911. Provide your address and inform them of the CO alert. Follow their instructions and remain on the line until help arrives. Stay safe and avoid re-entering the building until emergency services confirm it’s clear. Prompt action ensures everyone’s safety.

Differences Between CO and Smoke Detectors

CO detectors sense carbon monoxide gas, while smoke detectors identify smoke particles. Each serves a unique purpose and requires separate installation for comprehensive home safety protection.

10.1 Unique Functions of CO Detectors

CO detectors uniquely monitor carbon monoxide levels, detecting both fast-rising and consistent low-level leaks. They alert before CO reaches dangerous levels, unlike smoke detectors, and specifically target odorless, invisible CO gas, ensuring early warning for this silent threat.

10.2 Why Both Are Necessary for Home Safety

Both smoke and CO detectors are essential for comprehensive home safety. Smoke detectors alert to fires, while CO detectors identify invisible gas threats. Together, they provide complete protection against two deadly household risks, ensuring early warnings for both types of emergencies.

Compatible Models and Accessories

First Alert CO detectors are compatible with models like SC9120B, CO400, and CO710. Accessories include additional sensors, mounting hardware, and replacement batteries, ensuring enhanced safety and convenience.

11.1 List of Compatible First Alert Models

The First Alert CO detector is compatible with models such as SC9120B, CO400, CO710, CO1210, CO605, CO606, and CO5120BN. These models ensure seamless integration and enhanced safety features, providing reliable protection against carbon monoxide threats in your home.

  • SC9120B
  • CO400
  • CO710
  • CO1210
  • CO605
  • CO606
  • CO5120BN

11.2 Additional Accessories for Enhanced Safety

Enhance your safety setup with accessories like the Onelink Home App for remote monitoring, mounting hardware for secure installation, and replacement batteries. Additional features include remote silence controls and interconnectivity modules, ensuring comprehensive protection and seamless integration with your First Alert CO detector system;

  • Onelink Home App
  • Mounting Hardware
  • Replacement Batteries
  • Remote Silence Controls
  • Interconnectivity Modules

Frequently Asked Questions

This section addresses common questions about your First Alert CO detector, helping you understand its operation, maintenance, and troubleshooting for optimal safety.

12.1 How Often Should I Test My CO Detector?

Test your First Alert CO detector monthly by pressing the test button to ensure it’s functioning properly. Additionally, check the battery expiration dates and replace them as needed to maintain reliability and accuracy in detecting carbon monoxide levels.

12.3 How Long Does a CO Detector Typically Last?

12.2 Can I Use Rechargeable Batteries in My CO Detector?

Rechargeable batteries are not recommended for use in First Alert CO detectors. The manual advises against using them to ensure optimal performance and reliability. Always use the specified battery type to maintain accurate detection and safety standards.

nikon d5100 owners manual

Welcome to the Nikon D5100 Owner’s Manual, your comprehensive guide to unlocking the full potential of your DSLR camera. This manual is designed to help you navigate the camera’s features, settings, and modes, ensuring you master photography techniques and troubleshooting. With detailed explanations and step-by-step instructions, it’s an essential resource for both beginners and advanced photographers.

1.1 Importance of Reading the Manual

Reading the Nikon D5100 Owner’s Manual is crucial for unlocking the camera’s full potential and ensuring optimal performance. The manual provides detailed insights into the camera’s features, shooting modes, and customization options, helping you understand how to use each function effectively. Without proper knowledge of the camera’s capabilities, you may miss out on advanced settings or misunderstand critical controls, leading to suboptimal results. The manual also serves as a troubleshooting guide, addressing common issues and offering solutions to help you resolve problems quickly. By investing time in reading the manual, you’ll gain a deeper understanding of your camera, enhancing both your technical skills and creative vision. Whether you’re a beginner or an experienced photographer, the manual is an indispensable resource for mastering the Nikon D5100.

1.2 Key Features of the Nikon D5100

The Nikon D5100 is a versatile DSLR camera designed for both enthusiasts and professionals. It features a 16.2-megapixel DX-format CMOS sensor, delivering high-resolution images with excellent detail and color accuracy. The camera is equipped with the EXPEED 2 image-processing engine, which enhances performance and ensures faster operation. One of its standout features is the 11-point autofocus system, providing precise and quick subject tracking. Additionally, the D5100 offers full HD video recording capabilities, making it ideal for capturing stunning movies. The 3-inch vari-angle LCD screen allows for flexible composition, and the in-camera effects and editing options enable creativity without post-processing. These features make the Nikon D5100 a powerful tool for capturing life’s moments with precision and artistry, suitable for a wide range of photographic applications.

Camera Specifications and Design

The Nikon D5100 features a 16.2-megapixel DX-format CMOS sensor and EXPEED 2 image processor, delivering sharp images and fast performance. Its lightweight design includes a 3-inch vari-angle LCD screen for flexible shooting.

2.1 Technical Specifications

The Nikon D5100 boasts a 16.2-megapixel DX-format CMOS sensor and the EXPEED 2 image processing engine, ensuring high-quality images and efficient performance. It features an 11-point autofocus system for precise subject tracking and a 3-inch vari-angle LCD monitor for flexible composition. The camera supports ISO sensitivity from 100 to 6400, expandable to 25600 in Hi modes, allowing for low-light photography. Continuous shooting is available at 4 frames per second, and it records 1080p full HD video at 24 or 30 fps with stereo sound. The D5100 uses SD, SDHC, and SDXC memory cards and is compatible with Nikon F-mount lenses. Its compact design measures 5.0 x 3.8 x 3.1 inches and weighs 19.7 ounces, making it portable yet powerful for photographers of all levels.

2.2 Exterior Components and Controls

The Nikon D5100 features a user-friendly design with strategically placed controls for easy access. The mode dial on top allows quick switching between shooting modes, while the shutter button is ergonomically positioned for comfortable shooting. The live view switch enables seamless transition to video recording, and the command dial adjusts settings like aperture and shutter speed. The 3-inch vari-angle LCD monitor offers flexibility for composing shots at various angles. Other key controls include the menu button, playback button, and delete button, all conveniently located for intuitive operation. The camera also features a memory card slot and tripod socket for expanded functionality. Its durable build and ergonomic grip ensure comfort during extended use, making it a versatile tool for photographers of all skill levels.

Shooting Modes Explained

The Nikon D5100 offers various shooting modes to suit different photography needs. Auto Mode simplifies shooting, while Aperture Priority, Shutter Priority, and Manual Mode offer advanced control over settings like aperture, shutter speed, and ISO for creative freedom.

3.1 Auto Mode

Auto Mode on the Nikon D5100 is designed for simplicity, making it ideal for beginners or quick shots. The camera automatically adjusts aperture, shutter speed, and ISO to ensure well-balanced exposures. This mode is perfect for casual photography, allowing you to focus on composition without worrying about technical settings. It’s also a great starting point for new users to familiarize themselves with the camera before exploring manual controls. While it limits creative input, Auto Mode delivers reliable results in most lighting conditions, making it a versatile option for everyday use. For more control, you can transition to other modes like Aperture Priority or Manual Mode as you gain confidence in your skills.

3.2 Aperture Priority Mode

Aperture Priority Mode (A/Av mode) on the Nikon D5100 allows you to set the aperture manually, while the camera automatically adjusts the shutter speed to achieve the correct exposure. This mode is ideal for photographers who want control over depth of field without managing shutter speed. A smaller aperture (higher f-stop value) ensures more of the image is in focus, while a larger aperture (lower f-stop value) creates a shallow depth of field, blurring the background. This mode is particularly useful for portraits, landscapes, and macro photography, where depth of field is critical. The camera’s advanced metering system ensures accurate exposures, making it a versatile choice for creative photography. Use this mode to experiment with artistic effects while relying on the camera’s automation for optimal results.

3.3 Shutter Priority Mode

Shutter Priority Mode (S/Tv mode) on the Nikon D5100 lets you manually set the shutter speed, while the camera automatically adjusts the aperture to maintain proper exposure. This mode is ideal for capturing motion, as it allows you to freeze fast-moving subjects or create artistic motion blur. Faster shutter speeds are great for sports and wildlife photography, while slower speeds can add dynamic effects to water or clouds. To use this mode, turn the mode dial to ‘S’ and adjust the shutter speed using the rear control dial. The camera will automatically adjust the aperture based on the lighting conditions. Be mindful of extreme shutter speeds, as they may result in overexposure or camera shake. Using a tripod is recommended for slower speeds to ensure sharp images. This mode offers a balance of creativity and automation, making it versatile for various shooting scenarios.

3.4 Manual Mode

Manual Mode (M) on the Nikon D5100 offers complete control over both aperture and shutter speed, allowing photographers to fine-tune every aspect of their shot. This mode is ideal for experienced users who want precise control over their camera settings. To use Manual Mode, turn the mode dial to ‘M’ and adjust the aperture using the front control dial and the shutter speed with the rear control dial. The exposure meter in the viewfinder or on the LCD will guide you to achieve the desired exposure. Manual Mode is perfect for creative photography, such as long exposures, astrophotography, or when specific artistic effects are desired. Always consider using a tripod for stability, especially at slower shutter speeds. This mode requires a good understanding of exposure principles but offers unparalleled flexibility for professional-level photography. Mastering Manual Mode is a key skill for any serious photographer.

Autofocus System

The Nikon D5100 features an 11-point autofocus system, providing high-speed and precise focus acquisition. It enhances subject tracking and ensures sharp images, even in dynamic shooting conditions, with flexible composition control.

4.1 Understanding Autofocus Modes

The Nikon D5100 autofocus system offers multiple modes to suit various shooting scenarios. The AF-A mode automatically selects between single and continuous autofocus, adapting to subject movement. Single AF (AF-S) locks focus on a stationary subject, ideal for portraits or stills. Continuous AF (AF-C) tracks moving subjects, perfect for action or wildlife photography. Additionally, Manual Focus (MF) allows precise control for creative or challenging situations. Each mode ensures sharp focus, enhancing image clarity and versatility for photographers of all skill levels. Understanding these modes enables better control over your camera, helping you capture moments with precision and confidence. This section explains how to select and use autofocus modes effectively, ensuring optimal results in diverse photography conditions.

4.2 Customizing Autofocus Settings

The Nikon D5100 allows you to customize autofocus settings to meet your specific needs. You can adjust the AF-area modes, such as Single-Point AF, Dynamic AF, or Auto-Area AF, depending on your subject’s movement and composition. Additionally, the camera offers focus tracking options, enabling continuous focus on moving subjects. Customizing these settings ensures sharper images and improved performance in various shooting conditions. Access the autofocus customization options through the camera’s menu system, where you can fine-tune parameters like focus priority and release timing. By tailoring the autofocus settings to your shooting style, you can enhance your photography experience and achieve professional-quality results with ease. This section provides a detailed guide on how to navigate and adjust these settings for optimal performance.

Mastering Image Quality

Optimize your Nikon D5100’s image quality by utilizing its 16.2 MP CMOS sensor and EXPEED 2 processor. Adjust settings like white balance, ISO, and compression to enhance clarity and detail in every shot.

5.1 Settings for Optimal Image Quality

To achieve the best image quality with your Nikon D5100, start by using the RAW file format, which retains maximum detail for post-processing. Set the white balance according to lighting conditions to ensure accurate colors. Lower ISO settings (100-400) minimize noise, while higher ISOs (6400 and above) are best reserved for low-light situations. Utilize Picture Controls to tailor sharpness, contrast, and saturation to your creative vision. For crisp results, enable the built-in noise reduction and lens distortion correction. Additionally, experiment with the Active D-Lighting feature to balance high-contrast scenes. Finally, ensure your lens is clean and free of smudges to avoid any unwanted artifacts in your photos. By fine-tuning these settings, you can consistently capture images that reflect the full potential of your Nikon D5100.

rexton hearing aid user manual

The Rexton hearing aid is a advanced device designed to enhance hearing clarity and comfort. This guide provides essential information for optimal use and maintenance.

1.1 Overview of the Hearing Aid and Its Features

The Rexton hearing aid offers advanced sound processing and wireless connectivity‚ enhancing hearing clarity in various environments. It features Bluetooth technology for seamless connection to devices‚ customizable sound settings via the ReSound Smart App‚ and Surround Sound by ReSound for immersive audio. The device also includes a Find My Hearing Aid feature for easy tracking if misplaced‚ ensuring convenience and peace of mind.

1.2 Safety Precautions and Warnings

To ensure safe use‚ avoid exposing the hearing aid to extreme temperatures or moisture. Handle electrical components carefully to prevent damage. Keep the device out of reach of children. When flying‚ follow airline instructions and turn off wireless functionality. Clean the hearing aid regularly to maintain performance. Always use the provided accessories and follow the user manual guidelines for proper care and maintenance.

Understanding the Components of the Hearing Aid

The Rexton hearing aid consists of a microphone‚ sound processor‚ receiver‚ and battery compartment. Additional components like domes or earmolds ensure a secure and comfortable fit.

2.1 Key Parts of the Rexton Hearing Aid

The Rexton hearing aid features a microphone to capture sound‚ a sound processor to enhance clarity‚ and a receiver to deliver amplified sound. It includes a rechargeable battery compartment‚ domes or earmolds for comfort‚ and advanced sensors for optimal performance. Additional components like the charger and app ensure seamless functionality and customization for a personalized hearing experience.

2.2 Accessories Included in the Package

The Rexton hearing aid package includes essential accessories like the premium charger‚ drying box‚ and cleaning tools. Additional items such as domes‚ earmold hooks‚ and wax guards ensure a secure fit and proper maintenance. The ReSound Smart App guide and user manual are also provided for easy setup and customization of settings. These accessories enhance functionality and user experience.

Charging and Battery Management

The Rexton hearing aid offers a quick charging process‚ typically requiring three hours for a full charge‚ providing up to 30 hours of continuous use.

3.1 How to Charge the Hearing Aid

Charging your Rexton hearing aid is straightforward. Turn the charger around and gently place the hearing aids inside. It takes about three hours to fully charge‚ providing up to 30 hours of use. Ensure the aids are properly seated for optimal charging. Refer to the user manual for detailed steps and safety guidelines to maintain battery health and performance.

3.2 Battery Life and Maintenance Tips

To maximize battery life‚ store your Rexton hearing aids in a cool‚ dry place when not in use. Avoid exposing them to moisture or extreme temperatures. Regularly clean the hearing aids to prevent debris buildup. Replace batteries as needed‚ and ensure they are fully charged before extended use. Proper maintenance ensures optimal performance and longevity of the device. Always follow the user manual guidelines for best results.

Putting On and Removing the Hearing Aid

For hearing aids with domes‚ gently hang the device over your ear and secure it. For earmolds‚ lift from behind the ear and position carefully.

4.1 Instructions for Hearing Aids with Domes

To put on a dome-style hearing aid‚ gently hang it over the top of your ear‚ ensuring the dome sits comfortably in the ear canal. For removal‚ lift the hearing aid from behind the ear‚ carefully sliding it out. Regularly inspect the dome for wax buildup and clean as needed for optimal performance. Always handle with care to maintain functionality and hygiene.

4.2 Instructions for Hearing Aids with Earmolds

For hearing aids with earmolds‚ lift the device from behind your ear‚ letting it hang momentarily. Gently slide it out using both hands. Ensure a snug fit for optimal sound quality. Regularly clean the earmold to prevent wax buildup. If difficulties arise‚ consider using a removal tool for added ease. Proper handling ensures comfort and longevity.

Connecting to Audio Sources and Devices

This section guides users through pairing their Rexton hearing aids with Bluetooth devices‚ ensuring seamless audio streaming from phones‚ TVs‚ and other compatible devices for enhanced listening.

5.1 Pairing the Hearing Aid with Bluetooth Devices

Pairing your Rexton hearing aid with Bluetooth devices enables direct audio streaming. Ensure Bluetooth is activated on both the hearing aid and the device. Open the ReSound Smart App‚ select “Pair Device‚” and follow prompts to connect. Once linked‚ you can enjoy clear sound from phones‚ TVs‚ and other compatible devices effortlessly. Troubleshoot by restarting if issues arise.

5.2 Troubleshooting Connection Issues

If your Rexton hearing aid experiences connection issues‚ restart both the hearing aid and the Bluetooth device. Ensure Bluetooth is enabled and the hearing aid is in pairing mode. Check for interference from nearby devices. If problems persist‚ reset the hearing aid by removing and reinserting the battery. Use the ReSound Smart App to verify connections and update firmware if needed.

Customizing Settings and Using the App

The ReSound Smart App allows users to customize hearing aid settings and access features like Surround Sound. Available for Apple and Android devices‚ it enhances personalization.

6.1 Navigating the ReSound Smart App

The ReSound Smart App simplifies customization‚ offering intuitive controls for sound settings and features. Users can adjust volume‚ switch programs‚ and access advanced options like Surround Sound. The app provides real-time feedback‚ ensuring personalized hearing experiences. Compatible with Apple and Android devices‚ it enhances convenience and user control‚ making it easy to tailor settings to specific environments or preferences.

6.2 Adjusting Sound Settings for Optimal Hearing

Adjusting sound settings on your Rexton hearing aid ensures a personalized listening experience. Through the ReSound Smart App‚ users can fine-tune treble‚ bass‚ and noise reduction levels. Customization options allow adaptation to different environments‚ enhancing clarity and comfort. Regular adjustments can optimize speech recognition and overall sound quality‚ ensuring the best possible hearing experience tailored to individual preferences and auditory needs.

Troubleshooting Common Issues

Common issues with Rexton hearing aids include battery drain‚ connectivity problems‚ and sound distortion. Check the battery‚ restart devices‚ and refer to the user manual for solutions.

7.1 Resolving Battery-Related Problems

If your Rexton hearing aid experiences battery issues‚ ensure the charger is functioning correctly. Clean the charging contacts and check for proper placement. Replace batteries if necessary. Avoid extreme temperatures and moisture. If problems persist‚ consult the user manual or contact a professional for assistance. Proper care can extend battery life and device performance.

7.2 Fixing Connectivity and Sound Quality Issues

If experiencing intermittent sound or connection drops‚ restart both the hearing aid and paired device. Ensure Bluetooth pairing is correct and devices are updated. Check for physical obstructions or interference from nearby electronics. Use the ReSound Smart App to adjust settings or reset the connection. If issues persist‚ consult the user manual or contact support for further assistance.

Maintenance and Care

Regularly clean and store your Rexton hearing aid in a cool‚ dry place to maintain performance. Avoid exposure to moisture‚ extreme temperatures‚ or chemicals. Use a protective case when not in use to prevent damage.

8.1 Cleaning the Hearing Aid

To maintain your Rexton hearing aid‚ clean it daily with a soft‚ dry cloth. Gently wipe the outer surfaces‚ domes‚ and earmolds. Avoid using water‚ alcohol‚ or harsh chemicals. For deeper cleaning‚ use a brush or cleaning tool provided with your device. Regular cleaning ensures optimal sound quality and prevents damage. Always handle the hearing aid with care to maintain its functionality.

8.2 Storing the Hearing Aid Properly

Store your Rexton hearing aid in a cool‚ dry place‚ away from direct sunlight and moisture. Use the provided charging case when not in use. Avoid exposing it to extreme temperatures or chemicals. Proper storage protects the device from damage‚ ensuring longevity. Always keep it out of reach of children and pets for safety. Regularly check for dust or debris in the storage case.

Advanced Features and Technologies

Experience enhanced sound quality with Surround Sound by ReSound and locate misplaced aids using the Find My Hearing Aid feature. These technologies ensure improved functionality.

9.1 Surround Sound by ReSound

Surround Sound by ReSound enhances your hearing experience by providing immersive audio clarity. This technology captures and processes sound from all directions‚ reducing background noise and improving speech recognition; It ensures a natural listening experience‚ making conversations and ambient sounds feel more authentic and engaging in various environments. This feature is seamlessly integrated into Rexton hearing aids.

9.2 Find My Hearing Aid Feature

The Find My Hearing Aid feature‚ accessible via the ReSound Smart App‚ helps locate misplaced devices using Bluetooth. It displays the last known location and distance‚ enhancing security. This feature reduces anxiety and offers peace of mind‚ ensuring users can quickly find their hearing aids when needed. It’s a convenient‚ user-friendly solution seamlessly integrated into Rexton hearing aids for added convenience.

10.1 Maximizing the Benefits of Your Rexton Hearing Aid

To maximize the benefits of your Rexton hearing aid‚ ensure proper care and regular maintenance. Use the provided accessories and follow the user manual for optimal performance. Adjust settings through the app to personalize your hearing experience. Explore advanced features like Surround Sound by ReSound for enhanced audio quality. By following these steps‚ you can enjoy improved hearing and discomfort for years.

10.2 Final Tips for Long-Term Use

For long-term use‚ regularly clean and store your Rexton hearing aid properly. Check battery levels and replace or charge them as needed. Use the ReSound app to customize settings for optimal sound quality. Protect the device from moisture and extreme temperatures. Schedule regular checkups with your audiologist to ensure peak performance and address any issues promptly.

massachusetts motorcycle manual

The Massachusetts Motorcycle Manual is a comprehensive guide for motorcyclists‚ providing essential information on safety‚ licensing‚ and road rules to ensure safe riding practices statewide.

Overview of the Manual

The Massachusetts Motorcycle Manual serves as a detailed guide for motorcyclists‚ covering essential topics such as road rules‚ licensing requirements‚ traffic signals‚ and safety practices. It also includes sections on night riding‚ motorcycle registration‚ and moped/scooter regulations. Available both online as a free PDF and in print for a fee‚ the manual is designed to help riders prepare for tests and ensure safe‚ legal operation of motorcycles.

Importance of Reading the Manual

Reading the Massachusetts Motorcycle Manual is crucial for understanding state-specific laws‚ safety tips‚ and best practices for motorcyclists. It helps riders prepare for licensing exams‚ reduces risks on the road‚ and ensures compliance with local regulations‚ ultimately contributing to safer roads for all motorists. Regular updates in the manual keep riders informed of changes in traffic laws and safety guidelines.

Availability of the Manual (Online and Offline)

The Massachusetts Motorcycle Manual is accessible online as a free PDF download from the RMV website‚ allowing riders to study at their convenience. Physical copies are available for purchase at RMV Service Centers for a small fee‚ ensuring easy access for all motorcyclists to stay informed and safe on the road.

Massachusetts Motorcycle Licensing Requirements

Motorcyclists must meet specific requirements to obtain a Class M license‚ including a learner’s permit and completing necessary testing to ensure safe and legal operation of motorcycles.

Applying for a Motorcycle Learner’s Permit

To obtain a motorcycle learner’s permit in Massachusetts‚ applicants must be at least 16 years old and complete an application at an RMV office. A $30 fee is required‚ and applicants must pass a vision test and a knowledge test covering motorcycle-specific rules and safety. Once issued‚ the permit allows practice riding under supervision‚ with restrictions on carrying passengers and driving without a licensed motorcyclist nearby. Study materials‚ including the Motorcycle Manual‚ are available online to help prepare for the tests.

Requirements for Obtaining a Class M License

To obtain a Class M license in Massachusetts‚ applicants must be at least 16 years old‚ complete a motorcycle rider education course‚ or pass a road test. A $15 fee is required for a 5-year license. Applicants must also hold a valid learner’s permit for at least 6 months before applying. A vision test and proof of identity are mandatory. Study materials‚ including the Motorcycle Manual‚ are available online to prepare for the road test and ensure compliance with state regulations.

Rules of the Road for Motorcyclists

The Massachusetts Motorcycle Manual outlines essential rules for motorcyclists‚ including obeying traffic signals‚ understanding road signs‚ and practicing safe driving techniques to ensure roadway safety.

Traffic Signals and Signs

Understanding traffic signals and signs is crucial for motorcyclists in Massachusetts. The manual outlines the importance of recognizing and obeying all traffic signals‚ including stop signs‚ traffic lights‚ and pavement markings. Motorcyclists must adhere to these signals to ensure safe and legal operation of their vehicles. Failure to comply can result in accidents or legal penalties‚ emphasizing the need for constant vigilance and adherence to traffic rules.

Safe Driving Practices

Safe driving practices are essential for motorcyclists in Massachusetts. The manual emphasizes maintaining a safe speed‚ anticipating the actions of other drivers‚ and using signals to communicate intentions. Motorcyclists should always keep a safe distance from other vehicles and avoid weaving in and out of lanes. Impaired riding is strictly prohibited‚ and riders must stay alert to reduce the risk of accidents on the road.

Motorcycle Safety Tips

Massachusetts motorcyclists should always wear protective gear‚ follow traffic laws‚ and stay visible to other drivers. The manual highlights the importance of defensive driving and staying alert to reduce accident risks. Regular maintenance of the motorcycle is also crucial for safe operation. Riders are encouraged to practice safe maneuvers and avoid distractions while on the road.

Night Riding Safety

Night riding poses increased risks due to reduced visibility and driver awareness. Motorcyclists should wear reflective gear‚ use high beams when safe‚ and reduce speed. Avoid distractions and ensure all lights are functioning. Increase following distances and stay alert for unexpected obstacles. Proper protective gear and visibility enhancements are crucial for safe nighttime motorcycle operation in Massachusetts.

Helmet and Protective Gear Requirements

In Massachusetts‚ motorcyclists must wear a Department of Transportation (DOT)-approved helmet. Additional protective gear like gloves‚ boots‚ and eye protection is strongly recommended. The manual emphasizes that proper gear significantly reduces injury risks and is essential for safe motorcycle operation. Compliance with these requirements is mandatory to ensure rider safety and legal adherence while riding in the state.

Motorcycle Registration and Special Plates

Motorcycle registration in Massachusetts requires proper documentation and fees. Special plates are available for motorcyclists‚ offering unique designs. The RMV provides detailed information on registration processes and plate options‚ ensuring compliance with state regulations. Additional resources are available online for specific plate specifications and application guidelines.

Registration Process

Registering your motorcycle in Massachusetts involves submitting required documents‚ such as proof of ownership‚ insurance‚ and a completed registration application. Fees vary based on the motorcycle’s type and year. Visit an RMV Service Center or use online services to complete the process. Ensure all paperwork is accurate to avoid delays. Proper registration ensures legal operation on state roads and highways.

Special Plate Information

Massachusetts offers special motorcycle plates with unique designs and numbering. To obtain one‚ you must complete a special plate application and pay applicable fees. Some plates may require additional documentation or have specific eligibility criteria. Personalized plates are also available‚ allowing riders to customize their plate numbers. Visit the RMV website for details on available designs‚ fees‚ and application processes to enhance your motorcycle’s individuality on the road.

Moped and Scooter Regulations

Mopeds and scooters in Massachusetts are classified based on engine size and speed limits. Riders must meet specific licensing and registration requirements to legally operate these vehicles.

Definition and Classification

Mopeds and scooters in Massachusetts are defined by their engine size and maximum speed. Mopeds have engines up to 50cc and can’t exceed 30 mph‚ while scooters are larger. Classification determines licensing and registration requirements‚ ensuring safe operation on public roads.

Licensing Requirements for Mopeds and Scooters

In Massachusetts‚ mopeds and scooters require specific licensing. Operators must be at least 16 years old and hold a valid Class M motorcycle license or a moped permit. Completing a motorcycle safety course may be required for certain applicants. Always check state regulations for updated licensing requirements to ensure compliance and safe operation of mopeds and scooters on public roads.

Preparing for the Motorcycle Road Test

To prepare for the motorcycle road test‚ thoroughly study the Massachusetts Motorcycle Manual to understand traffic laws‚ safe practices‚ and test requirements. Practice essential riding skills to ensure readiness.

Skills and Maneuvers Tested

The motorcycle road test evaluates essential riding skills‚ including starting and stopping‚ turning‚ shifting gears‚ and navigating obstacles. Riders are assessed on balance‚ control‚ and adherence to traffic laws. safe practices‚ such as checking mirrors and signaling‚ are also observed. The test ensures riders can operate a motorcycle safely and confidently in various scenarios‚ aligning with the manual’s guidelines for proficiency.

Study Materials and Resources

The Massachusetts Motorcycle Manual is the primary study resource‚ available online as a free PDF or for purchase in print. Additional resources include practice tests and guides from third-party websites. The Massachusetts Rider Education Program also offers courses and materials to help prepare for the motorcycle license test‚ ensuring riders are well-prepared for the road test and safe operation.

Maintenance and Care of Your Motorcycle

Regular maintenance‚ including oil changes‚ tire checks‚ and brake inspections‚ ensures optimal performance and safety. Follow the manufacturer’s service schedule to extend your motorcycle’s lifespan.

Regular Maintenance Tips

Regular maintenance is crucial for motorcycle safety and performance. Check tire pressure‚ brakes‚ and oil levels frequently. Follow the manufacturer’s service schedule for routine inspections and replacements. Ensure chain or belt tension is correct‚ and inspect for wear. Clean and lubricate moving parts to prevent corrosion. Address any issues promptly to avoid mechanical failures and ensure reliable operation on the road.

Importance of Proper Motorcycle Handling

Proper motorcycle handling is vital for safety and control. Maintaining balance‚ leveraging weight distribution‚ and using correct braking techniques are essential. Smooth acceleration and deliberate steering help avoid sudden movements. Understanding how to handle different road conditions ensures stability and reduces accident risks. Poor handling can lead to loss of control‚ making it critical to master these skills for safe and confident riding on Massachusetts roads.

Massachusetts Motorcycle Laws and Regulations

Massachusetts enforces strict motorcycle laws to enhance road safety‚ including mandatory helmet use and specific licensing requirements. Adhering to traffic rules and regulations is essential for all motorcyclists statewide.

Specific Laws Governing Motorcyclists

Massachusetts requires motorcyclists to wear helmets that meet federal safety standards and prohibits lane splitting. Riders under 18 must complete a motorcycle safety course. Motorcycles are also subject to mandatory vehicle inspections‚ and all operators must carry valid insurance. Additionally‚ motorcyclists must follow the same traffic laws as other vehicles‚ including speed limits and right-of-way rules‚ to ensure safety on the road.

Penalties for Violations

Violating Massachusetts motorcycle laws can result in fines‚ license suspension‚ or increased insurance rates. For example‚ driving without a valid motorcycle license may lead to a $500 fine and a suspended license. Reckless driving or speeding can result in points on your record‚ while failure to wear a helmet may incur a $100 fine. Penalties aim to enforce safe riding practices and protect motorcyclists and other road users.

The Massachusetts Motorcycle Manual provides essential guidance for safe and legal riding. By following its principles‚ motorcyclists can reduce risks and enjoy a rewarding riding experience statewide.

Final Tips for Safe and Legal Motorcycle Operation

Always wear protective gear‚ follow traffic laws‚ and stay visible to other drivers. Regularly inspect your motorcycle and ride defensively. Avoid distractions and never ride under the influence. Stay informed about Massachusetts-specific regulations and seek additional training if needed. By combining knowledge from the manual with responsible practices‚ motorcyclists can enhance safety and enjoyment on the road.

Additional Resources for Motorcyclists

The Massachusetts RMV offers a variety of resources to support motorcyclists‚ including the Massachusetts Motorcycle Manual‚ available as a free PDF or for purchase. Practice tests and study guides are also accessible online to help prepare for exams. Additionally‚ the Massachusetts Rider Education Program provides training courses‚ and the Motorcycle Safety Foundation manual offers advanced tips. Visit the RMV website for updates and forms.

vankyo projector manual

Welcome to the Vankyo Projector Manual! This guide provides essential information for setting up, operating, and troubleshooting your projector․ It covers key features, connectivity options, and maintenance tips to enhance your viewing experience․ Use this manual to optimize your projector’s performance and resolve common issues efficiently․

Overview of Vankyo Projectors

Vankyo projectors offer a range of affordable, high-quality options for home entertainment․ Known for their budget-friendly prices, these projectors deliver features like Dolby Audio, 1080p resolution, and wireless connectivity․ Popular models include the Leisure 495W, Leisure 410, and M7P, catering to both casual and dedicated users․ Vankyo projectors are praised for their portability, ease of use, and value for money, making them a great choice for various viewing experiences․

Importance of Reading the Manual

Reading the Vankyo Projector Manual is crucial for understanding its features, proper setup, and troubleshooting․ It provides detailed guidance for optimizing image and sound quality, ensuring safe operation, and resolving common issues․ The manual also outlines maintenance tips and warranty information, helping users maximize their projector’s performance and longevity․ Familiarizing yourself with the manual ensures a seamless and enjoyable viewing experience․

Contents of the Vankyo Projector Manual

The manual includes a detailed packing list, quick start guide, projector components overview, and step-by-step setup instructions to help users get started effortlessly․

Packing List and Accessories

Your Vankyo projector package includes essential items for a seamless setup․ These accessories are a remote control (batteries not included), a carrying bag, a user manual, an HD cable, a power cable, an AV cable, and an HDMI cable for connectivity․ Additionally, a cleaning kit with a microfiber cloth and cotton swabs is provided to maintain the projector’s lens and filter, ensuring optimal performance and image clarity over time․

Quick Start Guide

Get started with your Vankyo projector by connecting your device via HDMI or AV cable․ Turn on the projector, select the correct input source using the remote, and adjust the kickstand for proper alignment․ Focus the lens and use keystone correction for a clear image․ Refer to the manual for optimal distance settings and troubleshooting tips to ensure a smooth setup and viewing experience․

Projector Overview and Components

The Vankyo projector includes essential components like the projector unit, remote control, HDMI cable, AV cable, and power cord․ Accessories such as a carrying bag and cleaning kit are also provided․ The projector features a built-in speaker and lens for clear visuals․ Refer to the manual for detailed descriptions of each part and their functions to ensure proper setup and usage of your device․

Setting Up the Vankyo Projector

Setting up your Vankyo projector involves turning it on, connecting devices via HDMI or AV cables, selecting the correct input source, and adjusting the kickstand for stability․ Consult the manual for optimal projector positioning․

Connecting Devices and Cables

Connect your devices to the Vankyo projector using HDMI, AV, or VGA cables․ Ensure all cables are securely plugged into the correct ports on both the projector and your device․ Turn on the projector, select the appropriate input source via the remote or menu, and adjust settings as needed for optimal performance and connectivity․

Adjusting Focus and Keystone Correction

Locate the focus ring on the projector lens and adjust it to sharpen the image․ Use the remote control to access keystone correction settings, ensuring the image is aligned properly on the screen․ Adjustments can be made horizontally or vertically for optimal viewing quality․

Positioning the Projector for Optimal Image Quality

Position the projector at the recommended distance from the screen or wall, as specified in the user manual․ Ensure it is level and aligned with the center of the projection surface․ Proper placement ensures a clear, distortion-free image․ Adjust the keystone correction and focus settings if necessary to achieve the best visual quality․

Key Features and Technologies

Discover the advanced features of Vankyo projectors, including Dolby Audio, 1080p resolution, and wireless connectivity․ Enjoy enhanced image quality with 4D keystone correction and precise focus adjustment․

Dolby Audio and Sound Quality

Vankyo projectors feature Dolby Audio technology, delivering immersive and crystal-clear sound․ This enhances your entertainment experience with deep bass and balanced tones․ The integrated speakers provide robust audio, while compatibility with external sound systems allows for even greater customization․ Ensure optimal audio settings by referring to the manual for a seamless listening experience․

1080p Resolution and Image Quality

Vankyo projectors deliver stunning visuals with 1080p resolution, offering sharp and vibrant images․ The high contrast ratio ensures deep blacks and bright whites, while advanced color accuracy enhances overall picture quality․ Features like keystone correction and focus adjustment help optimize the image, minimizing distortion․ Explore the manual to learn how to fine-tune settings for brightness, color balance, and clarity to achieve the best viewing experience․

Wireless Connectivity Options

Vankyo projectors offer seamless wireless connectivity, enabling effortless streaming from devices․ Built-in Wi-Fi and Bluetooth support let you connect smartphones, tablets, or laptops without cables․ The manual guides you through pairing devices, ensuring stable connections․ Wireless casting enhances convenience, allowing you to enjoy content from various platforms directly on the big screen for an immersive experience․

Advanced Settings and Customization

Explore advanced features like 4D keystone correction, focus adjustment, and image quality settings․ Customize brightness, contrast, and color to suit your preferences, enhancing your viewing experience․

Image Quality Settings and Adjustments

Optimize your viewing experience with customizable image settings․ Adjust brightness, contrast, and color saturation for vivid visuals․ Enable features like sharpness enhancement and noise reduction for clearer images․ Use the manual to explore advanced adjustments like gamma correction and color temperature, ensuring optimal picture quality tailored to your preferences and lighting conditions․

Connectivity Options (HDMI, VGA, Wi-Fi)

The Vankyo projector offers versatile connectivity options, including HDMI ports for high-definition devices, VGA for older equipment, and Wi-Fi for wireless streaming․ Use HDMI to connect Blu-ray players or gaming consoles, VGA for computers, and Wi-Fi for streaming content from smartphones or tablets․ The manual provides step-by-step guidance for each connection type, ensuring seamless setup and optimal performance․

4D Keystone Correction and Focus Adjustment

The Vankyo projector features advanced 4D keystone correction and focus adjustment for precise image alignment and clarity․ These tools allow vertical, horizontal, and rotational adjustments to eliminate distortion․ The manual provides detailed instructions for calibrating these settings, ensuring a sharp, well-aligned image․ Proper adjustment enhances viewing quality and prevents eye strain, making it essential for optimal performance․

Troubleshooting Common Issues

This section helps resolve common issues like projection problems, sound issues, and connection difficulties, providing practical solutions to ensure smooth operation of your Vankyo projector․

Projection Problems and Solutions

Common projection issues include blurry images, incorrect focus, or distorted visuals․ Ensure the lens is clean and free of smudges․ Adjust the focus ring for sharpness and use keystone correction for alignment․ Verify the projector is at the recommended distance from the screen․ Check for obstructions and ensure the surface is flat․ Refer to the manual for optimal setup and troubleshooting tips to resolve projection-related problems effectively․

Sound Issues and Audio Settings

Addressing sound issues involves checking volume levels, ensuring correct input selection, and verifying cable connections․ If no sound is present, test with an external audio device․ For low volume, adjust settings or connect external speakers․ Ensure Dolby Audio is enabled for enhanced sound quality․ Refer to the manual for troubleshooting steps and optimizing audio settings for a better entertainment experience․

Connection and Compatibility Problems

Ensure all cables are securely connected to the correct ports․ Check HDMI compatibility and verify device recognition․ If issues persist, restart both devices or use an adapter․ For wireless connectivity, confirm stable Wi-Fi signals and proper pairing․ Consult the manual for troubleshooting specific connection errors and compatibility with external devices for seamless operation․

Maintenance and Care

Regularly clean the lens and filter to prevent dust buildup․ Use a soft cloth and avoid harsh chemicals․ Refer to the manual for detailed cleaning instructions and tips to maintain optimal performance and extend the projector’s lifespan․

Cleaning the Projector Lens and Filter

Use a soft, dry microfiber cloth to gently wipe the lens and filter, avoiding harsh chemicals or abrasive materials․ For stubborn smudges, lightly dampen the cloth with distilled water․ Regular cleaning prevents dust buildup, ensuring clear visuals․ Refer to the manual for detailed instructions and recommended cleaning solutions to maintain your projector’s performance and longevity effectively․

Updating Firmware and Software

Regularly update your Vankyo projector’s firmware and software to access new features, improve performance, and fix bugs․ Use the USB port to install updates from the official Vankyo website․ Refer to the manual for detailed steps․ Ensure the projector is connected to a power source during updates to avoid interruptions․ Keeping your device updated ensures optimal functionality and enhanced user experience․

Warranty and Support Information

Vankyo offers a 1-year warranty covering manufacturing defects․ For inquiries or claims, contact their support team via phone, email, or website for assistance․

Vankyo Warranty Details

Vankyo provides a 1-year limited warranty for its projectors, covering defects in materials and workmanship․ This warranty commences from the purchase date and is non-transferable․ It excludes damage caused by misuse, accidents, or unauthorized modifications․ For warranty claims, contact Vankyo’s customer support team via phone, email, or their official website․ Ensure to have your proof of purchase ready for verification․

Contacting Customer Support

For assistance with your Vankyo projector, contact customer support through their official website or email․ Visit the support page to submit a ticket or find troubleshooting guides․ You can also reach them via phone during business hours․ Ensure to provide your order number and product details for faster service․ Vankyo’s team is dedicated to resolving issues promptly and efficiently․

Downloading the Vankyo Projector Manual

Visit the official Vankyo website or authorized retailers to download the PDF manual․ Choose from multiple language options, including English, Spanish, and French, for easy access․

Online Resources for Manual Download

The Vankyo projector manual is available for download on the official Vankyo website and trusted platforms like ManualsLib․ Visit the support section, enter your projector model, and download the PDF․ Models like Leisure 3W and Performance V630 are readily available․ Ensure to select the correct language version for your region․ Downloading from authorized sources guarantees authenticity and the most updated instructions․

Language Options and International Versions

The Vankyo projector manual is available in multiple languages, including English, French, German, and Spanish․ International versions cater to global users, ensuring accessibility worldwide․ Models like Leisure 3W and Performance V630 offer manuals in various languages, which can be downloaded from Vankyo’s official website or platforms like ManualsLib․ This feature allows users to understand instructions in their native language, enhancing ease of use and troubleshooting․

The Vankyo projector manual is a comprehensive guide designed to help users maximize their device’s potential․ By following the instructions, troubleshooting common issues, and maintaining proper care, you can ensure an exceptional viewing experience․ Explore advanced features, customize settings, and enjoy high-quality visuals and sound․ Refer to the manual for any assistance, and take full advantage of your Vankyo projector’s capabilities for endless entertainment and productivity․