krups coffee grinder instruction manual

Welcome to the Krups Coffee Grinder Instruction Manual, your guide to mastering precise coffee grinding. Explore models like GVX212 and F203, designed for optimal flavor and ease of use.

1.1 Overview of the Krups Coffee Grinder Models

Krups offers a range of coffee grinder models, including the GVX212 and F203, designed for precision and ease of use. These models feature sleek designs, multiple grind settings, and robust construction, catering to both casual and avid coffee enthusiasts. The GVX212 is ideal for various brewing methods, while the F203 provides a compact, user-friendly experience for daily grinding needs.

1.2 Importance of Reading the Instruction Manual

Reading the instruction manual is crucial for safe and effective use of your Krups coffee grinder. It provides essential safety precautions, assembly instructions, and operational guidelines. Understanding the manual ensures optimal performance, prevents damage, and helps troubleshoot common issues. It also highlights maintenance tips to preserve the grinder’s longevity and maintain consistent coffee quality. Always refer to the manual before first use and for ongoing care.

Safety Precautions and Electrical Information

Ensure safe operation by following essential guidelines, such as avoiding water immersion and keeping children away. Understand electrical requirements and precautions to prevent shocks or damage. Regular inspections of cords and components are vital for prolonged use and safety.

2.1 Essential Safety Guidelines

To ensure safe operation, avoid immersing the grinder or its parts in water. Keep children away and never operate the device near water sources. Avoid overloading the grinder, as this can cause mechanical issues. Always unplug the grinder before cleaning or performing maintenance. Regularly inspect the power cord for damage and ensure all components are securely assembled before use. Follow these precautions to prevent accidents and prolong the grinder’s lifespan.

2.2 Special Cord Set Instructions

Always use the original cord provided with your Krups coffee grinder. Never submerge the cord, plug, or grinder in water or liquid. Avoid overheating by ensuring proper ventilation. If the cord is damaged, stop use immediately and contact Krups customer service. Use the grinder on a dry, stable surface and ensure the voltage matches your region’s standards to prevent electrical issues. Replace damaged cords only with approved replacements.

2.3 Electrical Safety Tips

Always unplug the grinder before cleaning or servicing. Avoid using damaged cords or plugs, as they pose fire or shock risks. Keep the grinder away from water sources to prevent electrical hazards. Ensure the grinder is placed on a stable, dry surface. Never touch electrical parts with wet hands. Regularly inspect the cord and plug for wear and tear, replacing them if necessary to maintain safety and performance.

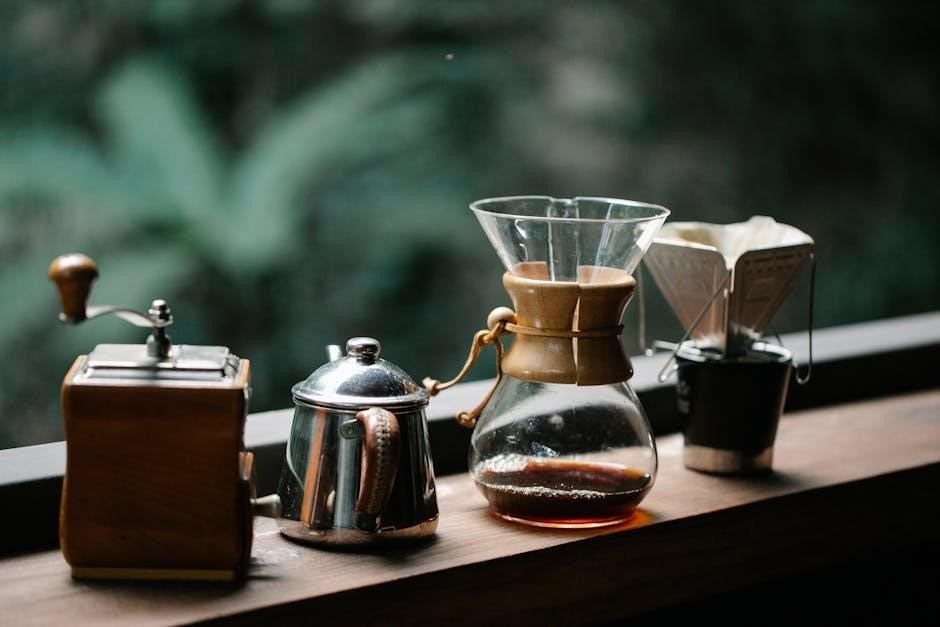
Components and Features of the Krups Coffee Grinder

The Krups Coffee Grinder features a burr grinder, bean container, and ground coffee container. It offers multiple grind settings for precise control over coffee texture and flavor.

3.1 Key Parts and Their Functions

The Krups Coffee Grinder includes a bean container for holding coffee beans, grinding burrs for consistent grinding, and a ground coffee container. The control panel adjusts grind size, while the motor ensures precise operation. These components work together to deliver optimal grinding performance, ensuring fresh and flavorful coffee. Regular maintenance of these parts is essential for longevity and consistent results.

3.2 Understanding the Grind Size Settings

The Krups Coffee Grinder offers adjustable grind size settings, ranging from fine to coarse. These settings are optimized for various brewing methods, such as espresso, cappuccino, and drip coffee. The precise grind size ensures the best flavor extraction. Micro adjustments allow for fine-tuning, enabling you to customize the grind to suit your preferred coffee type and brewing technique for the perfect cup every time.

Assembly and Initial Setup

Begin by unpacking and inspecting all components. Follow the manual to assemble the grinder correctly. Ensure all parts are securely aligned and tightened for proper function.

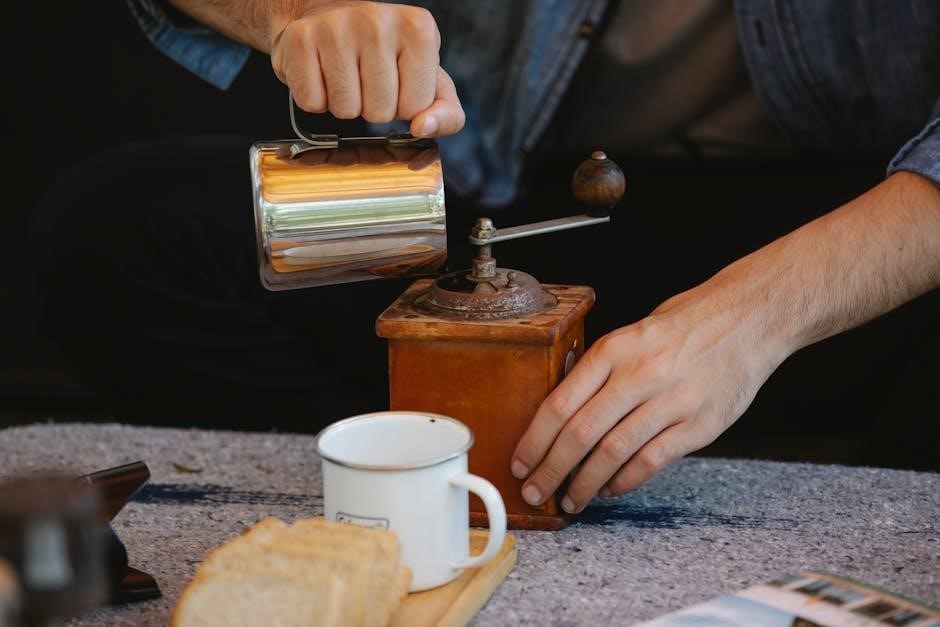
4;1 Unpacking and Preparing the Grinder

Unpack your Krups coffee grinder carefully, ensuring all components are included. Inspect for any damage. Before first use, read the manual thoroughly. For models like GVX212 and F203, ensure the grinder is placed on a stable surface. Always unplug before cleaning and avoid immersing electrical parts in water. Proper preparation ensures optimal performance and safety.

4.2 Assembling the Grinder Components

Align the grinder components as per the manual. Secure the burrs and bean container tightly. Plug in the device and test with a small amount of beans. Ensure stability and proper alignment for even grinding. Always unplug before assembling or cleaning to avoid accidents. Follow model-specific instructions for GVX212 or F203 to ensure correct assembly and optimal performance.

Operating the Krups Coffee Grinder

Press the power button to start grinding; Adjust the grind size using the dial. For espresso, use a finer setting. Models like GVX212 offer precise control.

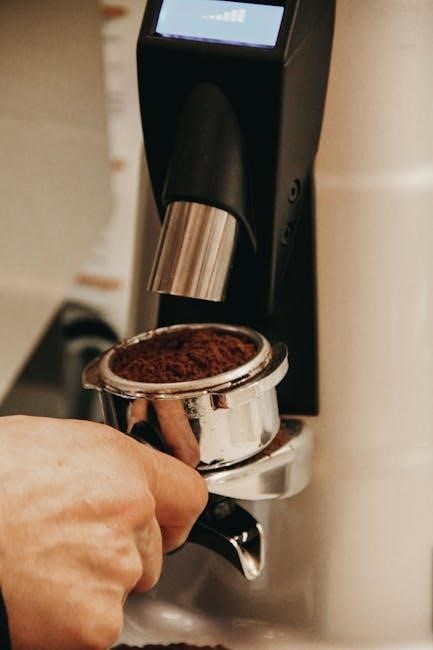
5.1 Step-by-Step Grinding Instructions

Plug in the grinder and ensure it’s stable. Add coffee beans to the hopper, adjusting quantity as needed. Select the desired grind size using the dial. Press the power button to start grinding. The process will stop automatically once complete. For consistent results, refer to the grind size chart in your manual or experiment with micro-adjustments for precision. Always ensure the bean container is not overfilled for optimal performance.

5.2 Customizing the Grind Size for Different Coffee Types

Adjust the grind size based on your brewing method. Fine grinds suit espresso, medium for drip coffee, and coarse for French press. The Krups grinder offers multiple settings and micro-adjustments to tailor the grind for optimal extraction. Experiment with different sizes to find your perfect cup, ensuring the best flavor for your preferred coffee type. Refer to the manual for specific guidance on grind size customization.

Maintenance and Cleaning

Regularly clean your Krups coffee grinder to maintain performance and hygiene. Empty the grounds container after use and wipe with a dry cloth. For deep cleaning, use a soft brush and avoid liquids. Refer to the manual for detailed maintenance tips to ensure longevity and optimal functionality of your grinder. Consistent upkeep ensures fresh, flavorful coffee every time.

6.1 Daily Cleaning Routine

For daily maintenance, unplug the grinder and empty the grounds container. Wipe the exterior with a dry cloth to remove residual coffee oils. Use a soft brush to clean the grinding chamber and burrs, ensuring no grounds remain. Avoid using water or liquids, as they may damage electrical components. Regular cleaning prevents mold growth and keeps your grinder in optimal working condition for consistent flavor.

6.2 Deep Cleaning and Maintenance Tips

Perform a deep clean every 1-2 months by disassembling the grinder and soaking removable parts in warm, soapy water. Scrub burrs with a soft brush to remove oil buildup. Reassemble and run a grind cycle with rice to absorb any residue. Regular descaling ensures optimal performance and prevents clogging. Always refer to the manual for specific disassembly instructions to avoid damage to internal components.

Troubleshooting Common Issues

Address common problems like clogged grinders or uneven grinds by cleaning burrs and ensuring proper bean feeding. Regularly empty the grounds container to maintain performance and flavor consistency.

7.1 Resolving Grinding Issues

Common grinding issues include clogged burrs, uneven grinds, or the grinder not turning on.
To resolve these, clean the burrs with a dry brush, ensure proper bean feeding, and check for blockages.
If the motor stops, unplug the grinder, empty the grounds container, and restart.
For inconsistent grind size, adjust the grind settings and ensure the grinder is placed on a stable surface.
Regular cleaning and maintenance can prevent most grinding issues.

  • Clean burrs regularly to avoid clogs.
  • Ensure beans are evenly fed into the grinder.
  • Check for blockages in the grinding chamber.

7.2 Addressing Electrical or Mechanical Problems

If your Krups coffee grinder experiences electrical or mechanical issues, start by unplugging it and checking the power cord for damage.
Ensure the outlet is functioning properly and verify that the grinder is assembled correctly.
If the motor stops suddenly, allow it to cool before restarting.
For unusual noises or vibration, check for misaligned parts or obstructions.
Contact Krups customer support if issues persist.

  • Check the power cord and outlet for connectivity issues.
  • Ensure all parts are securely and correctly assembled.
  • Allow the motor to cool if it overheats.

Coffee Grinding Tips and Best Practices

For optimal flavor, use freshly roasted beans and store them properly. Experiment with grind sizes for different brewing methods and clean the grinder regularly for consistency.

  • Choose high-quality beans for the best taste.
  • Adjust grind size based on brewing technique.
  • Store ground coffee in an airtight container.

8.1 Choosing the Right Coffee Beans

Selecting high-quality coffee beans is essential for optimal flavor. Opt for freshly roasted beans and consider their origin for unique taste profiles. Lighter roasts offer brighter acidity, while darker roasts provide richer, bolder flavors. Store beans in an airtight container to preserve freshness and aroma. Experiment with single-origin or blended beans to find your perfect match for any brewing method.

  • Freshness is key for vibrant flavors.
  • Light roasts suit pour-over, while dark roasts are ideal for espresso.
  • Store beans in a cool, dry place to maintain quality.

8.2 Storing Ground Coffee for Optimal Flavor

To preserve the flavor and aroma of ground coffee, store it in an airtight container in a cool, dark place. Avoid exposure to moisture, heat, and light, as these can degrade quality. For longer storage, consider freezing in an airtight bag or container, ensuring minimal air exposure. Use within a week for optimal freshness and flavor retention.

  • Use glass or ceramic containers to prevent odors.
  • Freeze for up to two months for extended freshness.
  • Grind only what you need to minimize storage time.

Advanced Features and Customization

Explore advanced features like micro adjustments for precision grinding and customizable settings to suit your brewing preferences. Optimize flavor extraction with tailored grind sizes for espresso, cappuccino, and more.

9.1 Micro Adjustments for Precision Grinding

The Krups grinder offers micro adjustments, allowing precise control over grind size. With a range of 12 grind settings, each with fine-tuning capabilities, you can customize the texture to suit espresso, pour-over, or drip brewing. Achieve the perfect grind consistency for optimal flavor extraction. This feature ensures ultimate flexibility for coffee enthusiasts seeking tailored brewing experiences.

9.2 Using the Burr Grinder for Espresso and Cappuccino

The Krups Burr Grinder is ideal for crafting espresso and cappuccino. With precise grind settings, you can achieve the perfect consistency for espresso crema and cappuccino froth. Use the finer grind sizes for espresso and slightly coarser for cappuccino. Adjustments are easy, ensuring optimal flavor extraction. This feature makes the grinder versatile for specialty coffee drinks, enhancing your home brewing experience.

Model-Specific Instructions

Find detailed guides for your specific Krups coffee grinder model, including GVX212 and F203. Access manuals, troubleshooting, and operation tips tailored to your device for optimal performance.

10.1 Krups GVX212 Model Features

The Krups GVX212 boasts a sleek design and precise grinding technology. It features 12 grind sizes with micro adjustments, ensuring perfect extraction. Designed for coffee enthusiasts, it offers versatility for espresso, cappuccino, and other brewing methods. The burr grinder ensures consistent results, while its compact build fits seamlessly into any kitchen. Explore its advanced features for tailored coffee experiences.

10.2 Krups F203 Model Operating Guide

The Krups F203 is a compact and user-friendly coffee grinder designed for home use. It features a powerful grinding mechanism with multiple grind settings to suit various brewing methods. The grinder includes a safety feature that automatically shuts off when the lid is removed. Easy to clean and maintain, the F203 is ideal for daily use, ensuring freshly ground coffee with minimal effort and optimal flavor.

Mastering your Krups coffee grinder ensures optimal flavor and performance. For further assistance, visit Krups’ official website or consult customer support for detailed manuals and troubleshooting guides.

11.1 Final Tips for Optimal Performance

For consistent results, clean your grinder daily and empty the ground coffee container after each use. Store coffee beans in an airtight container to preserve freshness. Experiment with grind sizes and brewing methods to enhance flavor. Regular maintenance ensures longevity. Refer to the manual for troubleshooting or explore advanced features for customization. Happy grinding!

11.2 Accessing Krups Coffee Grinder Manuals Online

Visit the official Krups website to download PDF manuals for your specific coffee grinder model, such as GVX212 or F203. Use the search function to find your model and access troubleshooting guides, FAQs, and detailed instructions. Online manuals are available 24/7, ensuring you can resolve issues or learn new features anytime. Always refer to official sources for accurate information.

baby wrap carrier instructions

A baby wrap carrier is a versatile tool that promotes bonding and offers hands-free convenience. It allows for secure, snug positioning, keeping your baby close and comfortable while enabling easy movement. This natural, intuitive way to carry your little one fosters a sense of safety and connection, making it a popular choice for parents worldwide.

What is a Baby Wrap Carrier?

A baby wrap carrier is a type of babywearing tool that consists of a long piece of fabric wrapped around the wearer’s body to securely hold a baby. It is designed to distribute the baby’s weight evenly, providing comfort and support for both the wearer and the child. Unlike structured carriers, wraps are highly adjustable and can be customized to fit different body types and baby sizes. They are suitable from newborn stages up to toddler age, offering multiple carrying positions such as front, hip, and back carries. The wrap promotes bonding through close contact and allows for hands-free parenting. Popular options like the Kari Me Baby Wrap and Beluga Baby Wrap highlight the versatility and ease of use once mastered.

Benefits of Using a Baby Wrap Carrier

A baby wrap carrier offers numerous benefits, including promoting bonding through close contact and skin-to-skin interaction. It allows for hands-free parenting, making daily tasks easier while keeping your baby secure. The wrap distributes your baby’s weight evenly, reducing strain on your back and shoulders. It is also versatile, accommodating multiple carrying positions such as front, hip, and back carries. Many parents find it helpful for soothing fussy babies, as the snug fit mimics the womb environment. Additionally, wraps are often easy to clean and store, making them a practical choice for everyday use. They are also ideal for newborns, supporting their fragile bodies while fostering a sense of safety and comfort.

Choosing the Right Baby Wrap Carrier

Selecting the right baby wrap involves considering material, size, and comfort. Opt for breathable, soft fabrics and ensure a proper fit for both you and your baby.

Popular Types of Baby Wrap Carriers

There are several popular types of baby wrap carriers available, each offering unique features and benefits. The Kari Me Baby Wrap and Beluga Baby Wrap are known for their versatility and comfort. The Bamboo Baby Wrap is lightweight and eco-friendly, while the Moby Wrap is a classic choice for its softness and ease of use. The KeaBabies Baby Wrap is praised for its stretchiness and durability, and the Solly Baby Wrap is a favorite for its stylish designs and breathability. These wraps cater to different preferences, ensuring a snug and secure fit for both baby and wearer. Choosing the right type depends on your lifestyle and baby’s needs.

Features to Consider When Selecting a Baby Wrap

When choosing a baby wrap, consider factors like material, safety, and adjustability. Opt for breathable, organic fabrics for comfort and skin-to-skin contact. Ensure the wrap has secure stitching and even weight distribution for your baby’s safety. Adjustable straps allow for a customizable fit, accommodating different body types and baby ages. Look for wraps with intuitive designs that make tying and untying easy, even for beginners. Durability is key, as frequent use requires a wrap that withstands wear and tear. Lastly, consider style options, such as neutral tones or vibrant patterns, to match your personal preference. These features ensure both comfort and practicality for you and your baby.

Safety Guidelines for Using a Baby Wrap Carrier

Always inspect the wrap for wear and tear. Ensure proper fit to support your baby’s neck and spine. Follow manufacturer instructions to avoid safety risks.

General Safety Tips

Always ensure the wrap is snug and secure, with your baby in an upright position. Check for any signs of wear or damage before use.

Keep your baby’s face visible and uncovered to monitor their breathing. Avoid loose fabric that could pose a suffocation risk.

Ensure your baby’s neck and spine are properly supported. Never leave your baby unattended while they are in the wrap.

Be mindful of your baby’s movements and strength as they grow, adjusting the wrap accordingly. Regularly inspect the wrap for any signs of deterioration.

Follow the manufacturer’s guidelines for weight and age limits to ensure safe use.

By adhering to these tips, you can create a safe and comfortable environment for your baby while using a wrap carrier.

Common Mistakes to Avoid

One of the most common mistakes is not positioning the baby correctly, leaving their legs dangling or their bottom uncovered.

A loose wrap can lead to discomfort and safety issues, so ensure it is snug and secure.

Avoid tying the wrap too tightly, as this can restrict movement or breathing.

Another mistake is not spreading the fabric evenly across your back, which can cause strain.

Neglecting to follow the manufacturer’s instructions is a frequent error, so always review them carefully.

Lastly, never leave excess fabric hanging, as it can pose a tripping hazard or obstruct your view of the baby.

By being mindful of these mistakes, you can ensure a safe and comfortable experience for both you and your baby.

Step-by-Step Instructions for Using a Baby Wrap Carrier

Position the wrap correctly, secure your baby snugly, and tie the fabric firmly to ensure a comfortable and safe fit for both you and your baby.

How to Position the Wrap

Begin by unfolding the baby wrap and draping it across your chest, forming an “X” shape with the fabric. Ensure the center of the wrap aligns with your chest for proper positioning. Gently place your baby into the pocket created by the fabric, keeping their bottom snug and close to your body. Adjust the wrap to evenly distribute the fabric across your shoulders and back for optimal comfort. Make sure the wrap is not too tight or too loose, allowing your baby to maintain a natural, upright position. This step is crucial for ensuring both you and your baby feel secure and comfortable throughout the day.

How to Secure Your Baby in the Wrap

To secure your baby in the wrap, ensure their bottom is fully covered by the fabric and their legs are in a natural, one-legged position. Gently pull the wrap around your baby’s back, making sure the fabric is evenly distributed for support. Bring the ends of the wrap around your sides and tie them securely behind your back or at your front, depending on the style. Check that your baby is upright, with their head at or above your chest level, and their face visible. Adjust the wrap as needed to maintain a snug fit, ensuring your baby feels safe and comfortable. Regularly verify that the wrap is not too tight or restrictive for your baby’s movement.

How to Tie the Wrap Properly

To tie the wrap properly, bring both ends over your shoulders and tuck them under the front panel or logo, depending on the carrier style. Cross the ends behind your back and bring them to the front, ensuring the fabric is not twisted. Tie a secure knot at your waist or hip, keeping the wrap snug but not too tight. Adjust the tie to ensure your baby’s position is upright and comfortable. Regularly check the knot for tightness and your baby’s fit to maintain safety and comfort throughout use.

Tips for Mastering the Baby Wrap

Practice Makes Perfect: Getting Comfortable with the Wrap

Be patient and practice regularly to build confidence. Start with your baby as a newborn, following instructions and guides. Watch tutorials and ensure a snug, secure fit for both comfort and safety.

Mastering the baby wrap takes time and patience, but consistent practice will help you and your baby feel comfortable and secure. Start with short sessions, gradually increasing as you gain confidence. Watch tutorials and follow step-by-step instructions to ensure proper positioning and tying techniques. Practice with your baby from newborn age to adapt to their growing size. Keep the wrap snug but not overly tight, ensuring your baby’s legs are spread evenly and their bottom is fully covered. Regularly check the wrap’s position to maintain safety and comfort. With time, you’ll find the process intuitive, making babywearing a seamless part of your daily routine.

Maintenance and Care for Your Baby Wrap

Regularly wash your baby wrap in cold water with mild detergent to keep it clean. Avoid harsh chemicals and machine drying to preserve fabric quality and longevity.

How to Clean and Store Your Baby Wrap

To keep your baby wrap clean and well-maintained, wash it in cold water using a mild detergent. Avoid using bleach or harsh chemicals, as they can damage the fabric. Gently hand wash or use a delicate cycle in your washing machine. After washing, air dry the wrap to prevent shrinking or damage from heat. For storage, fold or roll the wrap neatly and keep it in a cool, dry place away from direct sunlight. Avoid leaving it in a damp environment to prevent mildew. Proper care ensures your baby wrap remains soft, durable, and safe for your baby to use.

Troubleshooting Common Issues

Address common issues by adjusting fabric tension for comfort, ensuring proper positioning, and avoiding mistakes like twisting the wrap or leaving excess fabric loose.

Solving Fit and Comfort Problems

If your baby wrap feels too tight or too loose, adjust the fabric tension by gently pulling the edges to ensure even distribution. Check for any twists in the material, as this can cause discomfort. Ensure your baby’s legs are properly positioned, with knees bent and bottom supported, to prevent strain. If the wrap feels uneven, re-tie it, focusing on securing the fabric snugly around your body. Regularly inspect the wrap for wear and tear, and adjust the fit as your baby grows. Proper adjustment ensures both you and your baby stay comfortable, promoting a safe and enjoyable babywearing experience.

ugames.com/instructions.asp

University Games‚ based in San Francisco‚ creates educational board games‚ puzzles‚ and toys for all ages. Their products blend learning with fun‚ fostering cognitive development and creativity. UG Studios offers video support‚ enhancing the user experience with tutorials and gameplay insights.

1.1 Overview of University Games Corporation

University Games Corporation‚ headquartered in San Francisco‚ California‚ is a renowned manufacturer of educational toys‚ board games‚ and puzzles. Founded with a mission to create engaging and learning-focused products‚ the company caters to both children and adults. Known for its high-quality designs‚ University Games emphasizes cognitive development‚ creativity‚ and fun. Their product line includes popular items like 3D Crystal Puzzles and collaborative collections‚ ensuring a diverse range of options for all skill levels and interests.

1.2 Popular Products: Puzzles‚ Board Games‚ and Educational Toys

University Games offers a diverse range of popular products‚ including 3D Crystal Puzzles‚ board games‚ and educational toys. These items are designed to combine fun with learning‚ appealing to both kids and adults. Their puzzles‚ such as the 3D Minnie Mouse series‚ challenge and engage users‚ while their board games and toys promote critical thinking and creativity. The product line is known for its quality and innovative designs‚ making it a favorite among families and educators alike.

Accessing Instructions for UGames Products

Instructions for UGames products are easily accessible online. Visit ugames.com‚ where most guides are available in both English and Chinese‚ ensuring convenience for all users.

2.1 How to Find Instructions on ugames.com

To find instructions on ugames.com‚ visit the website and navigate to the “Instructions” section. Search by product name or number to locate your specific game or puzzle. Click on the product image to access the corresponding guide. Most instructions are available in both English and Chinese for convenience. If you can’t find your product‚ contact customer support for assistance. This streamlined process ensures easy access to the information you need to enjoy your UGames products.

2.2 Language Options: English and Chinese Instructions

UGames provides instructions in both English and Chinese‚ ensuring accessibility for a diverse audience. This bilingual support helps users understand game mechanics and assemble puzzles with ease. The inclusion of Chinese instructions reflects UGames’ commitment to catering to global users‚ making their products enjoyable for people of various linguistic backgrounds. This feature aligns with their mission to promote education and fun worldwide‚ breaking language barriers for an enhanced user experience.

Types of UGames Puzzles and Their Unique Features

UGames offers 3D crystal puzzles‚ collaborative collections‚ and deluxe editions. These puzzles are challenging‚ visually stunning‚ and designed for both fun and intellectual stimulation‚ appealing to all skill levels.

3.1 3D Crystal Puzzles: Design and Assembly Tips

3D Crystal Puzzles by UGames are intricate and visually captivating. Start by identifying obvious pieces‚ such as edges or corners‚ and build outward. Use the included instructions or online guides for reference. Ensure all pieces are accounted for to avoid missing parts. Regularly check your progress to maintain alignment and balance. Patience and meticulous assembly will reveal a stunning‚ display-worthy creation that showcases your problem-solving skills.

3.2 Collaborative and Deluxe Puzzle Collections

UGames offers deluxe and collaborative puzzle collections designed for shared enjoyment. These sets often feature unique themes‚ challenging designs‚ and high-quality pieces. Collaborative puzzles encourage teamwork‚ making them ideal for family or group activities. Deluxe editions may include additional components or larger piece counts‚ offering extended play value. They cater to various skill levels‚ ensuring fun for both casual puzzlers and experienced enthusiasts. Explore these collections to enhance your puzzle experience with others.

Troubleshooting Common Issues

UGames puzzles may occasionally present challenges. Ensure all pieces are included and correctly aligned. Double-check for misplaced parts and follow assembly tips for complex designs. Patience and careful observation are key to resolving issues. If problems persist‚ contact consumer support for assistance.

4.1 Dealing with Missing Puzzle Pieces

If you discover a missing piece in your UGames puzzle‚ start by thoroughly checking the box and all assembled parts to ensure it hasn’t been misplaced. Double-check every section of the puzzle to confirm the piece is truly missing. If the piece remains unaccounted for‚ refer to the instructions provided in English or Chinese for guidance. As a last resort‚ contact UGames consumer support for assistance in resolving the issue promptly.

4.2 General Tips for Assembling Complex Puzzles

Begin by identifying obvious sections‚ such as edges or corners‚ to create a foundation. Organize pieces by shape and color to streamline assembly. Start with the most recognizable parts‚ like tops or bottoms‚ and build outward. Regularly refer to the instructions provided in English or Chinese for clarity. If stuck‚ consider using video tutorials from UG Studios for visual guidance. Patience and careful planning are key to mastering even the most intricate designs.

Video Resources and Tutorials

UG Studios offers instructional videos for UGames products‚ providing step-by-step guides and gameplay insights. These resources help users understand mechanics and assemble complex puzzles effectively online.

5.1 UG Studios: A Hub for Instructional Videos

UG Studios is a dedicated platform offering a wide array of instructional videos for University Games products. From assembling complex puzzles to understanding game mechanics‚ these videos provide clear‚ step-by-step guidance. They cater to both new and experienced users‚ ensuring everyone can enjoy their UGames purchases to the fullest. The studio’s content is accessible online‚ making it easy to find help whenever needed‚ enhancing the overall user experience with detailed visual instructions.

5.2 How Videos Can Aid in Understanding Game Mechanics

Instructional videos from UG Studios are invaluable for comprehending game mechanics. They provide visual breakdowns of rules‚ gameplay‚ and strategies‚ making complex concepts easier to grasp. Videos often include demonstrations of turns‚ card placements‚ and piece movements‚ ensuring clarity for both new and experienced players. This visual guidance enhances understanding and reduces confusion‚ allowing users to fully enjoy their UGames products.

Additionally‚ these videos highlight tips for solving puzzles and assembling games‚ fostering problem-solving skills and creativity. They are particularly useful for intricate 3D puzzles‚ offering step-by-step assembly advice. By watching these tutorials‚ users can master their games and puzzles efficiently‚ maximizing their enjoyment of UGames’ diverse product line.

Special Collaborations and Limited Editions

University Games partners with brands like Beverly Enterprises to create unique‚ limited-edition puzzles and games. These special releases often feature seasonal or themed designs‚ enhancing their appeal.

6.1 Partnerships with Brands Like Beverly Enterprises

University Games collaborates with Beverly Enterprises to produce exclusive puzzles‚ combining creativity with timeless themes. These partnerships result in unique designs‚ such as the “Carousel” puzzle‚ blending artistry and challenge. The joint efforts ensure high-quality‚ engaging products that appeal to diverse audiences. Such collaborations highlight University Games’ commitment to innovation and delivering exceptional consumer experiences through shared creative visions and expertise.

6.2 Seasonal and Themed Puzzle Releases

University Games offers seasonal and themed puzzles‚ aligning with holidays and popular trends. These limited-edition releases‚ such as the 3D Minnie Mouse II and themed collaborations‚ cater to varied interests. Available in English and Chinese instructions‚ they provide global accessibility. These releases enhance the brand’s appeal‚ ensuring fresh and exciting options for puzzle enthusiasts while maintaining quality and educational value‚ a hallmark of University Games’ product line.

Contact Information and Support

University Games’ consumer support is accessible at 415.503.1600 or via their website. Their office is located at 2030 Harrison St‚ San Francisco‚ CA 94110.

7.1 Consumer Support Details

University Games offers comprehensive consumer support to assist with inquiries. Customers can contact them via phone at 415.503.1600 or through their official website. The support team is dedicated to helping users with product-related questions‚ troubleshooting‚ and general information. Additionally‚ the website provides easy access to resources like instruction manuals and FAQs‚ ensuring a seamless experience for all users. Their responsive support system aims to address concerns promptly and efficiently.

7.2 Office Location and Contact Numbers

University Games Corporation is located at 2030 Harrison St.‚ San Francisco‚ CA 94110. For inquiries‚ call 415.503.1600 or visit their website at consumerugames.com. This central location supports their mission to deliver high-quality‚ educational products. The office serves as the hub for their operations‚ ensuring efficient customer service and product distribution. Contacting their office provides direct access to assistance with orders‚ product information‚ and support needs.

The Future of UGames Instructions

UGames is focused on enhancing instructional content with innovative digital solutions. Future updates will include expanded multilingual support and interactive guides‚ ensuring accessibility for global users.

8.1 Innovations in Instructional Content

University Games is advancing its instructional content with cutting-edge digital tools. Enhanced features include interactive guides‚ video tutorials‚ and augmented reality integration for a richer‚ more intuitive user experience. These innovations aim to simplify assembly processes and deepen engagement. By leveraging technology‚ UGames ensures that users of all skill levels can enjoy their products effortlessly‚ fostering a seamless and enjoyable puzzling journey.

8.2 Expanding Accessibility for Global Users

University Games is committed to making its instructions and products more accessible globally. By translating instructions into multiple languages‚ including Spanish‚ French‚ and German‚ UGames ensures users worldwide can enjoy their puzzles and games. Additionally‚ the company is implementing multilingual video tutorials and regional website customization to cater to diverse markets. These efforts aim to foster an inclusive puzzling community‚ ensuring everyone can benefit from their innovative and educational products‚ regardless of language or location.

University Games offers comprehensive support through instructions‚ videos‚ and global accessibility‚ ensuring a seamless experience. Explore their diverse products and enjoy the perfect blend of fun and learning.

9;1 Final Thoughts on Navigating UGames Instructions

Navigating UGames instructions is straightforward with their user-friendly resources. From written guides to video tutorials‚ UGames ensures that users can easily assemble puzzles or understand game mechanics. The availability of instructions in multiple languages‚ including English and Chinese‚ caters to a global audience. Whether you’re tackling a complex puzzle or exploring a new board game‚ UGames provides the support needed to enhance your gaming experience. Their commitment to clarity and accessibility makes their products enjoyable for everyone.

9.2 Encouragement to Explore More Products

Exploring University Games’ diverse range of products is a rewarding experience. From challenging 3D puzzles to engaging board games‚ their offerings cater to all ages and interests. Collaborations with brands like Beverly Enterprises bring unique and themed collections. With a focus on education and fun‚ UGames encourages creativity and learning. Visit ugames.com to discover their full lineup‚ including seasonal releases and limited editions. Your next favorite game or puzzle might be just a click away!

About University Games Corporation

University Games Corporation‚ founded in 1985‚ is a leading manufacturer of educational toys and games. Headquartered in San Francisco‚ they emphasize intelligent play and learning through fun.

10.1 Company History and Mission

Founded in 1985‚ University Games is a San Francisco-based company dedicated to creating engaging‚ educational toys and games. Their mission emphasizes intelligent play‚ fostering learning through fun and creativity. By blending innovation with tradition‚ they aim to inspire cognitive growth and social interaction across all age groups.

10.2 Commitment to Quality and Education

University Games prioritizes quality and education in every product. They craft durable‚ safe‚ and thoughtfully designed toys and games that align with educational goals‚ promoting learning through play. Their commitment ensures that each item fosters cognitive development and creativity‚ making them trusted by educators and families worldwide.

ny it-204-ip instructions

The IT-204-IP form guides partners in reporting their share of income, deductions, and credits from New York-based partnerships, ensuring compliance with state tax regulations․

1․1 Purpose of Form IT-204-IP

Form IT-204-IP is designed for partnerships and LLCs treated as partnerships to report each partner’s share of income, deductions, gains, and credits from New York-based activities․ It ensures accurate distribution of tax attributes to individual partners, adhering to New York State tax regulations․ The form is filed by the partnership, not individual partners, and is crucial for compliance with state tax reporting requirements․

1․2 Overview of Schedule K-1 for Partners

Schedule K-1 for Form IT-204-IP details each partner’s share of income, deductions, gains, losses, and credits from New York-based partnership activities․ It is provided by the partnership to each partner, outlining their distributive share of tax attributes․ Partners use this schedule to report their portion of income on their personal tax returns, ensuring accurate state tax compliance and proper allocation of tax liabilities․

Partner’s Guide to Understanding IT-204-IP

This guide helps partners understand their tax obligations, detailing how to report income, deductions, and credits from New York partnerships using Schedule K-1․

2․1 Reporting Partnership Income

Partners must accurately report their share of income, deductions, and credits from New York partnerships using Schedule K-1․ This form details each partner’s distributive share, ensuring compliance with state tax regulations․ The partnership, not the individual partner, files Form IT-204-IP․ Partners must report this income on their personal tax returns, adhering to New York State tax laws and avoiding errors in their filings․

2․2 Tax Liability on Distributed and Undistributed Income

Partners are liable for taxes on both distributed and undistributed income from the partnership․ Distributed income refers to profits or assets received, while undistributed income remains in the business․ Both are subject to state tax, and partners must report these amounts on their personal returns, ensuring accurate representation of their tax obligations in accordance with New York State tax laws and regulations․

Filing Requirements and Deadlines

Partnerships and LLCs treated as partnerships must file Form IT-204-IP to report income and ensure compliance with New York State tax regulations and deadlines․

3․1 Who Must File Form IT-204-IP

Partnerships and LLCs treated as partnerships must file Form IT-204-IP if they have income, deductions, or other tax-related items from New York State sources․ This includes both New York residents and nonresidents with New York source income․ The form is used to report each partner’s distributive share of income, deductions, and credits, ensuring compliance with New York State tax regulations․

3․2 Important Filing Dates and Extensions

Form IT-204-IP must be filed by April 18, 2023, for the 2022 tax year․ Partnerships can request an automatic six-month extension, extending the deadline to October 18, 2023․ Quarterly estimated tax payments are due on April 15, June 15, September 15, 2023, and January 16, 2024․ Ensure timely filing to avoid penalties and meet New York State tax requirements․

Completing Form IT-204-IP

Form IT-204-IP is used to report a partner’s share of income, deductions, and credits from New York-based partnerships, requiring accurate completion of Schedule K-1․

4․1 Line-by-Line Instructions for Schedule K-1

Schedule K-1 provides a detailed breakdown of a partner’s share of income, deductions, and credits․ Each line corresponds to specific items, such as ordinary business income, guaranteed payments, and deductions․ Partners must carefully report these amounts on their personal tax returns, ensuring accuracy and compliance with New York tax regulations․ Instructions guide partners through complex calculations and adjustments, including federal and state-specific modifications․

4․2 Calculating New York-Specific Modifications

New York-specific modifications adjust federal income to align with state tax rules․ Partners must account for items like business income, credits, and deductions unique to New York․ These modifications ensure accurate reporting of income and compliance with state tax laws․ Detailed guidelines in the IT-204-IP instructions outline how to apply these adjustments correctly, avoiding common errors and ensuring proper tax reporting․

Special Considerations

Nonresident partners must report New York source income accurately, while all partners should address amended returns and corrections promptly to ensure compliance with state tax requirements․

5․1 Nonresident Partners and New York Source Income

Nonresident partners must accurately report income sourced from New York activities․ The IT-204-IP form requires detailed allocation of income, deductions, and credits attributable to New York․ Partners must ensure compliance with state-specific tax regulations and modifications․ Proper documentation and adherence to filing requirements are essential to avoid discrepancies and ensure accurate tax reporting for nonresident partners with New York-based income․

5․2 Amended Returns and Corrections

Amended returns for IT-204-IP must be filed to correct errors or omissions․ Partners should submit a revised Schedule K-1 and provide detailed explanations for changes․ Ensure all adjustments align with New York State tax regulations and submit necessary documentation․ The New York State Tax Department reviews amended returns for accuracy and compliance with state tax laws, ensuring proper corrections are reflected in final tax liability calculations․

Relationship Between IT-204-IP and Other Forms

Form IT-204-IP connects to IT-204, IT-201, IT-203, and IT-2658, ensuring proper reporting of partnership income and compliance with New York State tax requirements for individuals and entities․

6․1 Connection to Form IT-204 and IT-204-I

Form IT-204-IP is directly linked to Form IT-204, the partnership return, and its instructions, IT-204-I․ While IT-204-IP is for partners to report their share of income, IT-204 is filed by the partnership itself․ IT-204-I provides detailed guidance for completing the partnership return, ensuring alignment between the two forms․ However, IT-204-IP is not filed with individual tax returns but is used for personal income tax reporting purposes․

6․2 Attachment to Form IT-201 or IT-203

Form IT-204-IP must be attached to the partner’s personal income tax return, either Form IT-201 (for residents) or IT-203 (for nonresidents)․ While IT-204-IP is provided by the partnership, it is not filed separately․ Instead, it is included with the individual’s tax return to report their share of income, deductions, and credits from the partnership, ensuring accurate state tax reporting․

Common Mistakes to Avoid

  • Incorrect reporting of income and deductions on Schedule K-1․
  • Failure to adhere to New York tax regulations and filing requirements․

7․1 Incorrect Reporting of Income and Deductions

Common errors include misreporting federal adjustments, failing to accurately allocate income, and incorrect application of New York-specific modifications․ Ensure all Schedule K-1 items align with federal returns and properly reflect New York sourcing․ Inaccuracies can lead to audits, penalties, or delayed refunds, emphasizing the need for precise reporting and adherence to state tax guidelines․

7․2 Failure to Adhere to New York Tax Regulations

Noncompliance with New York tax laws, such as missing deadlines or ignoring state-specific modifications, can result in penalties and audits․ Partners must ensure accurate reporting of all state-sourced income and adhere to filing requirements, including providing Schedule K-1 forms to all partners․ Proper attention to regulatory details is crucial to avoid legal and financial consequences․

Where to Find Additional Help and Resources

Consult the New York State Tax Department’s official website and publications for detailed guidance․ Professional tax advisors can also provide personalized support and clarification on complex issues․

8․1 Official New York Tax Department Resources

The New York State Tax Department offers comprehensive resources, including downloadable forms, detailed instructions, and FAQs on their official website․ Taxpayers can access guides specific to Form IT-204-IP, ensuring accurate filing and compliance with state tax laws․ Additionally, the department provides customer support for addressing specific inquiries and clarifying complex tax scenarios․

8․2 Professional Tax Assistance andGuidance

8․2 Professional Tax Assistance and Guidance

Consulting a certified public accountant or tax professional specializing in New York State taxes ensures accurate completion of Form IT-204-IP․ Experts provide personalized guidance, addressing complex scenarios and ensuring compliance with state-specific regulations․ Additionally, tax preparation software often includes support for IT-204-IP, offering step-by-step instructions and error-checking features to streamline the filing process․

Compliance and Audit Considerations

Ensure all reported income, deductions, and credits on IT-204-IP align with New York tax laws․ The Tax Department may audit to verify accuracy and compliance․

9․1 Record-Keeping Requirements

Partners must maintain accurate records, including copies of Schedule K-1, ledgers, and documentation supporting income, deductions, and credits reported on IT-204-IP․ Records should be accessible for audit purposes․ Nonresident partners must retain documentation substantiating New York source income․ Electronic records are acceptable if they meet IRS standards for accuracy and accessibility․ Proper record-keeping ensures compliance and facilitates audit processes․

9․2 Audit and Revision Process

The New York State Tax Department may audit IT-204-IP forms to verify accuracy․ Partnerships must provide documentation supporting reported income, deductions, and credits․ If discrepancies are found, the Tax Department may adjust tax liabilities․ Partners will be notified of any changes, and revisions must be addressed promptly․ Accurate record-keeping and timely responses to audit inquiries help ensure compliance and minimize potential penalties․

Future Updates and Changes

Stay informed about New York tax law changes affecting IT-204-IP․ Subscribe to official updates for form modifications and compliance requirements․ Ensure timely adjustments to maintain accuracy․

10․1 Staying Informed About Tax Law Changes

Regularly visit the official New York Tax Department website for updates on tax law changes affecting IT-204-IP․ Subscribe to newsletters or bulletins for timely notifications․ Stay informed about modifications to ensure accurate reporting and compliance with state regulations․ This helps in understanding new requirements and deadlines, ensuring seamless filing of New York partnership returns and related forms like IT-204-IP․

10․2 Anticipated Modifications to IT-204-IP

Anticipate updates to IT-204-IP for tax year 2024, including potential changes to income reporting and New York-specific modifications․ The form may incorporate adjustments due to decoupling from federal tax laws, such as pass-through entity tax (PTET) add-back requirements․ Stay alert to any revisions in filing instructions or new fields added to reflect evolving state tax regulations․ Always verify with the New York Tax Department for the latest updates before filing․

trader joe’s brownie mix instructions

Trader Joe’s Brownie Mix offers a convenient and delicious way to bake rich, fudgy brownies at home. Made with Dutch cocoa and chocolate chips, it ensures deep flavor and a moist texture. The mix is popular for its ease of preparation, requiring just a few additional ingredients. Perfect for chocolate lovers, it provides a quick and affordable dessert solution without compromising on taste. A favorite among Trader Joe’s fans, it delivers consistent results with minimal effort required.

Overview of the Product

Trader Joe’s Brownie Mix is a popular baking product designed to simplify the process of making delicious, fudgy brownies at home. The mix combines high-quality ingredients like Dutch cocoa and semisweet chocolate chips, ensuring a rich, chocolatey flavor. It is packaged to make an 8×8-inch pan of brownies, perfect for satisfying cravings or serving at gatherings. Priced affordably at $2.99, it offers great value for the quality and convenience it provides. This mix is a favorite among Trader Joe’s fans for its ease of use and consistent results. With minimal additional ingredients required, it is a quick and reliable option for chocolate lovers seeking a homemade treat without the hassle of measuring multiple components.

Why Trader Joe’s Brownie Mix is Popular

Trader Joe’s Brownie Mix is beloved for its exceptional taste, convenience, and value. It delivers rich, fudgy brownies with deep chocolate flavor thanks to high-quality ingredients like Dutch cocoa and semisweet chocolate chips. The straightforward preparation process appeals to both novice and experienced bakers, requiring minimal additional ingredients. Its affordability, priced at $2.99, makes it a budget-friendly option without compromising on quality. Additionally, the mix stands out for its consistent results and the loyal following it has garnered among Trader Joe’s fans. Positive reviews and creative recipe hacks shared by enthusiasts further enhance its popularity, making it a top choice for those seeking a delicious, hassle-free dessert solution.

Ingredients and Nutritional Information

Trader Joe’s Brownie Mix contains sugar, semisweet chocolate chips, unbleached wheat flour, and Dutch cocoa for rich flavor. Allergens include wheat and soy. Nutritional details vary per serving.

Key Ingredients in the Mix

The Trader Joe’s Brownie Mix features sugar, semisweet chocolate chips, and unbleached enriched wheat flour as primary components. It also includes Dutch cocoa powder for a deep, rich chocolate flavor. The chocolate chips add natural sweetness and a creamy texture, while the flour provides structure. Additional ingredients like soy lecithin and vanilla extract enhance flavor and texture. These components work together to create a decadent, fudgy brownie experience. The mix is designed to deliver consistent results with minimal effort, making it a favorite for home bakers seeking a high-quality dessert solution.

Required Additional Ingredients

To prepare Trader Joe’s Brownie Mix, you’ll need a few simple additional ingredients. These include eggs, melted butter or oil, and water. The eggs provide moisture and richness, while the melted butter or oil enhances the fudgy texture. Water helps to balance the consistency of the batter. Some users also choose to add mix-ins like nuts or chocolate chips for extra flavor and texture. Ensure all ingredients are at room temperature for optimal mixing. Optional add-ins, such as espresso powder or a pinch of salt, can elevate the flavor profile. Follow the package instructions for precise measurements to achieve the perfect brownie consistency.

Nutritional Facts and Allergen Information

Trader Joe’s Brownie Mix contains key ingredients like sugar, semisweet chocolate chips, and unbleached enriched wheat flour. Each serving provides a mix of carbohydrates, fats, and proteins. The mix is free from artificial preservatives but may contain allergens such as soy, wheat, and milk, as indicated on the packaging. It is manufactured in facilities that also process tree nuts and eggs, making it unsuitable for those with severe allergies to these ingredients. Always check the label for the most accurate nutritional and allergen information, as formulations may change. Moderation is recommended due to the high sugar and calorie content typical of sweet baked goods.

Step-by-Step Instructions for Preparation

Preheat oven to 350°F. Grease an 8-inch baking pan. Mix eggs, melted butter, and brownie mix in a bowl. Pour batter into the pan, bake for 25-30 minutes, and let cool before cutting.

Preparation Tools and Equipment Needed

To prepare Trader Joe’s Brownie Mix, you’ll need a few essential tools and equipment. Start with a large mixing bowl to combine the ingredients. A whisk or mixing spoon is necessary for blending the mix, eggs, and melted butter. An 8-inch square baking pan is required for baking; grease it with cooking spray or line it with parchment paper for easy cleanup. Additionally, ensure you have a functional oven preheated to 350°F. Optional tools include a measuring cup for accuracy and a spatula for scraping the bowl. Having these items ready will streamline the process and ensure the best results for your brownies.

Detailed Cooking Instructions

Preheat your oven to 350°F (175°C). Lightly grease an 8-inch square baking pan with cooking spray or line it with parchment paper. In a large mixing bowl, whisk together the eggs, melted butter, and water. Gradually add the Trader Joe’s Brownie Mix to the bowl, stirring until the batter is smooth and well combined. Pour the batter into the prepared baking pan and smooth the top with a spatula. Bake for 20-25 minutes, or until a toothpick inserted into the center comes out with a few moist crumbs attached. Remove from the oven and let cool completely in the pan before cutting into squares and serving. Avoid overmixing to ensure a tender texture and even baking.

Timing and Temperature Guidelines

Preheat your oven to 350°F (175°C) before starting. The brownie mix typically requires 20-25 minutes of baking time in an 8-inch square pan. To ensure doneness, insert a toothpick into the center; it should come out with a few moist crumbs. Avoid overbaking, as this can make the brownies dry. If using a different pan size, adjust the baking time accordingly—larger pans may require less time, while smaller ones may need more. Let the brownies cool in the pan for at least 10 minutes before cutting to allow them to set properly. Cooling completely before serving ensures clean, even slices and the best texture.

Tips for the Best Results

  • Ensure proper mixing to avoid lumps for a smooth texture.
  • Use the recommended pan size for even baking.
  • Let brownies cool completely before cutting for clean slices.

Importance of Proper Mixing

Proper mixing is essential for achieving the best results with Trader Joe’s Brownie Mix. Overmixing can lead to dense, tough brownies, while undermixing may result in uneven distribution of ingredients. Start by whisking eggs thoroughly before adding the mix to ensure a smooth batter. Use a spatula to gently fold in any mix-ins, such as nuts or chocolate chips, to avoid deflating the mixture. Scrape the sides and bottom of the bowl to incorporate all ingredients evenly. Proper mixing ensures a consistent texture and prevents lumps of dry mix from forming. This step is crucial for achieving fudgy, evenly baked brownies with a rich, chocolatey flavor.

Pan Size and Baking Recommendations

For optimal results, bake Trader Joe’s Brownie Mix in an 8-inch square baking pan, lightly greased with canola oil spray or parchment paper. Preheat your oven to 350°F (175°C) and bake for 25-35 minutes. Avoid using a larger pan, as this may result in thinner brownies that cook too quickly. The brownies are done when a toothpick inserted into the center comes out with a few moist crumbs attached. Overbaking can lead to dryness, so monitor the brownies closely during the final minutes. Let them cool in the pan for at least 10 minutes before cutting to ensure clean, even slices. Proper pan size and baking time are key to achieving the perfect fudgy texture.

Cooling and Cutting Tips

Allow the brownies to cool completely in the pan for at least 30-45 minutes before cutting to ensure clean, even slices. Cooling helps the brownies set properly, making them easier to handle. Once cooled, use a sharp knife to cut into uniform squares. For cleaner cuts, lightly wet the knife with water or dip it in hot water between slices. To prevent the brownies from breaking, apply gentle pressure and cut in a smooth, steady motion. For the best texture, avoid cutting while the brownies are still warm, as they may crumble or stick together. Proper cooling and careful cutting will result in neat, fudgy brownies that are perfect for serving.

Creative Variations and Add-Ins

Elevate your brownies by adding nuts, dried fruits, or candy pieces. Try mixing in espresso powder or orange zest for unique flavor twists. Drizzle with caramel for extra indulgence.

Adding Nuts or Mix-Ins

Add a personal touch to your brownies by incorporating nuts or mix-ins. Walnuts, pecans, or hazelnuts provide a crunchy texture and nutty flavor. Dried cranberries or cherries add a sweet and fruity contrast. Candy pieces like chocolate chips, M&M’s, or caramel bits can enhance the indulgence. For a unique twist, try mixing in espresso powder or orange zest. Simply fold your chosen additions into the batter after mixing the base ingredients. Start with a small amount (1/2 cup) and adjust to your liking. This customization allows you to create a one-of-a-kind dessert that suits your preferences. Experiment with different combinations to find your perfect blend!

Customizing the Recipe

Elevate your brownies by tailoring the recipe to your taste preferences. For a deeper chocolate flavor, add a teaspoon of espresso powder or instant coffee to the mix. A pinch of flaky sea salt or a drizzle of caramel sauce can add a sophisticated touch. Substitute water with milk or melted coconut oil for added richness. Experiment with different types of chocolate by stirring in dark, milk, or white chocolate chips. For a boozy twist, mix in a tablespoon of liqueur like Kahlúa or Baileys. If you prefer a lighter texture, fold in a dollop of Greek yogurt or a mashed banana. These tweaks allow you to create a personalized dessert that aligns with your cravings and dietary preferences.

Alternative Baking Methods

Trader Joe’s Brownie Mix can be adapted to various baking methods for convenience and creativity. For a quicker treat, bake in a microwave-safe dish: mix as directed, cook on high for 1-2 minutes, and let cool. Alternatively, use an air fryer: pour the batter into a greased air fryer pan, set to 375°F for 10-12 minutes, and enjoy a gooey center. For a unique texture, try baking in a slow cooker: spread the batter evenly, cook on low for 2-3 hours, and slice into fudgy squares. These methods offer flexibility and allow you to achieve perfect brownies no matter your oven availability, ensuring a delicious dessert every time.

ender 3 instructions

Unboxing and Initial Setup

Start by carefully unboxing the Ender 3 and verifying all components. Check for the frame, print bed, extruder, motors, power supply, cables, and tools like Allen wrench, screwdrivers, pliers, and USB card. Organize everything on a clean, stable workbench for easy access during assembly.

  • Frame and base assembly
  • Print bed and springs
  • Extruder and print head
  • Motors and pulleys
  • Power supply and cables
  • Tools (Allen wrench, screwdrivers, pliers)
  • USB card with instructions

1.1. Checking the Components and Tools

Begin by carefully unboxing and inventorying all components to ensure nothing is missing or damaged. Verify the presence of the frame, print bed, extruder, motors, power supply, and cables. Check the tools provided, such as Allen wrenches, screwdrivers, and pliers, as they are essential for assembly. Locate the USB card containing the user manual and firmware instructions. Ensure the C7 capacitor is removed from the motherboard if using a BLTouch sensor. Inspect all parts for defects before proceeding.

1;2. Preparing the Workbench

Ensure your workbench is clean, stable, and well-lit. Cover it with a protective layer like cardboard or a silicone mat to prevent damage. Gather all tools and components within easy reach. Verify the workbench is at a comfortable height to avoid strain during assembly. Keep Allen wrenches, screwdrivers, and pliers handy, as they are frequently used. Organize smaller parts in containers to prevent misplacement. A clutter-free workspace ensures a smooth and efficient assembly process for your Ender 3 printer.

Assembly Instructions

Proceed systematically with the Ender 3 assembly, following the guide. Start with the frame, then attach the print head and extruder. Ensure all cables are securely connected. Use essential tools like Allen wrenches and screwdrivers for precise adjustments. A well-organized workspace and careful attention to detail are key for a successful build.

2.1. Frame Assembly Steps

Begin by assembling the frame using the upright profiles and base. Attach the vertical aluminum profiles to the base frame, ensuring they are securely fastened with screws. Tighten all connections firmly to maintain stability. Use an Allen wrench for bolts and a screwdriver for smaller screws. Align the frame carefully to avoid any misalignment, which could affect printer performance. Double-check the instructions for specific orientation and part placements. A sturdy frame is essential for accurate printing results.

  • Attach vertical profiles to the base
  • Secure with screws using Allen wrench
  • Ensure alignment and stability
  • Double-check all connections

2.2. Attaching the Print Head and Extruder

Mount the print head to the Z-axis gantry, ensuring proper alignment with the frame. Secure it using the provided screws and tighten with an Allen wrench. Next, install the extruder by attaching it to the print head. Feed the filament through the extruder, making sure it’s seated correctly. Connect the extruder motor to the motherboard, following the wiring diagram. Double-check all connections for tightness and alignment to ensure smooth operation during printing.

  • Mount print head to Z-axis gantry
  • Secure with screws using Allen wrench
  • Install extruder and feed filament
  • Connect extruder motor to motherboard
  • Verify all connections and alignment

Firmware and Software Setup

Install BLTouch-enabled firmware for auto bed leveling. Flash the firmware via USB using software like Arduino IDE. Configure motherboard settings to ensure compatibility with BLTouch and other components.

  • Download and install BLTouch firmware
  • Flash firmware via USB
  • Configure motherboard settings

3.1. Installing BLTouch Enabled Firmware

Begin by downloading the BLTouch-enabled firmware from Creality’s official website or trusted sources. Extract the firmware files to your computer. Install Arduino IDE and configure it for your Ender 3’s motherboard. Connect the printer to your PC via USB and select the correct COM port. Upload the firmware by clicking “Upload” in Arduino IDE. Ensure the BLTouch sensor is properly connected before flashing to avoid compatibility issues. Follow on-screen instructions to complete the installation successfully.

3.2. Configuring the Motherboard Settings

After installing the firmware, access the motherboard settings via the LCD screen or USB connection. Navigate to the control menu and ensure the BLTouch sensor is recognized. Set the correct input voltage (230V or 115V) to match your region. Enable BLTouch auto bed leveling in the settings. Save the configuration to ensure proper functionality. Verify the motherboard version (e.g., V4.2.7) for compatibility and adjust settings as needed to optimize performance and safety.

Bed Leveling and Calibration

Bed leveling ensures proper print adhesion. Use manual adjustment for basic setup or BLTouch for auto leveling. Tighten screws evenly for a precise calibration, ensuring a perfect first layer every time.

4.1. Manual Bed Leveling Process

Start by preheating the bed to 60°C. Place a sheet of paper on the bed and adjust each corner screw until the paper moves with slight resistance. Tighten each screw in a diagonal pattern to ensure even leveling. Use test prints to fine-tune the bed, ensuring proper adhesion and preventing warping. Repeat as needed for optimal calibration.

4.2. Using BLTouch for Auto Bed Leveling

Install BLTouch-enabled firmware and remove the C7 capacitor for V3.0 models. Mount the BLTouch on the extruder carriage and connect it to the motherboard. Power on the printer and navigate to the BLTouch menu. Select “Auto Leveling” and let the sensor probe the bed. Adjust the Z-offset if needed for proper first-layer height. This process ensures precise calibration without manual intervention, improving print quality and bed adhesion.

First Print Guide

Insert the SD card with pre-sliced models. Navigate the menu to select a test file. Ensure the bed is clean and properly leveled; Load filament, start the print, and monitor the first layer for proper adhesion.

5.1. Preparing the Print File and Slicing

Download your STL file and open it in slicing software like Cura. Select the Ender 3 printer profile and adjust settings such as layer height, infill density, and support material. Ensure the print orientation optimizes material usage and print time. Slice the model and save the G-code file to an SD card. Verify the file name is compatible with the printer and check the preview to ensure proper layer adhesion and print quality.

5.2. Loading Filament and Starting the Print

Preheat the extruder and bed to the recommended temperatures for your filament. Insert the filament into the extruder, guiding it gently until it feeds through. Use the control panel to navigate to the print menu, select your G-code file, and start the print job. Monitor the initial layers to ensure proper adhesion and adjust the bed leveling if necessary. Allow the printer to operate without interruption for optimal results. Always ensure filament is loaded correctly to avoid jams or failed prints.

Maintenance and Troubleshooting

Regularly clean the print bed, lubricate moving parts, and check belt tension. Inspect the nozzle for debris and ensure proper filament flow; Address clogs promptly to avoid damage.

6.1. Regular Maintenance Tasks

Perform routine maintenance to ensure optimal performance. Clean the print bed thoroughly with isopropyl alcohol and lubricate all moving parts, including linear bearings and rails, every 100 hours of printing. Check and tighten all bolts and belts periodically. Inspect the PTFE tubing for signs of wear and replace it if necessary. Regularly update the firmware to access new features and improvements. Always monitor the condition of the nozzle and extruder for proper filament flow and heat distribution.

  • Clean the print bed and frame
  • Lubricate moving parts
  • Tighten bolts and belts
  • Inspect and replace PTFE tubing
  • Update firmware
  • Monitor nozzle and extruder

6.2. Common Issues and Solutions

Address common issues promptly to ensure smooth printing. Bed leveling problems can cause uneven prints; adjust the springs or use BLTouch for auto leveling. Filament jams often occur due to incorrect temperatures; clean the extruder and adjust settings. Noise from the X-axis may indicate loose belts; tighten them firmly. Layer shifting can result from worn pulleys; replace them if necessary. Consult the user manual or online forums for detailed troubleshooting guides.

  • Bed leveling issues: Adjust springs or use BLTouch
  • Filament jams: Clean extruder and adjust temperatures
  • X-axis noise: Tighten belts
  • Layer shifting: Replace worn pulleys

Upgrades and Modifications

Popular upgrades for the Ender 3 include installing a dual gear extruder, PEI or glass bed, and silent stepper motors. These modifications enhance performance and print quality.

7.1. Popular Upgrades for Ender 3

Popular upgrades for the Ender 3 include a dual gear extruder for improved filament grip, a PEI or glass bed for better print adhesion, and silent stepper motor drivers for quieter operation; Many users also opt for a direct drive conversion, which enhances handling of flexible filaments. Additionally, installing a BLTouch auto-bed leveling sensor and upgrading the belts and pulleys can significantly improve print quality and ease of use. These modifications are widely available and relatively easy to install.

  • Dual gear extruder
  • PEI or glass bed
  • Silent stepper motor drivers
  • Direct drive conversion
  • BLTouch sensor

7.2. Installing Upgrades Safely

When installing upgrades, ensure the printer is disconnected from power to prevent electrical shocks. Use appropriate tools like Allen wrenches and screwdrivers. Follow detailed online guides or manufacturer instructions for each upgrade. Test each component after installation to ensure proper functionality. For complex upgrades like direct drive conversions, consider seeking assistance or consulting forums for troubleshooting common issues. Always prioritize safety and precision to maintain your printer’s performance and reliability.

  • Disconnect power before starting
  • Use correct tools (e.g., Allen wrench, screwdrivers)
  • Follow upgrade-specific instructions
  • Test upgrades thoroughly post-installation
  • Seek help for complex modifications

Safety Precautions

Always read the user manual before starting. Avoid using the printer in ways not described to prevent injury or damage. Ensure proper voltage selection (230V/115V) matches your location. Keep flammable materials away and avoid overheating. Supervise children and pets during operation. Follow all safety guidelines to ensure safe and reliable printing experiences.

  • Avoid incorrect usage to prevent harm
  • Set the correct voltage for your region
  • Keep flammable materials away
  • Supervise children and pets

8.1. General Safety Guidelines

Always read the user manual thoroughly before starting. Ensure the printer is placed on a stable, heat-resistant surface away from flammable materials. Keep children and pets away during operation. Avoid touching hot components like the extruder or print bed. Use protective gloves when handling sharp parts. Ensure proper ventilation to avoid inhaling fumes. Regularly inspect cables and connections for damage. Never leave the printer unattended while in operation. Follow all safety precautions to ensure a safe and reliable printing experience.

  • Read the manual carefully
  • Keep the printer away from flammable materials
  • Supervise children and pets
  • Avoid touching hot components
  • Inspect cables and connections regularly

8.2. Avoiding Common Hazards

To ensure safe operation, avoid common hazards like electrical malfunctions, burns, and mechanical injuries. Inspect all cables and connections regularly for damage. Keep hands away from moving parts and hot components like the extruder and print bed. Properly ventilate the workspace to avoid inhaling fumes from filaments. Use protective gloves when handling sharp tools or small parts. Ensure the printer is placed on a stable surface to prevent accidental tipping or damage.

  • Inspect electrical components for damage
  • Keep hands away from hot and moving parts
  • Ensure proper ventilation
  • Use protective gloves
  • Stabilize the printer

Manufacturer Instructions

The Ender 3 user manual provides detailed instructions for assembly, usage, and troubleshooting. Read the manual carefully before starting and follow all safety guidelines to avoid injuries or damage.

Instructions and videos are also available on the provided SD card or USB flash drive. Visit Creality’s official website for additional resources and support.

9.1. Official User Manual Highlights

The official Ender 3 user manual provides comprehensive guidance for assembly, usage, and troubleshooting. It includes detailed diagrams and step-by-step instructions to ensure a smooth setup process. The manual emphasizes safety precautions, such as selecting the correct input voltage (230V or 115V) and avoiding improper usage; Additional resources, including instructional videos, are available on the provided SD card or USB flash drive, along with access to Creality’s official website for further support.

  • Coverage of assembly and usage
  • Troubleshooting tips
  • Safety guidelines
  • Access to digital resources

9.2. SD Card and USB Instructions

The Ender 3 printer includes an SD card and USB flash drive containing essential instructions, diagrams, and videos for assembly and operation. These resources provide step-by-step guides for first-time users, ensuring a smooth setup process. The SD card also includes safety guidelines and troubleshooting tips. Users can access detailed manuals, firmware updates, and software drivers directly from the provided storage devices or by visiting Creality’s official website for additional support.

  • SD card with assembly instructions
  • USB flash drive with manuals
  • Access to firmware updates
  • Safety guidelines

self-alignment with instruction backtranslation

Self-alignment with instruction backtranslation is a novel approach enabling language models to generate high-quality training data autonomously, enhancing their performance through unsupervised learning techniques.

1.1 Definition of Self-Alignment

Self-alignment refers to a process where language models autonomously generate and refine their own training data, aligning their behavior with specific instructions or tasks. This method leverages the model’s ability to create structured and coherent outputs, enabling it to improve its performance without extensive human supervision. By generating instructions from unlabeled data, self-alignment bridges the gap between supervised and unsupervised learning, fostering more efficient and adaptable language models. This approach is particularly valuable in scenarios where labeled datasets are scarce or expensive to create.

1.2 Overview of Instruction Backtranslation

Instruction backtranslation is a core component of self-alignment, enabling language models to generate high-quality training data autonomously. It involves training a backward model to create instructions from unlabeled text, which are then used to fine-tune the forward model. This process mimics human learning, where models learn to align their outputs with desired tasks. By leveraging unlabeled data, instruction backtranslation reduces reliance on labeled datasets, making it a cost-effective and scalable solution. This technique enhances model adaptability and improves the quality of generated instructions through iterative refinement.

The Process of Self-Alignment

Self-alignment involves training a backward model to generate instructions from unlabeled data, which are then used to fine-tune the forward model, enhancing its task-specific capabilities.

2.1 Training a Backward Model

Training a backward model is the cornerstone of self-alignment with instruction backtranslation. This process involves developing a model that can generate instructions from unlabeled data, effectively reversing the typical language generation workflow. The backward model is trained on web-scale data, learning to predict the most likely instruction that could have led to a given text. This step is crucial as it enables the creation of synthetic training examples, which are then used to fine-tune the forward model. The backward model’s accuracy is validated using metrics like unigram and bigram precision and recall, ensuring high-quality instruction generation. This iterative process refines the model’s ability to align instructions with tasks, enhancing overall performance.

2.2 Generating Instructions from Unlabeled Data

Generating instructions from unlabeled data is a pivotal step in self-alignment with instruction backtranslation. The backward model, once trained, processes large volumes of unlabeled text to produce corresponding instructions. These instructions are then paired with the original text, forming synthetic training examples. This approach leverages web-scale corpora, enabling the creation of diverse and relevant task descriptions. The quality of generated instructions is validated through metrics such as unigram and bigram precision and recall, ensuring linguistic consistency. This method effectively scales supervised training by reducing reliance on human-annotated data, while maintaining high instructional fidelity and alignment with target tasks.

2.3 Fine-Tuning the Model

Fine-tuning the model involves leveraging the synthetic training examples generated from unlabeled data. The backward model, trained to reverse-map text to instructions, creates high-quality synthetic pairs. These pairs are then used to refine the forward model, enhancing its ability to align with target tasks. Fine-tuning improves the model’s performance by exposing it to diverse and relevant training data, ensuring better generalization and alignment with desired outcomes. This step is critical for optimizing the model’s capabilities and preparing it for real-world applications, where accurate and context-specific outputs are essential;

Key Techniques in Instruction Backtranslation

3.2 Bootstrapping Self-Alignment

Bootstrapping self-alignment involves starting with a small, high-quality dataset to generate synthetic examples, iteratively enhancing model performance through self-supervised learning without extensive human intervention.

3.1 Unigram and Bigram Precision and Recall

Unigram and bigram precision and recall are critical metrics for evaluating the quality of generated instructions in self-alignment. Precision measures the proportion of correctly generated tokens, while recall assesses how many correct tokens are produced. For unigrams, this involves single words, and for bigrams, it focuses on word pairs. These metrics ensure alignment between generated and expected outputs, providing insights into model accuracy and consistency. For example, unigram precision might be calculated as 17/17 (perfect), while bigram precision could be 13/16 (0.813). These evaluations are essential for refining instruction backtranslation systems.

Bootstrapping self-alignment is an iterative process that enhances model accuracy by leveraging generated instructions to improve future outputs. This method begins with a small set of seed data and expands by refining the quality of generated instructions over multiple iterations. It plays a pivotal role in improving the alignment between the model’s outputs and desired goals. For instance, studies have shown that bootstrapping significantly boosts the performance of large language models by reducing the need for extensive labeled datasets. This approach is particularly valuable for fine-tuning models in scenarios where labeled data is scarce, enabling more efficient and effective learning processes.

3.3 Principle-Driven Self-Alignment

Principle-driven self-alignment focuses on incorporating specific guidelines and principles during the training process to ensure alignment with desired outcomes. This method emphasizes the use of foundational rules and objectives to guide the model’s behavior, making it more reliable and consistent. By embedding these principles, the model generates instructions that are not only accurate but also aligned with ethical and operational standards. Research highlights that principle-driven approaches enhance the robustness of self-alignment techniques, particularly in complex tasks like code alignment and ESP course development, where adherence to specific guidelines is crucial for achieving optimal results.

Applications of Self-Alignment

Self-alignment enhances large language models, enables code alignment, and supports ESP course development, making models more adaptable and aligned with specific tasks and domains.

4.1 Enhancing Large Language Models

Self-alignment with instruction backtranslation significantly improves large language models (LLMs) by enabling them to generate high-quality training data autonomously. This method involves training a backward model to produce instructions from unlabeled data, which are then used to fine-tune the model. By curating these datasets, LLMs achieve better alignment with their intended tasks, reducing the need for extensive human supervision. This approach not only enhances model performance but also ensures that the generated instructions are contextually relevant and diverse, leading to more robust and adaptable language models capable of handling complex tasks effectively.

4.2 Code Alignment in LLMs

Self-alignment with instruction backtranslation plays a crucial role in improving code alignment within large language models (LLMs). By generating high-quality code snippets through backward models, this method enables LLMs to better understand and replicate programming patterns. The process involves fine-tuning the model on autonomously generated code data, ensuring alignment with specific coding tasks. This approach enhances the model’s ability to handle syntax, semantics, and logical structures in code, making it more effective for programming-related queries. Additionally, it reduces reliance on human-annotated datasets, fostering scalability and efficiency in code-related applications.

4.3 ESP Course Alignment

Self-alignment with instruction backtranslation has shown promise in aligning English for Specific Purposes (ESP) courses with workplace demands. By generating tailored instructions from professional contexts, this method ensures training materials closely match industry-specific needs. The approach reduces reliance on manual curation, enabling efficient adaptation of ESP programs. This alignment enhances learner outcomes by focusing on relevant, real-world language scenarios, making ESP courses more effective and practical for professional environments.

Challenges and Considerations

Self-alignment with instruction backtranslation faces challenges like data quality dependency and balancing human oversight with automation, requiring careful calibration to maintain alignment accuracy and model reliability.

5.1 Limitations of Self-Alignment Methods

Self-alignment methods, while innovative, face limitations such as heavy dependency on data quality and potential biases in generated instructions. Without robust human oversight, models may produce inconsistent or irrelevant training samples, undermining fine-tuning effectiveness. Additionally, the computational demands of training backward models and the need for iterative refinement can pose challenges. These methods also struggle with domain-specific complexities, requiring careful calibration to maintain alignment with intended tasks. Addressing these limitations is crucial for maximizing the potential of self-alignment in enhancing language models.

5.2 Balancing Supervised and Unsupervised Learning

Balancing supervised and unsupervised learning is critical in self-alignment methods. While supervised learning provides precise guidance, relying solely on labeled data can limit generalization. Unsupervised learning, through instruction backtranslation, offers scalability but may introduce noise or inconsistency. Striking the right balance ensures robust model performance without overfitting to labeled data or losing accuracy from unlabeled inputs. Techniques like data augmentation and iterative refinement help maintain this equilibrium, enabling models to leverage both structured guidance and autonomous learning effectively.

Future Directions in Self-Alignment Research

Future research in self-alignment focuses on advancing instruction backtranslation, expanding to multimodal models, and enhancing bootstrapping and principle-driven techniques for improved model alignment and scalability.

6.1 Innovations in Instruction Backtranslation

Recent advancements in instruction backtranslation focus on improving the accuracy and diversity of generated instructions. Researchers are exploring automated feedback loops to refine backtranslation frameworks, enabling models to produce more coherent and context-specific prompts. Additionally, innovations in cross-lingual transfer learning are being integrated to enhance alignment across multiple languages. These developments aim to reduce reliance on labeled datasets while maintaining high-quality training signals for self-alignment. Future work may also explore dynamic instruction generation tailored to specific tasks, further advancing the scalability and adaptability of instruction backtranslation in large language models.

6.2 Expanding to Multimodal Models

Expanding self-alignment techniques to multimodal models represents a significant frontier in AI research. By integrating visual, auditory, and textual data, models can achieve richer contextual understanding. Instruction backtranslation can be adapted to align diverse data types, enabling models to generate coherent cross-modal outputs. This approach could revolutionize applications like image captioning, speech recognition, and multimodal dialogue systems. Researchers are exploring how to balance alignment across modalities while maintaining task-specific accuracy. As multimodal models grow in complexity, self-alignment techniques will play a crucial role in scaling their capabilities effectively.

night at the museum instruction manual

Welcome to the Night at the Museum Instruction Manual‚ your guide to managing the magical world within the Museum of Natural History. Created by Cecil Fredericks‚ Gus‚ and Reginald‚ this manual ensures a smooth night shift‚ helping guards like Larry Daley navigate the enchanting exhibits and maintain order after dark. Essential for both new and experienced personnel‚ it offers practical advice and insights into the museum’s unique phenomena‚ ensuring a safe and fascinating experience for all.

1.1 Overview of the Manual’s Purpose and Importance

The Night at the Museum Instruction Manual serves as an essential guide for managing the magical phenomena within the Museum of Natural History. Created by Cecil Fredericks‚ Gus‚ and Reginald‚ it provides critical instructions for night guards to handle enchanted exhibits‚ ensure visitor safety‚ and maintain order. The manual is vital for preventing chaos and ensuring a smooth operation during the night shift‚ making it indispensable for both new and experienced personnel.

1.2 Brief History of the Museum and Its Magical Phenomena

The Museum of Natural History holds a centuries-old secret: an ancient Egyptian artifact brings exhibits to life at night. This magical phenomenon‚ tied to a mysterious tablet‚ has been a part of the museum’s hidden history since its founding. Over the years‚ night guards like Larry Daley have discovered and managed this enchanting world‚ ensuring the magic remains contained and the museum’s daytime visitors remain unaware of the nightly adventures that unfold.

Key Characters and Their Roles in the Museum

Larry Daley‚ the night guard‚ and the manual’s creators‚ Cecil Fredericks‚ Gus‚ and Reginald‚ are central to managing the museum’s magical phenomena and ensuring order nightly.

2.1 Larry Daley: The Night Guard

Larry Daley‚ the night guard‚ plays a pivotal role in maintaining order at the Museum of Natural History. His responsibilities include ensuring exhibits remain secure and managing the magical phenomena that come to life after dark. With the help of the instruction manual‚ Larry navigates challenges such as taming dinosaurs‚ interacting with historical figures‚ and preventing chaos caused by mischievous exhibits. His adaptability and resourcefulness are key to a successful night shift‚ ensuring everything returns to normal by dawn.

2.2 Cecil Fredericks‚ Gus‚ and Reginald: Creators of the Manual

Cecil Fredericks‚ Gus‚ and Reginald are the masterminds behind the Night at the Museum Instruction Manual. Their collaborative effort resulted in a comprehensive guide tailored for night guards‚ ensuring the magical exhibits remain under control. The manual includes essential rules like securing lions and tying horses‚ which are vital for maintaining order. Their work is indispensable‚ providing clear instructions that prevent chaos and ensure a smooth operation of the museum’s enchanted environment throughout the night.

2.3 Notable Exhibits and Their Personalities

The museum’s exhibits come to life at night‚ each with unique personalities. The T-Rex is mischievous‚ while historical figures like Teddy Roosevelt are charismatic. Enchanted creatures‚ such as Egyptian pharaohs and Greek statues‚ add to the lively atmosphere. These exhibits require special attention to manage their antics and ensure harmony within the museum. Their distinct traits make every night a fascinating adventure for the night guard‚ blending history with magic and wonder. This dynamic creates an unparalleled environment that demands skill and creativity to maintain order and safety.

Rules and Regulations for Managing the Museum

Essential instructions include locking up lions‚ securing magical artifacts‚ and ensuring all exhibits are properly managed. Follow these rules to maintain order and safety throughout the night.

3.1 Essential Instructions from the Manual

The manual outlines critical steps for managing the museum’s magical elements. Throw the bone to activate the exhibits‚ lock up the lions to prevent chaos‚ and tie the horses to the bench. Ensure all enchanted artifacts are secured‚ and double-check your belt before interacting with displays. These instructions are vital for maintaining order and safety during the night shift‚ as outlined by Cecil‚ Gus‚ and Reginald.

3.2 Consequences of Not Following the Rules

Neglecting the manual’s guidelines can lead to chaos and unpredictable behavior from the exhibits. Failure to secure enchanted artifacts may result in damage or misplacement‚ while ignoring instructions like locking up the lions or tying the horses can cause dangerous situations. Disregarding these rules risks disrupting the museum’s magical balance‚ potentially endangering both the guard and the exhibits themselves. Adherence is crucial to maintaining order and safety throughout the night.

Special Exhibits and Their Care

Special exhibits require meticulous attention to maintain their magical properties. Proper handling and storage ensure their preservation‚ while specific instructions‚ like locking lions‚ protect both exhibits and guards.

4.1 Handling Magical Artifacts

Magical artifacts require careful handling to maintain their enchantments and ensure safety. Always follow specific instructions‚ such as throwing the bone to awaken exhibits or locking lions to prevent them from causing harm. Proper techniques and precautions are essential to avoid triggering unintended magical reactions. Mishandling can lead to chaos‚ so adherence to the manual’s guidelines is critical for a smooth and safe night shift. Use caution and respect when interacting with these extraordinary items.

4.2 Managing Enchanted Objects and Displays

Enchanted objects and displays require precise management to maintain their magical properties. Always secure creatures like lions and horses‚ tying them to designated areas to prevent escapes. Ensure magical displays remain stable by following specific instructions‚ such as double-checking belts or activating enchantments correctly. Mishandling can lead to unpredictable behavior or damage. Follow the manual’s guidelines to preserve the integrity of these magical elements and ensure a safe‚ enchanting environment for all exhibits to thrive.

Security Protocols for the Night Shift

Secure all magical exhibits‚ lock up creatures like lions‚ and ensure displays are stable. Follow the manual’s instructions to prevent escapes and maintain order during nighttime operations.

5.1 Dealing with Enchanted Creatures

Enchanted creatures require careful handling to ensure safety and order. Always lock up lions to prevent them from causing harm. Tie horses securely to benches and avoid leaving them unattended. When encountering aggressive exhibits‚ throw the bone as instructed to distract and calm them. Never underestimate the magic within the museum—securing creatures properly prevents chaos. Following these steps ensures a peaceful night shift and protects both the guard and exhibits from potential damage.

5.2 Securing the Museum Premises

Securing the museum premises is crucial to prevent chaos and damage. Always lock doors‚ ensuring exhibits remain in place. Tie horses to benches and double-check your belt to avoid unexpected movements. Enchanted creatures‚ like lions‚ must be locked up to prevent harm. Regularly patrol the galleries to monitor activity. Following these steps ensures a secure environment‚ allowing you to manage the night shift effectively and prevent potential damage or disruptions caused by magical exhibits.

Visitor Safety and Emergency Procedures

Ensuring visitor safety is paramount. Monitor exhibits closely to prevent accidents. Establish clear emergency procedures and communicate them effectively. Guide visitors responsibly and maintain order at all times.

6.1 Ensuring Visitor Safety During Night Events

Visitor safety during night events requires vigilant monitoring of exhibits and interactive displays. Ensure all magical artifacts are securely contained and clearly labeled. Provide clear guidelines for guests‚ emphasizing safe distances from animated exhibits. Use flashlights to illuminate dark areas and prevent tripping hazards. Secure any unstable or hazardous displays before opening. Train staff to handle emergencies effectively and maintain a visible presence throughout the museum. Regularly check for potential risks and address them promptly to ensure a safe and enjoyable experience for all visitors.

6.2 Emergency Response Plan

In case of emergencies‚ activate the museum’s alert system immediately. Communicate clearly with staff and visitors‚ ensuring orderly evacuation if necessary. Provide first aid for minor injuries and call emergency services for severe cases. Contain any runaway exhibits or magical artifacts to prevent further chaos. Coordinate with security to secure the premises and investigate incidents. After resolving the emergency‚ conduct a thorough review to prevent future occurrences and update the manual with new safety protocols.

Managing Animated Exhibits

Animated exhibits require careful supervision to ensure safety and order. Establish clear boundaries and routines‚ such as tossing the bone to calm dinosaurs or securing mischievous artifacts nightly.

7.1 Taming Dinosaurs and Wild Animals

Taming dinosaurs and wild animals requires patience and consistency. Start by establishing trust through calm movements and gentle commands. Use tools like flashlights to guide them‚ ensuring they remain within designated areas. For aggressive behavior‚ employ distractions such as tossing a bone to redirect their focus. Avoid sudden gestures‚ as they may provoke reactions. Maintain a safe distance and never feed them unauthorized items. Consistency is key to fostering a harmonious environment.

7.2 Interacting with Historical Figures

When interacting with historical figures‚ maintain respect and professionalism. Address them by their proper titles and engage in polite conversation. Avoid debates or controversial topics‚ as they may provoke disagreements. Set clear boundaries to ensure they remain in their designated areas. Use calm gestures to guide them and avoid sudden movements that might startle them. Consistency is key to fostering a peaceful and orderly environment. Always prioritize their safety and the security of the museum premises.

Maintenance and Upkeep of the Museum

Regular maintenance ensures the museum’s magical exhibits remain stable. Perform daily checks on enchanted artifacts and secure any loose items. Patrol exhibits nightly to prevent unexpected activations. Always follow manual guidelines to avoid chaos. Ensure all displays are properly aligned and stable before closing hours. Neglecting these tasks may lead to unpredictable behavior and potential damage.

8.1 Daily Tasks for the Night Guard

The night guard must perform specific daily tasks to ensure the museum operates smoothly. Begin by throwing the bone to awaken the exhibits. Lock up the lions to prevent them from causing trouble. Double-check your belt and ensure all magical artifacts are secure. Tie the horses to the bench and verify that all displays are stable. Patrol the galleries to monitor exhibit behavior and address any anomalies promptly; Neglecting these duties can lead to chaos and unpredictable events during the night.

8.2 Preserving Magical and Historical Items

Preserving magical and historical items requires meticulous care. Follow the manual’s instructions to maintain the integrity of enchanted artifacts. Ensure all magical objects are securely stored‚ and historical items are handled with care. Regularly inspect displays for stability and safety. Failure to adhere to these guidelines can result in damage to exhibits or unpredictable magical behavior‚ disrupting the museum’s balance and causing potential risks during the night shift.

Handling Unusual Situations

Stay calm and refer to the manual when encountering unexpected events. Magical exhibits may behave unpredictably‚ requiring quick thinking and adherence to specific guidelines to maintain order and safety.

9.1 Dealing with Mischievous Exhibits

Mischievous exhibits‚ like wax figures or enchanted artifacts‚ often test boundaries. Stay calm and assertive‚ using the manual’s specific instructions to guide them back to their places. For instance‚ locking up the lions or securing loose items prevents chaos. Remember‚ exhibits may mimic human behavior but require firm‚ gentle handling. Always refer to the manual for tailored strategies to manage their antics effectively and maintain order throughout the night.

9.2 Resolving Conflicts Between Exhibits

Conflicts between exhibits‚ such as rival historical figures or playful dinosaurs‚ are common; To resolve these‚ remain neutral and refer to the manual’s conflict resolution section. Separate conflicting exhibits if necessary and redirect their attention to a calming activity. For example‚ engaging a restless T-Rex with a toy bone or distracting mischievous figures with a task. Always prioritize maintaining harmony and safety within the museum‚ ensuring a peaceful environment for both exhibits and staff.

This comprehensive guide‚ crafted by Cecil Fredericks‚ Gus‚ and Reginald‚ ensures a smooth night shift. Remember Larry Daley’s journey and embrace the museum’s vibrant exhibits. Stay curious‚ prepared‚ and ready to uncover its timeless magic. Happy guarding!

10.1 Summary of Key Points

The Night at the Museum Instruction Manual provides essential guidance for managing the museum’s magical exhibits and ensuring a smooth night shift. Key points include following specific rules like throwing the bone‚ locking up lions‚ and securing enchanted objects. Always double-check your belt‚ tie horses to the bench‚ and enter the temple cautiously. Stay prepared‚ interact respectfully with historical figures‚ and maintain order among exhibits. These tips ensure effective guardianship and a fascinating experience.

10.2 Final Advice for New Night Guards

For new night guards‚ trust the manual and its wisdom from Cecil‚ Gus‚ and Reginald. Stay vigilant‚ as magical exhibits demand attention. Be prepared for the unexpected‚ like mischievous dinosaurs or historical figures. Always follow rules like throwing the bone and securing lions. Keep your flashlight ready and belt tight. Most importantly‚ embrace the adventure and remember‚ every night is a new discovery. Confidence and humor will guide you through the magic of the museum.