miele washing machine w1 manual

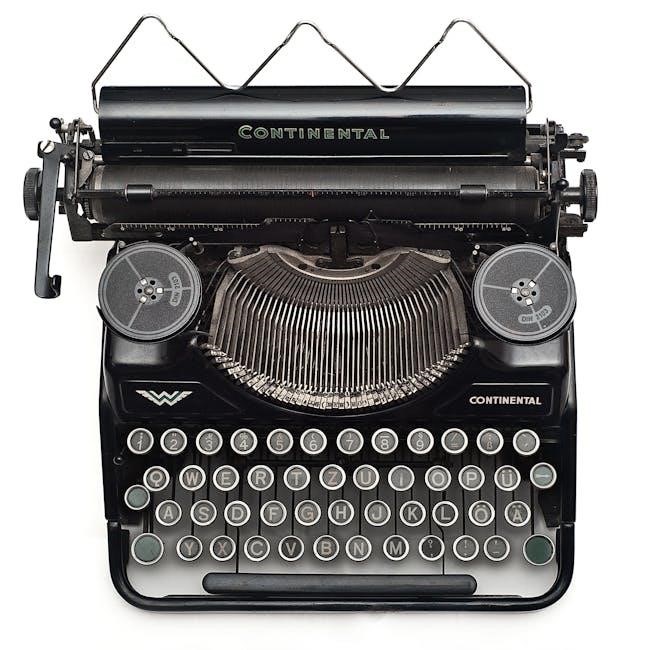
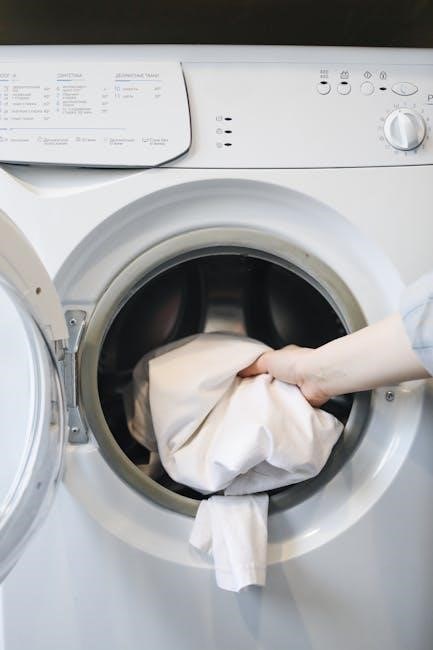
Welcome to the Miele W1 washing machine manual, your comprehensive guide to understanding and operating this efficient and reliable appliance. Designed for optimal performance, the W1 model offers advanced features, intuitive controls, and eco-friendly solutions for all your laundry needs. This manual provides detailed instructions for installation, operation, maintenance, and troubleshooting, ensuring you get the most out of your machine while preserving its longevity. Whether you’re a new user or seeking to enhance your laundry routine, this manual is your essential resource.

1.1 Overview of the Miele W1 Model

The Miele W1 washing machine is a high-performance appliance designed for efficient and reliable laundry care. With a maximum spin speed of 1600 RPM and a 9kg capacity, it is ideal for large households. The W1 model features advanced technology, including eco-friendly modes and intuitive controls, ensuring superior cleaning results while minimizing energy consumption. Built to Miele’s quality standards, this machine offers durability and longevity, making it a trusted choice for users seeking a powerful and eco-conscious solution for their laundry needs.

1.2 Importance of Reading the Manual

Reading the Miele W1 washing machine manual is essential for safe and efficient operation. It provides critical safety guidelines to prevent accidents and machine damage. Understanding the manual ensures proper installation, optimal use of features, and maintenance. It also helps users troubleshoot common issues and extend the machine’s lifespan. By following the manual, users can maximize energy efficiency and performance while adhering to warranty terms. Make sure to read it carefully before first use to ensure a smooth and safe laundry experience.

Safety Information and Precautions

Always follow safety guidelines to avoid accidents and machine damage. Ensure proper installation, use the correct detergent, and avoid moving the machine without shipping struts in place.

2.1 General Safety Guidelines

Always prioritize safety when using the Miele W1 washing machine. Ensure the machine is installed correctly and level to avoid imbalance. Check for visible damage before use and consult a qualified electrician if unsure about connections. Use the correct detergent amount and type, as excessive or inappropriate detergents can damage the machine or cause accidents. Never move the machine without re-installing the shipping struts to prevent damage. Adhere to Miele’s safety standards to ensure reliable and accident-free operation.

2.2 Avoiding Accidents and Damage

To prevent accidents and damage, ensure the Miele W1 washing machine is installed correctly and level. Never move the machine without re-installing the shipping struts, as this can cause structural damage. Avoid overloading the machine, as this may lead to imbalance or malfunction. Always use the recommended detergent amounts and types, as excessive or inappropriate detergents can harm the machine. Regularly clean filters and drains to maintain performance. Follow the manual’s guidelines for stacking with a Miele dryer using the appropriate kit. Proper usage and maintenance will ensure safe and efficient operation.

Installation and Setup

Inspect the machine for damage before installation. Ensure it is perfectly level and properly connected to the power supply. Consult a professional if unsure for safe setup.

3.1 Checking for Damage Before Installation

Before installing your Miele W1 washing machine, inspect it thoroughly for any visible damage, such as dents, scratches, or broken parts. Ensure all components, including the power cord and hoses, are intact. If damage is found, do not proceed with installation, as this could lead to malfunction or safety hazards. Additionally, verify that all shipping struts are still in place, as moving the machine without them can cause internal damage. Keep the struts in a safe location for future use or maintenance. If unsure, consult a qualified professional to avoid installation issues.

3.2 Leveling the Washing Machine

Proper leveling of your Miele W1 washing machine is crucial for stable operation and to prevent vibration during use. Place the machine on a firm, even surface and adjust the leveling legs located at the base. Use a spirit level to ensure the machine is perfectly horizontal. Once leveled, tighten the locking nuts to secure the legs in place. This step ensures optimal performance, reduces noise, and prevents potential damage to the appliance. Always refer to the manual for specific adjustment instructions to guarantee accuracy and safety.

3.3 Connecting to the Power Supply

Before connecting your Miele W1 washing machine to the power supply, ensure the data plate details match the mains electricity specifications. If unsure, consult a qualified electrician. Plug the machine into a grounded outlet to ensure safe operation. Avoid using extension cords or multiple plugs, as this may cause electrical issues. Always keep the power cord easily accessible to disconnect if needed. Proper connection ensures reliable performance and prevents potential hazards. Follow these steps carefully to guarantee safe and efficient operation of your appliance. Always prioritize safety when handling electrical connections.

Operating the Washing Machine

Discover how to operate your Miele W1 washing machine with ease. Learn to select the right programs, use detergent correctly, and optimize energy efficiency for perfect results.

4.1 Understanding the Control Panel

The Miele W1 washing machine features an intuitive control panel designed for seamless operation. The panel includes a clear LCD display and button controls for selecting wash programs, temperature, and spin speed. Dedicated buttons allow you to choose between pre-wash, eco mode, and additional rinse cycles. The display provides real-time updates on the wash cycle progress and remaining time. Additional features like RemoteStart, accessible via the Miele app, enable convenient control. Understanding the control panel ensures you can customize settings to meet your laundry needs effectively and efficiently.

4.2 Selecting the Right Wash Program

Selecting the right wash program on your Miele W1 washing machine ensures optimal cleaning and fabric care. Programs include Standard, Delicate, and Outdoor, tailored for different fabric types and soiling levels. Choose the Standard program for everyday laundry, while Delicate is ideal for sensitive fabrics like wool or silk. The Outdoor program is designed for heavily soiled items. Always consider the fabric type, load size, and soil level when selecting a program. This ensures efficient energy use and prevents fabric damage, delivering the best results for your laundry.

4.3 Using the Correct Detergent

Using the correct detergent in your Miele W1 washing machine is crucial for optimal performance and fabric care. Miele recommends using powder detergents, as they perform better than liquid detergents in this machine. Choose a detergent suitable for the water hardness in your area and adjust the quantity according to the load size and soil level. Using the right amount ensures efficient cleaning and prevents residue buildup. Always follow the manufacturer’s guidelines for detergent usage to maintain your machine’s longevity and ensure the best laundry results.

Maintenance and Care

Regular maintenance ensures optimal performance and longevity of your Miele W1 washing machine. Clean the detergent drawer, check filters, and store shipping struts safely to prevent damage.

5.1 Regular Cleaning and Maintenance

Regular cleaning and maintenance are crucial for ensuring your Miele W1 washing machine operates efficiently and lasts longer. Clean the detergent drawer and gasket regularly to prevent mold and odors. Check and clean the filter and drain pump to maintain proper drainage and avoid blockages. Run a cleaning cycle with a recommended detergent to remove built-up residue. Ensure the machine is leveled correctly to prevent vibrations. Store shipping struts safely to avoid damage during moves. Refer to the manual for specific maintenance schedules and guidelines.

5.2 Storing Shipping Struts

Shipping struts are essential for stabilizing the washing machine during transportation. After installation, store them in a safe and dry place to prevent loss or damage. Ensure the struts are securely fastened or stored separately to avoid accidental misuse. Refer to the manual for specific storage instructions. Keeping the struts accessible ensures they are available for future moves, preventing potential damage to the machine. Proper storage helps maintain the appliance’s integrity and ensures safe relocation when needed.

Troubleshooting Common Issues

Address common issues like error codes, improper loading, or drainage problems by consulting the error code list, redistributing laundry, or cleaning the filter and drain pump.

6.1 Identifying and Resolving Errors

When the Miele W1 washing machine displays an error code, refer to the manual’s error code list for explanations. Common issues include improper loading, unbalanced distribution, or blockages in the filter or drain pump. To resolve, redistribute laundry evenly, clean the filter, or check for obstructions. For persistent errors, restart the machine or consult the troubleshooting guide. If issues remain unresolved, contact Miele customer support for professional assistance. Regular maintenance and adherence to guidelines can prevent many common problems, ensuring smooth operation.

6.2 Checking the Filter and Drain Pump

Regularly inspecting the filter and drain pump ensures optimal performance and prevents issues like clogs or poor drainage. Locate the filter at the bottom of the machine, typically behind a cover or panel. Remove and rinse it under running water to clear debris. Check the drain pump for blockages and clean as needed. If water remains after a cycle, ensure the drain hose is correctly positioned and kink-free. Cleaning these components regularly prevents malfunctions and maintains your machine’s efficiency. Refer to the manual for specific instructions on accessing and servicing these parts.

Additional Features and Accessories

Explore additional features and accessories, such as stacking kits for Miele tumble dryers and the Miele app for remote control, to enhance functionality and convenience.

7.1 Stacking with a Miele Tumble Dryer

The Miele W1 washing machine can be paired with a Miele tumble dryer using a stacking kit, an optional accessory. This space-saving solution allows you to optimize your laundry area while maintaining functionality. Ensure the stacking kit is specifically designed for your Miele W1 model to guarantee compatibility and safety. Proper installation is essential to prevent machine damage. Always refer to the manual for detailed instructions on how to stack and secure the appliances correctly.

7.2 Using the Miele App for Remote Control

Enhance your laundry experience with the Miele app, enabling remote control of your W1 washing machine. Check program settings, start or pause cycles, and receive notifications on cycle completion. The app allows seamless integration with your smartphone, offering convenience and flexibility. Ensure the “RemoteStart” feature is activated in the machine’s settings for compatibility. This feature is ideal for managing your laundry efficiently, even when you’re not nearby. The app is a perfect companion for optimizing your laundry routine and ensuring everything runs smoothly.

Warranty and Customer Support

Miele offers a comprehensive warranty and dedicated customer support for the W1 washing machine. For details, visit Miele’s official website or contact their support team directly.

8.1 Understanding the Warranty Terms

Miele provides a comprehensive warranty for the W1 washing machine, ensuring coverage for parts and labor under normal use. The warranty period varies by region but typically lasts 1-2 years from the purchase date. Registration may be required to activate full benefits. Coverage includes repairs for manufacturing defects, excluding wear and tear or misuse. For detailed terms, refer to the warranty document or visit Miele’s official website. Proper maintenance and adherence to guidelines are essential to uphold warranty validity and ensure optimal performance.

8.2 Contacting Miele Customer Service

For assistance with your Miele W1 washing machine, contact customer service via phone, email, or through the official Miele website. Support is available Monday-Friday, 8:30 AM to 5:00 PM EST. Visit the Miele website to find regional contact details or submit a service request. Additionally, the Miele app offers remote support options. Ensure to have your appliance’s model and serial number ready for efficient assistance. Miele’s dedicated team is here to address any inquiries or concerns regarding your W1 washing machine;

Eco-Friendly and Energy Efficiency Features

The Miele W1 washing machine is designed with energy efficiency in mind, featuring an Eco Mode that minimizes water and energy consumption while maintaining superior cleaning performance. By optimizing wash cycles and detergent use, the W1 helps reduce environmental impact and lowers utility bills, making it a sustainable choice for eco-conscious households.

9.1 Energy-Saving Tips

Maximize energy efficiency by using the Eco Mode, which reduces water and energy consumption. Always wash full loads to minimize cycles. Select lower temperature programs when possible, as they use less energy. Use the correct detergent amount based on water hardness to avoid unnecessary re-washing. Regularly clean the filter and drain pump to ensure optimal performance. Consider using the delay start feature to run cycles during off-peak hours. These practices help lower energy bills and extend the machine’s lifespan while reducing environmental impact.

9.2 Understanding the Eco Mode

Eco Mode is a feature designed to optimize water and energy consumption during washing cycles. By extending wash times and carefully managing water temperature, the machine achieves significant energy savings without compromising cleaning performance. This mode is ideal for everyday laundry, helping reduce utility bills and environmental impact. Eco Mode works seamlessly with other settings, ensuring efficient operation while maintaining Miele’s high standards of cleaning quality. Regular use of Eco Mode not only saves resources but also contributes to the longevity of your washing machine.

pioneer vsx-520-k manual pdf

Overview of the Pioneer VSX-520-K Manual

The Pioneer VSX-520-K manual is a comprehensive guide for setting up and operating the AV receiver. It covers installation, features, and troubleshooting, ensuring optimal performance. Available as a free PDF download, the manual provides detailed instructions for connecting devices, using advanced settings, and resolving common issues. This 168-page document is essential for maximizing the receiver’s capabilities and ensuring a seamless user experience.

1.1 Key Features of the Pioneer VSX-520-K Receiver

The Pioneer VSX-520-K receiver offers 240W power consumption, a 1-year warranty, and is manufactured in China. It features a full remote control, dimensions of 164×235 cm, and supports advanced audio modes like Dolby TrueHD and DTS-HD Master Audio. The receiver also includes MCACC calibration for optimal sound and HDMI connectivity for modern devices, ensuring high-quality audio and video performance.

1.2 Importance of the Manual for Optimal Performance

The manual is crucial for unlocking the Pioneer VSX-520-K’s full potential. It guides users through installation, advanced features like MCACC, and troubleshooting. Proper ventilation and temperature control are emphasized to prevent damage. The manual ensures users understand how to switch between stereo and Auto Level Control modes, optimize HDMI settings, and maintain the receiver for long-term reliability and peak performance.

Technical Specifications of the Pioneer VSX-520-K

The Pioneer VSX-520-K features 240W power consumption, dimensions of 164×235 cm, and a one-year warranty. Made in China, it includes advanced remote control and additional features for enhanced functionality.

2.1 Power Consumption and Dimensions

The Pioneer VSX-520-K consumes 240W of power and measures 164cm in height, 235cm in width, and 35cm in depth. Its compact design ensures efficient performance while fitting seamlessly into home setups. Proper ventilation is essential to maintain optimal operating temperatures between 5°C and 35°C, with humidity levels below 85%. These specifications ensure reliable operation and longevity of the receiver.

2.2 Warranty and Country of Origin

The Pioneer VSX-520-K comes with a 1-year warranty, offering protection against defects in materials and workmanship. Manufactured in China, this AV receiver combines quality engineering with reliable performance. The warranty ensures customer satisfaction and support, providing peace of mind for users. For warranty claims or service, owners can contact Pioneer’s authorized service centers or refer to the manual for detailed instructions.

2.3 Remote Control and Additional Features

The Pioneer VSX-520-K includes a remote control for complete operation, enabling seamless adjustment of settings and modes. Additional features such as proper ventilation and temperature control (5°C to 35°C, humidity below 85%) ensure stable performance. The receiver is designed to avoid electrical shock, with clear guidelines for installation and maintenance outlined in the manual.

Installation and Setup Guide

Ensure proper ventilation and avoid electrical shock by following manual guidelines. Install the receiver in a well-ventilated area, and use the remote control for simplified setup and adjustments.

3.1 Step-by-Step Installation Instructions

Place the receiver on a stable surface, ensuring proper ventilation. Connect speakers to the appropriate terminals, matching positive and negative cables. Attach HDMI devices to the receiver’s HDMI inputs. Plug in the power cable and turn on the receiver. Use the remote control to navigate the setup menu, configuring audio settings and input assignments. Refer to the manual for detailed diagrams and specific connection guidelines to ensure a seamless installation process. Proper ventilation and correct cable management are crucial for optimal performance. Follow the manual’s instructions carefully to avoid damage or electrical issues.

3.2 Connecting Speakers and External Devices

Connect speakers to the receiver’s terminals, ensuring correct polarity (positive to positive, negative to negative). Use RCA cables for analog devices and HDMI cables for digital devices. Securely tighten all connections to prevent signal loss. Place antennas for optimal reception. Refer to the manual for specific port assignments and wiring diagrams. Proper connection ensures clear audio and reliable performance. Always follow safety guidelines to avoid electrical hazards and damage to components.

Operating the Pioneer VSX-520-K

Use the remote control to navigate settings and switch between modes. Ensure optimal performance by adjusting audio settings and selecting the correct input for connected devices.

4.1 Using the Remote Control Effectively

The remote control provides full control over the Pioneer VSX-520-K, enabling easy navigation of settings and features. Use the “STEREO” button to switch between modes and “ALC” for Auto Level Control. Ensure proper ventilation to prevent overheating, as the receiver operates optimally in temperatures between 5°C and 35°C. Refer to the manual for detailed guidance on remote functionality and environmental considerations.

4.2 Switching Between Stereo and Auto Level Control Modes

To switch modes, press the “STEREO A L C” button on the remote. Stereo mode delivers immersive sound, while Auto Level Control balances audio levels for consistent playback. Use these modes to enhance your listening experience based on content type. Refer to the manual for detailed steps on mode selection and optimal audio customization.

Advanced Features and Settings

The Pioneer VSX-520-K offers advanced features like MCACC calibration for optimal audio tuning and HDMI support for high-definition connectivity. Explore settings for immersive sound customization and enhanced performance.

5.1 MCACC and HDMI Capabilities

The Pioneer VSX-520-K features MCACC calibration for precise audio tuning and HDMI support with 3D and ARC capabilities. MCACC optimizes speaker settings for immersive sound, while HDMI ensures high-definition video and audio transmission. These advanced features enhance your home theater experience, providing clarity and compatibility with modern devices. Refer to the manual for detailed setup instructions and troubleshooting tips to maximize these capabilities.

5;2 Dolby TrueHD and DTS-HD Master Audio Support

The Pioneer VSX-520-K supports Dolby TrueHD and DTS-HD Master Audio, delivering high-fidelity surround sound. These formats ensure lossless audio reproduction, enhancing your cinematic experience. The manual guides you through enabling these settings and troubleshooting common issues. Proper configuration is essential to unlock the full potential of these advanced audio technologies, providing an immersive listening experience for movies and music.

Troubleshooting Common Issues

The manual addresses common issues like connectivity and sound problems, offering solutions to restore functionality. It also guides users through firmware updates and system resets effectively.

6.1 Solving Connectivity and Sound Problems

The manual provides detailed solutions for connectivity issues, such as checking cable connections and ensuring proper HDMI link stability. For sound problems, it offers troubleshooting steps like resetting audio settings or updating firmware. Additionally, it guides users through diagnosing no-sound scenarios and resolving impedance mismatches with connected speakers. These solutions help restore optimal performance quickly and efficiently.

6.2 Updating Firmware and Software

The manual guides users through updating firmware and software to ensure optimal performance. Access the update option via the menu, then download the latest version from Pioneer’s website. Use a USB drive to install updates, ensuring the receiver remains powered on. Regular updates enhance functionality and fix bugs. Always follow safety precautions to avoid data loss or hardware damage during the process.

Maintenance and Safety Precautions

Ensure proper ventilation to prevent overheating. Operate the receiver at temperatures between 5°C and 35°C with humidity below 85%. Avoid exposing it to direct sunlight or moisture to prevent damage. Regularly clean vents and avoid blocking airflow for optimal performance and longevity.

7.1 Proper Ventilation and Temperature Control

Ensure the Pioneer VSX-520-K operates in well-ventilated areas to prevent overheating. Maintain a temperature range of 5°C to 35°C and humidity below 85%. Avoid blocking ventilation openings or placing the receiver near direct sunlight or heating vents. Regularly clean dust from vents to maintain airflow. Proper ventilation ensures optimal performance and prevents damage from overheating, extending the receiver’s lifespan.

7.2 Avoiding Electrical Shock and Damage

To prevent electrical shock or damage, never open the Pioneer VSX-520-K receiver yourself. Contact a certified technician for internal repairs. Avoid inserting metal objects or liquids into the unit. Keep the receiver dry and ensure all connections are secure. Use only the provided power cord and avoid overloading circuits. Follow all safety precautions in the manual to protect yourself and maintain the device’s functionality and longevity.

Additional Resources and Support

The Pioneer VSX-520-K manual is available as a free PDF download. For further assistance, contact Pioneer’s customer support or visit authorized service centers for professional help.

8.1 Downloading the PDF Manual

To download the Pioneer VSX-520-K manual, visit the official Pioneer website or authorized portals. Click on the provided links labeled “Download PDF” or “View Manual.” Ensure you have a PDF reader installed to open the file. The manual is free and instantly accessible, offering detailed instructions for setup, operation, and troubleshooting. Save it for future reference to maximize your receiver’s performance and resolve any issues efficiently.

8.2 Contacting Pioneer Support and Service Centers

For assistance, visit Pioneer’s official website to locate service centers or contact support directly. Use the “Contact Us” section to submit inquiries or request help. Authorized service centers offer professional assistance for repairs and troubleshooting. Ensure to provide model details like VSX-520-K for accurate support. This resource is crucial for resolving complex issues beyond manual guidance, ensuring your receiver performs optimally with expert assistance.

The Pioneer VSX-520-K manual is an essential resource for optimizing receiver performance. It provides detailed guidance for setup, operation, and troubleshooting, ensuring a personalized audio experience. Referencing the manual regularly helps users unlock advanced features and maintain their system effectively, guaranteeing long-term satisfaction and premium sound quality from their AV receiver.

9.1 Final Tips for Maximizing Receiver Performance

For optimal performance, regularly update the firmware and ensure proper ventilation to prevent overheating. Use high-quality cables and correctly calibrate speakers using MCACC. Experiment with audio modes like Dolby TrueHD for enhanced sound. Refer to the manual frequently to explore advanced features and troubleshoot issues promptly. By following these tips, users can enjoy a premium audio experience tailored to their preferences.

ultrasound guided cortisone injection bulk bill

Ultrasound-guided cortisone injections are a non-invasive procedure using ultrasound technology to precisely target areas for steroid delivery‚ offering effective pain relief for conditions like arthritis and tendinitis‚ with bulk billing options available for cost-effective treatment.

What Are Ultrasound-Guided Cortisone Injections?

Ultrasound-guided cortisone injections are a minimally invasive procedure where corticosteroids are delivered directly into affected areas using ultrasound imaging for precise placement. This technique ensures accurate targeting of inflamed joints or soft tissues‚ minimizing the risk of complications. The use of ultrasound allows for real-time visualization‚ enhancing the effectiveness of the injection. Cortisone‚ a potent anti-inflammatory medication‚ helps reduce swelling and pain in conditions like arthritis and tendinitis. This method is often preferred for its accuracy and is commonly bulk-billed‚ making it a cost-effective treatment option for many patients.

Purpose and Benefits of the Procedure

Ultrasound-guided cortisone injections are primarily used to alleviate pain and inflammation in joints and soft tissues‚ particularly for conditions like arthritis and tendinitis. The procedure offers precise delivery of corticosteroids‚ reducing the risk of complications. Bulk billing options make it cost-effective‚ ensuring accessibility for patients without additional expenses. This method is both safe and efficient‚ providing a reliable solution for managing inflammatory conditions effectively.

How Ultrasound Guidance Enhances Precision

Ultrasound guidance provides real-time imaging‚ enhancing accuracy and minimizing complications during cortisone injections. Bulk billing makes this precise‚ cost-effective option accessible to many patients.

The Role of Ultrasound Technology in Guiding Injections

Ultrasound technology provides real-time imaging‚ enabling precise needle placement during cortisone injections. It helps avoid blood vessels and nerves‚ reducing risks. This advanced guidance ensures accurate delivery of corticosteroids to the target area‚ such as joints or tendon sheaths‚ enhancing treatment effectiveness for conditions like arthritis and tendinitis. The use of ultrasound improves outcomes by ensuring the medication reaches the intended site‚ making the procedure both safe and efficient. Bulk billing options further increase accessibility for patients seeking this modern‚ accurate treatment method.

Improved Accuracy and Reduced Complications

Ultrasound guidance significantly enhances the accuracy of cortisone injections‚ ensuring the medication is delivered directly to the affected area. This reduces the risk of complications‚ such as joint infections or nerve damage‚ often associated with blind injections. The real-time visualization provided by ultrasound minimizes errors and improves patient safety. Additionally‚ the precision of this method leads to better clinical outcomes‚ making it a preferred choice for treating inflammatory conditions. Bulk billing options further enhance accessibility‚ ensuring affordable and effective treatment for patients with joint or soft tissue pain.

Bulk Billing and Cost Considerations

Bulk billing is available for ultrasound-guided cortisone injections‚ with costs ranging from £200‚ as seen at Practice Plus Group‚ ensuring affordable treatment options.

Understanding Bulk Billing for Medical Procedures

Bulk billing is a payment option where healthcare providers directly bill Medicare‚ reducing patient out-of-pocket costs. For ultrasound-guided cortisone injections‚ this means patients pay less‚ with costs often covered by Medicare rebates. Clinics like Practice Plus Group offer bulk-billed services‚ starting from £200‚ making treatments more accessible. This billing method simplifies the process‚ eliminating upfront fees and ensuring affordable care for conditions like arthritis and tendinitis.

Cost of Ultrasound-Guided Cortisone Injections Under Bulk Bill

Under bulk bill‚ ultrasound-guided cortisone injections are cost-effective‚ with Medicare covering a significant portion of the fee. Prices typically range from £200‚ depending on the clinic. For instance‚ Practice Plus Group offers bulk-billed services starting at £200‚ ensuring affordability. Patients benefit from reduced out-of-pocket expenses‚ making this procedure accessible for managing conditions like arthritis and tendinitis. Bulk billing streamlines the payment process‚ providing a financially viable option for those seeking pain relief through this advanced treatment method.

Conditions Treated with Ultrasound-Guided Cortisone Injections

Ultrasound-guided cortisone injections effectively treat various conditions‚ including arthritis‚ tendinitis‚ and joint and soft tissue pain‚ targeting areas like the shoulder‚ knee‚ hip‚ and tendon sheaths to reduce inflammation and alleviate pain.

Common Conditions Like Arthritis and Tendinitis

Ultrasound-guided cortisone injections are widely used to treat arthritis and tendinitis‚ offering precise delivery of corticosteroids to inflamed joints or tendons. These injections effectively reduce pain and inflammation‚ providing relief for conditions affecting the knees‚ shoulders‚ hips‚ and other joints. By targeting the exact site of inflammation‚ they help manage symptoms and improve mobility. However‚ caution is advised as corticosteroids may increase the risk of joint infections‚ particularly in surgical contexts. This method is particularly beneficial for patients seeking non-invasive‚ bulk-billed treatments under Medicare.

Joint and Soft Tissue Pain Management

Ultrasound-guided cortisone injections are highly effective for managing joint and soft tissue pain‚ particularly in conditions like arthritis and tendinitis. By precisely delivering corticosteroids to the affected area‚ these injections reduce inflammation and alleviate discomfort; This method is especially beneficial for targeting specific joints‚ such as knees‚ shoulders‚ and hips‚ ensuring localized relief. The procedure is non-invasive and often covered under bulk billing schemes‚ making it an accessible option for patients seeking to improve mobility and function while managing chronic pain effectively.

Procedure Details and Preparation

Ultrasound-guided cortisone injections are non-invasive‚ using real-time imaging to target the injection site. Preparation involves cleaning the area‚ and aftercare includes rest and avoiding strenuous activities.

Step-by-Step Overview of the Injection Process

The procedure begins with the patient positioned comfortably. The target area is cleaned and sterilized. Ultrasound imaging is used to visualize the tissue in real-time. A local anesthetic may be administered to minimize discomfort. The cortisone injection is then precisely guided into the affected joint or soft tissue using ultrasound visualization. Post-injection‚ the area is monitored for any immediate reactions‚ and patients are advised on post-care to avoid strenuous activities temporarily.

Preparation and Aftercare Instructions

Patient preparation includes avoiding blood-thinning medications and wearing loose clothing for easy access. Fasting is generally not required. After the procedure‚ patients should rest the treated area and avoid strenuous activities for 48 hours. Applying ice can reduce swelling. Avoiding heavy lifting or exercise is recommended. Patients are advised to keep the injection site clean and dry. Follow-up appointments are typically scheduled to monitor progress and address any concerns. These guidelines ensure optimal recovery and minimize potential complications.

Risks and Side Effects

Ultrasound-guided cortisone injections are safe with minimal complications. Potential risks include joint infection‚ localized pain‚ or temporary swelling. Rarely‚ skin discoloration or fat atrophy may occur.

Possible Risks and Complications

While generally safe‚ ultrasound-guided cortisone injections carry risks‚ including joint infections‚ localized pain‚ or temporary swelling. Rarely‚ skin discoloration or fat atrophy may occur. Patients with certain medical conditions‚ like diabetes or compromised immune systems‚ are at higher risk. Infection rates are low due to sterile techniques‚ but proper aftercare is crucial. Some individuals may experience a temporary flare in pain post-injection. Discussing personal health history with your doctor is essential to minimize complications and ensure safe treatment outcomes.

Short-Term and Long-Term Side Effects

While ultrasound-guided cortisone injections are typically well-tolerated‚ short-term side effects may include localized pain‚ swelling‚ or redness at the injection site. Rarely‚ patients might experience a temporary increase in pain or fatigue. Long-term risks are uncommon but can include localized fat atrophy or skin depigmentation. Repeated injections may weaken tendons or ligaments‚ potentially increasing the risk of rupture. Serious complications‚ such as joint infections‚ are rare but more likely in immunocompromised individuals. Discussing personal health history with your doctor is crucial to minimize risks and ensure safe outcomes.

Clinical Evidence and Effectiveness

Studies demonstrate ultrasound-guided cortisone injections are more effective than blind injections‚ with improved accuracy and outcomes. Comparative research highlights reduced complications and higher success rates‚ supported by clinical data.

Success Rates and Patient Outcomes

Ultrasound-guided cortisone injections have demonstrated high success rates‚ significantly reducing inflammation and pain in patients with conditions like arthritis. Many patients experience improved mobility and reduced discomfort‚ enhancing their quality of life. The precision of ultrasound guidance ensures better outcomes compared to traditional methods‚ with fewer complications. Studies show a notable improvement in joint function‚ particularly for those with chronic pain. Bulk billing options make this treatment more accessible‚ ensuring patients can benefit without financial strain‚ leading to higher patient satisfaction and effective long-term pain management.

Comparative Studies with Other Injection Methods

Comparative studies highlight the superiority of ultrasound-guided cortisone injections over traditional blind injections. The use of ultrasound ensures higher accuracy‚ reducing complications and improving treatment success rates. Studies demonstrate that ultrasound guidance leads to better patient outcomes‚ with fewer adverse effects compared to non-guided methods. Additionally‚ the precision of ultrasound reduces the need for multiple injections‚ making the process more efficient and cost-effective‚ especially under bulk billing arrangements‚ which further enhance accessibility and affordability for patients seeking effective pain relief.

Ultrasound-guided cortisone injections offer precise‚ effective pain relief‚ especially for conditions like arthritis. Bulk billing makes this treatment accessible and affordable‚ enhancing patient care outcomes significantly.

Ultrasound-guided cortisone injections offer a non-invasive‚ precise method for treating joint and soft tissue pain‚ with bulk billing making it cost-effective. The use of ultrasound ensures accurate targeting‚ reducing complications and improving outcomes. Conditions like arthritis and tendinitis benefit significantly‚ providing effective pain relief. Bulk billing options enhance affordability‚ making this treatment accessible to more patients. Overall‚ this procedure combines advanced technology with cost efficiency‚ offering a reliable solution for managing chronic pain and inflammation.

Alright‚ so I need to generate the text for the subheading ‘

When to Consider Ultrasound-Guided Cortisone Injections

‘ based on the topic ‘ultrasound guided cortisone injection bulk bill’. The user has provided specific instructions that I need to follow carefully.

First‚ I must ensure that the text is exactly ‚ no more‚ no less. That’s a precise requirement‚ so I have to be careful with my word count. I also should not include any information that will be covered in other subheadings. This means I need to focus solely on when to consider these injections‚ without touching on how they work‚ their benefits‚ or costs‚ which are covered elsewhere.

The topic is ‘ultrasound guided cortisone injection bulk bill’‚ so I need to incorporate information about when these injections are appropriate‚ especially in the context of bulk billing. From the previous interactions‚ it seems that bulk billing makes the procedure more accessible and cost-effective for patients‚ so that’s a point to include.
I also need to use the information provided from the internet. Looking back‚ there were mentions of conditions like arthritis and tendinitis being treated with these injections‚ and the use of ultrasound for precision. Additionally‚ the cost considerations and bulk billing incentives were highlighted. However‚ since I’m focusing on when to consider the injections‚ I should discuss the scenarios or conditions where this treatment is most beneficial.

I should start by identifying the key points to cover:
When the injections are most effective.
The conditions they are suitable for.
The advantage of bulk billing in making the procedure accessible.
The role of ultrasound in ensuring precision and effectiveness.

Now‚ I need to craft a concise paragraph that includes these points without exceeding . I’ll also need to ensure that the language is clear and informative‚ avoiding any repetition of information that will be covered in other sections.
Let me try drafting this:
Ultrasound-guided cortisone injections are a highly effective treatment option for patients suffering from chronic joint pain and inflammation‚ particularly those with conditions such as arthritis or tendinitis. These injections are especially beneficial for individuals who have not found relief through other treatments like physical therapy or medication. The precision offered by ultrasound guidance ensures accurate delivery of the corticosteroid‚ minimizing potential complications. Additionally‚ the availability of bulk billing makes this procedure more accessible and affordable for many patients‚ reducing out-of-pocket expenses and ensuring that they can receive the care they need without financial strain. This combination of efficacy and cost-effectiveness makes ultrasound-guided cortisone injections a valuable consideration for managing chronic pain conditions.

Wait‚ that’s a bit over . Let me count:

Ultrasound-guided
cortisone
injections
are
a
highly
effective
treatment
option
for

patients
suffering
from
chronic
joint
pain
and
inflammation‚
particularly
those
with
conditions
such
as
arthritis
or
tendinitis.
These
injections
are
especially
beneficial
for
individuals
who
have
not
found
relief
through
other
treatments
like
physical
therapy
or
medication.
The
precision
offered
by
ultrasound
guidance
ensures
accurate
delivery
of
the
corticosteroid‚
minimizing
potential
complications.
Additionally‚
the
availability
of
bulk
billing
makes
this
procedure
more
accessible
and
affordable
for
many
patients‚
reducing
out-of-pocket
expenses
and
ensuring
that
they
can
receive
the
care
they
need
without
financial
strain;
This
combination
of
efficacy
and
100. cost-effectiveness
101. makes
102. ultrasound-guided
103. cortisone
104. injections
105. a
106. valuable
107. consideration
108. for
109. managing
110. chronic
111. pain
112. conditions.

Oh‚ that’s way too long—over . I need to condense this.

Let me try again‚ focusing on brevity:

Ultrasound-guided cortisone injections are ideal for patients with chronic joint pain and inflammation‚ especially those with arthritis or tendinitis who haven’t responded to other treatments. The precision of ultrasound ensures accurate corticosteroid delivery‚ reducing complications. Bulk billing makes the procedure affordable‚ reducing costs for patients and ensuring accessibility. This combination of effectiveness and cost-efficiency makes these injections a valuable option for managing chronic pain conditions.

Now‚ let’s count the words:

Ultrasound-guided
cortisone
injections
are
ideal
for
patients
with
chronic
joint
pain
and
inflammation‚
especially
those
with
arthritis
or
tendinitis
who
haven’t
responded
to
other
treatments.
The
precision
of
ultrasound
ensures
accurate
corticosteroid
delivery‚
reducing
complications.
Bulk
billing
makes
the
procedure
affordable‚
reducing
costs
for
patients
and
ensuring
accessibility.
This
combination
of
effectiveness
and
cost-efficiency
makes
these
injections
a
valuable
option
for
managing
chronic
pain
conditions.
That’s —too short. I need to expand a bit without exceeding .

Let me add a bit more detail:
Ultrasound-guided cortisone injections are a highly effective treatment for chronic joint pain and inflammation‚ particularly for patients with arthritis or tendinitis who haven’t found relief through other treatments. The use of ultrasound ensures precise delivery of the corticosteroid‚ minimizing potential complications. With bulk billing available‚ this procedure becomes more accessible and affordable‚ reducing out-of-pocket expenses for patients. This combination of precision‚ effectiveness‚ and cost-efficiency makes ultrasound-guided cortisone injections a valuable option for managing chronic pain conditions effectively.

Now‚ let’s count:

Ultrasound-guided
cortisone
injections
are
a
highly
effective
treatment
for
chronic
joint
pain
and
inflammation‚
particularly
for
patients
with
arthritis
or
tendinitis
who
haven’t
found
relief
through
other
treatments.
The
use
of
ultrasound
ensures
precise
delivery
of
the
corticosteroid‚

minimizing
potential
complications.
With
bulk
billing
available‚
this
procedure
becomes
more
accessible
and
affordable‚
reducing
out-of-pocket
expenses
for
patients.
This
combination
of
precision‚
effectiveness‚
and
cost-efficiency
makes
ultrasound-guided
cortisone
injections
a
valuable
option
for
managing
chronic
pain
conditions
effectively.

That’s —still under 83. I’ll add a bit more:

Ultrasound-guided cortisone injections are a highly effective treatment for chronic joint pain and inflammation‚ particularly for patients with arthritis or tendinitis who haven’t found relief through other treatments. The use of ultrasound ensures precise delivery of the corticosteroid‚ minimizing potential complications. With bulk billing available‚ this procedure becomes more accessible and affordable‚ reducing out-of-pocket expenses for patients. This combination of precision‚ effectiveness‚ and cost-efficiency makes ultrasound-guided cortisone injections a

mitsubishi heavy industries air conditioner manual

This manual serves as a comprehensive guide for Mitsubishi Heavy Industries air conditioners, ensuring optimal performance, safety, and efficiency. It provides detailed instructions for installation, operation, and maintenance, helping users understand the unit’s features and troubleshooting procedures to maximize comfort and longevity.

Importance of the Manual for Optimal Performance

This manual is essential for achieving optimal performance and longevity of your Mitsubishi Heavy Industries air conditioner. It provides critical safety precautions, installation guidance, and operational instructions to ensure efficient cooling and energy savings. Regular maintenance tips and troubleshooting advice help prevent issues, reducing repair costs and extending the unit’s lifespan. Adhering to the manual ensures safe, reliable, and energy-efficient operation.

Overview of Mitsubishi Heavy Industries Air Conditioner Models

Mitsubishi Heavy Industries offers a diverse range of air conditioner models catering to different needs. From compact wall-mounted units to advanced split-system models, each series is designed for energy efficiency and performance. Models like SRK20MA-S and SRK50MA-S utilize R410A refrigerant, ensuring eco-friendly operation. With features like variable frequency control and whisper-quiet operation, these models provide reliable cooling solutions for both residential and commercial spaces.

Safety Precautions and Guidelines

Always follow safety guidelines to avoid accidents. Read the manual carefully to understand risks like electric shock or moving parts. Ensure proper installation and operation.

General Safety Instructions for Installation and Operation

Always follow safety guidelines to prevent accidents. Read the manual carefully before installation and operation. Ensure proper grounding and avoid overloading circuits. Keep children away from moving parts. Use only approved accessories to prevent risks like electric shock. Never operate the unit with damaged cords or plugs. Ensure the area is well-ventilated and avoid installing near flammable materials. Follow all warnings and precautions to ensure safe and efficient operation.

Electrical Safety and Potential Hazards

Ensure proper grounding to prevent electric shock. Avoid overloading circuits, as this can cause fires or system damage. Use only approved power sources and accessories to maintain safety. Never operate the unit with damaged cords or plugs, as this poses a significant risk of electrical hazard. Keep flammable materials away from the air conditioner to prevent fire risks; Always adhere to electrical safety guidelines to ensure safe and reliable operation.

Installation Requirements and Recommendations

Proper installation is crucial for efficient performance. Ensure suitable location, level surface, and adequate clearance. Follow manufacturer guidelines for correct electrical connections and refrigerant handling to optimize functionality and safety.

Step-by-Step Installation Process

Begin by preparing the installation site, ensuring a level surface and adequate clearance. Mount the indoor and outdoor units according to the manual’s guidelines. Install the refrigerant pipes, electrical connections, and drainage system securely. Connect the units following the wiring diagram. Test the system for leaks and proper operation. Finally, power on the unit and verify all functions are working correctly. Always follow manufacturer recommendations for optimal results.

Recommended Tools and Materials for Installation

Essential tools include a drill, screwdrivers, wrenches, and wire cutters. Materials needed are refrigerant pipes, electrical wires, insulation, and mounting brackets. Ensure all components are compatible with your Mitsubishi model. Use a vacuum pump for refrigerant line evacuation and sealants to prevent leaks. Refer to the manual for specific requirements to ensure a safe and efficient installation process.

Operating Instructions and Controls

Understand the remote control functions, basic operations, and advanced settings. Learn how to start/stop the unit, adjust modes, and utilize timer and smart sensor features effectively.

Understanding the Remote Control and Its Functions

The remote control is an essential component for operating your Mitsubishi Heavy Industries air conditioner. It allows you to adjust temperature, fan speed, and operating modes conveniently. Key functions include turning the unit on/off, selecting cooling, heating, or fan-only modes, and adjusting airflow direction. The remote also features a timer for scheduling operations and smart sensors to optimize performance. Familiarize yourself with these controls to maximize comfort and efficiency. Always ensure the remote has fresh batteries for reliable operation.

Starting and Stopping the Air Conditioner

To start the air conditioner, press the “ON/OFF” button on the remote control. Ensure the unit is properly plugged in and the circuit breaker is on. For stopping, press the “ON/OFF” button again. Allow a few minutes between operations to avoid straining the compressor. Always refer to the remote control instructions for specific startup and shutdown procedures to ensure smooth operation and maintain efficiency. Proper usage extends the unit’s lifespan and performance.

Maintenance and Troubleshooting Tips

Regularly clean filters and check refrigerant levels for optimal performance. Address issues like unusual noises or error codes promptly. Refer to the manual for troubleshooting solutions and routine maintenance procedures to ensure efficiency and longevity of your Mitsubishi Heavy Industries air conditioner.

Regular Maintenance to Ensure Efficiency

Regular maintenance is crucial for optimal performance. Clean air filters monthly to ensure proper airflow and energy efficiency. Inspect and clean the outdoor unit’s condenser coils annually to prevent dust buildup. Check refrigerant levels and ensure all electrical connections are secure. Schedule professional servicing every two years to maintain warranty validity and performance. Always refer to the manual for specific maintenance schedules and procedures tailored to your Mitsubishi Heavy Industries air conditioner model.

Common Issues and Their Solutions

Common issues include error codes, insufficient cooling, or unusual noise. Check the remote control for proper operation and ensure the air filters are clean. For error codes, refer to the manual or reset the unit. If the issue persists, inspect the outdoor unit for blockages or refrigerant leaks. Contact a certified technician for complex problems. Regular maintenance can prevent many of these issues, ensuring smooth operation and optimal performance.

Technical Specifications and Features

Mitsubishi Heavy Industries air conditioners feature advanced technical specifications, including high cooling capacity, energy-efficient ratings, and eco-friendly refrigerants like R-410A. They offer variable frequency operation and multiple modes for optimal performance. Built with durable, compact designs and cutting-edge technology, these units ensure reliable and efficient cooling solutions for various applications.

Key Parameters and Performance Metrics

Mitsubishi Heavy Industries air conditioners are designed with key parameters such as cooling capacity, energy efficiency ratings (SEER), and refrigerant type (e.g., R-410A). Performance metrics include airflow range, operating noise levels, and energy efficiency ratio (EER). These units offer advanced features like variable frequency operation and multiple fan speeds, ensuring optimal cooling performance while minimizing energy consumption. The specifications ensure reliability, efficiency, and comfort across various applications.

Refrigerant and Operational Modes

Mitsubishi Heavy Industries air conditioners primarily use R-410A refrigerant, known for its eco-friendly properties and high performance. The units operate in cooling, heating, and fan-only modes, ensuring versatile functionality; Additional modes include dehumidification and turbo for enhanced comfort. The refrigerant’s efficiency and operational modes work together to provide consistent temperature control, minimize energy usage, and maintain optimal performance across various environmental conditions.

Energy Efficiency and Environmental Considerations

Mitsubishi Heavy Industries air conditioners prioritize energy efficiency and eco-friendliness, utilizing advanced technologies to minimize environmental impact while reducing energy consumption and promoting sustainability.

Energy-Saving Features and Modes

Mitsubishi Heavy Industries air conditioners offer advanced energy-saving features, including inverter technology, power-saving modes, and smart sensors. These innovations optimize energy consumption while maintaining comfort. The inverter technology adjusts compressor speed to match demand, reducing unnecessary power use. Additionally, eco-mode and timer functions help minimize energy waste. These features ensure efficient operation, lowering energy bills and environmental impact without compromising performance or comfort.

Eco-Friendly Refrigerants and Compliance

Mitsubishi Heavy Industries air conditioners utilize eco-friendly refrigerants like R-410A, which have lower environmental impact compared to older refrigerants. These units comply with global environmental regulations, minimizing ozone depletion and greenhouse gas emissions. By adhering to strict international standards, Mitsubishi ensures sustainable cooling solutions that meet both performance and ecological requirements, promoting a greener future while maintaining high efficiency and reliability.

Warranty and Customer Support Information

Mitsubishi Heavy Industries offers a comprehensive warranty program, covering parts and labor for up to 5 years. Dedicated customer support is available via phone, email, or online portals to address inquiries and service requests promptly, ensuring customer satisfaction and system reliability.

Warranty Coverage and Terms

Mitsubishi Heavy Industries provides a comprehensive warranty program for its air conditioners, typically covering parts and labor for up to 5 years. The warranty ensures protection against manufacturing defects and operational issues, offering customers peace of mind. Proper installation by authorized technicians and adherence to maintenance guidelines are essential to maintain warranty validity. Specific terms and conditions may vary depending on the model and regional regulations, so reviewing the official documentation or contacting customer support is recommended for detailed information.

Contacting Mitsubishi Heavy Industries Support

For inquiries or assistance, Mitsubishi Heavy Industries offers comprehensive support options. Customers can visit the official website to access contact details, including customer service numbers, email addresses, and regional office locations. The support team is available to address questions, provide troubleshooting guidance, and assist with warranty claims. Additionally, the website offers downloadable resources and FAQs to help users resolve common issues independently.

Downloading and Accessing the Manual

Visit ManualsLib or Mitsubishi Heavy Industries’ official website to download the manual. Browse by model number or series to access PDF guides for your specific air conditioner.

Online Resources for Manual Downloads

ManualsLib and Mitsubishi Heavy Industries’ official website offer easy access to air conditioner manuals. Users can search by model number or series to find and download PDF guides quickly. These resources ensure you have comprehensive instructions for installation, operation, and maintenance, helping you maximize your air conditioner’s performance and longevity with ease.

Searching by Model Number or Series

Users can easily locate specific Mitsubishi Heavy Industries air conditioner manuals by searching online using the model number or series name. Websites like ManualsLib and the official Mitsubishi Heavy Industries portal provide dedicated search tools, allowing quick access to PDF manuals. This ensures users find the correct guide for their unit, facilitating proper installation, operation, and troubleshooting for optimal performance and longevity.

Understanding the Manual Structure

The manual is organized into clear sections, including installation, operation, and maintenance, with detailed diagrams and tables to help users navigate and find specific information quickly.

Navigating Through the Manual Sections

The manual is divided into logical sections, starting with safety precautions, followed by installation, operation, and maintenance. Technical specifications and troubleshooting guides are included, along with detailed diagrams. Users can easily locate specific information using the table of contents or index. Each section is clearly labeled, ensuring quick access to instructions for optimal performance and resolving common issues efficiently.

Interpreting Technical Diagrams and Schematics

Technical diagrams and schematics are crucial for comprehending the air conditioner’s internal workings. They include detailed wiring diagrams, refrigerant flowcharts, and component layouts, all labeled with standard symbols and codes. Referencing these visuals helps users identify parts, diagnose issues, and perform maintenance accurately. Clear understanding of these diagrams ensures proper installation, efficient troubleshooting, and optimal system performance.

Advanced Features and Settings

Mitsubishi Heavy Industries air conditioners offer advanced features like smart sensors, timer functions, and automatic modes, enhancing energy efficiency and comfort for tailored cooling experiences.

Timer and Scheduling Functions

The timer function allows users to set specific start and stop times for the air conditioner, optimizing energy usage and comfort. Scheduling features enable programming of temperature settings for different times of the day or night. This ensures the unit operates efficiently without constant manual adjustments. The remote control typically includes buttons for easy programming, and the user manual provides detailed steps for setting up these features effectively.

Smart Sensors and Automatic Modes

Mitsubishi Heavy Industries air conditioners feature advanced smart sensors that detect room temperature and humidity, adjusting operation automatically for optimal comfort. Automatic modes, such as Eco Mode and Sleep Mode, optimize energy consumption while maintaining desired conditions. These sensors and modes work seamlessly to provide efficient cooling or heating, ensuring a comfortable environment with minimal user intervention, while also reducing energy waste and lowering utility bills effectively.

By following the Mitsubishi Heavy Industries air conditioner manual, users can ensure optimal performance, energy efficiency, and long-lasting comfort. Refer to the manual for any operational or maintenance needs to maximize your unit’s potential and enjoy reliable cooling and heating year-round.

Final Tips for Maximizing Air Conditioner Performance

Regularly clean filters and check refrigerant levels to maintain efficiency. Use smart sensors for automatic adjustments and schedule operations with timers. Ensure proper installation and adhere to the manual’s guidelines. Utilize energy-saving modes and maintain consistent temperatures to reduce strain. Refer to troubleshooting sections for quick solutions and keep the manual handy for operational clarity. Proper care ensures long-lasting performance and optimal comfort.

simpson washing machine repair manual

This manual provides essential guidance for troubleshooting, maintaining, and repairing Simpson washing machines. It offers detailed instructions, safety tips, and solutions to common issues, ensuring efficient appliance care.

1.1 Overview of the Importance of a Repair Manual

A repair manual is crucial for Simpson washing machine owners, providing detailed troubleshooting guides and DIY repair solutions. It helps identify error codes, understand machine components, and perform routine maintenance. By referencing the manual, users can avoid costly repairs and extend the appliance’s lifespan. It also empowers users to resolve common issues independently, ensuring optimal performance and safety. Regularly consulting the manual fosters a better understanding of the machine’s operation, helping to prevent breakdowns and maintain efficiency.

1.2 Brief History of Simpson Washing Machines

Simpson washing machines have a long-standing reputation for reliability and innovation. Originating in Australia, the brand has been a trusted name in home appliances for decades. Known for their durable construction and user-friendly designs, Simpson washing machines have evolved to meet modern laundry needs. Their product line includes top-load and front-load models, offering advanced features like multiple wash cycles and energy efficiency. Over the years, Simpson has consistently delivered high-quality appliances, making them a preferred choice for households worldwide; Their commitment to innovation ensures they remain at the forefront of laundry technology.

Finding the Correct Simpson Washing Machine Manual

Locate your Simpson washing machine manual by searching online with the model number. Popular models like SWT1043 and SWT8043 are available on ManualsLib and Manual.nz.

2.1 How to Search for Simpson Manuals Online

To find Simpson washing machine manuals, visit websites like ManualsLib, Manual.nz, or Manua.ls. Use the search bar with the brand name “Simpson” and your specific model number. Popular models like SWT1043 and SWT8043 are readily available. Many manuals are free to download in PDF format. Ensure to verify the model number for accuracy. These platforms also offer ratings and user feedback, helping you find reliable guides quickly and efficiently for your appliance.

2.2 Popular Simpson Washing Machine Models and Their Manuals

Some of the most popular Simpson washing machine models include the SWT1043, SWT8043, and SWT6055TMWA. Manuals for these models are widely available online and can be downloaded from platforms like ManualsLib or Manua.ls. The SWT1043 manual, for instance, is highly rated and provides detailed instructions for troubleshooting and maintenance. Additionally, the SWF10761 manual was recently added, offering comprehensive guidance for newer models. These resources ensure users can easily access the information needed to maintain and repair their appliances effectively.

Understanding Your Simpson Washing Machine

Understanding your Simpson washing machine involves familiarizing yourself with its key components, features, and operational modes. This knowledge aids in effective maintenance and troubleshooting, ensuring optimal performance and longevity.

3;1 Key Components and Parts of Simpson Washing Machines

The key components of Simpson washing machines include the wash bowl, agitator or impeller, spin basket, control panel, water inlet valves, drain pump, motor, and suspension system. The wash bowl holds the laundry, while the agitator or impeller moves clothes during washing. The control panel manages settings and cycles. Water inlet valves supply water, and the drain pump removes it. The motor powers the machine, and the suspension system reduces vibration. Understanding these parts helps in identifying issues and performing repairs effectively.

3.2 Reading the Manual: Essential Sections to Familiarize Yourself With

Familiarizing yourself with the Simpson washing machine manual is crucial for optimal use and repair. Key sections include installation instructions, operation guide, maintenance tips, and troubleshooting. The safety precautions section highlights important warnings to prevent accidents. The parts diagram helps identify components, while the error code list aids in diagnosing issues. Understanding the warranty information ensures you know what is covered. Regularly reviewing these sections will help you maintain your machine effectively and address common problems before they escalate, ensuring longevity and performance.

Troubleshooting Common Issues

Identify error codes, diagnose issues like uneven loading or poor drainage, and explore DIY fixes for common problems. Knowing when to call a professional is equally important for complex repairs.

4.1 Identifying Error Codes and Their Meanings

Understanding error codes is crucial for diagnosing issues with your Simpson washing machine. Common codes like E0 or E1 indicate problems with water supply or drainage, while E2 may signal an imbalance detection. Refer to the manual for a detailed list of error codes specific to your model. For instance, models like the Simpson SWT1043 or SWT8043 often display codes related to sensor malfunctions or door lock issues. Always consult the user manual or online resources for precise interpretations to address the problem effectively and avoid further damage to the machine.

4.2 Common Problems and DIY Solutions

Common issues with Simpson washing machines include uneven loads, poor drainage, and error codes. For uneven loads, check balance by adjusting legs. Clogged drains can be fixed by cleaning filters. For error codes, reset the machine or check connections. DIY solutions include checking the lid switch, ensuring proper water supply, and inspecting the drain pump. Regular maintenance, like cleaning filters and checking belts, prevents many issues. Always refer to your manual for model-specific guidance before attempting repairs.

4.3 When to Call a Professional

If issues persist after troubleshooting or are complex, such as major electrical faults or internal component failures, it’s best to call a professional. Persistent error codes, severe vibration, or water leakage may indicate serious problems beyond DIY fixes. A professional can diagnose and repair issues like faulty motors, damaged pumps, or electrical malfunctions safely and effectively. Always consult the user manual for guidance, and contact authorized Simpson service providers for reliable assistance to prevent further damage or safety risks.

Safety Precautions for Repair and Maintenance

Always disconnect power before starting repairs. Wear protective gear and avoid risky DIY fixes. Ensure all users understand safety features and precautions outlined in the manual.

5.1 General Safety Guidelines

Always read the manual carefully before operating or repairing your Simpson washing machine. Ensure the appliance is properly installed and balanced to avoid accidents. Disconnect power before performing any maintenance or repairs. Keep children away from the machine during operation. Avoid touching hot surfaces and never tamper with internal components like the heating element. Use genuine replacement parts and follow the manufacturer’s instructions to prevent hazards. Regularly check for wear and tear to maintain safety and efficiency.

5.2 SpecificWarnings for Simpson Washing Machines

Never operate the machine until you’ve read the manual and understood all safety instructions. Avoid contact with the nozzle during operation to prevent injury. Do not attempt repairs yourself, especially on internal components like the heating element. Keep the machine on a firm, level surface to prevent imbalance; Regularly inspect the power cord and plugs for damage. Avoid overloading the machine, as this can cause mechanical stress. Always unplug the machine before performing maintenance or repairs to ensure your safety.

Repairing Your Simpson Washing Machine

Repairing your Simpson washing machine requires the right tools and a step-by-step approach. Always follow the manual’s instructions for disassembling and replacing parts safely and effectively.

6.1 Tools and Equipment You Will Need

To repair your Simpson washing machine, gather essential tools like screwdrivers, pliers, wrenches, and a multimeter. Protective gloves and safety goggles are recommended. For specific repairs, a tub wrench or drain pump remover may be necessary. Ensure all equipment is compatible with your model. Always unplug the machine before starting work. Consult the manual for model-specific tool requirements. Having the right tools ensures efficient and safe repairs, minimizing risks and downtime for your appliance.

6.2 Step-by-Step Guide for Common Repairs

Start by disconnecting power and water supply. For common issues like faulty lids or drain pumps, follow these steps: diagnose the problem using error codes, locate the faulty part, and replace it. Use screwdrivers, pliers, and wrenches as needed. Consult the manual for specific instructions. Replace wearable parts like belts or seals regularly. If unsure, seek professional help. Always refer to your Simpson manual for model-specific repair guidance to ensure safety and effectiveness. Proper tools and precautions are key to successful DIY repairs.

Maintenance Tips to Prevent Future Issues

Regularly clean filters and gaskets to maintain efficiency. Check and replace worn parts like belts and seals. Schedule professional servicing annually for optimal performance and longevity.

7.1 Regular Cleaning and Upkeep

Regular cleaning is vital for maintaining your Simpson washing machine’s efficiency. Clean the detergent dispenser, gasket, and drain pump filter monthly to prevent mold and odors. Run a hot water cycle with vinegar or a cleaning tablet to remove residue. Check and clean the lint filter after each use to ensure proper drainage. Regular upkeep prevents clogs and extends the machine’s lifespan. Always refer to your manual for specific cleaning instructions tailored to your model.

7.2 Checking and Replacing Wearable Parts

Regularly inspect wearable parts like seals, belts, and hoses for signs of wear. Replace any damaged or worn components to prevent leaks or mechanical failures. Check the drain pump filter and impeller for blockages. Lubricate moving parts as recommended in your manual. Replace tub bearings if you notice excessive noise or vibration. Ensure all replacements are genuine Simpson parts for optimal performance. Schedule annual checks or after heavy usage to maintain efficiency and extend the machine’s lifespan.

7.3 Scheduling Professional Maintenance

Arrange annual professional maintenance to ensure your Simpson washing machine operates at peak performance. Certified technicians will inspect internal components, clean internal systems, and address hidden issues. They will check for software updates and ensure all parts are functioning correctly. Regular professional checks can prevent costly repairs, improve efficiency, and extend the lifespan of your appliance. Always use authorized Simpson service providers to maintain warranty validity and ensure high-quality service. Schedule maintenance during periods of low usage for minimal disruption.

This manual guides you in troubleshooting, maintaining, and repairing your Simpson washing machine efficiently. By following the tips and guidelines, you can ensure optimal performance and extend its lifespan for years to come.

8.1 Final Tips for Effective Repair and Maintenance

Regularly clean filters and check for blockages to prevent issues. Refer to your manual for specific maintenance schedules and DIY fixes. Always unplug the machine before repairs. For complex problems, consult a professional to avoid further damage. Store the manual for quick reference and ensure all users understand safety guidelines. Schedule annual professional check-ups for optimal performance. By following these tips, you can extend the lifespan of your Simpson washing machine and maintain its efficiency.

1000 hour brow dye instructions

The 1000 Hour Brow Dye is a semi-permanent at-home solution offering long-lasting color up to six weeks. It’s waterproof, smudge-proof, and includes all tools for easy application, making it a cost-effective, popular choice for defined, vibrant brows.

1.1 Overview of the Product

The 1000 Hour Brow Dye is a semi-permanent, at-home tinting solution designed to enhance brow color and definition. It offers long-lasting results, typically lasting up to six weeks, and is both waterproof and smudge-proof, making it ideal for daily wear. The kit includes a tint cream, developer liquid, mixing stick, and applicator, providing everything needed for a professional-quality finish. Available in shades like dark brown, brown-black, black, and blue-black, it caters to various brow preferences. The product is celebrated for its ease of use and cost-effectiveness, eliminating the need for frequent salon visits. With a simple 3-step application process, it allows users to achieve salon-like results in the comfort of their own homes, making it a popular choice for beauty enthusiasts seeking defined, vibrant brows.

1.2 Benefits of Using 1000 Hour Brow Dye

The 1000 Hour Brow Dye offers numerous benefits, making it a top choice for those seeking professional-quality results at home. Its long-lasting formula ensures vibrant color for up to six weeks, eliminating the need for frequent touch-ups. The dye is waterproof and smudge-proof, maintaining its intensity through daily activities, including exposure to water or sweat. It enhances brow definition, creating a fuller and more polished appearance while being easy to apply with a simple 3-step process. The kit includes all necessary tools, making it user-friendly and convenient. Additionally, it is cost-effective, offering salon-quality results without the expense of regular professional appointments. With customizable shades and quick application, it is ideal for anyone looking to achieve defined, low-maintenance brows effortlessly.

Preparation for Brow Dye Application

Preparation involves cleansing the brow area, removing makeup or oils, and conducting a patch test. Gather materials like applicators, mixing cups, and protect the skin with petroleum jelly.

2.1 Cleansing and Preparing the Brow Area

Cleansing and preparing the brow area is essential for optimal results. Start by removing all makeup, oils, and impurities using a mild cleanser. Gently wash the brow area with lukewarm water and pat it dry with a clean towel. Avoid using harsh products or exfoliants, as they may irritate the skin. Ensure the area is completely clean and dry, as any residue can interfere with the dye’s adhesion. If you have sensitive skin, consider applying a thin layer of petroleum jelly around the brows to protect the surrounding skin from staining. Allow the skin to fully dry before proceeding. Proper preparation ensures the dye adheres evenly and reduces the risk of irritation or uneven color distribution.

2.2 Gathering Necessary Materials

Gathering the necessary materials is crucial for a smooth and successful application. You will need the 1000 Hour Brow Dye Kit, which includes the tint, developer liquid, mixing stick, and spoolie (a mascara wand for application). Additionally, prepare a clean mixing cup, cotton pads, and protective gloves to protect your skin. Petroleum jelly is recommended to safeguard the skin around your brows from staining. Keep a mirror handy for precise application and a timer to monitor the processing time. A clean towel and makeup remover are also essential for cleaning up any accidental spills. Having all materials ready ensures a seamless process and helps achieve professional-looking results. Proper organization prevents delays and ensures you have everything needed within reach during the application.

2.3 Performing a Patch Test

Performing a patch test is essential to ensure safety and avoid allergic reactions before using the 1000 Hour Brow Dye. Even if you’ve used similar products before, sensitivity can vary. Apply a small amount of the mixed dye to a discreet area, such as behind your ear or on your wrist. Wait 48 hours to observe any adverse reactions, like redness, itching, or irritation. This step is crucial to confirm the product’s compatibility with your skin. If no reactions occur, proceed with the application. If irritation appears, discontinue use. The patch test also helps verify the desired color result. Skipping this step could lead to discomfort or unsatisfactory outcomes, making it a vital part of the process for achieving safe and successful results.

Step-by-Step Application Guide

Mix 2cm of dye with 10 drops of developer, stir until smooth. Apply to brows using a spoolie, following hair growth. For lashes, use the wand, sweeping upward. Process 1-2 minutes, rinse thoroughly.

3.1 Mixing the Dye and Developer

To achieve the perfect tint, mix 2cm of the color cream with 10 drops of the developer liquid in a clean mixing cup. Stir thoroughly until smooth and consistent, ensuring no lumps remain for even application. It’s essential to follow the instructions carefully to avoid over-mixing, as this can affect the tint’s effectiveness. Always perform a patch test before application to confirm the desired shade and check for any allergic reactions. Once mixed, the dye is ready to apply to your eyebrows or lashes using the provided applicator or spoolie. Proper mixing ensures vibrant, long-lasting results for your brows and lashes, making this step crucial for achieving professional-quality outcomes at home.

3.2 Applying the Tint to Eyebrows

Using the provided spoolie or applicator, apply the mixed tint to your eyebrows in upward strokes, following the natural direction of hair growth. Start from the arch and work towards the tail for full coverage. Gently brush the tint onto each brow hair, ensuring even distribution. Avoid getting the dye on the surrounding skin. For precision, use a cotton swab to clean up any excess tint around the brow area. Leave the tint on for the recommended time, usually 1-2 minutes, before rinsing with warm water. Proper application ensures even, professional-looking results that last. Following the instructions carefully is key to achieving the desired shade and definition for your brows.

3.3 Applying the Tint to Eyelashes

For eyelash tinting, lie down with your eyes closed and gently sweep the spoolie or applicator upward, starting from the base to the tips of your lashes. Mimic the motion of applying mascara to ensure even coverage. Avoid the waterline to prevent staining. Allow the tint to process for the recommended time, then rinse thoroughly with warm water. This method ensures long-lasting, vibrant results for your lashes. Proper application enhances lash appearance without salon visits, offering a quick and effective at-home solution for dramatic, defined lashes.

Post-Dye Care and Maintenance

After tinting, avoid oil-based products and harsh cleansers to prevent fading. Gently clean with mild soap, pat dry, and moisturize. Touch-up every 4-6 weeks for optimal results.

4.1 Removing Excess Dye Safely

To remove excess dye safely, gently wipe the area with a damp cotton pad. Avoid rubbing or pulling to prevent skin irritation. For stubborn dye, apply petroleum jelly and wipe carefully. Rinse thoroughly with warm water, ensuring no residue remains. Pat dry with a clean towel to maintain skin health and even fading. Proper removal prevents irritation and ensures the tint fades evenly over time, keeping your brows looking polished and defined.

4.2 Aftercare Tips for Long-Lasting Results

To maintain long-lasting results, avoid using oil-based cleansers or makeup removers, as they can fade the color prematurely. Gently clean the area with a mild, oil-free cleanser and pat dry. Use a spoolie daily to keep brows defined and tidy. Avoid exfoliating products near the brow area, as they may remove the dye. For touch-ups, reapply the tint every 4-6 weeks or as needed. Moisturize the area to keep the skin healthy and the color vibrant. Proper aftercare ensures your brows stay polished and colorful for weeks, maintaining the professional finish achieved with the 1000 Hour Brow Dye.

Common Mistakes and Solutions

Common mistakes include over-processing and uneven application. Solutions involve following instructions, avoiding excessive product, and using proper techniques to ensure desired results and prevent irritation.

5.1 Avoiding Over-Processing and Uneven Application

Over-processing and uneven application are common mistakes when using the 1000 Hour Brow Dye. To avoid these, ensure the dye is left on for the recommended time (1-2 minutes) and avoid applying too much product. Using a spoolie or applicator, apply the tint in light, upward strokes, following hair growth. Gently wipe excess dye from the skin with a cotton swab to prevent staining. If the tint is too dark, rinse immediately. For uneven results, touch up sparse areas lightly. Proper technique and adherence to instructions prevent dryness and ensure vibrant, even color. Always patch test first to confirm the desired shade and avoid allergic reactions. By following these steps, you can achieve professional-looking brows without over-processing or unevenness.

t shirt size guide australia

This guide helps you navigate Australian t-shirt sizing, ensuring a perfect fit. It covers standard sizes, body measurements, and tips for choosing the right fit. Ideal for online shoppers and retailers alike.

Understanding Standard T-Shirt Sizing in Australia

In Australia, t-shirt sizing is standardized to ensure consistency across brands. Sizes range from XS to 3XL, with measurements based on chest circumference, body length, and sleeve length. Men’s sizes typically align with US and UK standards, while women’s and children’s sizes follow similar patterns. For men, chest measurements range from approximately 87cm (XS) to 108cm (XXL), while women’s sizes are slightly smaller, starting from about 80cm (XS) to 112cm (3XL). Children’s sizes are based on age groups, with measurements adjusted accordingly. Sleeves and body lengths vary proportionally with chest size. It’s important to note that some brands may offer slim or loose fits, which can affect sizing. Always refer to the specific brand’s size chart for accurate measurements, as slight variations exist between brands. This guide helps consumers make informed purchases, ensuring the best fit for comfort and style.

Standard T-Shirt Size Chart in Australia

Australian t-shirt sizes range from XS to 3XL, with measurements based on chest circumference. Men’s sizes typically align with US standards, while women’s and children’s sizes follow similar patterns for consistency.

Men’s T-Shirt Size Chart

Men’s t-shirt sizes in Australia typically range from Small to 3XL. The chart below provides standard measurements based on chest circumference, body length, and sleeve length to ensure the perfect fit.

Size Chest (cm) Length (cm) Sleeve Length (cm)
S 92 70 19
M 97 71 20.5
L 102 73 22
XL 108 76 23.6
2XL 114 78 25.2
3XL 120 80 26.7

Measure your chest circumference to find your size. Add 2-3cm for a relaxed fit or subtract for a slim fit. Sleeves and length vary slightly with size for proportionate styling.

Women’s T-Shirt Size Chart

Women’s t-shirt sizes in Australia range from XS to 3XL, catering to various body types. The chart below outlines standard measurements based on bust, waist, and hip circumference to help you find the perfect fit.

Size Bust (cm) Waist (cm) Hips (cm)
XS 80-85 62-67 86-91
S 86-91 68-72 92-97
M 92-97 73-77 98-103
L 98-103 78-82 104-109
XL 104-109 83-87 110-115
2XL 110-115 88-92 116-121
3XL 116-121 93-97 122-127

To choose your size, measure around the fullest part of your bust. Consider whether you prefer a slim, regular, or loose fit. Sizes may vary slightly between brands, so always check the specific brand’s sizing chart for accuracy.

Children’s T-Shirt Size Chart

Kids’ t-shirt sizes in Australia are designed to fit various age groups, ensuring comfort and ease of movement. The chart below provides standard measurements based on chest circumference and length to help parents choose the right size.

Size Age Chest (cm) Length (cm)
4Y 4-5 years 66-70 45-50
6Y 6-7 years 72-76 50-55
8Y-10Y 8-10 years 78-82 55-60
12Y 12 years 84-88 60-65
14Y 14 years 90-94 65-70

When measuring your child, ensure the t-shirt isn’t too tight or restrictive. Consider their growth spurts and choose a size that allows room for movement. Sizes may vary between brands, so always refer to the specific brand’s chart for accuracy.

How to Measure Yourself for the Perfect Fit

Measure your chest circumference at the fullest point, keeping the tape level. For waist, measure naturally around your midsection. Sleeves are measured from the shoulder to cuff. Ensure accuracy for the best fit.

Measuring Chest Circumference

To accurately measure your chest circumference, place the tape measure around the fullest part of your chest, ensuring it is level and parallel to the floor. The tape should be snug but not tight. For men, this is typically across the nipple line, while for women, it should be around the bust. Keep your arms relaxed at your sides during the measurement. This will give you the key measurement needed to determine your t-shirt size. If you’re measuring a shirt you already own, lay it flat and measure the width from one underarm seam to the other, then double this measurement to get the chest circumference. This ensures the best fit for your body type and preferred style, whether slim, regular, or loose. Always refer to the specific size chart for accurate sizing, as variations may exist between brands.

Measuring Waist and Sleeves

To measure your waist, wrap the tape measure around the narrowest part of your torso, approximately 5 cm above your hip bone. Keep the tape level and not too tight. For sleeves, measure from the shoulder seam to the end of the cuff with the shirt laid flat. This gives the sleeve length. To measure the bicep, wrap the tape around the widest part of your upper arm. For the best fit, compare these measurements to the size chart. If measuring a shirt, lay it flat and measure the waist width from one side to the other at the narrowest point. Sleeve length is measured from the shoulder seam to the cuff. These measurements help determine the perfect fit, ensuring comfort and style. Always refer to the specific size chart for accurate sizing, as variations may exist between brands. This guide ensures you find the right size for your body type and preferred fit.

Understanding Different Fits: Slim, Regular, and Loose

Australian t-shirts come in slim, regular, and loose fits. Slim fits are tight and form-fitting, while regular offers a classic comfort. Loose fits provide a relaxed, casual feel for all body types.

How to Choose the Right Fit for Your Body Type

Choosing the right t-shirt fit depends on your body type and personal style. For a slim fit, opt if you have a lean build, as it hugs the body without restricting movement. Regular fit suits most body types, offering comfort and a classic look. Loose fit is ideal for a relaxed, casual vibe or for layering. Measure your chest, waist, and preferred sleeve length to match with the size chart. Consider your lifestyle—active individuals may prefer slim or regular fits, while loose fits are great for casual outings. Use an existing t-shirt that fits well as a reference. Ensure the fabric type aligns with your needs, such as breathable materials for active wear. By aligning fit with your body type and preferences, you can achieve both comfort and style effortlessly.

Tips for Online Shoppers

Measure yourself or use a well-fitting shirt as a reference. Check the size chart and fabric type to ensure comfort. Read reviews for sizing insights to make informed purchases.

How to Use a T-Shirt Size Guide for Online Purchases

Using a t-shirt size guide for online purchases ensures a perfect fit without trying the garment. Start by measuring your chest circumference and compare it with the size chart. Look for measurements in centimeters, as most Australian brands use this unit. If unsure, use a well-fitting shirt as a reference by laying it flat and measuring its width and length. Check the fabric type, as materials like cotton or polyester may affect sizing. Pay attention to specific fits like slim, regular, or loose, and read customer reviews for insights into how the shirt runs. Finally, verify the return policy in case adjustments are needed. By following these steps, you can confidently shop online and find the ideal size for your comfort and style.

how to talk to anyone pdf

How to Talk to Anyone: A Comprehensive Guide

Discover the secrets to mastering communication with Leil Lowndes’ How to Talk to Anyone. This practical guide offers 92 proven techniques to enhance your social and professional interactions. Download the PDF to learn how to build rapport, read body language, and converse confidently with anyone, anywhere.

How to Talk to Anyone by Leil Lowndes is a comprehensive self-help guide designed to enhance communication skills in all areas of life. First published in 2003, the book has become a trusted resource for individuals seeking to improve their interpersonal relationships, both personally and professionally. The author presents 92 practical and easy-to-apply techniques, divided into seven sections, to help readers master the art of conversation. From understanding body language to starting conversations confidently, the book covers essential topics like small talk, active listening, and building rapport. Lowndes emphasizes the importance of empathy, adaptability, and positivity in interactions, offering actionable advice for overcoming social anxieties and connecting with others. The book is available in PDF format, making it accessible for readers worldwide. Whether you’re looking to strengthen friendships, excel in business, or simply feel more confident in social settings, How to Talk to Anyone provides a roadmap to success.

Key Takeaways from Leil Lowndes’ “How to Talk to Anyone”

Leil Lowndes’ How to Talk to Anyone offers invaluable insights into effective communication. One key takeaway is the importance of body language, which can convey confidence and engagement. The book emphasizes active listening as a powerful tool to build deeper connections. Lowndes also provides practical tips on starting conversations, such as using open-ended questions and showing genuine interest. Another crucial aspect is understanding and adapting to different personalities, allowing readers to navigate various social dynamics with ease. The book also highlights the value of positive reinforcement and making a lasting first impression. With its focus on actionable strategies, How to Talk to Anyone equips readers with the skills to communicate confidently in any setting, from professional meetings to casual gatherings. The techniques are designed to be simple yet impactful, ensuring readers can apply them immediately. This guide is a must-read for anyone looking to enhance their social and professional interactions.

Mastering the Art of Communication

Mastering communication involves techniques like body language, active listening, and rapport-building. Leil Lowndes’ guide provides tips to navigate social dynamics confidently, ensuring meaningful interactions in any setting.

The Importance of Body Language in Conversations

Body language plays a crucial role in communication, often conveying more than words alone. Leil Lowndes emphasizes that non-verbal cues like eye contact, posture, and gestures can significantly impact how others perceive you. In How to Talk to Anyone, she shares techniques such as “ins synchronization,” where subtly mirroring the other person’s movements fosters rapport. Open and confident body language, like uncrossing arms or standing tall, signals approachability and self-assurance. Additionally, maintaining eye contact shows genuine interest and builds trust. These strategies help create a positive first impression and make conversations more engaging; By mastering body language, you can navigate social situations with ease and leave a lasting impact.

How to Start a Conversation Confidently

Starting a conversation confidently is a skill that can be mastered with practice and the right strategies. According to How to Talk to Anyone, preparation is key—having a few thought-provoking questions ready can help break the ice. Leil Lowndes suggests being the first to say hello, as it demonstrates confidence and initiative. She also recommends using openers that invite the other person to share, such as asking about their interests or opinions. Additionally, positive reinforcement through smiles and nods can make the other person feel at ease. The book emphasizes the importance of listening actively, as it not only builds rapport but also gives you material to continue the conversation. By combining these techniques, you can start conversations with confidence and create meaningful connections. Over time, these strategies become second nature, making social interactions more enjoyable and rewarding.

Active Listening: The Key to Deeper Connections

Active listening is a cornerstone of effective communication, as highlighted in How to Talk to Anyone. Leil Lowndes emphasizes that truly listening to others fosters trust and understanding, leading to deeper connections. Instead of preparing your next response, focus on the speaker, maintaining eye contact and nods to show engagement. Paraphrasing and reflecting back what you hear demonstrates that you value their thoughts. The book suggests techniques like “listening with your eyes,” where you observe non-verbal cues to better understand the speaker’s emotions. By doing so, you create a safe space for open dialogue, encouraging others to share more freely. Active listening not only enhances personal relationships but also strengthens professional interactions, making it a vital skill for anyone seeking to communicate effectively. Mastering this technique can transform conversations, turning them into meaningful exchanges rather than mere exchanges of words.

Building Rapport with Anyone

Building rapport is about creating instant connections. Leil Lowndes’ techniques include mirroring body language, using positive reinforcement, and showing genuine interest. These strategies help establish trust and make conversations more engaging and meaningful.

Using Positive Reinforcement in Interactions

Positive reinforcement is a powerful tool for fostering connections. Leil Lowndes emphasizes the importance of genuine praise and encouragement to make others feel valued. Simple gestures like compliments or acknowledging someone’s efforts can create a supportive atmosphere. By focusing on the positive aspects of a conversation, you encourage openness and build trust. This technique not only enhances rapport but also makes interactions more enjoyable and productive. Learning to incorporate positive reinforcement into your communication style can significantly improve your relationships and social interactions.

How to Make a Lasting First Impression

Making a lasting first impression is crucial for building strong connections. Leil Lowndes highlights the importance of being the first to say hello and using open, confident body language. A warm smile, direct eye contact, and approachable posture can instantly make others feel at ease. Additionally, showing genuine interest in the conversation partner by asking thoughtful questions and actively listening can create a memorable impression. Lowndes also emphasizes the value of preparation, such as having a few conversation starters ready. These strategies not only help you stand out but also set the tone for meaningful interactions. By mastering these techniques, you can ensure that your first impressions are positive and impactful, paving the way for stronger relationships in both personal and professional settings.

Understanding and Adapting to Different Personalities

Understanding and adapting to different personalities is a key aspect of effective communication, as highlighted in How to Talk to Anyone. Leil Lowndes emphasizes the importance of recognizing and responding to individual traits, ensuring that your approach resonates with the other person. For instance, introverts may prefer quieter, one-on-one conversations, while extroverts thrive in lively, dynamic interactions. By observing body language, tone, and conversational style, you can tailor your communication to match their comfort level. This adaptability fosters trust and rapport, making interactions more meaningful. Lowndes also suggests using techniques like mirroring and adjusting your energy levels to align with the other person’s demeanor. This flexibility not only enhances connections but also demonstrates empathy and understanding. By learning to adapt to diverse personalities, you can navigate conversations with confidence and build stronger relationships in both personal and professional settings. This skill is a cornerstone of effective communication and lasting connections.

Advanced Techniques for Effective Communication

Master advanced communication strategies with Leil Lowndes’ insights. Learn to use open-ended questions, humor, and emotional intelligence to navigate complex conversations. Her techniques ensure clarity and connection in any interaction, making communication effortless and impactful.

The Power of Open-Ended Questions

Open-ended questions are a cornerstone of effective communication, as highlighted in Leil Lowndes’ How to Talk to Anyone. These questions encourage meaningful dialogue by requiring more than a simple “yes” or “no” response. By asking questions that begin with “what,” “how,” or “why,” you invite the other person to share their thoughts and feelings, fostering deeper connections. This approach not only keeps the conversation flowing but also demonstrates genuine interest in the other person’s perspectives. Lowndes emphasizes that open-ended questions prevent conversations from becoming one-sided and help avoid awkward silences. They also allow you to gain valuable insights into the other person’s needs, desires, and motivations, making interactions more engaging and productive. Mastering the use of open-ended questions can transform your ability to communicate effectively in both personal and professional settings, ensuring that every conversation is impactful and memorable.

How to Navigate Difficult Conversations

Navigating difficult conversations is a critical skill highlighted in How to Talk to Anyone. Leil Lowndes provides practical strategies to handle tough discussions with confidence and tact. One key approach is to remain calm and composed, ensuring emotions do not escalate. Active listening is essential, as it shows respect and helps uncover the root of the issue. Using phrases like “I understand where you’re coming from” can diffuse tension and create a safe space for dialogue. Another technique is to focus on the problem, not the person, avoiding personal attacks. Lowndes also suggests using open-ended questions to encourage the other person to express their views, fostering collaboration. Additionally, she recommends acknowledging shared goals to align perspectives and find common ground. By mastering these strategies, you can turn potentially explosive conversations into opportunities for understanding and resolution, ensuring productive outcomes even in challenging situations.

Using Humor to Break the Ice

Using humor to break the ice is a powerful technique emphasized in How to Talk to Anyone. Leil Lowndes suggests that well-timed, light-hearted comments can instantly ease tension and create a relaxed atmosphere. Humor acts as a universal connector, making people feel comfortable and open. However, it’s crucial to use humor appropriately, ensuring it’s inclusive and not at someone’s expense. Lowndes recommends observing the other person’s style of humor and mirroring it subtly. For instance, if they appreciate witty remarks, you can use clever wordplay. If they prefer subtle jokes, stick to understated humor. Self-deprecating jokes can also work well, as they make you appear approachable and modest. The key is to keep it natural and avoid over-the-top jokes that might fall flat. By using humor strategically, you can transform awkward silences into engaging conversations and build rapport effortlessly.

pusheen the cat’s guide to everything

Meet Pusheen, the chubby tabby cat created by artist Claire Belton. This webcomic sensation has captured hearts worldwide with her lazy, playful personality and adorable antics.

1.1 Who is Pusheen and Her Creator?

Pusheen is a beloved chubby tabby cat created by artist Claire Belton. Known for her lazy and playful personality, Pusheen first gained fame through webcomics. Belton’s artwork showcases Pusheen’s daily life, quirky friends, and humorous antics, resonating with fans worldwide. The character’s charm has led to books, merchandise, and a global following, cementing Pusheen as an internet icon and a symbol of joy and relaxation.

1.2 The Rise of Pusheen as an Internet Sensation

Pusheen rose to fame as a webcomic character, charming audiences with her relatable, humorous, and endearing personality. Her lazy antics, love for snacks, and quirky adventures quickly made her a viral sensation. Through social media, merchandise, and collaborations, Pusheen became a global icon, capturing hearts with her simple yet universal appeal, and solidifying her place as one of the internet’s most cherished characters.

Key Features of “Pusheen the Cat’s Guide to Everything”

Pusheen the Cat’s Guide to Everything offers a delightful mix of adorable comics, expert advice, and silly antics. It covers mastering laziness and identifying Vampurr tendencies.

2.1 Adorable Comics and Illustrations

Pusheen the Cat’s Guide to Everything is filled with charming comics and vibrant illustrations that showcase Pusheen’s daily life, playful interactions, and heartwarming moments with friends like Squicket and Fluff. The comics, often presented in a classic four-panel format, highlight Pusheen’s love for naps, snacks, and mischief, making them irresistibly cute and relatable. These visuals bring Pusheen’s whimsical world to life, captivating fans and comic lovers alike with their simplicity and humor.

2.2 Expert Advice and Silly Antics

Pusheen the Cat’s Guide to Everything offers a mix of humorous advice and lighthearted antics. From tips on how to tell if your cat is a Vampurr to guides on mastering laziness, Pusheen shares her expertise with a playful twist. The book is filled with witty insights and comedic scenarios, making it both entertaining and surprisingly useful for anyone embracing their inner feline spirit. Pusheen’s antics are sure to delight readers of all ages.

Pusheen’s Personality and World

Pusheen’s world is full of charm and personality, showcasing her lazy yet playful nature and the quirky friends and family that make her adventures unforgettable.

3.1 Pusheen’s Lazy and Playful Nature

Pusheen is a chubby tabby cat known for her lazy and playful personality. She loves napping, eating snacks, and cuddling, embodying the essence of relaxation. Despite her laziness, Pusheen occasionally bursts into playful energy, chasing toys or engaging in imaginative antics. Her hobbies include lounging in the sun, pestering her siblings, and enjoying cozy moments with friends. This balanced mix of laziness and playfulness makes her a relatable and endearing character to fans worldwide.

3.2 Friends, Family, and Their Quirks

Pusheen is surrounded by a cast of lovable friends and family, each with unique personalities. Her siblings, like her mischievous brother, and her parents, who often tolerate her antics, add depth to her world. Friends such as Sloth and Pip bring their own quirks, creating a dynamic and humorous social circle. Together, they engage in playful adventures, highlighting the joy of friendship and shared experiences in Pusheen’s delightful universe.

Pusheen’s Alter Egos

Pusheen’s alter egos showcase her creativity, from a majestic unicorn to a fiery dragon and even a mysterious Vampurr. These transformations highlight her playful and imaginative personality, capturing fans worldwide with unique charm and humor.

4.1 Unicorn, Dragon, and Other Creative Transformations

Pusheen’s alter egos are a delightful showcase of her imagination. She transforms into a graceful unicorn, a fiery dragon, and even a mysterious Vampurr, each with unique traits and charm. These creative personas highlight her versatility, offering fans a fresh perspective on her personality. The unicorn version, with its shimmering coat, and the dragon, exuding power, are fan favorites. These transformations add depth to Pusheen’s character, making her even more endearing to her global audience.

4.2 How to Tell if Your Cat is a Vampurr

Discover the amusing signs that your feline friend might be a Vampurr, Pusheen’s mysterious alter ego. Look for clues like midnight mischief, an affinity for shadows, and an unusual fondness for cozy, hidden spots. With playful humor, Pusheen guides you through identifying these vampurric tendencies, blending fun and creativity to celebrate the unique quirks of your cat. This lighthearted section adds a touch of whimsy to the guide, making it a delightful read for cat lovers everywhere.

The Comprehensive Guide to Being Lazy

Master the art of doing nothing with Pusheen’s ultimate guide to laziness. Discover expert tips, from napping strategies to snack optimization, all delivered with Pusheen’s signature charm.

5.1 Tips for Mastering the Art of Laziness

Discover Pusheen’s expert tips on embracing laziness. From perfecting naps to optimizing snacks, her guide helps you master the art of doing nothing with ease and humor.

  • Invest in a cozy blanket for ultimate comfort.
  • Snack strategically to minimize movement.
  • Embrace your inner couch potato wholeheartedly;
  • Schedule regular breaks to recharge.

5.2 Pusheen’s Favorite Lazy Activities

Pusheen loves indulging in activities that celebrate her laid-back lifestyle. Her go-to pastimes include lounging in cozy spots, snacking on treats, and napping for hours.

  • Long, uninterrupted naps on soft blankets.
  • Munching on snacks like pizza and desserts.
  • Watching the world go by from a sunny window.
  • Doing absolutely nothing with full enthusiasm.

These activities define her carefree and humorous approach to life.

Pusheen’s Cultural Impact

Pusheen has become a global icon, inspiring countless merchandise, from plushies to clothing, and collaborations with major brands. Her charm has also led to fan art and viral memes worldwide.

6.1 Merchandise, Collaborations, and Fan Art

Pusheen has inspired a wide range of merchandise, from plushies and apparel to home decor. Collaborations with brands like Primark and Mediatonic have brought her charm to slippers, clothing, and even video games. Fans worldwide create countless artworks, showcasing her as a unicorn, vampurr, or other imaginative forms. This cultural phenomenon highlights her universal appeal, making her a beloved character in both physical and digital spaces.

6.2 Pusheen in Video Games and Media

Pusheen’s charm extends beyond comics into video games and media. She appears in games like Fall Guys as playable skins, including her classic form and the magical Super Pusheenicorn. Additionally, she stars in card games like Purrfect Pick and short animated clips. Her presence in digital media has further cemented her status as a global icon, delighting fans across various platforms and age groups with her signature cuteness and humor.

Fan-Favorite Content

Discover the beloved Pusheen comics, memes, and interactive content that fans adore. From hilarious antics to quizzes, there’s something for every Pusheen enthusiast to enjoy.

7.1 Popular Comics and Memes

Pusheen’s comics and memes have become a staple of internet culture. From her hilarious transformations into unicorns and dragons to her relatable lazy antics, fans can’t get enough. The guide features some of the most beloved comics, showcasing Pusheen’s adorable personality and quirky adventures. Memes like “How to Tell if Your Cat is a Vampurr” and her iconic lazy-day antics have made her a viral sensation, delighting both cat lovers and comic fans worldwide.

7.2 Quizzes and Fun Activities for Readers

The guide includes engaging quizzes and activities that invite readers to interact with Pusheen’s charming world. From “Which Dessert Are You?” to tips on how to draw Pusheen, these features make the book a delightful experience. Fun activities like lazy costume ideas for cats and seasonal guides add a playful touch, encouraging fans to embrace their creativity and share in the joy of Pusheen’s whimsical adventures.

Pusheen the Cat’s Guide to Everything is a must-read for cat lovers and comic fans alike, offering humor, heartwarming moments, and a comprehensive guide to embracing life’s simple joys.

8.1 Why “Pusheen the Cat’s Guide to Everything” is a Must-Read

Pusheen the Cat’s Guide to Everything is a delightful collection of comics and illustrations that blend humor, heartwarming moments, and expert advice. It captures Pusheen’s lazy yet playful personality, offering tips on mastering laziness and exploring her creative transformations. With its universal appeal, the book is a must-have for cat lovers, comic fans, and anyone seeking a lighthearted guide to life’s simple joys.

8.2 Joining the Pusheen Community

Joining the Pusheen community means becoming part of a vibrant, global fanbase that celebrates creativity and joy. From merchandise to fan art, enthusiasts share their love for the chubby tabby through various platforms. Collaborations with brands, video games, and even themed cafes further expand Pusheen’s reach. Fans also engage with quizzes, activities, and shared content, fostering a sense of belonging and connection among cat lovers and comic enthusiasts worldwide.

the slater field guide to australian birds

The Slater Field Guide to Australian Birds is a comprehensive guide designed for field use, covering all recorded bird species in Australia; It is portable, user-friendly, and ideal for both beginners and experienced birdwatchers, providing detailed descriptions and illustrations to aid in bird identification.

History and Development of the Guide

The Slater Field Guide to Australian Birds was first published in 1986 by Rigby Publishers in Sydney. Authored by Peter Slater and his family, it quickly became a trusted resource for Australian birders. The guide was designed to be compact and portable, weighing in at 215 mm high by 113 mm wide. It describes and illustrates approximately 775 species recorded in Australia, nearby islands, and seas of the continental shelf. The Slater family’s expertise in birdwatching and photography ensured the guide’s accuracy and visual appeal. Over the years, the guide has undergone updates to reflect new species discoveries and advancements in bird identification. Its development reflects a commitment to providing a user-friendly tool for both amateur and experienced birdwatchers, solidifying its place as a cornerstone of Australian ornithology.

Key Features of the Slater Field Guide

The Slater Field Guide features detailed descriptions, color illustrations, and a portable design, covering over 775 Australian bird species for easy identification in the field.

3.1 Design and Portability

The Slater Field Guide is renowned for its compact and lightweight design, making it highly portable for birdwatching excursions. Measuring 215 mm in height and 113 mm in width, it fits effortlessly into a hip-pocket, backpack, or glove box. This practical size ensures it remains accessible without hindering movement, whether during hikes or quick observations. The guide’s durable binding and sturdy pages are designed to withstand frequent use in outdoor conditions. Its user-friendly layout, with clear illustrations and concise descriptions, enhances the field experience. The portability and ergonomic design make it an essential tool for birders of all levels, allowing seamless identification of species in various Australian habitats. This thoughtful design ensures the guide remains a reliable companion for both casual and dedicated birdwatchers alike.

3.2 Comprehensive Species Coverage

The Slater Field Guide to Australian Birds provides extensive coverage of approximately 775 bird species recorded in Australia, its surrounding islands, and the continental shelf. This includes both native and vagrant species, ensuring a wide range of birdlife is represented. The guide is regularly updated to reflect new discoveries and taxonomic changes, maintaining its relevance for birders; Each species is described in detail, with attention to plumage, size, and behavioral traits, as well as subspecies variations. Distribution maps and habitat information further enhance the identification process. This comprehensive approach makes the guide invaluable for identifying birds across Australia’s diverse regions, from urban backyards to remote wilderness areas. Its thorough coverage caters to both casual observers and dedicated researchers, solidifying its reputation as a trusted resource in Australian ornithology.

3.3 Illustrations and Descriptions

The Slater Field Guide to Australian Birds features detailed and accurate illustrations that are essential for bird identification. Each species is accompanied by high-quality artwork that captures key plumage details, behavioral traits, and distinctive features. The illustrations are arranged for easy comparison, particularly between similar species, making it easier for users to distinguish one bird from another. Descriptions are concise yet thorough, covering aspects such as size, habitat, calls, and seasonal variations. The guide’s artwork and text are carefully coordinated to provide a holistic view of each species, ensuring that both visual and descriptive cues are available for accurate identification. This combination of clear illustrations and informative descriptions makes the guide a trusted tool for birdwatchers of all skill levels, enhancing their ability to identify birds in the field effectively.

Target Audience

The Slater Field Guide to Australian Birds is ideal for both beginners and experienced birdwatchers, providing essential tools for identifying and understanding Australia’s diverse bird species.

4.1 Beginners

The Slater Field Guide to Australian Birds is an excellent resource for beginners, offering clear and concise information to help identify birds. Its user-friendly design and portability make it easy to carry on outdoor adventures. The guide provides detailed descriptions and high-quality illustrations, enabling newcomers to birdwatching to recognize species accurately. It covers over 775 bird species, giving beginners a comprehensive understanding of Australia’s avifauna. The straightforward layout and concise text ensure that even those with limited knowledge can quickly find the information they need. This guide serves as a foundational tool, helping beginners develop their bird identification skills and fostering a deeper appreciation for Australia’s birdlife. Its accessibility and thorough coverage make it an ideal starting point for anyone new to birdwatching.

4.2 Experienced Birdwatchers

The Slater Field Guide to Australian Birds is equally valuable for experienced birdwatchers, offering detailed descriptions and high-quality illustrations to aid in identifying even the most challenging species. Its comprehensive coverage of over 775 bird species ensures that seasoned enthusiasts can rely on it for accurate information. The guide’s portability and user-friendly design make it a practical tool for fieldwork, while its concise yet thorough descriptions allow for quick comparisons between similar species. Experienced birdwatchers appreciate its ability to clarify subtle differences, enhancing their identification skills. Additionally, the guide’s authoritative content and reliability make it a trusted resource for refining expertise and exploring Australia’s diverse avifauna. Its robust design ensures it withstands frequent use, making it a long-lasting companion for advanced birding adventures.

Impact on Birdwatching in Australia

The Slater Field Guide to Australian Birds has significantly influenced birdwatching in Australia by providing a reliable and accessible resource for identifying native and visiting species. Its comprehensive coverage of over 775 species has made it an indispensable tool for both casual observers and dedicated enthusiasts. The guide’s portability and user-friendly design have encouraged more people to engage in birdwatching, fostering a greater appreciation for Australia’s avifauna. By offering detailed descriptions and high-quality illustrations, it has simplified species identification, democratizing access to ornithological knowledge. This has contributed to the growth of birdwatching as a popular hobby and conservation effort, promoting environmental awareness and education. The guide’s widespread adoption has also set a benchmark for field guides, inspiring further research and documentation of Australian birds.

Comparison with Other Australian Bird Field Guides

The Slater Field Guide to Australian Birds stands out among other Australian bird field guides for its unique combination of portability, comprehensive coverage, and user-friendly design. While guides like Simpson and Day’s Field Guide to Australian Birds and Pizzey and Knight’s A Field Guide to the Birds of Australia are highly regarded, Slater’s guide is often praised for its compact size and ease of use. The CSIRO Australian Bird Guide, another prominent resource, offers detailed scientific information but is larger and less portable. Slater’s guide bridges the gap by providing concise yet thorough descriptions and illustrations, making it a favorite among birdwatchers of all levels. Its focus on field practicality and accessibility has made it a staple in Australian birding culture, setting it apart from more specialized or bulky alternatives.

Reception and Reviews

The Slater Field Guide to Australian Birds has received widespread acclaim for its practicality and accuracy. Birdwatchers and naturalists praise its detailed illustrations and concise descriptions, which facilitate quick identification in the field. Many reviewers highlight its portability and user-friendly design, making it a favorite among both casual observers and seasoned experts. The guide is often commended for its ability to cater to a broad audience, from beginners to experienced birders. Some users note that while other guides may offer more detailed scientific information, Slater’s guide excels in its accessibility and ease of use. Overall, it is regarded as an essential tool for anyone interested in Australian birdlife, earning it a reputation as one of the most trusted field guides in the region.

Practical Uses in Birdwatching

The Slater Field Guide to Australian Birds is a valuable tool for birdwatchers, offering practical applications in the field. Its compact size allows it to be easily carried on hikes, in backpacks, or even in a vehicle glove box. The guide’s detailed illustrations and descriptions enable quick identification of species, even in challenging outdoor conditions. Birdwatchers can use the guide to compare similar species side by side, reducing the likelihood of misidentification. Additionally, the guide’s notes on habitat preferences and behavioral traits provide further aids in accurately identifying birds. Its portability and user-friendly design make it an indispensable resource for both casual birding excursions and more intensive field studies. Whether used for rapid observations or detailed analysis, the Slater Field Guide enhances the birdwatching experience, ensuring accurate and efficient species identification.

Availability and Editions

The Slater Field Guide to Australian Birds has been published in multiple editions since its initial release in 1986 by Rigby Publishers. The first edition was authored by Peter Slater and his family, while subsequent editions have been updated to include new species and improved illustrations. The guide is widely available in paperback format and can be purchased through online retailers like Amazon, as well as in local bookstores and wildlife shops. Additionally, digital versions may be accessible for convenience. The compact size and affordability make it accessible to a broad audience. Regular updates ensure the guide remains relevant, reflecting the latest in Australian ornithology. Its availability in various formats and editions caters to both casual birdwatchers and dedicated researchers, solidifying its place as a trusted resource in the field.

Contribution to Australian Ornithology

The Slater Field Guide to Australian Birds has significantly contributed to Australian ornithology by providing a detailed and accessible resource for identifying bird species nationwide. First published in 1986, it has become a cornerstone for researchers, birdwatchers, and conservationists. The guide’s comprehensive coverage of approximately 775 species, including those found on nearby islands and seas, has helped standardize bird identification processes. Its portability and user-friendly design have made it a valuable tool for fieldwork, fostering greater understanding and appreciation of Australia’s avifauna. By combining detailed descriptions with high-quality illustrations, the guide has bridged the gap between scientific research and public engagement, inspiring further study and conservation efforts. Its impact is evident in its widespread use and influence on subsequent field guides, solidifying its role as a key resource in Australian ornithology.

The Slater Field Guide to Australian Birds stands as a trusted and authoritative resource for birdwatchers and researchers alike. Since its first publication in 1986, it has become an essential tool for identifying Australia’s diverse avifauna. Its comprehensive coverage of over 775 species, paired with detailed illustrations and descriptions, has made it a cornerstone of Australian ornithology. The guide’s portability and user-friendly design have democratized bird identification, making it accessible to both beginners and seasoned enthusiasts. Its enduring popularity underscores its significance in promoting the study and conservation of Australian birds. As a testament to its influence, the Slater Field Guide remains a vital companion for anyone exploring Australia’s rich birdlife, ensuring its legacy as a fundamental resource for generations to come.